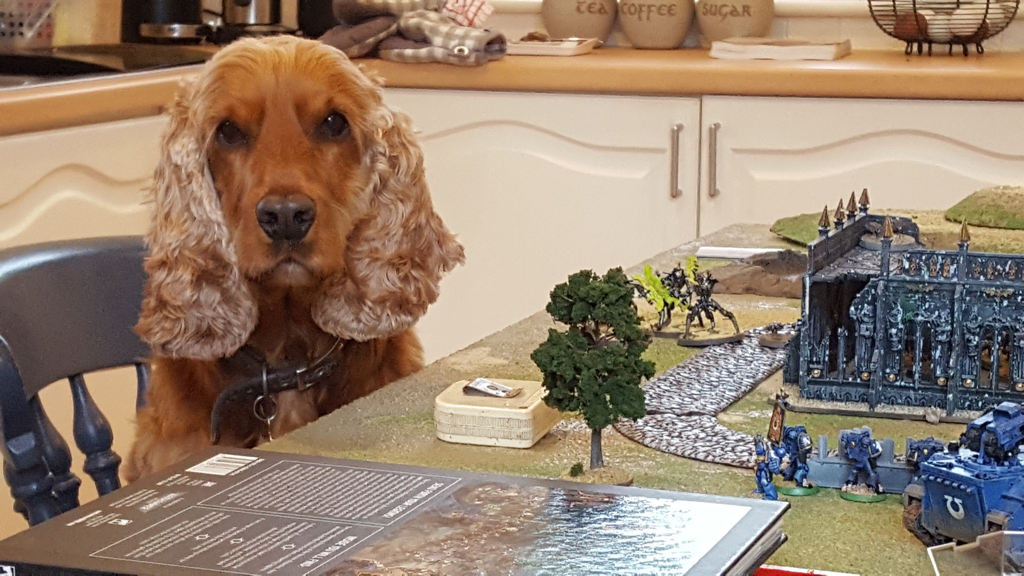
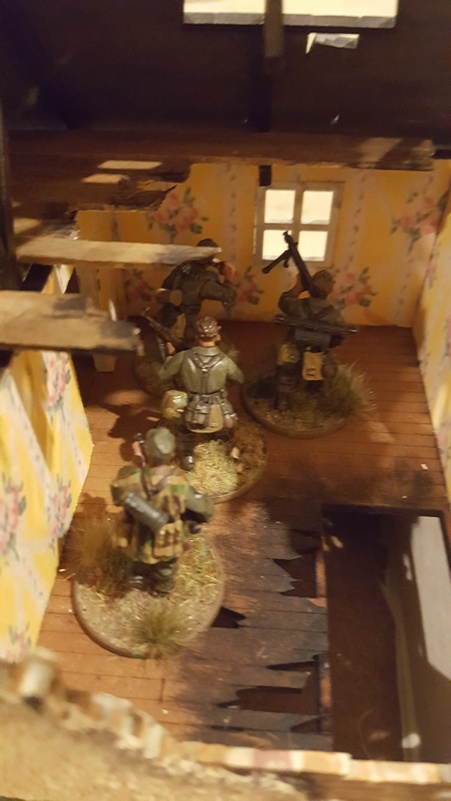
 Copper is disappointed by my Ultramarines’ performance We and Games Workshop got historyBetween 1997 and about 2015, Games Workshop was a central part of our family life. We played every system they released between Gorkamorka and 40K 7th edition, with the exception of Inquisitor. Nick, our older son, was (and still is) a gamer above all while his younger brother, Will, enjoyed the modelling and painting, even selling his skills to raise cash while at university. I both played, but not as well as Nick, and painted, though not a patch on Will. The boys have grown up and moved out and our gaming opportunities have become rarer. Wargames still have a pull: I started playing historical games again and Nick has been happy to join in, while Will still enjoys picking up obscure modelling materials at wargame shows. At most, we now play a couple of GW games a year. I stopped buying White Dwarf soon after Age of Sigmar was released, not in protest exactly, but the new universe just didn’t interest me. 40K 8th edition also passed us by, though I did enjoy the one brief game that Ian Barber ran to introduce the new system. In short, for no particular reason, my 40K knowledge ended with 7th. My Firstborn: beaten by my first bornUntil autumn 2020 that is, when Nick bought me the Indomitus boxed set as a surprise lockdown gift. We had both been curious about 9th edition and he couldn’t resist the bargain of large new forces for two of our favourite 40K armies. A small test game between Orks and Cadians went well (for the Orks), Christmas brought the Space Marine and Necron codices and we were back in the thick of it. Nick came over on Father’s Day and we played our first biggish game with the new rules. Nick took Necrons and I led the Ultramarines. Nick had some of the new Necron models but my army was a continuation of my 7th edition force. Who knew when I originally collected them that I would be fielding ‘Firstborn’ Space Marines? Honestly, I turn my back for a moment and the lore changes everything! We fought over a ruined Imperial settlement, which allowed a lot of cover to both sides. This favoured the close combat specialists who could close the range without exposing themselves to too much firepower. I was happy with my deployment, including landing a drop pod and some terminators behind Nick’s line, so for a short time Ultramar seemed ascendant. Then Nick’s warriors shot up my Assault Marines, his scarabs ate up my dropped squad and his destroyers destroyed my razorback squad. That basically put the lid on my efforts and by game’s end he held all but one objective. It was an exciting game that moved fast despite us both having to refer often to our faction rules. My mistakes included focussing overmuch on Nick’s Monolith, which I did nearly destroy but only after pounding it with my Vindicator for most of the game. Those shots could have been more successful thinning out Nick’s Necron warrior horde. I also failed to appreciate that under 9th edition Ultramarines can fall back from close combat and still fire. Had I done that instead of staying engaged, I might not have suffered the humiliation of a whole squad succumbing to a tide of tin cockroaches. My ‘gun line’ on the other side of the table might also have lasted longer by keeping more distance between itself and the Skorpeth destroyers. Just wait until next time! As ever, it was a pleasure to be across the table from Nick, adding another chapter to the story of our games since the late 90s. That’s a lot of happy memories, for which I will always be grateful to Games Workshop. Good to be back?So how does it feel to jump straight from 7th edition into 9th? I can’t deny it’s confusing. I suppose vehicles have changed the most and they strike me as more resilient than before. Right up to 7th edition, a couple of lucky dice rolls could wipe out a very expensive piece of kit. Things can still go wrong for vehicles but they generally hang around for longer, no doubt making them a less risky investment. The stripped back rules themselves are appealing and I especially like the way morale is now treated. I love the extra involvement provided by command points, which give a nod to Chain of Command, one of the best World War 2 rules on the market. Anything I don’t like? Nope. I even like the Primaris Marines, who seem more like the superhuman giants encountered in 40K literature. The ‘Firstborn’ plot twist is a clever bit of reverse lore engineering. I would, however, observe that 9th edition seems no less complex than older editions. The basic rules are now wonderfully simple but the complexity has transferred over to army and faction rules, the range and detail of which is bewildering. I had expected today’s 40K to be more accessible for new, casual or ageing players like me, but I don’t think it is. If I am to play my next game half-way effectively, I’m going to have to revise, remember and apply all the subtleties required to get the most out of an Ultramarine force. I really look forward to our next game but will timetable in some serious pre-fight preparation first. 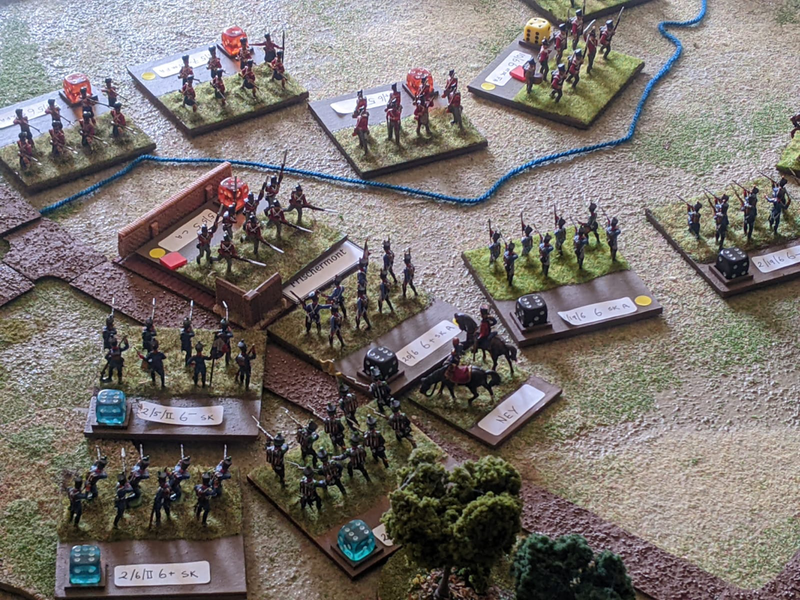 Hell, yeah! When Firstborn were metal...
0 Comments
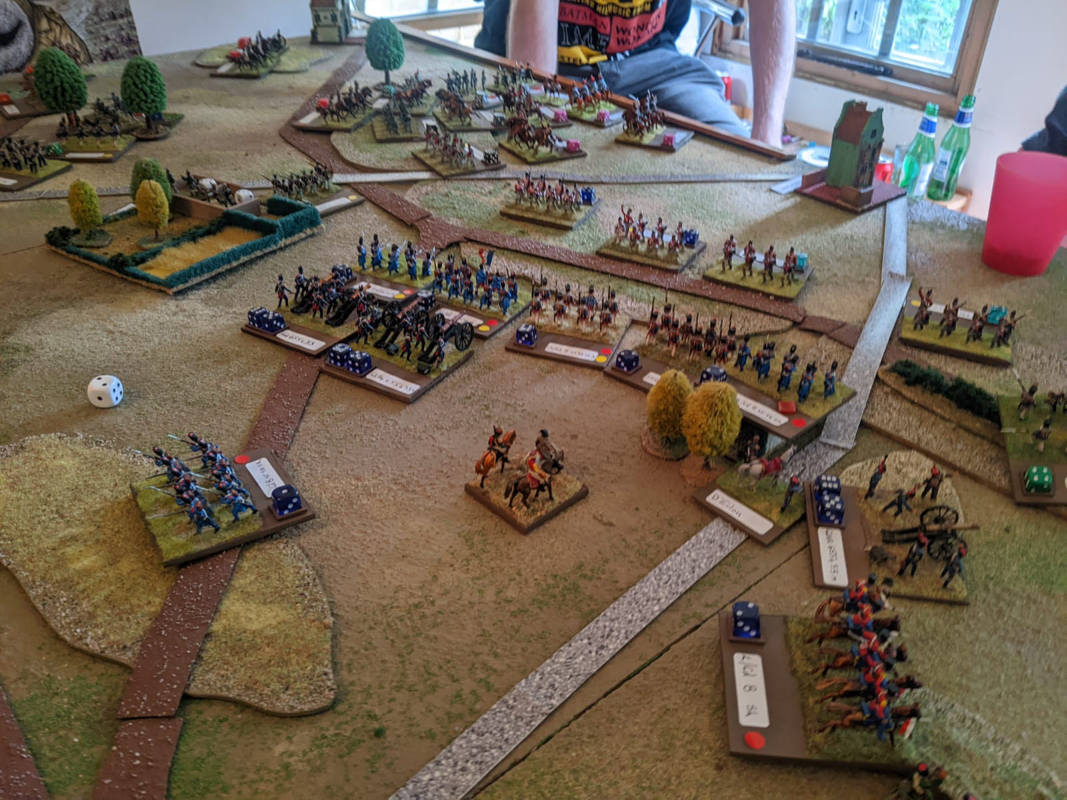
Last month Chris and I played a game of Lasalle 2, the tactical Napoleonic game by Sam Mustafa of Honour Games. Chris was new to the rules and picked them up very quickly. We replayed the Markkleeberg 1813 scenario that I had first tried on Spencer and Dan, described here. After the first game of Markkleeberg I had changed the victory conditions by removing the sudden death victory provision, which allows a player to win by ignoring geographical objectives and simply killing enough enemy units. In our first game Spencer had bunched all his forces into his right wing and tried to overwhelm Dan’s left, while leaving Markkleeberg with its objective marker alone. A valid approach in a stand-alone game (and it nearly succeeded) but it meant the battle played out very differently from the actual events of 1813. With sudden death removed, victory now depends on who holds real estate in two locations: the village on the Polish right and the hill in their centre. I also modified the arrival of some Prussian reinforcements, after rereading the sources and producing a ‘best guess’ sequence of events drawn from the five different accounts that I have of the action. The current version of the scenario is here. I am happy with these tweaks as the game with Chris played out more closely to the actual battle. My Prussians tried and failed to kick Chris’s Polish garrison out of Markkleeberg while the Russians attacked the central hill. To cut a long story short, after a bitter struggle the Russians briefly reached the objective on the hill but couldn’t consolidate their hold and the Poles retook it in the final turn. Victory therefore went to Chris, with my troops back near their starting positions in the valley. The game moved quickly and we both enjoyed the rules. The fluid turn sequence keeps both sides fully involved and presents the players with tricky choices about how to use their scarce momentum points. There was only one incident when our experience of ‘conventional’ rules made us question whether what happened was right. Namely, a regiment of cavalry charged and overthrew an enemy battery, without that battery being able to fire canister as the cavalry closed. This did feel tough on the guns but chewing it over afterwards, I concluded the issue was of our perception rather than a failing in the rules. In most circumstances, Lasalle would allow a battery facing cavalry to its front the chance to fire before that cavalry charged. It just happened in our game that the battery had already fired at a different target earlier in the same turn, so it is plausible that the cavalry could have closed while the battery was reloading. Also, even without firing, there was a slim chance that the battery could have won the combat against the charging cavalry, which, had this happened, might have been rationalised as the gunners successfully loading and firing canister in the nick of time. Try these rules! It’s interesting to see how fashions in wargame rules evolve. When I started playing Napoleonics in 1974 or thereabouts, the fashion was for simultaneous turns, highly differentiated national characteristics, detailed casualty calculations, quirky game aids (anybody remember the bounce stick??) and almost no command friction. In recent years there has been a shift to IGO-UGO turn sequences, more abstraction of the mechanics of combat, and greater focus on the options and limitations placed on command control. All welcome developments as far as I can see. The combination of MO points and totally fluid turn sequence in Lasalle 2 takes us into yet new territory. This approach may sound odd to some, but I would urge every Napoleonic gamer to give it a try. I suspect that with Lasalle 2, Sam Mustafa has set a new standard for tactical Napoleonic games that other rules writers will be emulating for some time to come.
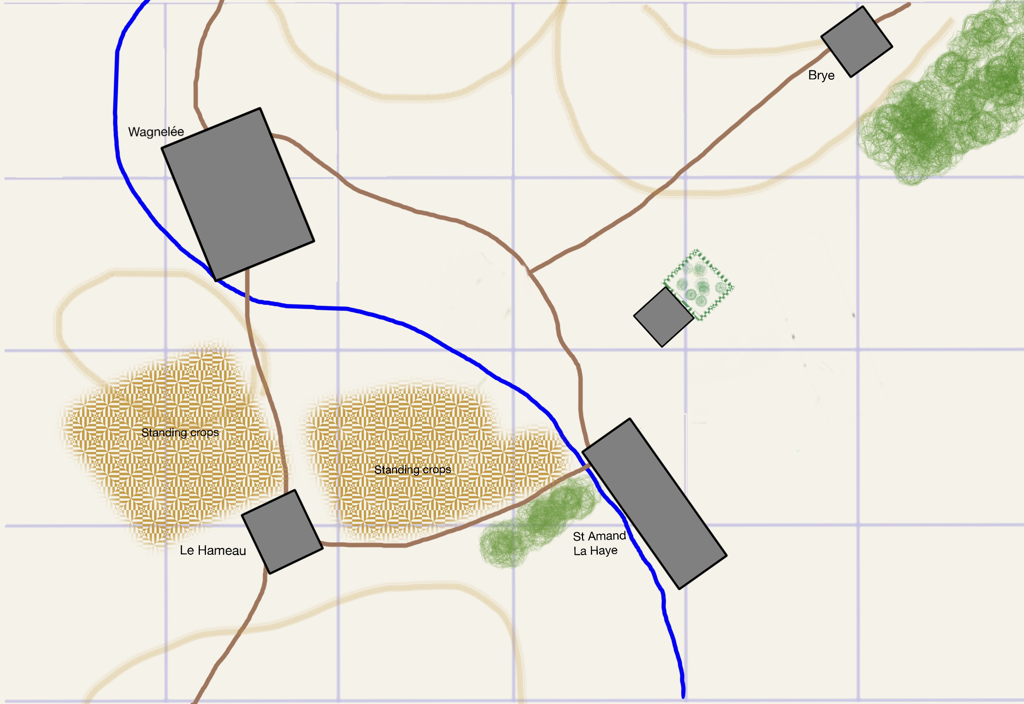
 The Allies advance The revised version of Sam Mustafa’s tactical Napoleonic rules, Lasalle, has been some time coming. If I recall rightly, it was first trailed in mid-2019 with the aim of landing in 2020. The release timeline then went vague, presumably in part due to Covid, and it finally appeared in February this year. As he usually does with new rules, Sam put various teasers and extracts on the Honour website in advance, including two quick reference sheets: one over several pages and a single-sider for hardcore players. I bought the new rules in pdf and print. As is now the Honour standard, they are well laid out, clearly written and nicely illustrated. There are also several opportunities to find out why a rule was written as it was and generally to understand the author’s design philosophy. If you haven’t read the rules yet, I’d say their most important feature is the lack of a fixed player turn or sequence of play. Both players begin each turn with a variable number of momentum points, with which they can pay for various actions. The initiative can pass between the two sides several times until both run out of momentum, when the turn ends. The order in which a force might move, fire, change formation, charge or rally is entirely up to the player. It makes for some tough choices, careful timing and steady nerves. After a read-through of the rules and some solo moves I thought Lasalle 2 looked promising, but I was finally able to test it with live opponents last Friday, in our first face to face game since March last year. Now, I suppose I should aim off a bit for the excitement of live gaming after such a long break, but I had a fantastic time and was absolutely delighted with these rules. 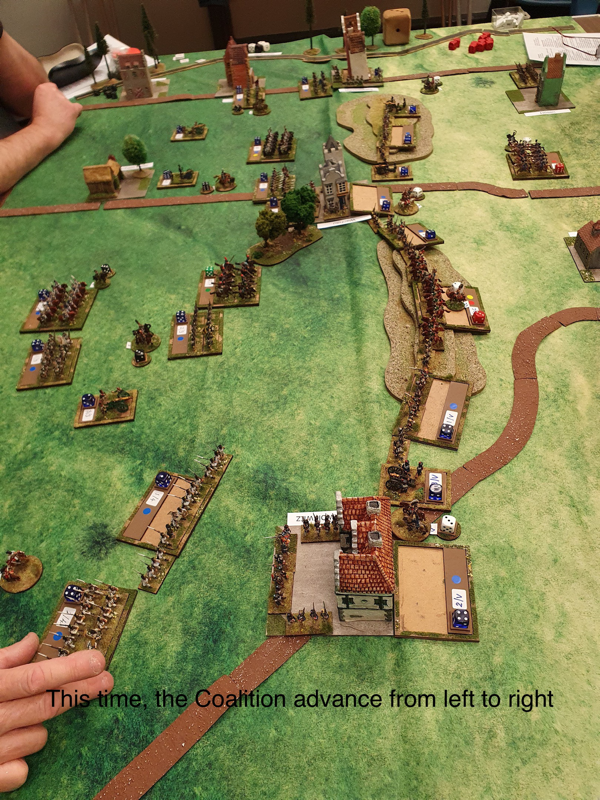 Dignity, always Dignity! A brief battle reportWe used the Markkleeberg scenario from the first day of the battle of Leipzig, on the scenarios page here. Dan took Poniatowski and his Poles, reinforced later by French from Augereau’s Corps. Spencer took the role of Kleist, assaulting the village and the high ground to its north east with the Prussian 12th Brigade and 14th Russian Division. Dan deployed the Vistula regiment in Markkleeberg and the rest of his infantry behind the stream, with artillery on the hill behind. He divided Uminski’s Cavalry Division, putting the cuirassiers on the eastern flank and the Krakus and horse artillery behind Markkleeberg in the West. Spencer masked off the village with three artillery batteries and massed the rest of his force on the eastern half of the table, with the Prussians in front of the Russians. Spencer advanced on the Polish line behind the stream, halting to exchange fire while his landwehr lancers sent Dan’s cuirassiers packing in an upset victory (I bear some responsibility for this: I encouraged Dan to come forward, assuring him he wasn’t running a big risk. I was wrong. All things considered, he was remarkably good about it!). Dan’s artillery did some impressive damage early on, destroying a Russian battery and disrupting several battalions. Spencer’s troops were initially packed in a small area so suffered a fair bit from bounce through, although they rallied most of this off. The Polish Infantry in line had the better of the firefight with the Prussian columns, as one would expect. Dan then decided to exploit the disruption of the left hand Prussian column by crossing the stream and attacking it. This was a great success and the Prussian unit was destroyed. Dan used the ‘huzzah’ counter to then bowl into the flank of the next unit along, in which the odds were stacked in his favour. However, Spencer achieved his second upset victory of the game, which stopped Dan’s attack and saved Spencer’s bacon. The attack had been so well conceived that Spencer actually apologised for defeating it. On the western flank, the artillery duel didn’t do much damage, except when Dan took it into his head to send the Krakus skittling South past Markkleeberg, where they took a pasting from Spencer’s cannon and scuttled back to their starting position with several empty saddles. It appears that Dan had heard of the Charge of the Light Brigade but didn’t know how it turned out.... It was his only misstep in an otherwise masterful game. Back East, reinforcements arrived for both sides, in the nick of time for Dan as Spencer was just swinging around his flank and racking up kills. The landwehr lancers wiped out a French battery soon after it entered the table and two Prussian columns destroyed Dan’s eastern-most Polish battalion. The French reinforcements managed to plug the gap in the line but Spencer was one unit away from inflicting sudden death on the Polish side. In the final stage, Dan sent his three surviving Polish battalions over the stream and into the Prussians with whom they had been engaged for most of the game. The Poles had inflicted more losses in the preceding firefight and so were in better shape, but even so we were not expecting quite the success they enjoyed. First one, then a second Prussian battalion was destroyed, pushing Spencer past his sudden death limit. “What do you think of the rules so far?” “Brilliant!”We thoroughly enjoyed the game and were greatly impressed by the rules. The momentum rules at their heart work smoothly and keep both sides involved throughout the turn. The concepts are easier to play than they are to explain and the fluid sequence of play makes for a tense and exciting game. The simple movement rules spared us the fiddling and bickering that accompanies some tactical rules I know. The rules don’t impose a straitjacket on the players but they reward ‘historical’ deployment and formations and punish rash actions, as Dan’s cavalry found out! As ever, Spencer and Dan threw themselves into the game with good humour and sportsmanship. Although his victory was snatched from him, Spencer was so impressed by Dan’s game-winning attack that he was genuinely pleased it succeeded. It is always a pleasure to play with such people. I’d like to play Markkleeberg again but our next outing with Lasalle will see French and Bavarians facing off against Austrians. Lots of Austrians. 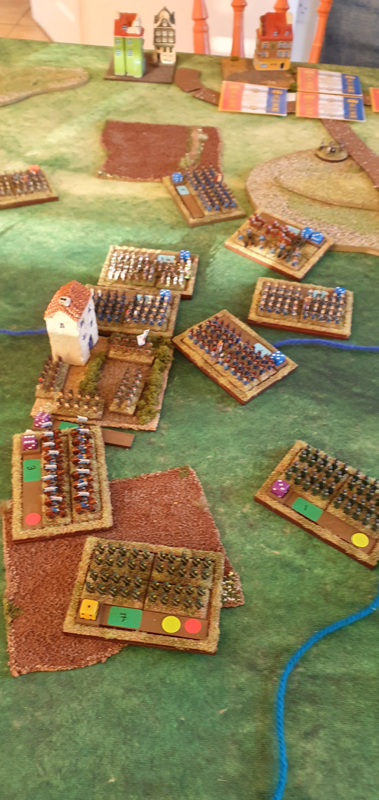 The Krakusi, my latest Polish unit, bought from Fighting 15s during lockdown. I have uploaded a Blucher scenario for the fighting at Laichling on 21 April 1809, between Marshals Davout and Lefebvre and the Austrian IV Corps under Rosenberg. In a foretaste of Aspern-Essling later in the campaign, this encounter really showed the quality of the Austrian soldier in a stand-up fight. I first wrote a scenario for Laichling in the mid 1990s, for use with the Napoleon's Battles rules by Avalon Hill. I believe it translates well to Sam Mustafa's Blucher. However, thanks to the Covid lockdown I have not yet played the scenario against a live opponent, I don't normally upload scenarios that we haven't played but I do plan to play it once we can meet up for gaming later this month. I will report on how the game goes and make any tweaks to the scenario after that. The scenario is posted here  Over the Easter weekend I was able to play two socially distanced wargames with my son Nick, using the To the Strongest rules (TtS) by Simon Miller. We play TtS with 25mm figures on a 6” grid. The figures are a mix of ages and manufacturers, some of them dating back to 1981 when, aged 21, I started collecting Classical Greeks by Minifigs and by the long-defunct Rospaks. I have added to the collection over the years, with both modern sculpts by First Corps and Newline Designs and older models picked up through eBay or gifted by a friend who has downsized to 15s. I now have Greeks, Macedonians, Gauls, Iberians, Carthaginians and Republican Romans. The Romans are an entire army of very early Minifigs from the collection of a gamer who had passed away. I felt honoured to re-home them. Their spears are like telegraph poles and sculpting definition can be fuzzy but they have great character. And unlike so many ‘heroic’ scale figures, their proportions are realistic. To my eye, too many 28s today look like Space Marines in togas. But I digress! 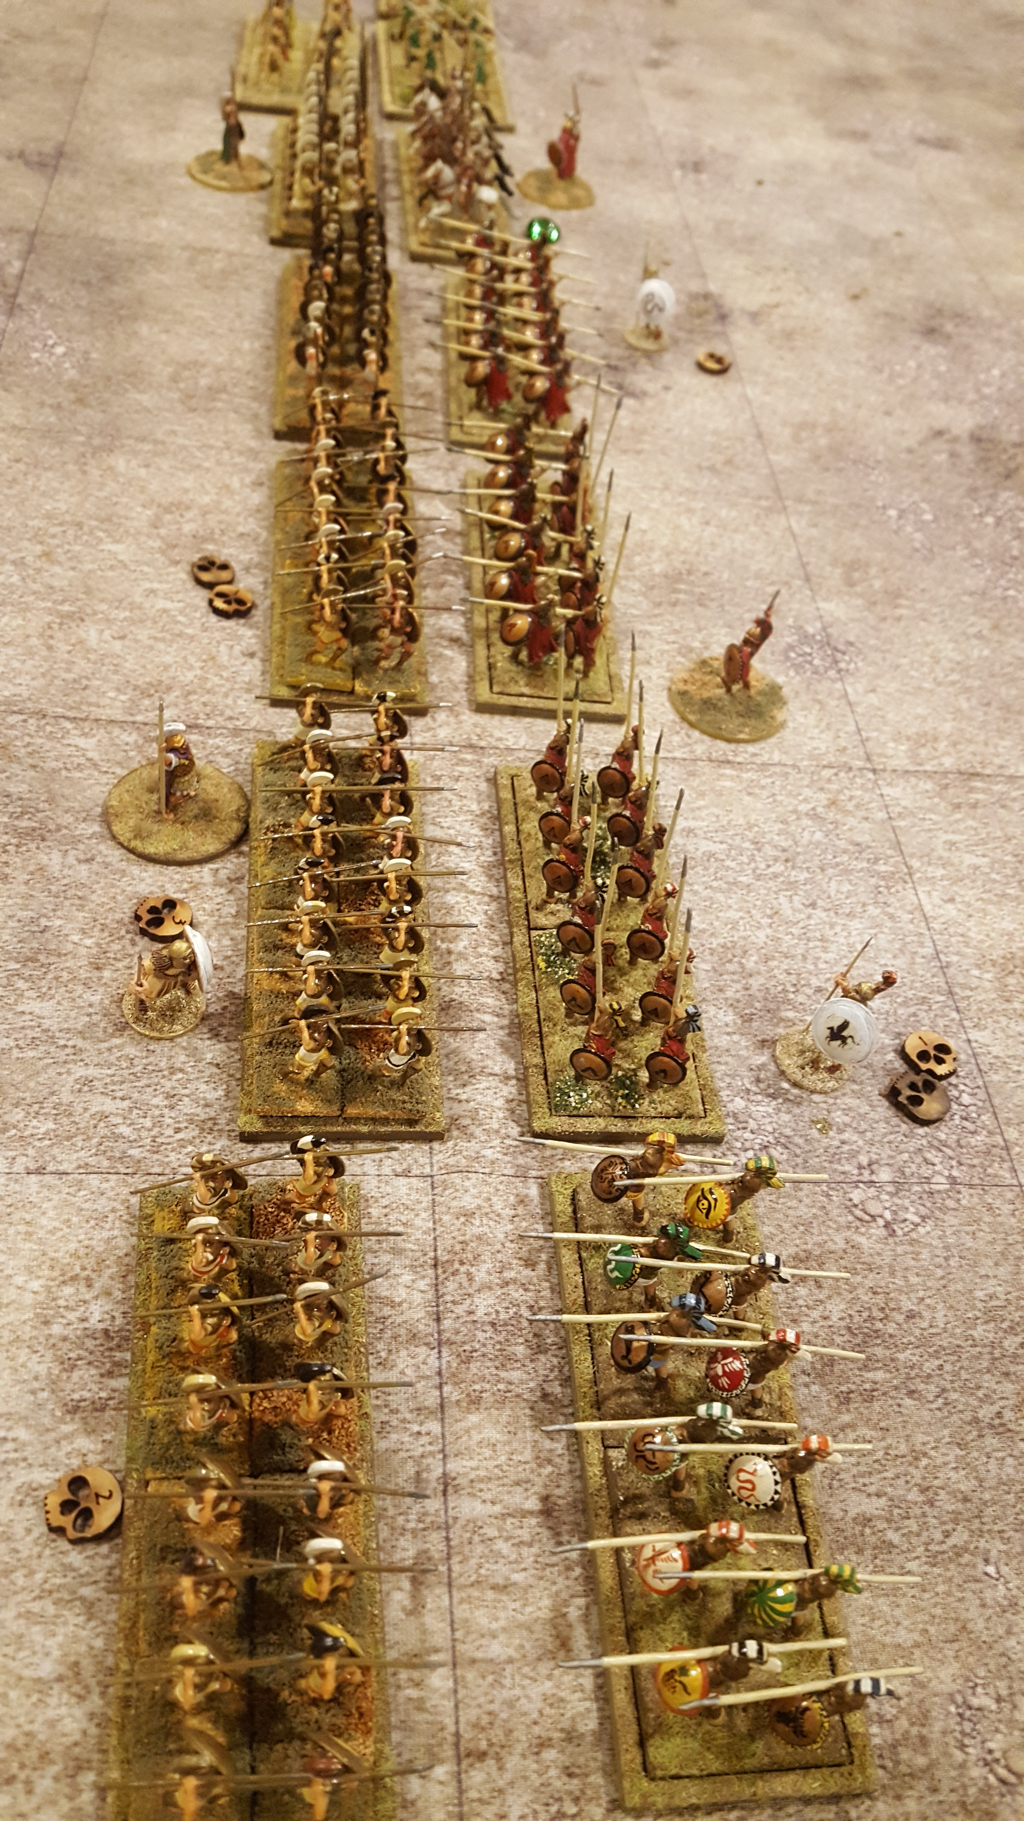 The death of LeonidasOur first game was a battle between my Athenians and Nick’s Spartans. His hoplites had the qualitative edge while I had more lights. While the two flanks bickered, our centres got stuck in, with Nick’s lads doing marginally better. We both had success with our left flank forces, so as the fight developed, each of our right flanks had to deal with the danger of being rolled up. I was losing victory medals faster than Nick but then had the good fortune to kill his heroic general, which brought our losses into balance. The cards went my way next turn, destroying one more Spartan hoplite unit and the battle was mine. The whole thing was very close however and at game’s end I had only one victory medal surviving. Still, a win is a win! The game felt very satisfying as a clash between two hoplite armies, with no fancy manoeuvres and no detached generals. Our lights kept busy fighting each other but the game’s outcome was decided by the hoplites. 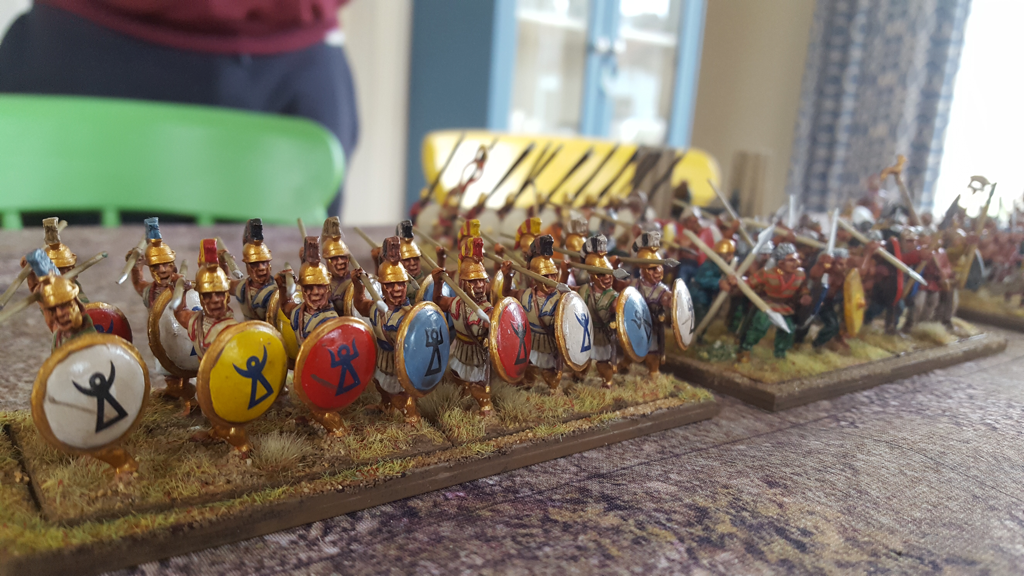 Hannibal ad portasGame two was between Nick’s Carthaginians and my Romans. I was seriously outnumbered and Nick set out to envelop my army. On the other hand my infantry were rock hard and their pila gave them an edge on the first turn of combat. I set out to demolish Nick’s centre while I refused both of my flanks and kept my triarii back to act as a fire brigade. Nick placed all his cavalry on his right flank and two units of elephants on his left, along with some high quality Iberian Scutarii. My centre started well, doing serious damage to some Gauls and wiping out a unit of citizen spearmen. However, the general in command of my centre then missed a turn at a key moment when he drew two aces in succession on his first activation. This allowed Nick time to patch up his centre while his left wing trundled down as far as my baseline and turned to face inwards. I squandered my next turn in a bout of tunnel vision, trying multiple activations on one unit so it could destroy a double-disordered unit of Gauls. Of course I failed the third activation on my unit and so ended the turn without activating a single other unit in the Command. I know, I know! Basic mistake and I should never be so dumb, except I was so fixated on the opportunity to destroy the single enemy unit I was attacking that I completely forgot my own advice. Meanwhile Nick’s left wing started grinding down the troops defending my right rear, as well as threatening my front line from the side. At this point our lines were in an ‘L’ shape, with particular pressure on my units in the angle. Then in one turn, a flurry of high card hits by Nick, met with low card failed saves by me, took him comfortably over the victory line. To his only slight disappointment, he had won without his elephants actually fighting anybody. But we agreed that they had done great work forcing me to conform to their advance.  Nick’s Carthaginians How (not) to play Republican RomansThat didn’t go well for me, but as we played we agreed some resolutions for the next time the Romans fight. Ideally, we would seek to use terrain to negate the enemy’s numerical advantage. In this game, it was Nick who exploited rough ground to shelter his advance down his left flank. Next, the Roman shouldn’t wait around to be outflanked by a bigger force: the heavy infantry should get stuck in quickly and try to eat up the enemy centre before the flanks and rear are threatened. Once engaged, the first priority each turn must be to use the Romans’ special line exchange rule for every unit that is disordered (representing the fresh principes replacing the tired hastati in the front line). This is a really powerful advantage but I lacked the discipline to sort out the line before other activations. At least twice, my command’s turn ended before I had attempted a line exchange. Finally, we decided that if possible, every command should have just one main function. My centre command Included both front line units and my reserve. Besides making it a very big command, I was trying to deploy the triarii to face Nick’s flank attack and to fight his centre to the front. Too often, the command’s turn ended before one group or the other had completed its tasks. It is of course one thing to draw conclusions after a game but entirely another to remember them next time I play. And in case I haven’t made it clear: I didn’t ‘throw’ the game. Nick conclusively won it, making great use of his army’s strengths and obliging me to respond to his movements. A classy win for Carthage. 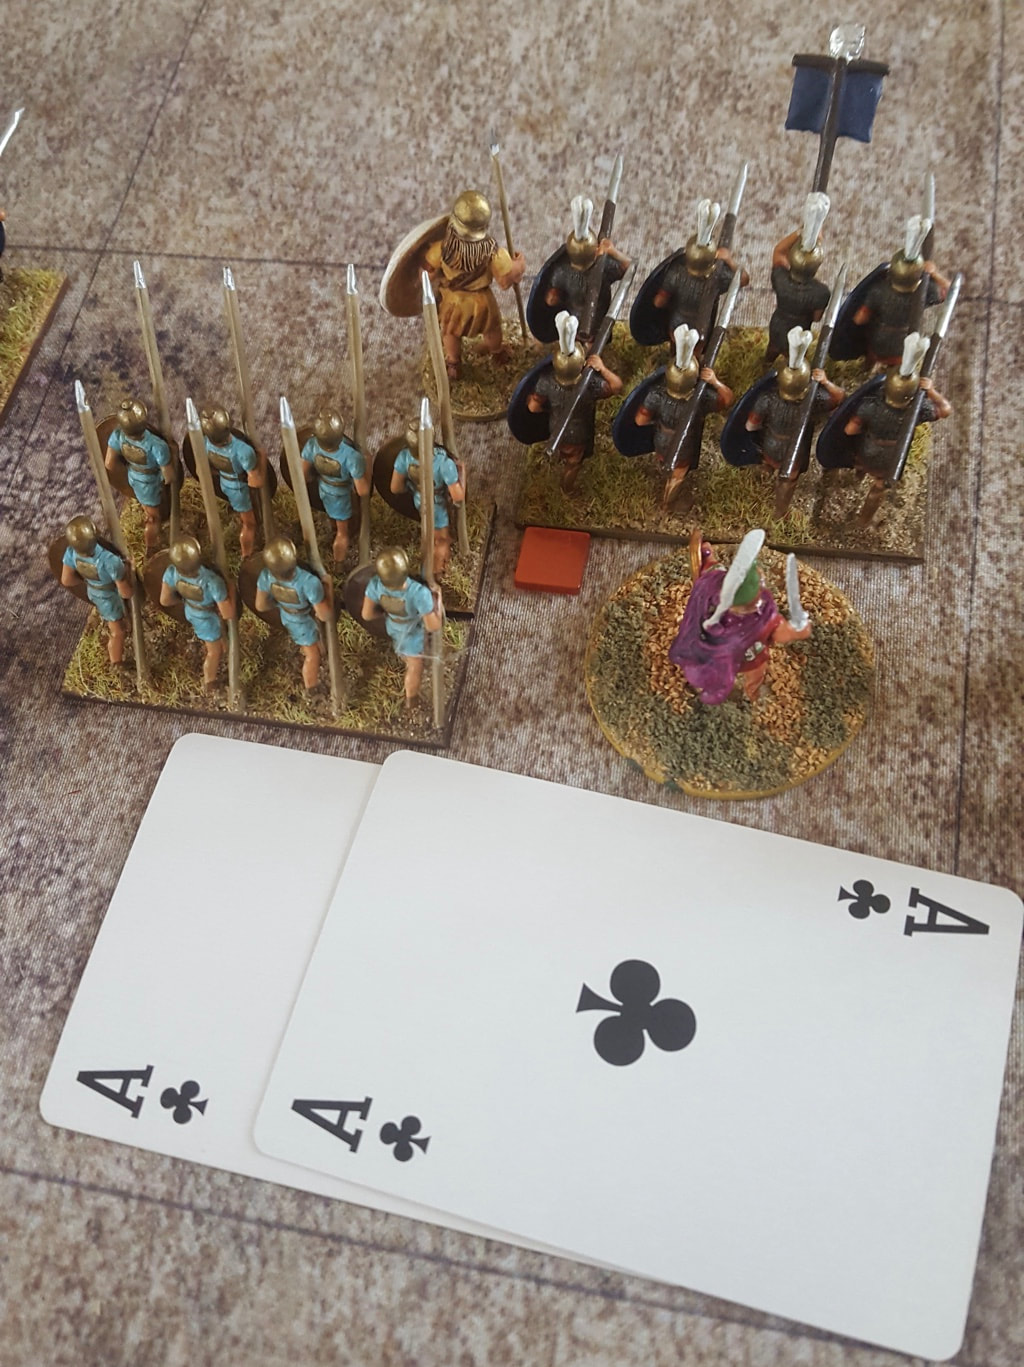 Aww, nuts! Turn over before it begins Out of lockdown with To the StrongestThe second game was much more fluid than the hoplite encounter had been and it felt a bigger challenge for both of us. The card activation system in To the Strongest is inspired. A sensible player can minimise the risk of their turn ending prematurely but very occasionally, as when I drew two aces in succession at the start of one turn, bad luck just happens. Fair enough. On the other hand, it is all too easy for an idiot like me to get drawn into the drama of a single combat and completely forget that I should be taking care of other activations before trying again with the critical combat. I reckon a game that draws me in so completely is doing something right.
I remember that when I first read the TtS rules, I wondered if units had enough hits/lives to sustain a good game. I also worried that a squared grid might be too restrictive on movement. Neither concern survived contact with actual play. I very soon concluded that these rules are perfectly gauged to give an exciting and rewarding game, with the strong sense of what I would expect from an ancient battle. They are also so easy to learn and (crucial at my age!) to remember during play. After months and months without a face to face game, it was wonderful to be playing again. Fingers crossed, if the road map out of lockdown stays on track, we can soon play a great many more. It is some time since I last played a 17th Century game but earlier this year I was tempted back after reading Michał Paradowski’s new book published by Helion, “Despite destruction, misery and privations” about the Polish army fighting the Swedes in Prussia in the 1620s. This fascinating book is full of detailed information about the recruitment, equipment and organisation of the Polish forces. I rather wish it had also described the course of the war, if only in general terms, for the benefit of non-Poles like me who don’t already know the history. But I still strongly recommend it to anybody with an interest in the period. Over the years our gaming group has tried a few rules sets for 17th Century Battles in Eastern Europe. My favourite for some time have been Tercios by el Kraken, but the need to issue a separate order card to every unit can make bigger battles a bit slow to play. When Simon Miller and Andrew Brentnall released ‘For King and Parliament’ three or so years ago, I picked them up because I really like Simon’s Ancients rules, ‘To the Strongest’. FK&P doesn’t have rules for several east European troop types but they are easily adaptable. With a bit of borrowing from To the Strongest, I drew up some house rules to adapt FK&P to battles further east. We played a test game based on Berestechko, 1651, which went well. I then started on troop stats for 1660, which added Muscovite troop types to the mix. At that point I was distracted by a rebasing project for my 15mm Napoleonics and 1660 went onto the back burner. Thanks to Paradowski, I have now hauled it out again and done some more work on the house rules and troop stats, and have written a couple of scenarios to test them. The latest house rules are here 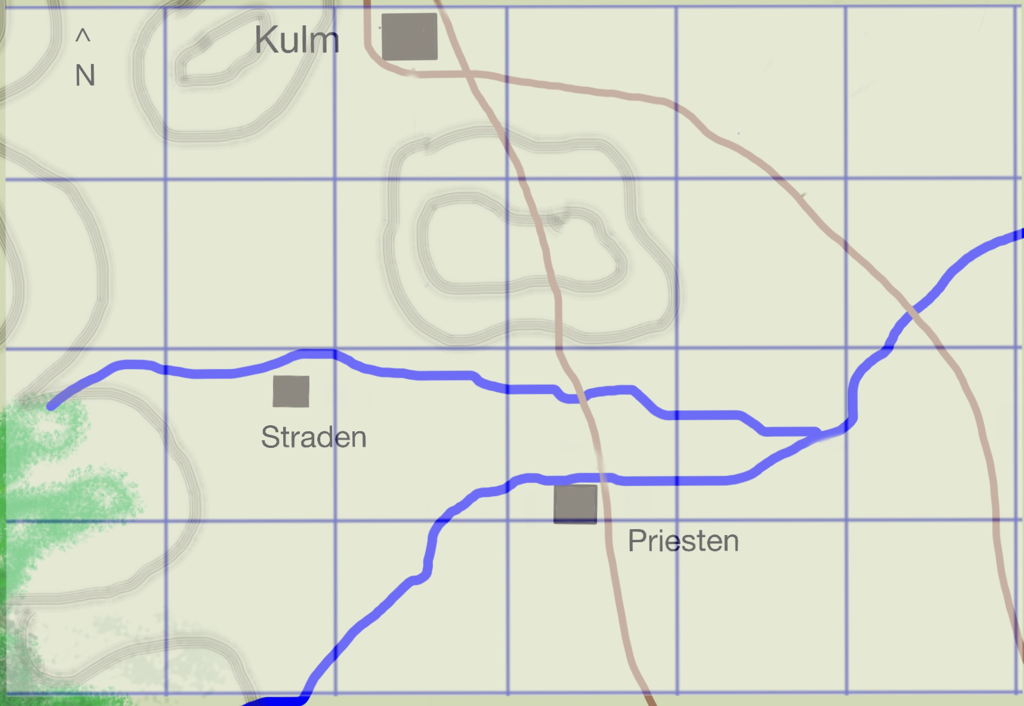 Two scenarios for the price of oneThe scenarios are set during the 1660 Chudnov/Cudnów campaign, between the Commonwealth and Tatars on one side and a Muscovite-Cossack alliance on the other. I love taking ideas from this campaign! It offers several candidates for an interesting game, including a clash of advance guards, a running fight, a rearguard action at a ford, a field battle and an assault on the enemy camp. Both of the new scenarios are based on the third day of the battle of Lubar on 16 September 1660. The historical version represents an attack by the Poles and Tatars on the enemy camp. The second is a What If scenario, involving a battle in the open ground between the two camps. This scenario presumes the Poles adopted a battle plan supposedly put forward by Field Hetman Lubomirski. Both scenarios can be found here. We played the What If version as a multiplayer scenario in 2014 using Warlord Games’ Pike and Shotte and It gave a balanced game. I later converted the orders of battle for the Tercios rules and we played the historical battle in 2016. Last week I played the historical FKaP scenario with Chris and Paul and will play it again this Friday with two more opponents, Kevin and Rupert. I will post battle reports and photos after the second game. Meanwhile, as English language accounts are hard to come by, I have written an account of the battle below. It is based on a few sources, mainly Łukasz Ossolinski and Mirosław Nagielski. 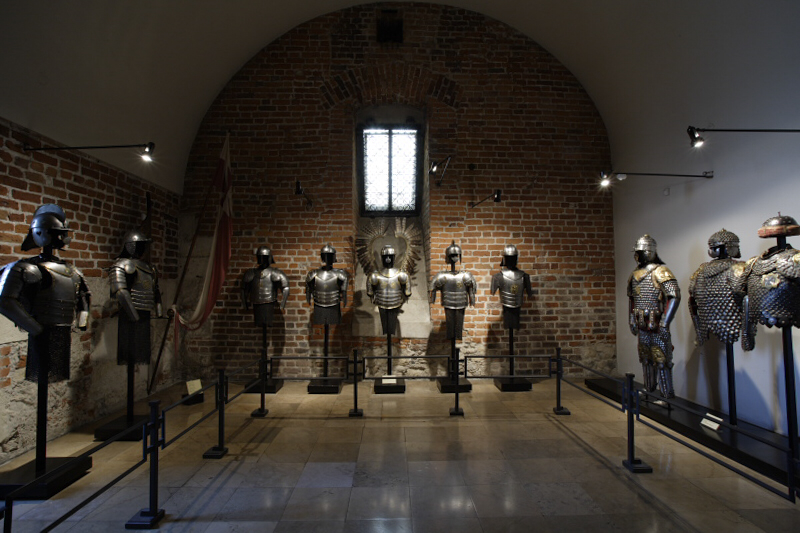 Hussar panoplies at the Wawel Castle in Kraków The battle of Lubar 16 September 1660
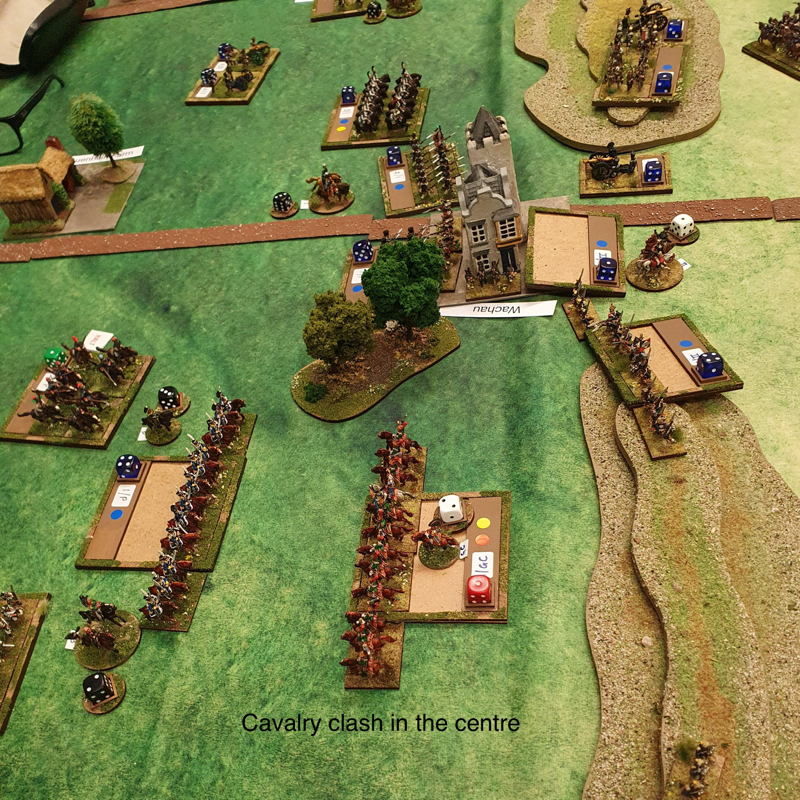
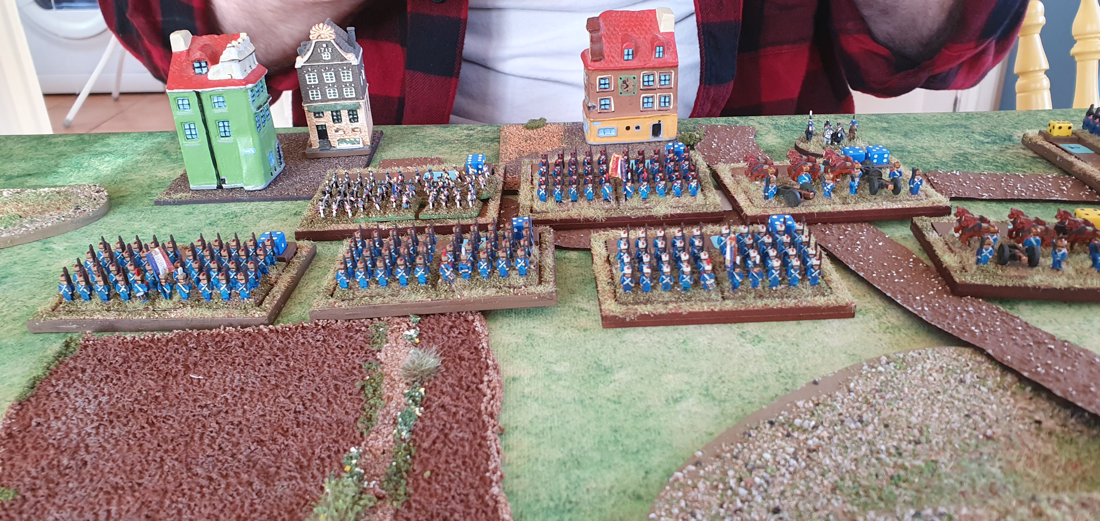
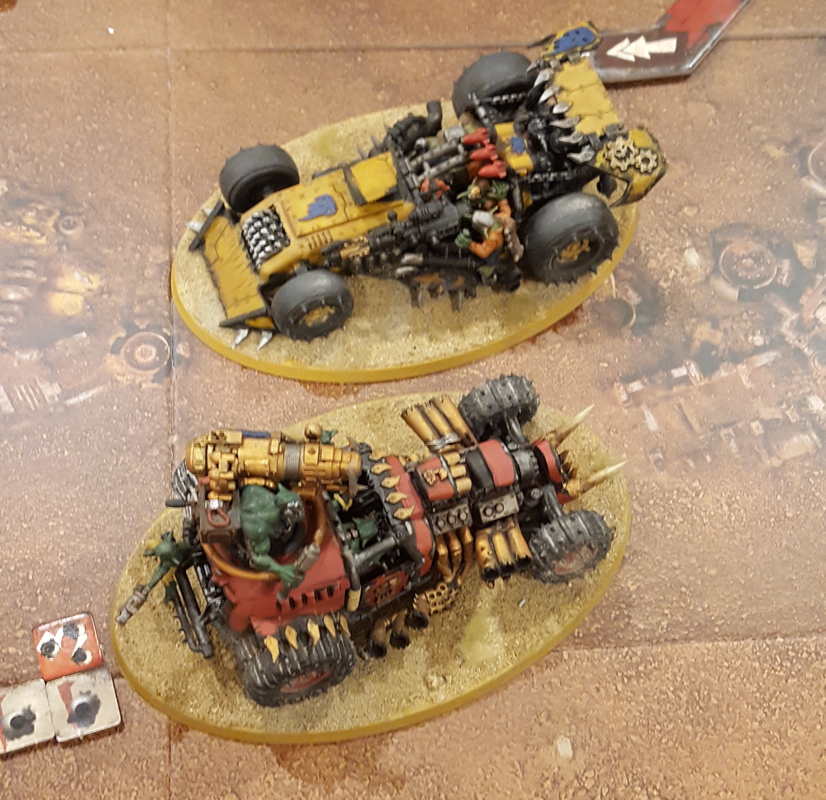
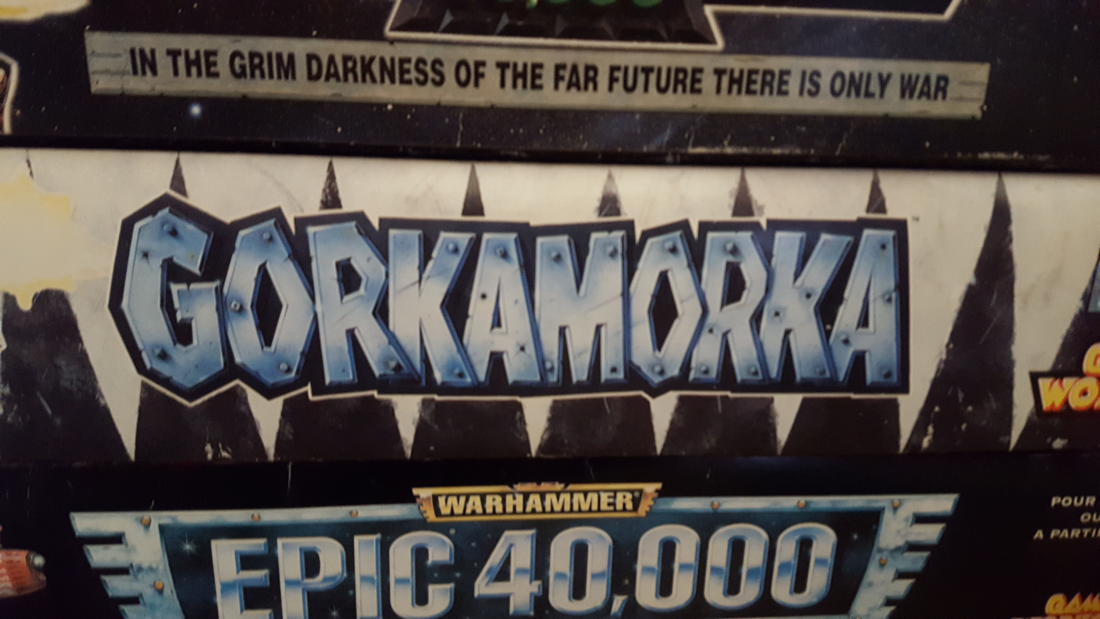
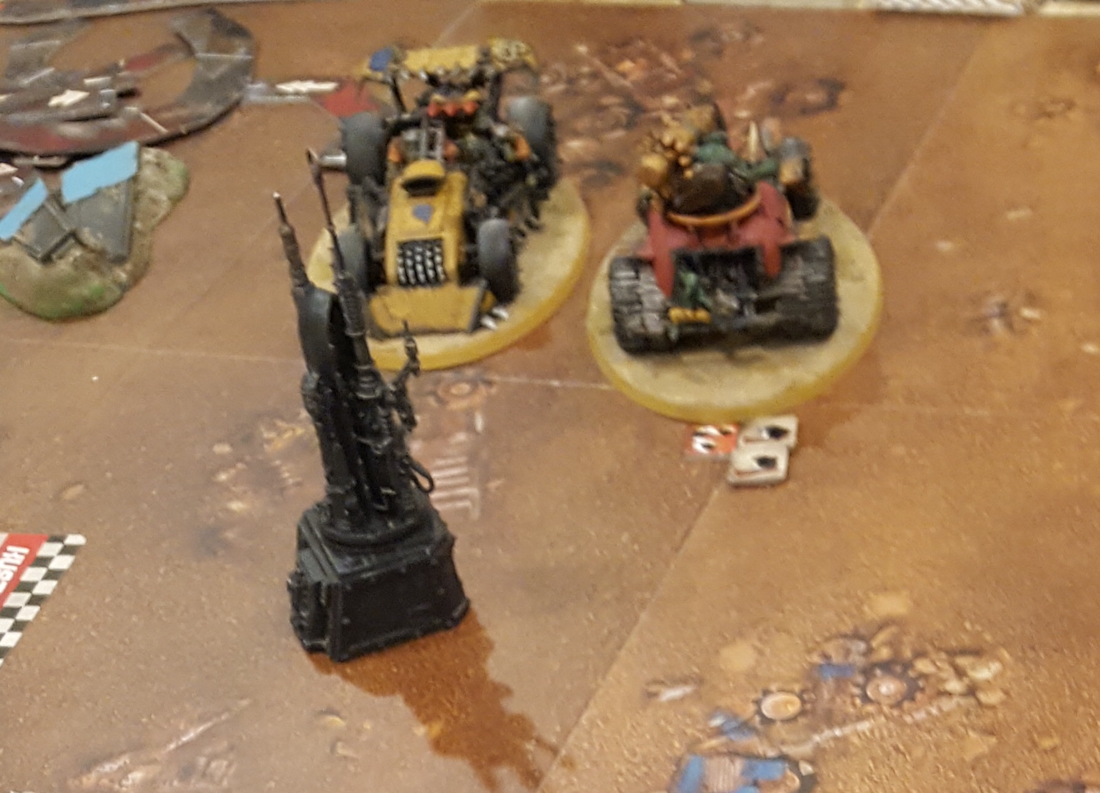
The battle of Lubar was the first act of the Chudnov campaign of 1660, when a Muscovite-Cossack alliance took the field against the armies of the Polish-Lithuanian Commonwealth and their Tatar allies in Ukraine. Lubar was in fact a confrontation over several days. It began on 14 September with a chance encounter between the vanguards of the Commonwealth-Tatar army and the main Muscovite-Cossack army led by Sheremetyev and Tsetsura. Having made contact, the two sides made camp within a few kilometres of each other. At this time it was standard practice to fortify in the presence of the enemy, first by placing wagons around the perimeter and if a long stay seemed likely, by digging earthworks. After the initial clashes of the 14th, both sides spent the 15th strengthening their camps and preparing for battle. The Commonwealth and Tatar camps were placed near the town of Lubar, with easy access to fresh water and forage. Sheremetyev and Tsetsura’s camp was well situated for defence with forest to its rear and an emplacement on high ground covering its southern side, facing the enemy. However, it was poorly suited to a long stay, as forage was scarce and its water supply was a marshy stream that was barely able to meet the needs of 30,000 men and their livestock. On 16 September, the opposing forces drew up in battle array, facing each other between their camps. The Commonwealth army had an interest in fighting in the open, where it could take full advantage of its superiority in cavalry. The enemy was believed to be unaware that Field Hetman Lubomirski and his division had arrived in theatre to join Grand Hetman Potocki. According to some accounts, Lubomirski proposed setting a trap, by hiding his troops behind high ground and drawing the enemy further into the open before launching an ambush. For whatever reason, no trap was laid and the whole Commonwealth army advanced on the enemy. In response, Sheremetyev withdrew the bulk of his army back behind his camp earthworks, leaving two forward garrisons: the fortified hill in front of his left, occupied by infantry and artillery with cavalry hidden behind the hill; and trenches in front of his right, occupied by Tsetsura’s Cossacks with light artillery. The action began with an assault by Potocki’s Command on the Muscovite-held hill. The first attack, by Polish dragoons, overran the position and forced the enemy infantry out. The Muscovites counterattacked and retook the hilltop, to be ejected in turn by some of Potocki’s ‘foreign’ foot. Meanwhile a cavalry fight developed around the base of the hill, with both sides feeding in reinforcements. The hilltop may have exchanged hands again in the course of the fight but by late afternoon it was in Polish hands and the Muscovite forces had withdrawn to their main camp. With the hill in his possession, Potocki ordered his troops to prepare to assault the main enemy camp. However, as his infantry formed up in front of the Muscovite earthworks it was disrupted by heavy artillery bombardment and this evidence of Muscovite determination, combined with the advanced hour, prompted Potocki to call off the assault. On the Commonwealth left flank, Lubomirski’s infantry attacked the Cossack forward trenches and eventually cleared them. Again, given the late hour, Lubomirski did not wish his troops to go on to attack the main camp, from which the Cossacks kept up a determined fire. At this point, according to Polish eyewitnesses, an incident occurred that led to the fight restarting. Throughout the day, the Tatar contingent had been coming and going from the field, harassing the enemy with bow fire and looking for weaknesses around the enemy position. Shortly after the Cossack trenches had been cleared, a senior Tatar warrior fell wounded from his horse in front of the enemy camp and a group of Cossacks jumped out from behind their earthworks to take him prisoner. Seeing this, those Tatars in the vicinity rounded on the Cossack group, saved their wounded comrade and amidst the confusion, pursued the enemy back inside the camp. More Tatars followed and were joined by Polish horse and a regiment of foreign foot, all of whom broke into the Cossack earthworks. The infantry commander believed the Cossacks were breaking and urged that the breach be exploited, but Lubomirski insisted that all troops return to Polish lines. The day therefore ended with the Commonwealth army abandoning its gains on both the left and right wings and retiring to its own camp. The fighting on 16 September illustrated the strengths and weaknesses of the opposing armies. Sheremetyev and Tsetsura were outclassed in the cavalry arm so unlikely to win a battle in the open. Potocki and Lubomirski meanwhile had too few infantry to carry the enemy camp by storm. Sheremetyev decided to stay behind his earthworks and wait to be reinforced by Chmielnicki’s 20000-strong Cossack army, which was only a few days’ march away. Potocki and Lubomirski laid siege to Sheremetyev’s camp. Over the days that followed, the Muscovite/Cossack camp, hemmed in by the Commonwealth/Tatar blockade, began to suffer from the poor water supply and limited access to fodder. Moreover, Chmielnicki showed no signs of advancing to reinforce Sheremetyev, despite exhortations to hurry up. On 26 September Sheremetyev retreated to his forward supply depot at Chudnov, pursued a little belatedly by the Commonwealth army. The next day, the two armies settled down again in much the same situation as before, with Sheremetyev blockaded in his camp by the Poles and Tatars. There would follow several minor engagements, a battle at Słobodiście and the desertion of his Cossack allies before Sheremetyev was forced to surrender and marched his army into captivity. As events turned out, the confrontation at Lubar on 16 September had been the high point of Muscovite fortunes. Game reportThis post completes the story of our refight of Waterloo, played in 2015.  Deployment, made easy by Honour Games' '100 Days' cards Special house rule: garrisons for strongpointsI have a lot of skirmisher bases from Volley & Bayonet days, mounted on 1.5" squares. The Allies were allowed to use these to garrison La Haye Sainte and Hougoumont if they wished. A small base began with up to 3 élan points, subtracted from a parent unit. It would benefit from the attributes of its parent brigade as well as the usual urban area benefits (+2 for it, -1 for the attacker). In the Allied turn, a friendly brigade within 3" and unengaged may reinforce the garrison by transferring élan points to it, reducing its own élan accordingly. However the most élan points that may garrison either strongpoint at any one time is 3. I prepared similar markers for the French in case they took either strongpoint and wished to garrison it.  1st French Corps advances in the West Player briefingsEach side had three players. They selected cards to determine side and whether CinC or subordinate. The briefing notes for Napoleon and Wellington are below. "Napoleon Your army is all present on table. You will set up second, on the ridge of La Belle Alliance including, if you wish, the spur east of La Haye Sainte. Your objective is to open the road to Brussels and knock Wellington out of the war. You have two subordinate players, to each of whom you should allocate an infantry corps. You may also allocate other formations to these players although you may retain as many of these formations under direct control as you wish. Each of you should deploy your forces in accordance with your instructions as CinC. During the battle you may devolve control of any formation to a subordinate, but with a one turn delay: they may only move the added formation the turn after you allocate it to them. On the other hand, you may take direct control of any units of any formation yourself, immediately and without consulting your colleagues. In the early hours you heard from Grouchy that he is before Wavre. This means he is unlikely to reinforce you today, as to do so he would have to pass through the Prussians. However if he presses his advance this morning as you have ordered him to, he should at least prevent the Prussians from reinforcing Wellington." "Wellington You will set up first. Your objective is to stop the French from advancing on Brussels and to hold on until help arrives from Blucher. Your army may deploy anywhere on table, no further South than the two strongpoints. You have two subordinates, to whom you should allocate at least two infantry divisions apiece and as many as you wish. You may also retain direct control of a reserve. During the battle you may devolve control of any formation to a subordinate, but with a one turn delay: they may only move the added formation the turn after you allocate it to them. On the other hand, you may take direct control of any units of any formation yourself, immediately and without consulting your colleagues." I admit the instructions on allocating troops to subordinates don't match the historical command structure but this is a game after all and I wanted everyone to have a satisfying command. Keith, our eighth participant and seventh player agreed to help as umpire from the start and to take on the role of any reinforcing commander (of either nationality) if and when they arrived on the field. He was reconciled to the possibility that he might not arrive at all but he is a natural umpire who genuinely enjoys the job. He was also the only other person who had played Blucher before. 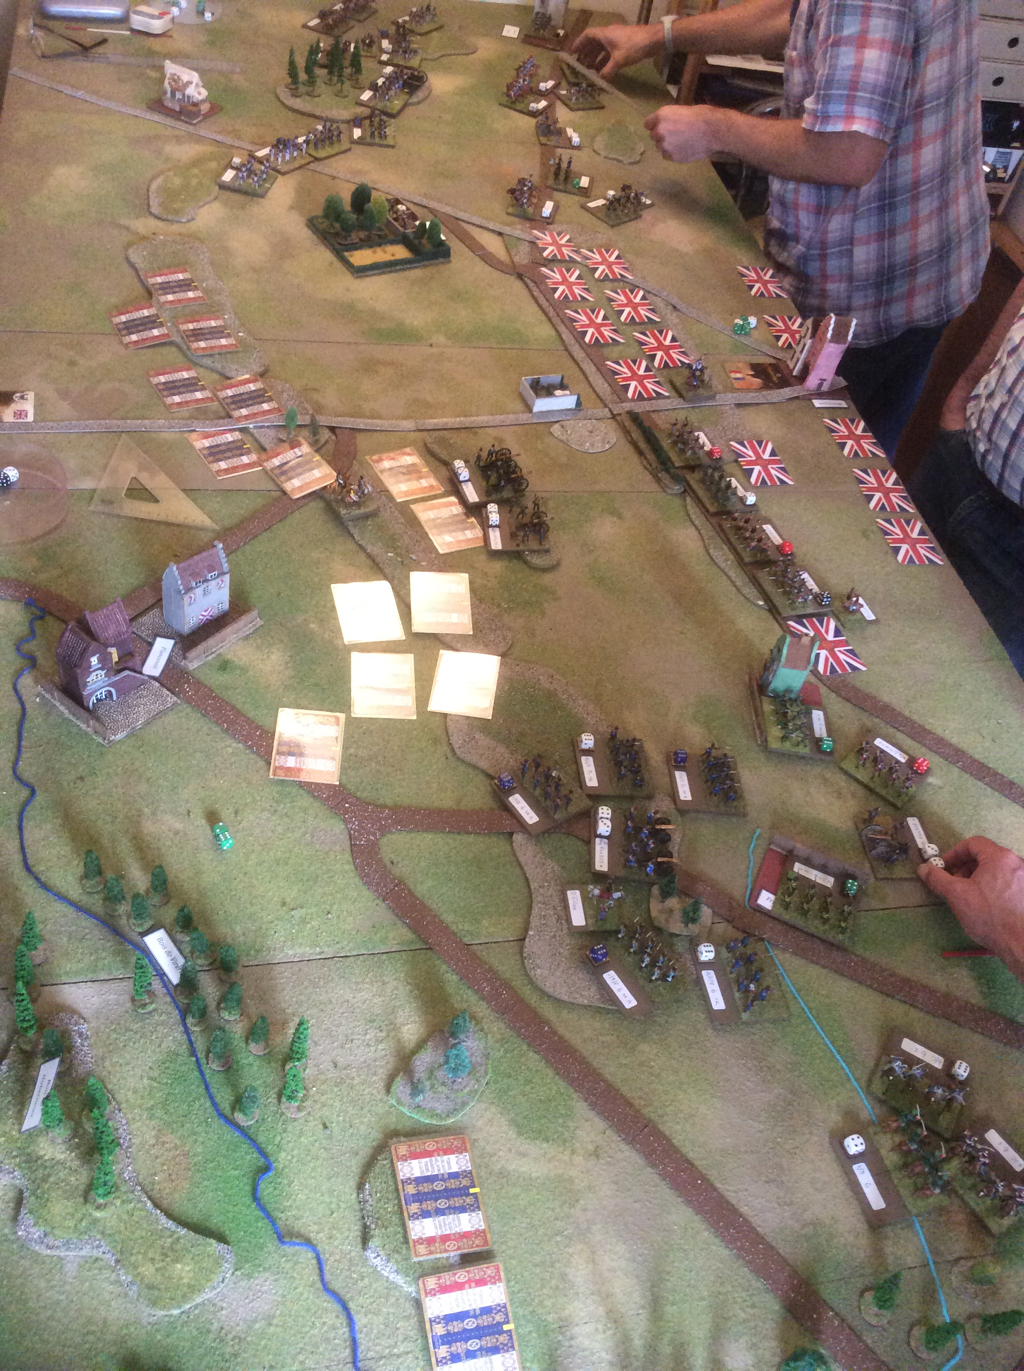 2nde French Corps advances on Papelotte How it played outThe Allied deployment broadly followed history, except with more troops on the West flank. The strongpoints of La Haie Sainte and Hougoumont were garrisoned, as were Papelotte and Frischermont on the Eastern flank. We used the 100 Days cards to place units, replacing them with figures when they were revealed to the enemy. The French set up with only the Guard facing the Allied centre; I Corps was to the South and West of Hougoumont and II Corps set up opposite Papelotte. VI Corps was in reserve behind II Corps. The fight began with a determined left hook by D'Erlon, supported by IV Cavalry Corps. In the East, Reille became engaged with the enemy in Papelotte and Frischermont. The centre stayed mostly inactive at the start, apart from some bombarding by Napoleon's heavy guns. The Allied defence on both flanks was spirited but Napoleon pressed his generals to keep up the early momentum. The Allied Right started to crumble under the pressure but a series of hard-hitting counterattacks by British and Brunswick cavalry brigades bought some breathing space. On the opposite flank, the French stalled outside Papelotte. News then reached both sides of a force approaching from the East. It soon became clear that Blucher, not Grouchy was on his way to the battlefield. Aware that time was running out, Napoleon launched the Guard in the centre, in the first serious action of the day in this sector. At the same time, the French Left resumed its assaults and a series of Allied brigades were eliminated in quick succession. At this point, Blucher arrived with 15 and 16 brigades from Bulow's Corps, increasing the Allied morale total and staving off collapse. Napoleon sent VI Corps to face the new threat but also reinforced his centre with the Guard Cavalry. By this point, his only reserve on the table was the Red Lancers of the Guard. One more turn of hammering pushed the Allies over even their adjusted morale level. The Anglo-Allies began their retreat; the Prussians, realising that the field was already lost, halted their advance and moved onto the defensive. They had come too late to save Wellington from defeat. The day was Napoleon's. 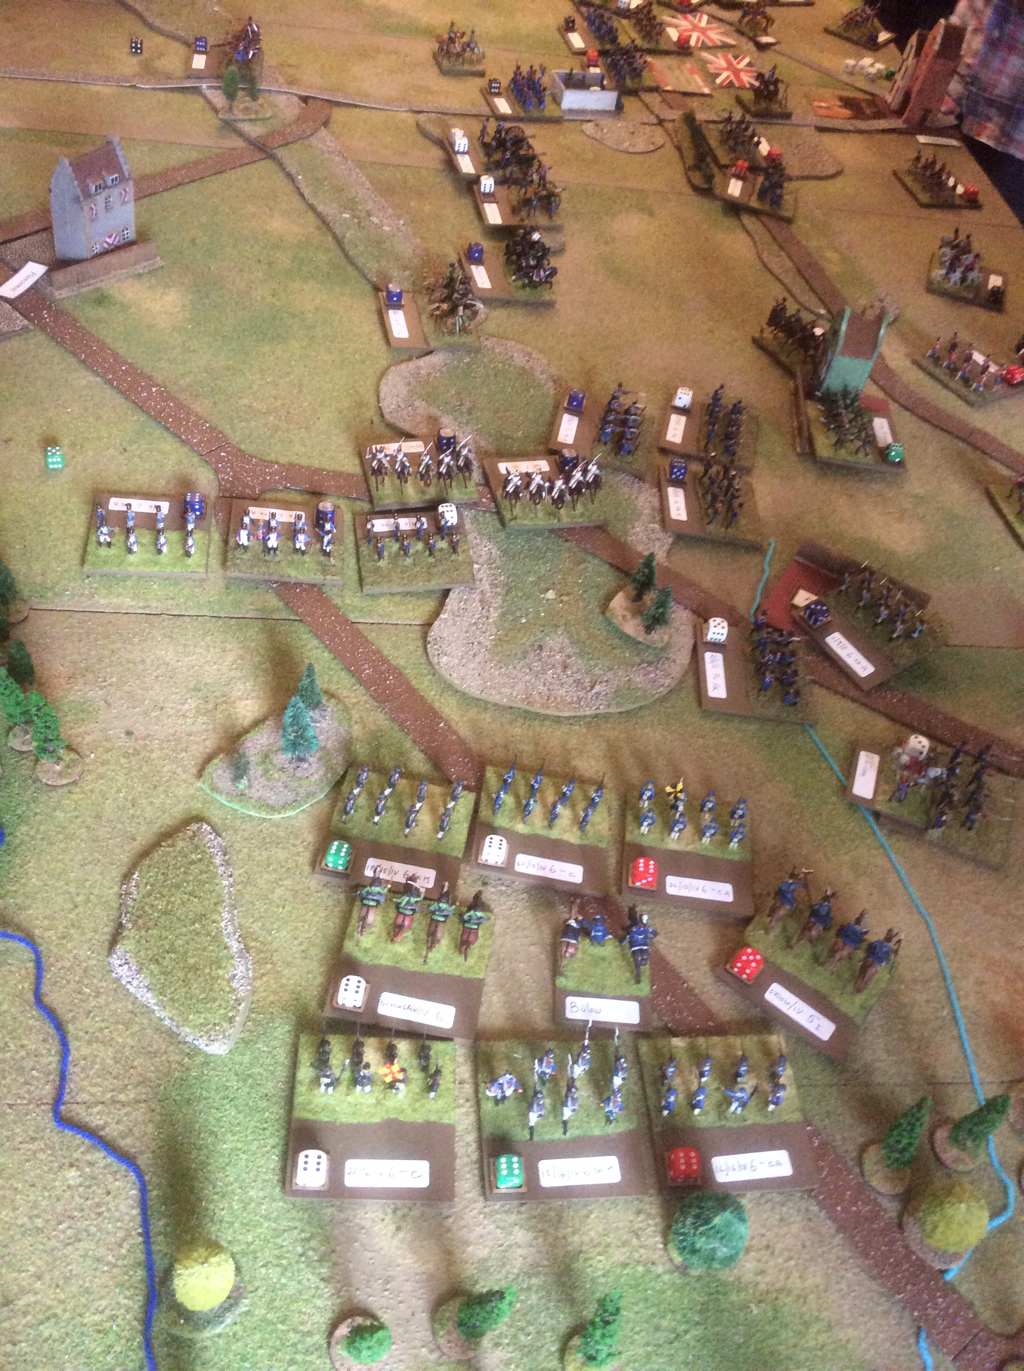 The Prussians arrive, just too late Post Match AnalysisThe game had lasted from 11am to 5pm, with a break for lunch. In game turns, working to the broad rule of 45 minutes per pair of player turns, the battle ended around 7pm. The early turns had dragged a little as the players learned the rules, but it soon picked up speed. It was a great feeling to reach a firm conclusion inside one day's gaming. The players seemed to enjoy the day and certainly picked up the principles of the game quickly. Most of the rules made sense to them, although there were inevitably a few concerns about bits and pieces. The main wish was that infantry could fire in more situations, for example after changing facing. There was also a suggestion that if prepared units took a difficult move, they might retain their prepared status. On the other hand, some thought that prepared units should not be permitted to skirmish, presuming that part of being prepared would involve drawing in the brigade's skirmishers. The feel of play was smoother than Napoleon's Battles or Volley & Bayonet. I think we would have been hard put to reach a conclusion with either set in the same time span. It is also interesting to follow Sam Mustafa's journey from Grande Armee, through Fast Play Grande Armee, to this. Blucher is stripped of all but the key game mechanics, yet retains a convincing period feel. The use of momentum dice puts real pressure on the players to move the important formations first. The reserve rule, which allows a one-off burst of speed to units that are still concealed, is an entertaining mechanic that both encourages the players to keep reserves and creates tension when these are finally committed. The game was a joy to umpire and I found answers to all the rules questions that arose. From where I stood, the French deserved their victory, having chosen a good plan and stuck tenaciously to it. The Allies tried hard to hold them, especially Chris on the beleaguered Right who handled his cavalry particularly well. But it wasn't to be and when the line started to unzip, it gave way decisively. 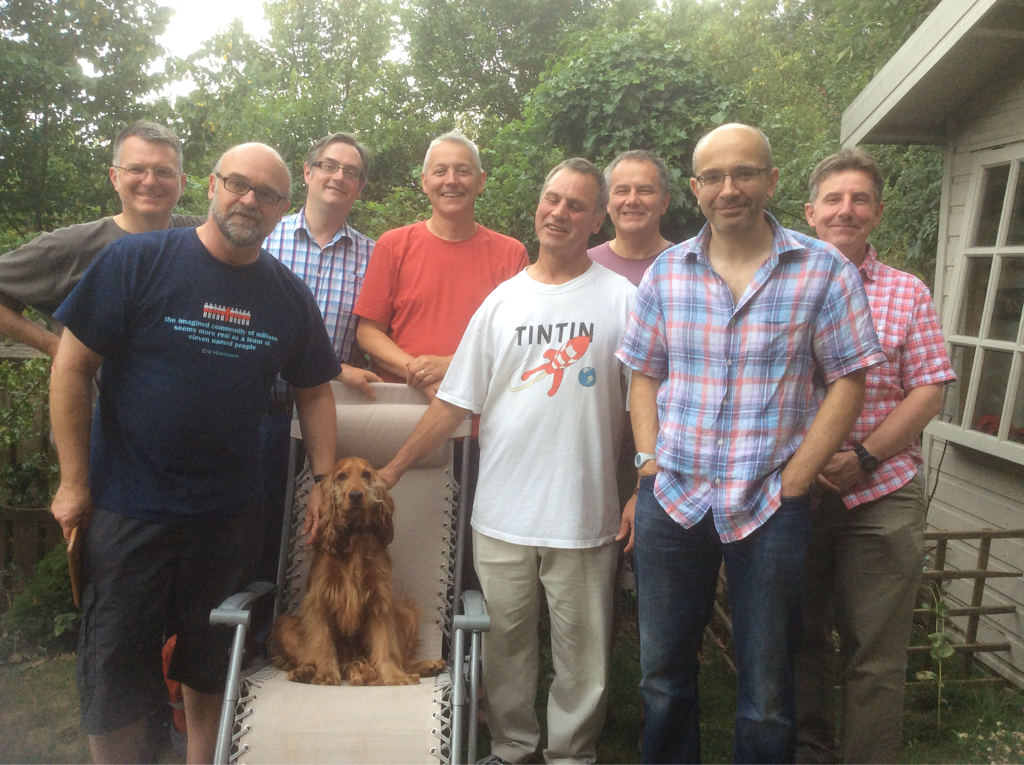 The Players  Our last game before lockdown: 6mm Lasalle When the lockdown began, a few jokes did the rounds that wargamers would barely notice the difference since we already spend so much time alone with our hobby. Of course, the same joke has been applied to online gaming, model railways, stamp collecting and other indoor pass times. And to some extent, I do think those of us with hobbies like these might have had some advantages compared to people whose leisure involves, say, team sports or ballroom dancing. But the past few months have brought home to me that interacting with other gamers is central both to my enjoyment of wargaming and to my motivation. It has been a challenge to make up for the absence of face to face gaming. Although we haven’t met to play since mid-March, I have found our little wargaming WhatsApp group to be a source of entertainment and solace over the past several months. We range in age from mid 20s to 60 and have diverse interests but I greatly enjoy our chats and following other gamers’ projects. Our first attempt to fill the gaming void was a play-by-email ACW campaign. Players supplied their instructions each turn and I resolved the moves on a master map. I played out larger battles solo, using plans submitted by the players, and worked out lesser encounters with a simple combat results table combined with some free kriegspiel. The most fun for me was inventing a bit of incidental narrative, such as the nighttime escapade of a federal cavalry unit passing through rebel lines, aided by a local school mistress who supported the union cause. This incident had very little impact on the big picture but added some flavour to my next report to General Frémont. I ran the ACW campaign with two groups of players and I think it went quite well. I hope the players enjoyed it too: I was given a rather fine bottle of Black Dog gin by one group after their campaign ended. I wish I could have played more socially distanced games once the lockdown eased but have only managed one, with my son Nick, which was a knockabout ‘Middlehammer’ game between Orcs and Empire. I suspect our choice of an old Games Workshop System was influenced in part by the desire to play a familiar game from happier days. Or is that a bit deep I wonder? For the rest of my hobby time I’ve been rebasing old figures, painting models that I’ve had for years and writing scenarios for when face to face gaming comes back. I’ve also ordered my first 15mm Napoleonics for at least twenty years, mostly in the form of gun limbers but also an entirely new army: I’ve always loved Bavarian uniforms and am delighted to have added them to my collection. This afternoon new measures were announced by Boris Johnson to tackle the resurgence of Covid cases in the UK. Maybe it’s time I started looking at another email campaign... Recently, Nick and I played our first game of Speed Freeks, the Games Workshop game of warring Orks on buggies, bikes and improbable dragsters. He and Will bought me the game last year, mainly for reasons of nostalgia, since this game is a descendant of the old GW classic, Gorkamorka. Gorkamorka was our entry game into the GW universe. One day in 1997 we came across a demo of this brand new game in the Games Workshop branch in Staines. We left the shop with the boxed game and that was it. We collected most of the metal figures and later picked up Digganob, which added human, grot and mutie mobs. We loved the random silliness, both of the background and of the rules themselves. When GW released the 3rd edition of 40K, our Gorkamorka figures became the nucleus of an Ork army. We still have all of our original models, although the plastic boyz on narrow bases were pensioned off when GW released Brian Nelson’s (still) excellent plastics. We played Gorkamorka for a good while before it slowly gave way to 40k. Anyway. Fast forward to 2018 and we were intrigued to learn about the release of Speed Freeks. I might have dropped a hint or two, so on my next birthday I received the new boxed game. First impressions The Speed Freeks box is packed full of models, markers and even a reversible playing board. The models are exquisite and the markers very solid. In comparison, Gorkamorka also had everything we needed to start playing, except for a surface. Of course, the buildings were a mix of coloured card and plastic bulwarks and the models, though quite serviceable, were less elaborate than nowadays. But unlike Speed Freeks, Gorkamorka had figures and rules for dismounted figures and the wartrukk was designed to carry individual foot models. There were even specially designed narrow bases to allow players to cram more figures onto the vehicle. Speed Freeks has no rules or models for figures on foot: in today’s version, every Ork or grot is on a bike or buggy. The most striking difference I suppose is that Gorkamorka provided an extensive back story and campaign system which was further elaborated in the supplement, Digganob, with several additional mobs and models. The Speed Freeks box provides a bit of backstory for atmosphere and a sort of campaign. It is also possible to buy a few more models to supplement the box contents, but the new game is more of a stand alone game that does not draw the players into its world to the extent that Gorkamorka did.  First Play
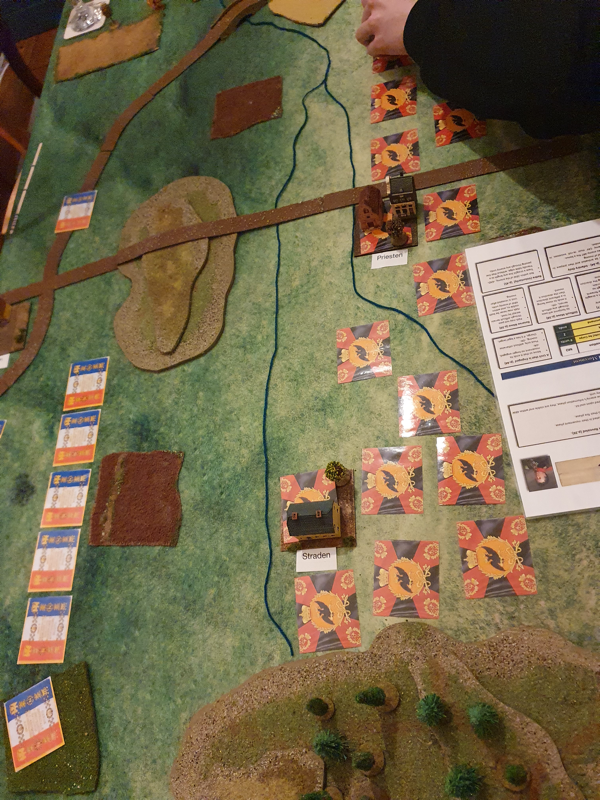
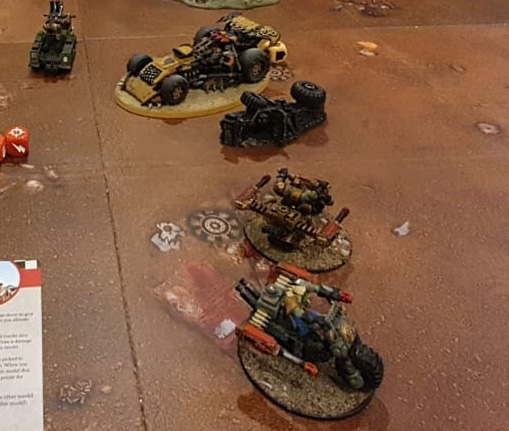
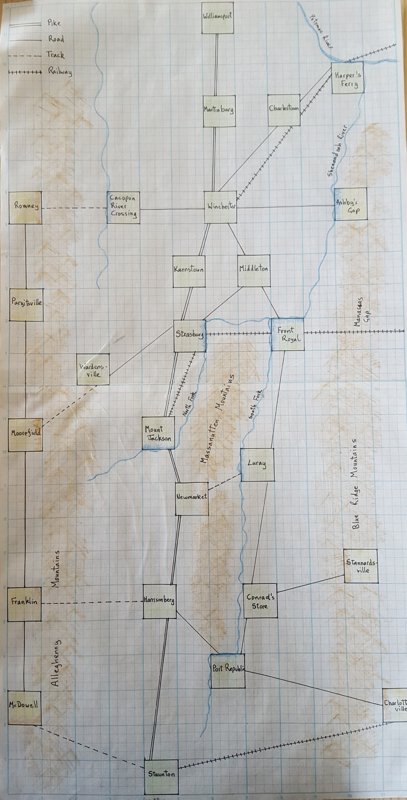
Nick and I played our first game using the buggies from the Speed Freeks boxed set, four old 40k bikes and the two wartraks from the Gorkamorka box. At this point we noticed another great difference between the two games: while Gorkamorka’s mechanics were rooted in 2nd edition 40k, Speed Freeks has totally different rules, including special combat dice, which the players distribute in secret at the start of each turn. The rules are quick to learn and give an unpredictable and very enjoyable game. The mechanics owe a lot to X Wing, and even to Wings of War (or Wings of Glory, depending on how old your set is). Movement uses a set of measurement sticks, some of them distinctly curvy. In a challenging twist, there are limits to the number of times the more interesting sticks can be used. This means that a player really has to plan his mob’s actions as a team, since that useful curvy stick might only be usable once in the turn. There is also a good chance that a vehicle will spin at the end of its move, ending up facing completely the wrong way. Unpredictable Speed Freeks may be, but the players still shape the play, both by the allocation of dice at the start of each turn and the selection of movement sticks. The rules add up to an unpredictable and atmospheric game, in which buggies and bikes careen around the field, colliding, firing wildly and blowing bits off each other. We had a fine time. Speed Freeks plays fast too and is ideal for filling a free hour. I even think a non-wargamer would enjoy it, although I need to test this theory on some unsuspecting family members. We will certainly be playing and enjoying this game again, but I doubt we will be starting a campaign. For that, I don’t think Gorkamorka can be beaten.  Our second Valley Campaign of lockdown ended today, with victory for Stonewall Jackson and Baldy Ewell. This campaign lasted for ten turns (taking about that number of weeks) and ended with a decisive victory for the rebels. I’m glad to report that all four players put their all into the campaign, right up to the final turn. Below, I am recording the Richmond Times report that went to the players today. Afterwards, I have supplied a post campaign analysis, again shared with the players. Gentlemen This is a different form of report from previously as you are all receiving the same document. The campaign has ended with a victory for the Confederacy. Jackson and Ewell are in possession of Winchester. Banks is at Charlestown and Frémont at Martinburg, excepting a force at Wardensville. The Federals have lost a great many men and materiel and are not in a position to continue the fight for now. The last turn proved decisive. I pass on the following report, some of it eye witness, by Monty Breeches, a correspondent of the Richmond Times, travelling with General Jackson. “The past few days have seen a dramatic series of events, the consequence of which has seen the retirement of Union forces towards the Potomac. It began a while back with a reconnaissance ordered by General Jackson, to explore the passes into the valley from the Allegheny mountains. His cavalry reported that the road to Winchester across Cacopon River Crossing had been left unguarded. Jackson responded immediately, summoning all available troops to follow this route into the heart of Federal territory. The Federal commanders, Frémont and Banks, reacted to this movement by pulling back their forces from further up* the Valley, but Jackson got the drop on his opponents and, after some struggle, took Winchester from Banks, in so doing dividing the latter’s Command. Meanwhile General Ewell followed the Federals northwards, keeping in close touch with their outposts. The final stage in the campaign began with Jackson established in Winchester with almost his entire command; Banks divided between Charlestown and Middleton; Frémont between Strasburg and Wardensville; and Ewell between Front Royal and Mount Jackson. Banks and Frémont agreed that their top priority must be to regain Winchester and so reopen communications with Harper’s Ferry. To do this, Frémont would recall his forces from Wardensville and march northwards down* the Valley Pike. Banks would wait for his approach and then the two would attack Winchester simultaneously from Kernstown, Middleton and Charlestown. This plan, however, depended for success upon the inactivity, or at least sluggishness, of General Ewell. A dangerous calculation indeed! For General Ewell, aware also that a crucial challenge had arrived, chose this moment to unleash a bold assault on Strasburg from the South and East. In one of those occasions when bad luck bites the bottom of the bold, Frémont, in his haste to move north, marched out of the entrenchments at Strasburg before his troops in Wardensville reached the town, leaving the defences unoccupied. At just this moment, Ewell’s cavalry, reinforced by half of Jackson’s cavalry, arrived in the town, followed closely by hard marching infantry. Frémont, who by chance was riding through en route from Wardensville, ordered his accompanying cavalry to restabilise the situation while his infantry forged ahead to Winchester. It was a brave decision not to recall any infantry from the march. Alas for Frémont, his cavalry although it fought bravely, could not stem the confederate tide. Ewell’s troopers smashed through the federal horse. Ewell detailed some troops to hold Strasburg against the Wardensville road and, fully aware of the need for haste, spurred his main body onwards down the pike. With Ewell coming up fast behind him, Frémont was forced to turn his forces around or face being taken from behind while on the march. The messy running fight that ensued favoured Ewell, whose cavalry was superior in both numbers and quality. Try as Frémont might to send at least one brigade to attack Winchester, his whole command became embroiled in the battle. Frémont’s men fought stubbornly but by nightfall, his line had ruptured. Frémont himself was wounded and made off northwards with a knot of troopers. Various small bodies of men made their escape in the darkness, but a great many Federals were taken prisoner. Skirting around to the west of Winchester, the remnants of his command began to reassemble at Martinburg. Meanwhile the Federal troops following on from Wardensville were surprised to find their way blocked at Strasburg by Confederates who were themselves now manning the town’s entrenchments. After a half-hearted exploratory attack was repulsed, they retired on Wardensville, guessing that Federal fortunes had taken a dark turn. While Frémont and Ewell fought their running battle between Strasburg and Kernstown, Banks launched his assault on Winchester. However Jackson, well served by his aggressive scouts, had good warning of both advances and met each of them with resolution. The attack from Middleton, led by Banks himself, made initial headway and at one point broke in to the rebel earthworks. It was then thrown out by a counterattack by the Stonewall brigade. Banks was hampered by falling ammunition supplies, having been unable to restock since the first attack on Winchester in the previous turn. Determined not to be cut off from Harper’s Ferry or ground between Jackson and Ewell, Banks was able to retire cross country towards the east, eventually linking up with the rest of his command at Charlestown. His losses in men and materiel, however, were considerable. At the end of this eventful turn, Ewell marched into Winchester to meet Jackson in person for the first time since the start of the campaign. The two men celebrated with a pot of coffee and a tray of grits. (Well, what did you expect? Jackson weren’t no party animal and Ewell could hardly get pissed on his own). Post Campaign Analysis The first moves of the campaign saw the Federals take and hold the central position, while Jackson went West and Ewell held the eastern fringes of the valley. Jackson displayed an admirably focussed maintenance of aim. He set himself the campaign objective of a left hook through the Alleghenies, first to cut Fremont from his supply line and then to get in behind the federal line. All the while, there was scope for the Union to overwhelm one or other rebel wing and for most of the campaign, they were able to bring superior numbers to each confrontation. The transport capacity of the Valley turnpike was also a great help. For much of the game there was the thinnest rebel screen in the centre, which was fortunate not to be overwhelmed. But the rebels evidently calculated, rightly as it turns out, that if Jackson kept pushing northwards, the enemy would have to conform to his movements. Sure enough, the Federals kept a nervous eye to both east and west and were made cautious by the prospect of Jackson or Ewell falling on their flanks. Jackson’s repulse at Strasburg was a surprise blow to the rebel commander, who had not expected both Frémont and Banks to be present in force. After Strasburg, I thought the campaign was about to be won for the Union. The victors even agreed on a march south that would, I am convinced, have ripped the Confederate defences to shreds and at the very least, have brought Jackson tearing back down the valley to protect Staunton. Yet over the course of their exchanges they persuaded themselves that a more cautious advance was preferable, since they feared a threat from Ewell in the East. At the time, the Pike in front of them was weakly defended and there was in fact no threat from the east beyond an aggressive rebel cavalry regiment. Looking back, I think the federal decision to go cautious after Strasburg was the turning point in the campaign. From then on, the initiative passed to and stayed with the Confederates. In the final stage of the campaign, the rebels got into the midst of the Federal position, seizing the central position that had benefited the Federals until then. First Banks and then Frémont had their commands split by enemy action. Moreover, Jackson and Ewell were now close enough to one another to combine their efforts to defeat their enemy. 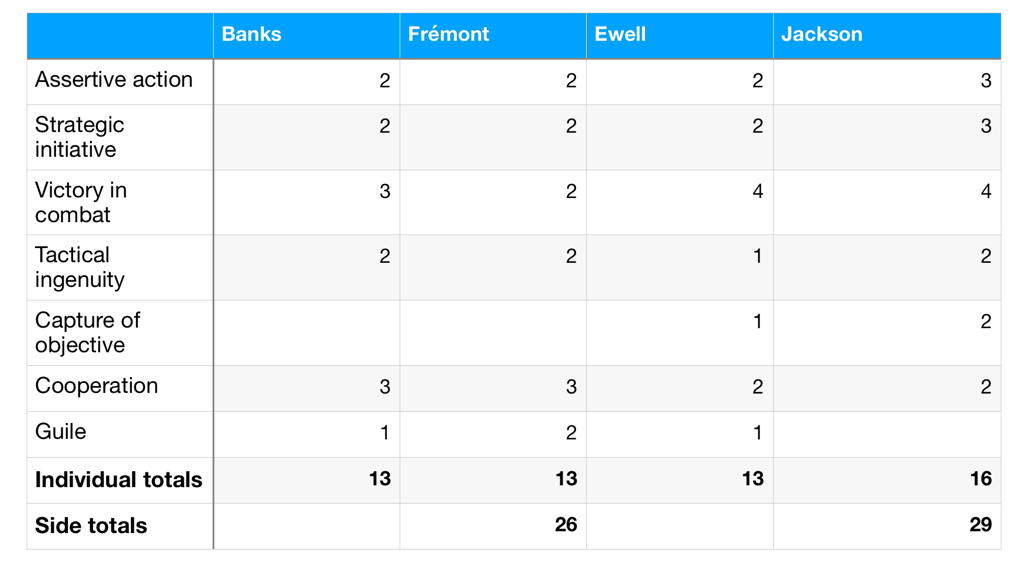 Winners and Placed
I have been awarding VPs to all players throughout the campaign, both for physical achievements (battles won, supply centres captured) and for actions or behaviours that impressed me. The table above is entirely subjective of course, but I added points each turn, based on the outcomes and orders submitted at the time. While the rebels are overall winners, there are areas where every player performed well. In the end, the totals levelled out pretty evenly, with the exception of Jackson, who received extra points for taking one supply source, blocking another supply line and demonstrating a single-minded capacity to keep his eyes on the prize. Of course, he couldn’t have done this without Ewell’s readiness to keep Federal attention in the Valley. Jackson’s tour of the Alleghenies left Ewell constantly facing superior enemy numbers. He was prepared to give ground where the odds looked too dangerous but he was quick to move northwards again when the chance arose. Crucially, in the final stages, he was close enough to the action to act in concert with Jackson and thwart the federal attempt to reopen their supply lines through Winchester. Ewell showed plenty of aggression when it was needed and without him, Jackson would very likely have been ejected from Winchester. Banks and Frémont started the campaign very well, reaching quite far south and causing Ewell in particular some uneasy moments. Throughout the campaign their cooperation was excellent, sharing all information and acting almost as one command. This allowed them to respond to the threat to Strasburg with a nasty surprise for Jackson when he found both Frémont and Banks to be present with large portions of their armies. Their plan and execution of the battle of Strasburg was first rate. For ruses, Frémont showed particular ingenuity. He mined (and blew) bridges; indulged in a bit of Beau Geste posturing behind earthworks, crept a cavalry regiment past a sleeping garrison and hid whole brigades in ambush. Everybody participated with complete focus and exemplary sportsmanship throughout the campaign, accepting bad news with good grace and never questioning the umpire’s reports. This is especially impressive considering that the restrictions of lockdown prevented players from playing out the battles that occurred. If the defeated secretly thought that had they been rolling the dice in person, the outcome could have been different, they did not share such thoughts with me. I hope you enjoyed the campaign. I am very grateful to you all for taking part. My lockdown has certainly been more bearable thanks to you. I hope to meet and perhaps play a face to face game with you before too long. Tim (Note the photos with this post are of figures in my collection but are not ‘action shots’ of the final turn, as I played this out using unphotogenic counters and maps). * I am indebted to George Mangano from Winchester for explaining that troops moving northwards are travelling ‘down’ the valley, and vice versa. It’s always good to get these things right! |
Archives
November 2023
Categories
All
|


 RSS Feed