|
I have been working on some new scenarios for Honour Games' big battle rules, Blucher, based on the battles around Leipzig in October 1813. I began by revisiting one I had already uploaded for Mockern, the fight to the north of the city between the Army of Silesia and Marshal Marmont. I wrote this a few years ago and reading it again, I realise it wasn't the most helpful document for somebody looking for a scenario without the need to research the historical battle. For example, I failed to explain which units were infantry and which cavalry. I also left out some key information like the number of MO dice and a clear reinforcement schedule. So I have now uploaded an amended scenario which will, I hope, be more useful than the previous version. While I was at it, I also tweaked the scenario for Montmirail, 1814, to make it more accessible. I decided it was also time to remove the one and only scenario for Lasalle 1, since anybody who still wants to play Lasalle 1 can adapt a scenario from Lasalle 2 without bursting a blood vessel. Both scenarios can be found here. 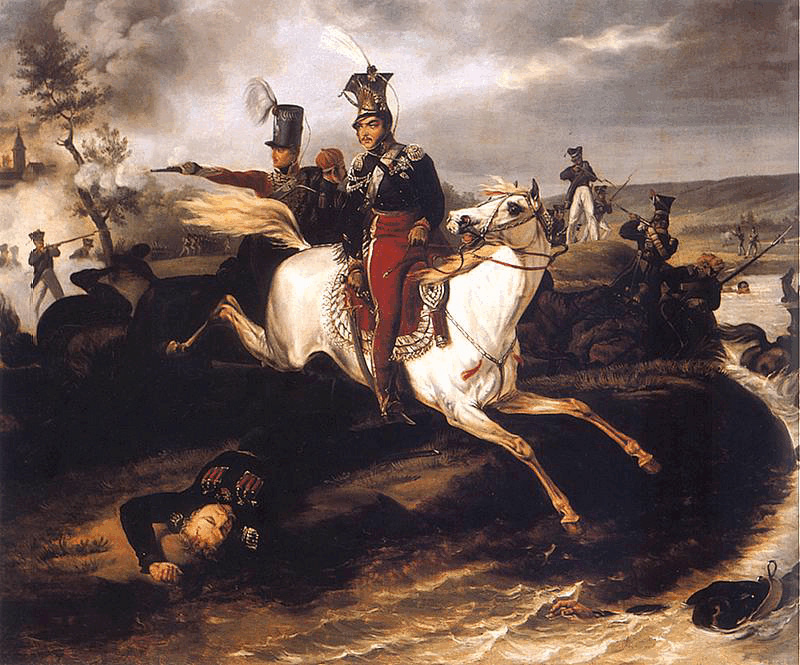
2 Comments
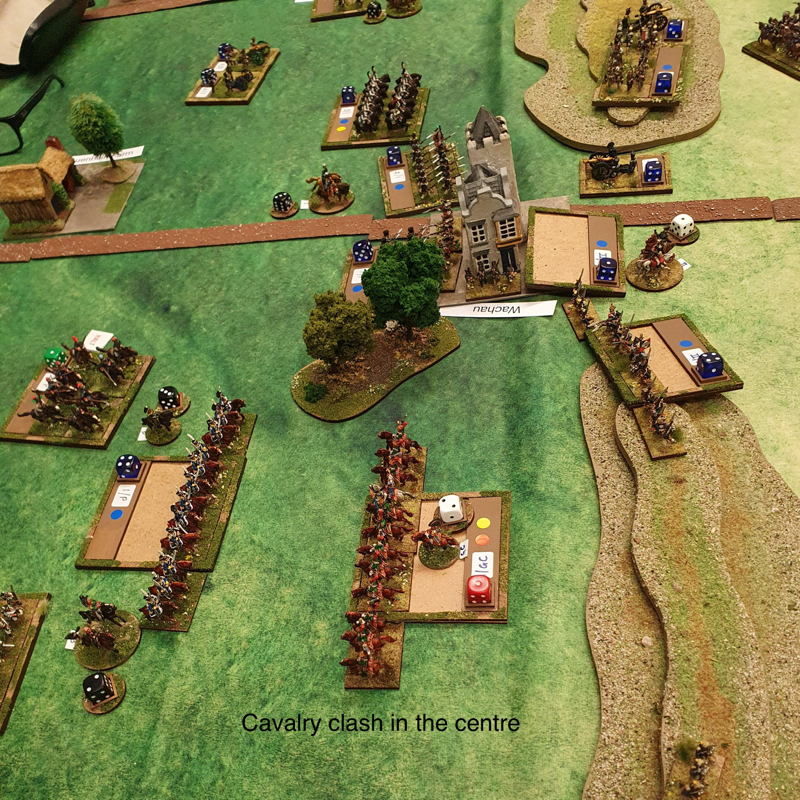
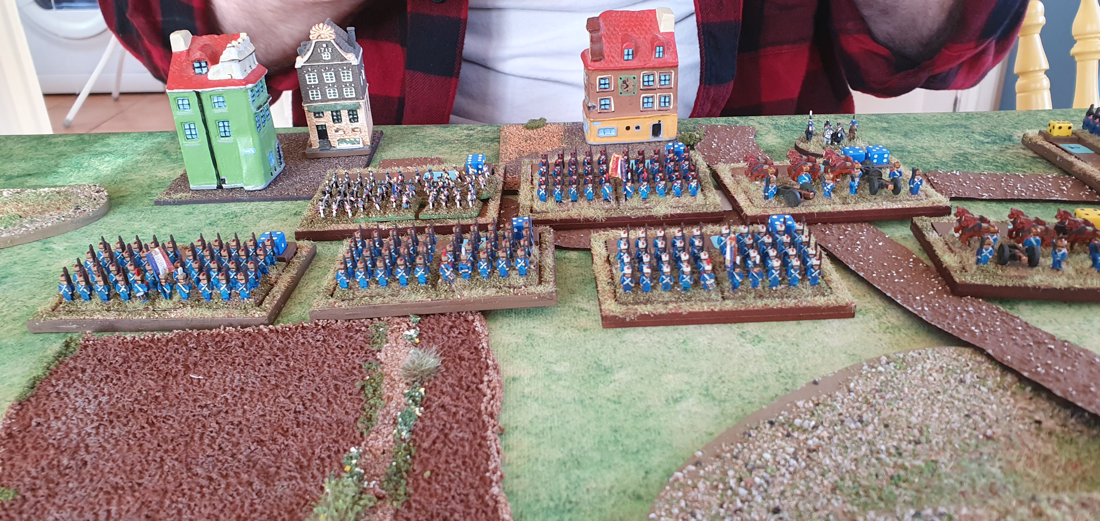
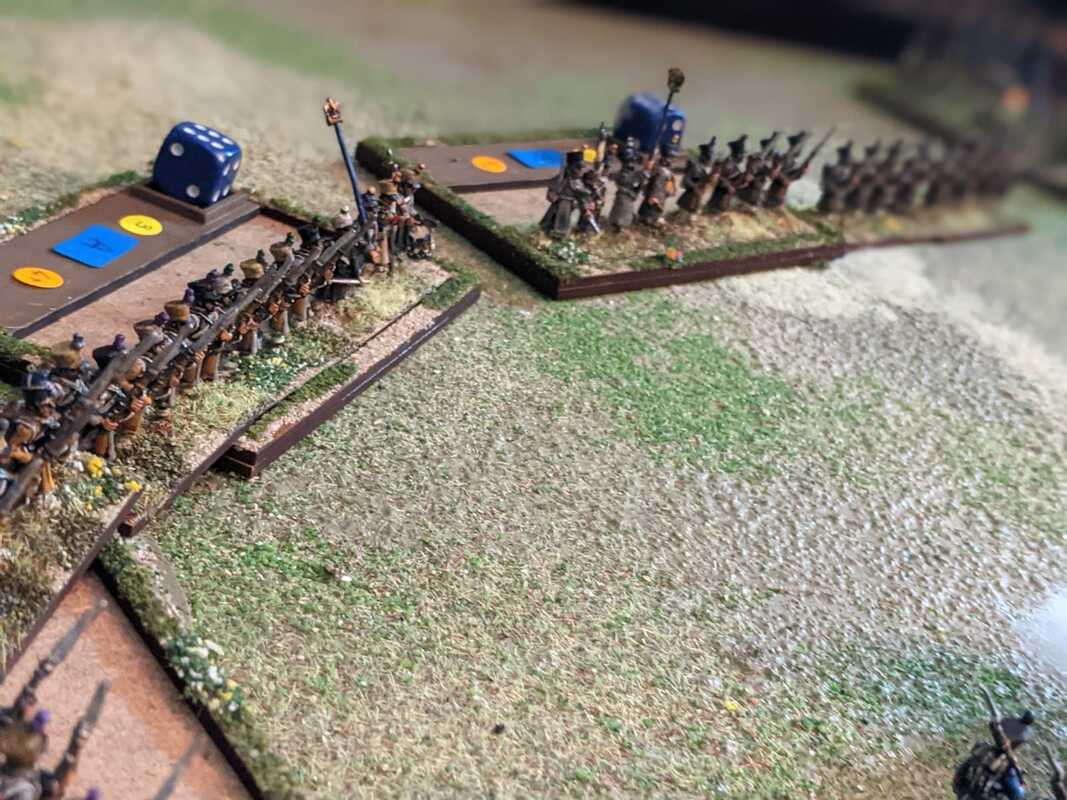
Last month Chris and I played a game of Lasalle 2, the tactical Napoleonic game by Sam Mustafa of Honour Games. Chris was new to the rules and picked them up very quickly. We replayed the Markkleeberg 1813 scenario that I had first tried on Spencer and Dan, described here. After the first game of Markkleeberg I had changed the victory conditions by removing the sudden death victory provision, which allows a player to win by ignoring geographical objectives and simply killing enough enemy units. In our first game Spencer had bunched all his forces into his right wing and tried to overwhelm Dan’s left, while leaving Markkleeberg with its objective marker alone. A valid approach in a stand-alone game (and it nearly succeeded) but it meant the battle played out very differently from the actual events of 1813. With sudden death removed, victory now depends on who holds real estate in two locations: the village on the Polish right and the hill in their centre. I also modified the arrival of some Prussian reinforcements, after rereading the sources and producing a ‘best guess’ sequence of events drawn from the five different accounts that I have of the action. The current version of the scenario is here. I am happy with these tweaks as the game with Chris played out more closely to the actual battle. My Prussians tried and failed to kick Chris’s Polish garrison out of Markkleeberg while the Russians attacked the central hill. To cut a long story short, after a bitter struggle the Russians briefly reached the objective on the hill but couldn’t consolidate their hold and the Poles retook it in the final turn. Victory therefore went to Chris, with my troops back near their starting positions in the valley. The game moved quickly and we both enjoyed the rules. The fluid turn sequence keeps both sides fully involved and presents the players with tricky choices about how to use their scarce momentum points. There was only one incident when our experience of ‘conventional’ rules made us question whether what happened was right. Namely, a regiment of cavalry charged and overthrew an enemy battery, without that battery being able to fire canister as the cavalry closed. This did feel tough on the guns but chewing it over afterwards, I concluded the issue was of our perception rather than a failing in the rules. In most circumstances, Lasalle would allow a battery facing cavalry to its front the chance to fire before that cavalry charged. It just happened in our game that the battery had already fired at a different target earlier in the same turn, so it is plausible that the cavalry could have closed while the battery was reloading. Also, even without firing, there was a slim chance that the battery could have won the combat against the charging cavalry, which, had this happened, might have been rationalised as the gunners successfully loading and firing canister in the nick of time. Try these rules! It’s interesting to see how fashions in wargame rules evolve. When I started playing Napoleonics in 1974 or thereabouts, the fashion was for simultaneous turns, highly differentiated national characteristics, detailed casualty calculations, quirky game aids (anybody remember the bounce stick??) and almost no command friction. In recent years there has been a shift to IGO-UGO turn sequences, more abstraction of the mechanics of combat, and greater focus on the options and limitations placed on command control. All welcome developments as far as I can see. The combination of MO points and totally fluid turn sequence in Lasalle 2 takes us into yet new territory. This approach may sound odd to some, but I would urge every Napoleonic gamer to give it a try. I suspect that with Lasalle 2, Sam Mustafa has set a new standard for tactical Napoleonic games that other rules writers will be emulating for some time to come.
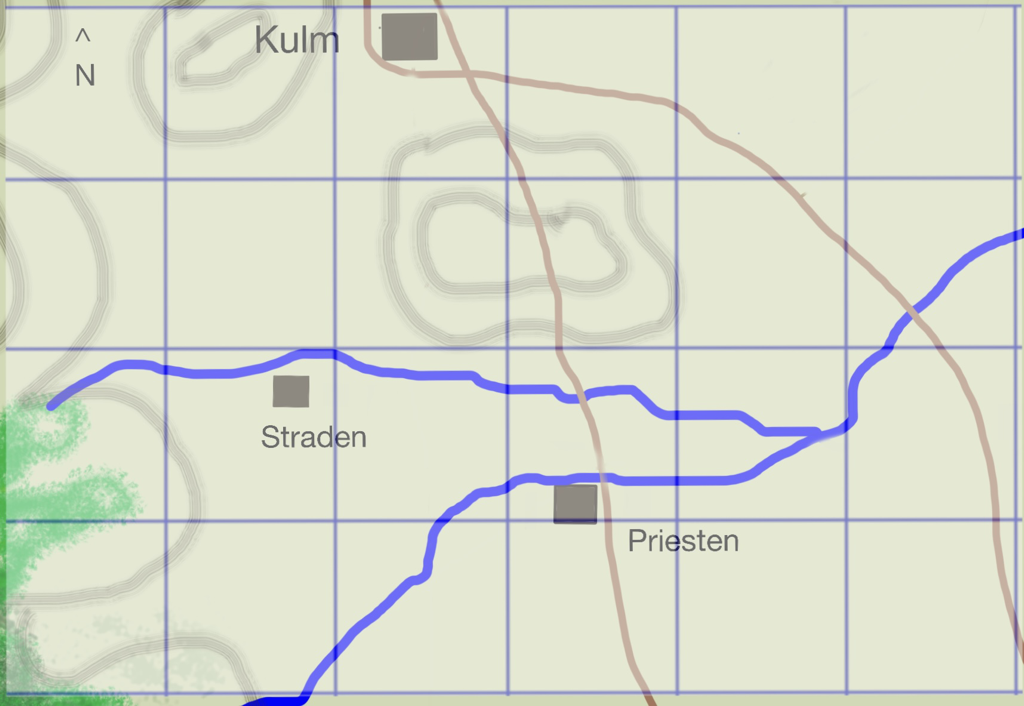
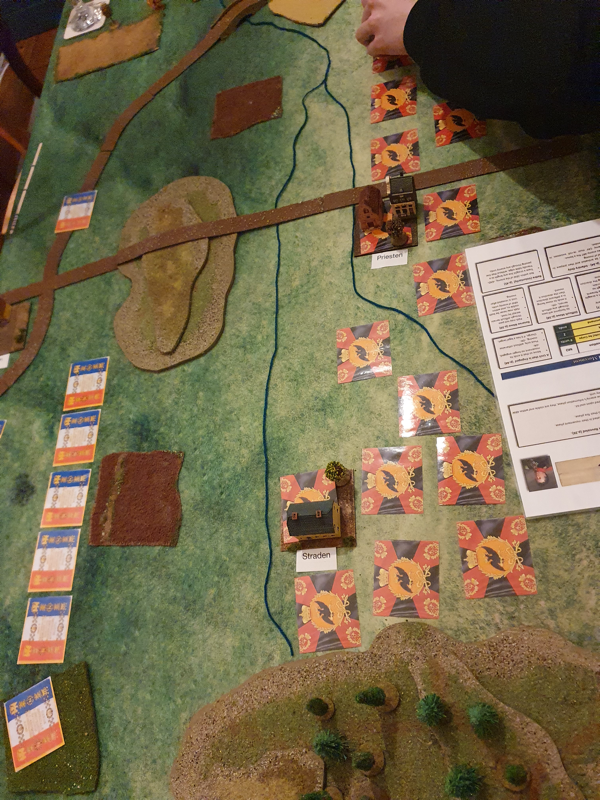
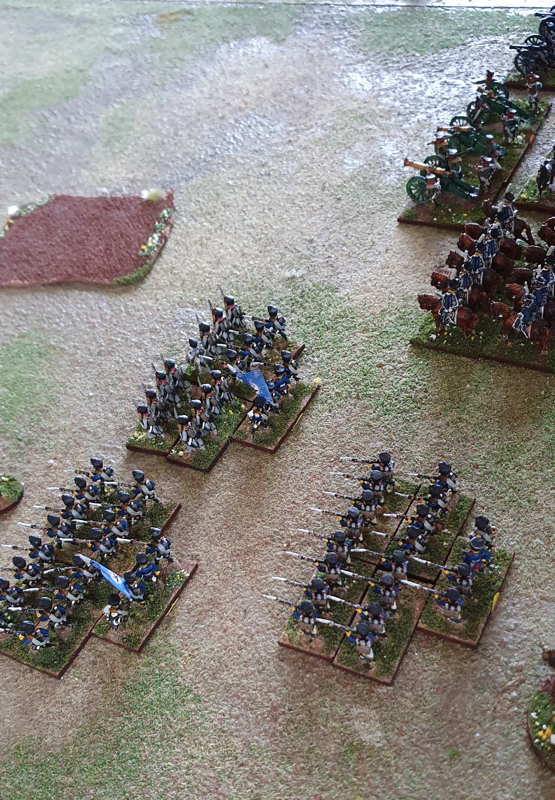
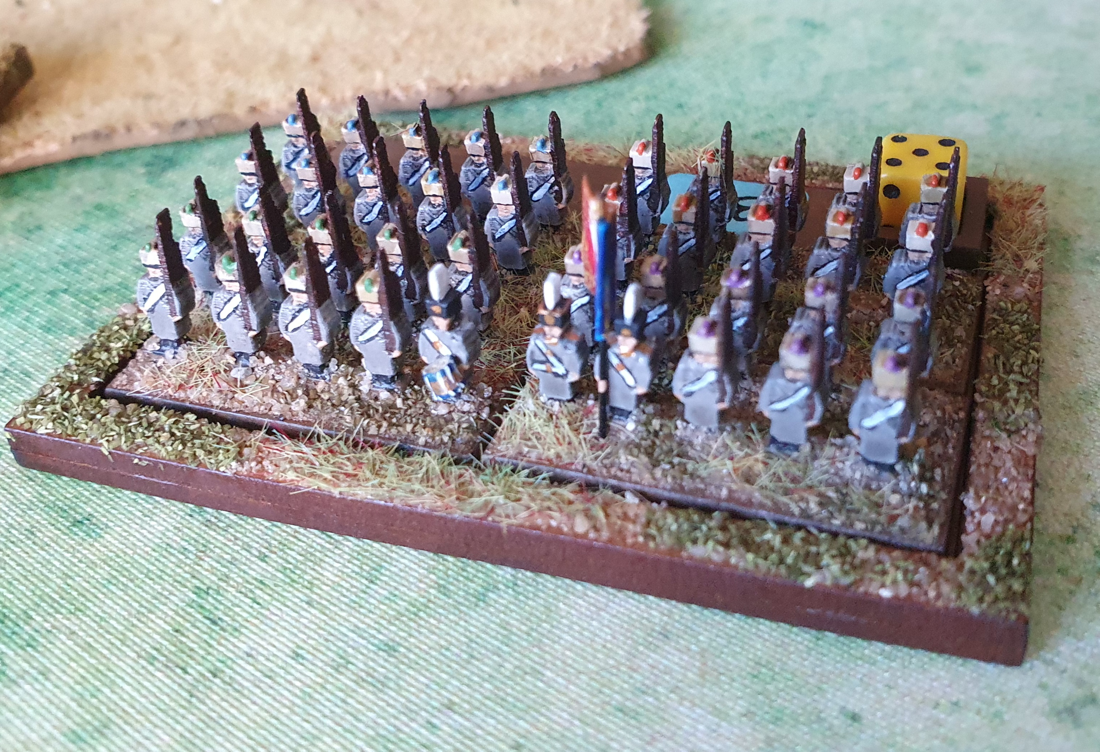
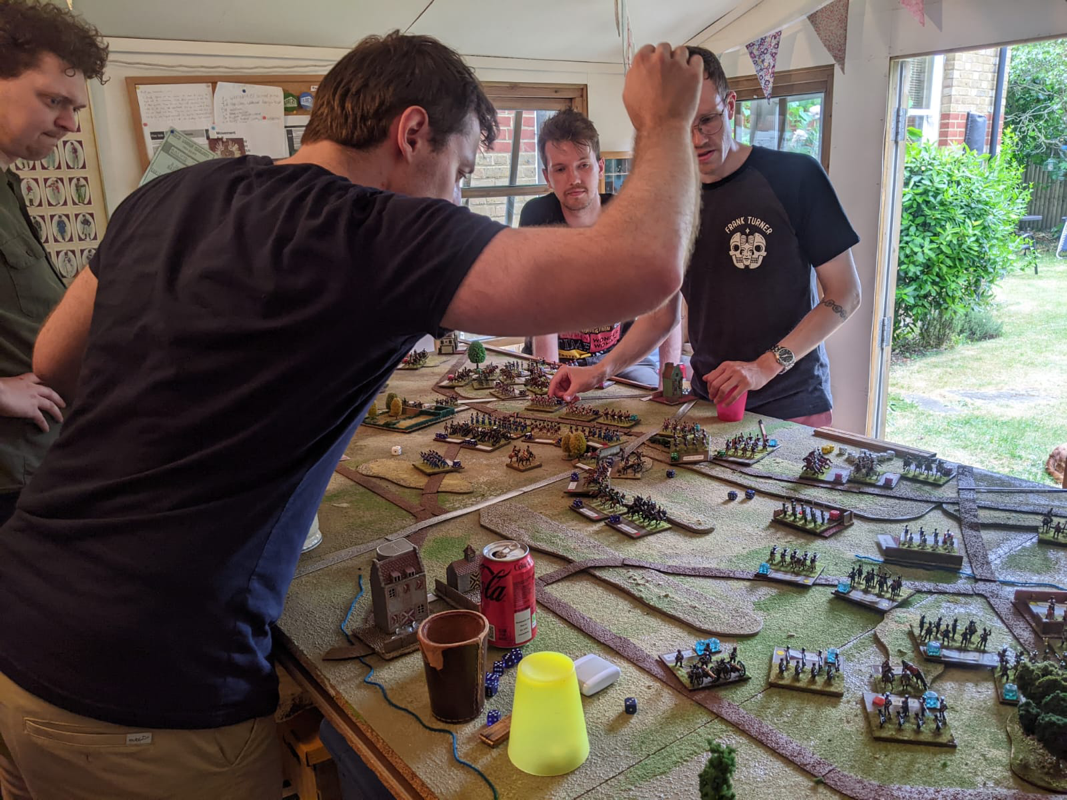
 The Allies advance The revised version of Sam Mustafa’s tactical Napoleonic rules, Lasalle, has been some time coming. If I recall rightly, it was first trailed in mid-2019 with the aim of landing in 2020. The release timeline then went vague, presumably in part due to Covid, and it finally appeared in February this year. As he usually does with new rules, Sam put various teasers and extracts on the Honour website in advance, including two quick reference sheets: one over several pages and a single-sider for hardcore players. I bought the new rules in pdf and print. As is now the Honour standard, they are well laid out, clearly written and nicely illustrated. There are also several opportunities to find out why a rule was written as it was and generally to understand the author’s design philosophy. If you haven’t read the rules yet, I’d say their most important feature is the lack of a fixed player turn or sequence of play. Both players begin each turn with a variable number of momentum points, with which they can pay for various actions. The initiative can pass between the two sides several times until both run out of momentum, when the turn ends. The order in which a force might move, fire, change formation, charge or rally is entirely up to the player. It makes for some tough choices, careful timing and steady nerves. After a read-through of the rules and some solo moves I thought Lasalle 2 looked promising, but I was finally able to test it with live opponents last Friday, in our first face to face game since March last year. Now, I suppose I should aim off a bit for the excitement of live gaming after such a long break, but I had a fantastic time and was absolutely delighted with these rules. 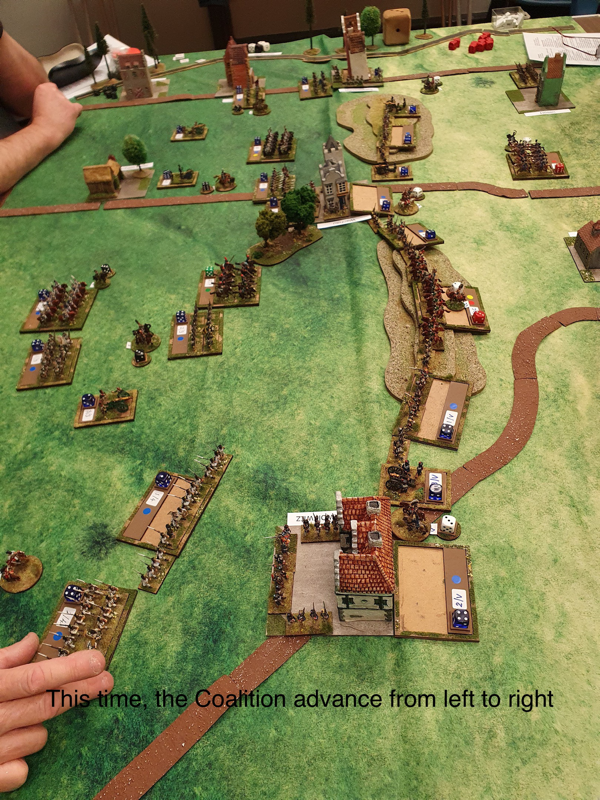 Dignity, always Dignity! A brief battle reportWe used the Markkleeberg scenario from the first day of the battle of Leipzig, on the scenarios page here. Dan took Poniatowski and his Poles, reinforced later by French from Augereau’s Corps. Spencer took the role of Kleist, assaulting the village and the high ground to its north east with the Prussian 12th Brigade and 14th Russian Division. Dan deployed the Vistula regiment in Markkleeberg and the rest of his infantry behind the stream, with artillery on the hill behind. He divided Uminski’s Cavalry Division, putting the cuirassiers on the eastern flank and the Krakus and horse artillery behind Markkleeberg in the West. Spencer masked off the village with three artillery batteries and massed the rest of his force on the eastern half of the table, with the Prussians in front of the Russians. Spencer advanced on the Polish line behind the stream, halting to exchange fire while his landwehr lancers sent Dan’s cuirassiers packing in an upset victory (I bear some responsibility for this: I encouraged Dan to come forward, assuring him he wasn’t running a big risk. I was wrong. All things considered, he was remarkably good about it!). Dan’s artillery did some impressive damage early on, destroying a Russian battery and disrupting several battalions. Spencer’s troops were initially packed in a small area so suffered a fair bit from bounce through, although they rallied most of this off. The Polish Infantry in line had the better of the firefight with the Prussian columns, as one would expect. Dan then decided to exploit the disruption of the left hand Prussian column by crossing the stream and attacking it. This was a great success and the Prussian unit was destroyed. Dan used the ‘huzzah’ counter to then bowl into the flank of the next unit along, in which the odds were stacked in his favour. However, Spencer achieved his second upset victory of the game, which stopped Dan’s attack and saved Spencer’s bacon. The attack had been so well conceived that Spencer actually apologised for defeating it. On the western flank, the artillery duel didn’t do much damage, except when Dan took it into his head to send the Krakus skittling South past Markkleeberg, where they took a pasting from Spencer’s cannon and scuttled back to their starting position with several empty saddles. It appears that Dan had heard of the Charge of the Light Brigade but didn’t know how it turned out.... It was his only misstep in an otherwise masterful game. Back East, reinforcements arrived for both sides, in the nick of time for Dan as Spencer was just swinging around his flank and racking up kills. The landwehr lancers wiped out a French battery soon after it entered the table and two Prussian columns destroyed Dan’s eastern-most Polish battalion. The French reinforcements managed to plug the gap in the line but Spencer was one unit away from inflicting sudden death on the Polish side. In the final stage, Dan sent his three surviving Polish battalions over the stream and into the Prussians with whom they had been engaged for most of the game. The Poles had inflicted more losses in the preceding firefight and so were in better shape, but even so we were not expecting quite the success they enjoyed. First one, then a second Prussian battalion was destroyed, pushing Spencer past his sudden death limit. “What do you think of the rules so far?” “Brilliant!”We thoroughly enjoyed the game and were greatly impressed by the rules. The momentum rules at their heart work smoothly and keep both sides involved throughout the turn. The concepts are easier to play than they are to explain and the fluid sequence of play makes for a tense and exciting game. The simple movement rules spared us the fiddling and bickering that accompanies some tactical rules I know. The rules don’t impose a straitjacket on the players but they reward ‘historical’ deployment and formations and punish rash actions, as Dan’s cavalry found out! As ever, Spencer and Dan threw themselves into the game with good humour and sportsmanship. Although his victory was snatched from him, Spencer was so impressed by Dan’s game-winning attack that he was genuinely pleased it succeeded. It is always a pleasure to play with such people. I’d like to play Markkleeberg again but our next outing with Lasalle will see French and Bavarians facing off against Austrians. Lots of Austrians.  The Krakusi, my latest Polish unit, bought from Fighting 15s during lockdown. I have uploaded a Blucher scenario for the fighting at Laichling on 21 April 1809, between Marshals Davout and Lefebvre and the Austrian IV Corps under Rosenberg. In a foretaste of Aspern-Essling later in the campaign, this encounter really showed the quality of the Austrian soldier in a stand-up fight. I first wrote a scenario for Laichling in the mid 1990s, for use with the Napoleon's Battles rules by Avalon Hill. I believe it translates well to Sam Mustafa's Blucher. However, thanks to the Covid lockdown I have not yet played the scenario against a live opponent, I don't normally upload scenarios that we haven't played but I do plan to play it once we can meet up for gaming later this month. I will report on how the game goes and make any tweaks to the scenario after that. The scenario is posted here  Game reportThis post completes the story of our refight of Waterloo, played in 2015.  Deployment, made easy by Honour Games' '100 Days' cards Special house rule: garrisons for strongpointsI have a lot of skirmisher bases from Volley & Bayonet days, mounted on 1.5" squares. The Allies were allowed to use these to garrison La Haye Sainte and Hougoumont if they wished. A small base began with up to 3 élan points, subtracted from a parent unit. It would benefit from the attributes of its parent brigade as well as the usual urban area benefits (+2 for it, -1 for the attacker). In the Allied turn, a friendly brigade within 3" and unengaged may reinforce the garrison by transferring élan points to it, reducing its own élan accordingly. However the most élan points that may garrison either strongpoint at any one time is 3. I prepared similar markers for the French in case they took either strongpoint and wished to garrison it.  1st French Corps advances in the West Player briefingsEach side had three players. They selected cards to determine side and whether CinC or subordinate. The briefing notes for Napoleon and Wellington are below. "Napoleon Your army is all present on table. You will set up second, on the ridge of La Belle Alliance including, if you wish, the spur east of La Haye Sainte. Your objective is to open the road to Brussels and knock Wellington out of the war. You have two subordinate players, to each of whom you should allocate an infantry corps. You may also allocate other formations to these players although you may retain as many of these formations under direct control as you wish. Each of you should deploy your forces in accordance with your instructions as CinC. During the battle you may devolve control of any formation to a subordinate, but with a one turn delay: they may only move the added formation the turn after you allocate it to them. On the other hand, you may take direct control of any units of any formation yourself, immediately and without consulting your colleagues. In the early hours you heard from Grouchy that he is before Wavre. This means he is unlikely to reinforce you today, as to do so he would have to pass through the Prussians. However if he presses his advance this morning as you have ordered him to, he should at least prevent the Prussians from reinforcing Wellington." "Wellington You will set up first. Your objective is to stop the French from advancing on Brussels and to hold on until help arrives from Blucher. Your army may deploy anywhere on table, no further South than the two strongpoints. You have two subordinates, to whom you should allocate at least two infantry divisions apiece and as many as you wish. You may also retain direct control of a reserve. During the battle you may devolve control of any formation to a subordinate, but with a one turn delay: they may only move the added formation the turn after you allocate it to them. On the other hand, you may take direct control of any units of any formation yourself, immediately and without consulting your colleagues." I admit the instructions on allocating troops to subordinates don't match the historical command structure but this is a game after all and I wanted everyone to have a satisfying command. Keith, our eighth participant and seventh player agreed to help as umpire from the start and to take on the role of any reinforcing commander (of either nationality) if and when they arrived on the field. He was reconciled to the possibility that he might not arrive at all but he is a natural umpire who genuinely enjoys the job. He was also the only other person who had played Blucher before. 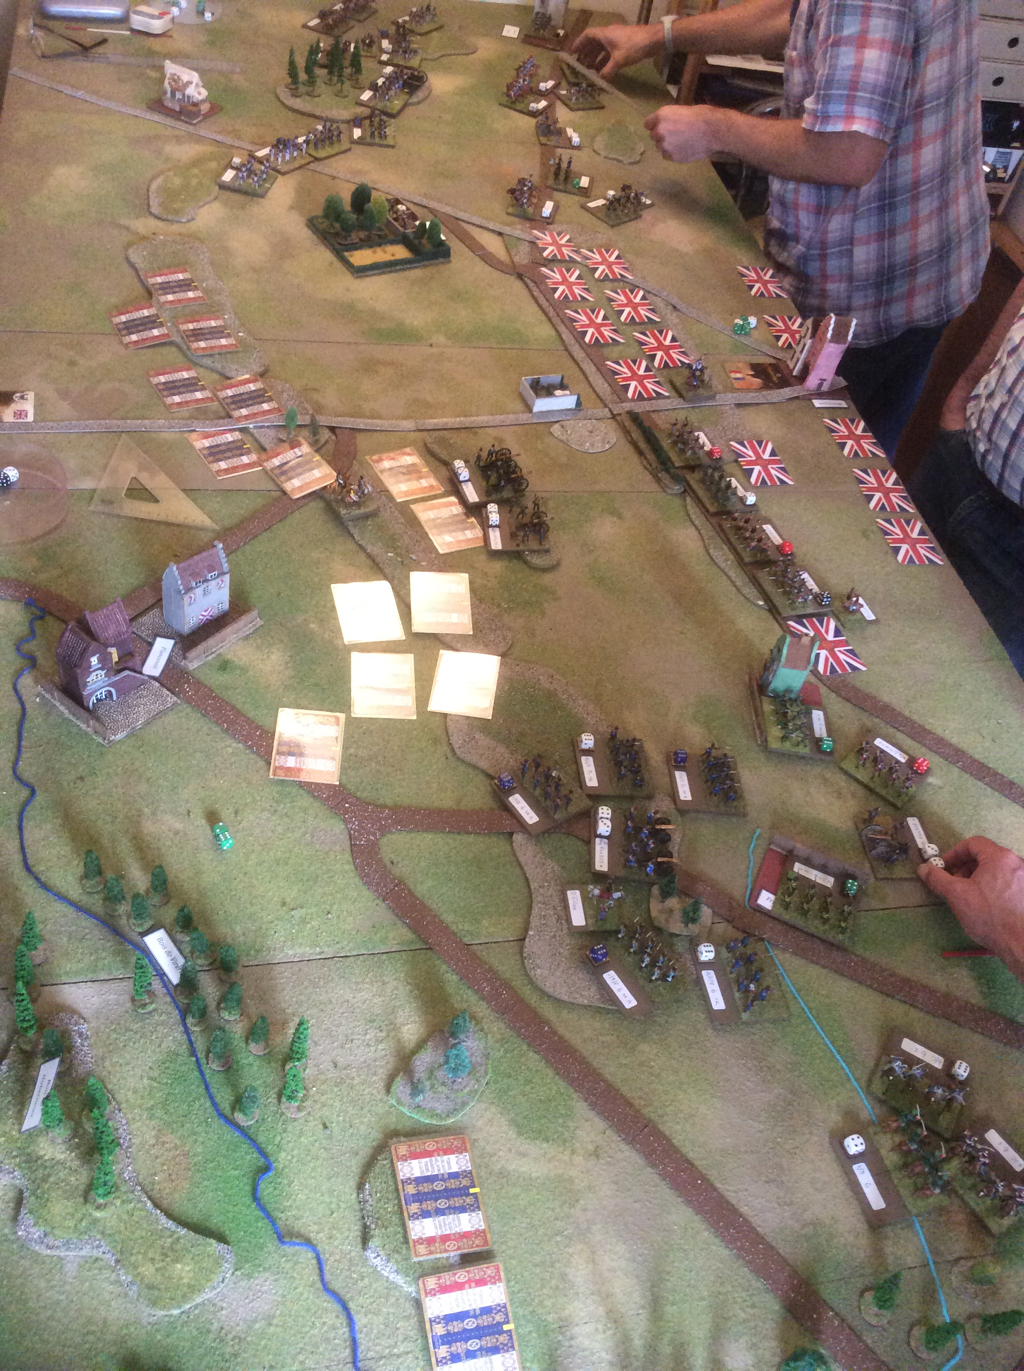 2nde French Corps advances on Papelotte How it played outThe Allied deployment broadly followed history, except with more troops on the West flank. The strongpoints of La Haie Sainte and Hougoumont were garrisoned, as were Papelotte and Frischermont on the Eastern flank. We used the 100 Days cards to place units, replacing them with figures when they were revealed to the enemy. The French set up with only the Guard facing the Allied centre; I Corps was to the South and West of Hougoumont and II Corps set up opposite Papelotte. VI Corps was in reserve behind II Corps. The fight began with a determined left hook by D'Erlon, supported by IV Cavalry Corps. In the East, Reille became engaged with the enemy in Papelotte and Frischermont. The centre stayed mostly inactive at the start, apart from some bombarding by Napoleon's heavy guns. The Allied defence on both flanks was spirited but Napoleon pressed his generals to keep up the early momentum. The Allied Right started to crumble under the pressure but a series of hard-hitting counterattacks by British and Brunswick cavalry brigades bought some breathing space. On the opposite flank, the French stalled outside Papelotte. News then reached both sides of a force approaching from the East. It soon became clear that Blucher, not Grouchy was on his way to the battlefield. Aware that time was running out, Napoleon launched the Guard in the centre, in the first serious action of the day in this sector. At the same time, the French Left resumed its assaults and a series of Allied brigades were eliminated in quick succession. At this point, Blucher arrived with 15 and 16 brigades from Bulow's Corps, increasing the Allied morale total and staving off collapse. Napoleon sent VI Corps to face the new threat but also reinforced his centre with the Guard Cavalry. By this point, his only reserve on the table was the Red Lancers of the Guard. One more turn of hammering pushed the Allies over even their adjusted morale level. The Anglo-Allies began their retreat; the Prussians, realising that the field was already lost, halted their advance and moved onto the defensive. They had come too late to save Wellington from defeat. The day was Napoleon's. 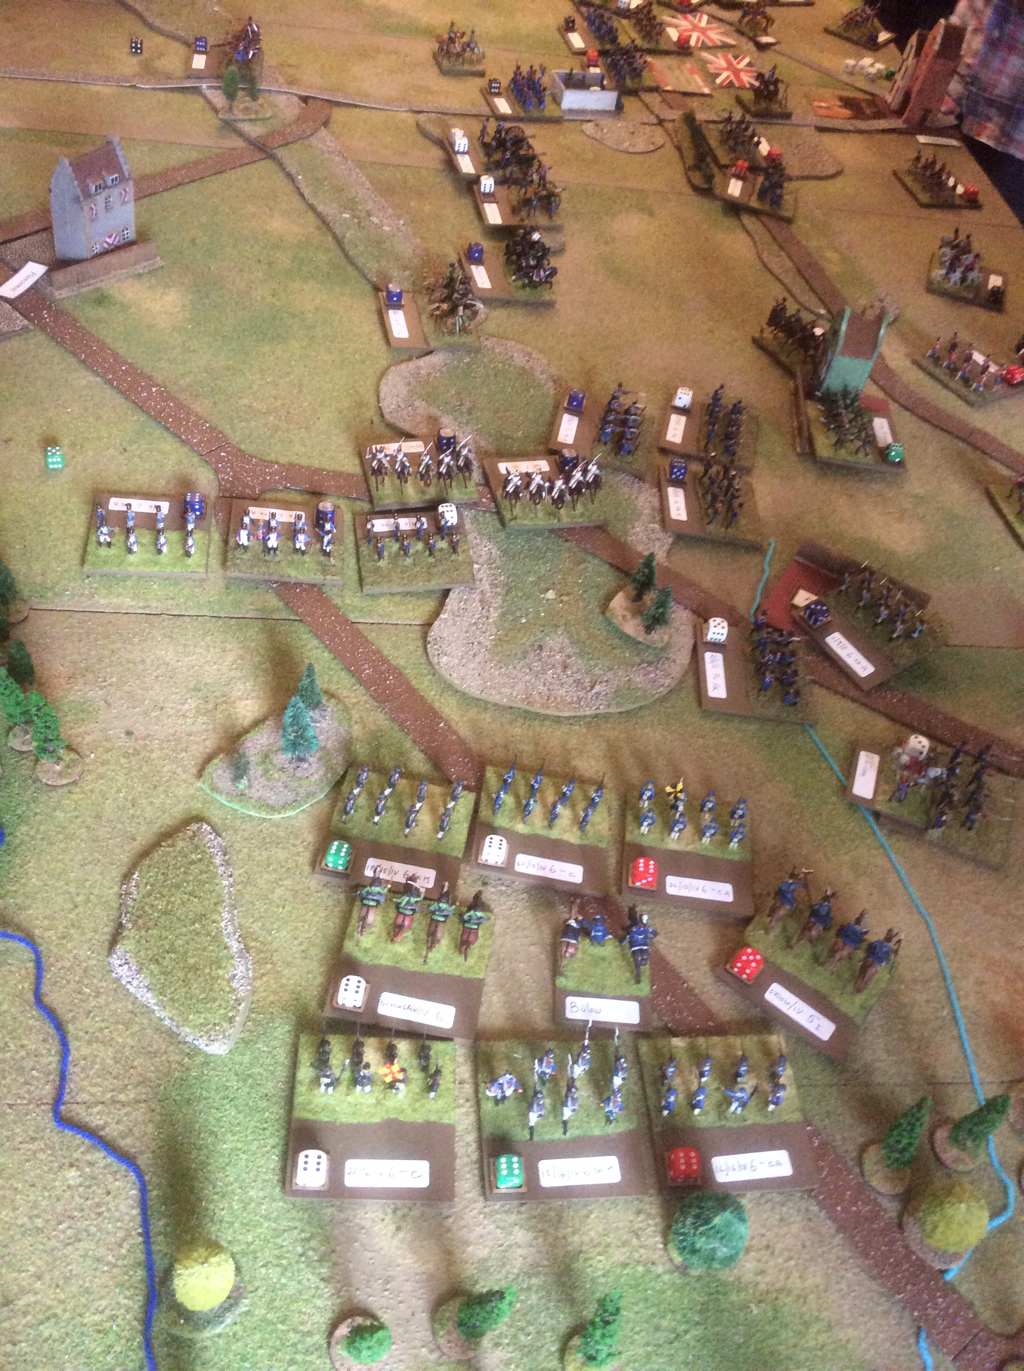 The Prussians arrive, just too late Post Match AnalysisThe game had lasted from 11am to 5pm, with a break for lunch. In game turns, working to the broad rule of 45 minutes per pair of player turns, the battle ended around 7pm. The early turns had dragged a little as the players learned the rules, but it soon picked up speed. It was a great feeling to reach a firm conclusion inside one day's gaming. The players seemed to enjoy the day and certainly picked up the principles of the game quickly. Most of the rules made sense to them, although there were inevitably a few concerns about bits and pieces. The main wish was that infantry could fire in more situations, for example after changing facing. There was also a suggestion that if prepared units took a difficult move, they might retain their prepared status. On the other hand, some thought that prepared units should not be permitted to skirmish, presuming that part of being prepared would involve drawing in the brigade's skirmishers. The feel of play was smoother than Napoleon's Battles or Volley & Bayonet. I think we would have been hard put to reach a conclusion with either set in the same time span. It is also interesting to follow Sam Mustafa's journey from Grande Armee, through Fast Play Grande Armee, to this. Blucher is stripped of all but the key game mechanics, yet retains a convincing period feel. The use of momentum dice puts real pressure on the players to move the important formations first. The reserve rule, which allows a one-off burst of speed to units that are still concealed, is an entertaining mechanic that both encourages the players to keep reserves and creates tension when these are finally committed. The game was a joy to umpire and I found answers to all the rules questions that arose. From where I stood, the French deserved their victory, having chosen a good plan and stuck tenaciously to it. The Allies tried hard to hold them, especially Chris on the beleaguered Right who handled his cavalry particularly well. But it wasn't to be and when the line started to unzip, it gave way decisively.  The Players This and the next blog post contain the first battle report I wrote when I created this web page. New to the whole blogging business, I put it on a standard web page where it didn't really belong. I am now tidying up the site but didn't want to lose the report so here it is again. The 20 year Waterloo projectIn 2015 we played a refight of the Battle of Waterloo, using Honour Games’ Blücher and a figure collection that started in 1995. Back in 1995, I had just picked up Frank Chadwick's Napoleon Returns, his 100 Days Campaign book for Volley & Bayonet. At the time all our Napoleonic armies were in 15mm and I didn't have any Anglo-Allied figures at all. I thought it would be quicker and cheaper to create the Order of Battle for 1815 using plastic 20mm figures. My older son was showing interest in toy soldiers and the slightly larger figures appealed to him more than the 15s. To spread the budget, I based only 8 foot or 4 horse on each 3" square base, with a bare strip at the back for an information sticker. I set out to paint in a toy soldier style and was helped in the early stages by my sons. The project got off to a good start but was mothballed as my sons and I fell heavily for Warhammer and WH40K. We spent many happy years building and fighting with Games Workshop armies while the 20mm project gathered dust in the attic. Then in 2009 I chanced upon Sam Mustafa's Fast Play Grande Armee and dug the plastics out of the roof space. There were now many more plastic figures on the market than in the mid 90s and some were very fine sculpts. By summer 2010 I had painted the Order of Battle for Quatre Bras, which my friend Mark and I played to test the rules. A few months later four of us played a refight of D'Erlon's attack at Waterloo. There followed breaks for the 17th Century, then the War of Spanish Succession, tactical Napoleonics and the ACW, but in between other periods, I kept adding to the Napoleonic collection. With the bicentennial looming I decided it was time I finally put all the figures on the table and so I invited my regular opponents to a Waterloo multiplayer refight on 12 July 2015.  The raw materials Which rules?The first options for a whole battle refight were Napoleon's Battles, Volley & Bayonet and Grande Armee. We still play Napoleon's Battles occasionally but they don't please everyone and can play a bit slowly unless the players know the rules really well. Both Volley& Bayonet and Grande Armee give a faster game. But a new rules book had just been published that settled the decision for me. In early 2015 I acquired Sam Mustafa's new Big Battle rules set, Blücher. We have already played a lot of Sam's rules, especially Longstreet and Lasalle as well of course as Grande Armée. Blücher has not disappointed. For our first game We played a Franco-Austrian 1809 fight for a group of friends who game regularly but didn't know historical Wargames. It worked a treat: four complete beginners fought a large battle very happily inside one day. Keith (my longest-serving opponent) and I then played Plancenoit twice, using Sam Mustafa's 100 Days unit cards. Both games were tense and rewarding. So Blücher it was. A unit in Blucher mostly represents a brigade although some French Cavalry units represented whole understrength divisions. Each unit starts with a number of élan points (typically 6) that reflect its fighting quality. These determine how many dice to roll in fire and hand to hand combat. The dice can also be affected by attributes such as a good skirmish ability; attached artillery; shock power in the attack and so on. Élan is lost through combat and when reduced to 1 élan point, a unit dissolves. Blucher rewards the side that keeps fresh troops to throw in when the enemy is wearing down. The mechanics of the whole game are simple but subtle. Blücher is relaxed about figure and ground scales, encouraging players to adapt to the battle in question and the size of their collection and games table. In this case, I went for one inch to represent 100 yards and one unit to be a brigade. This scale, is already used in Napoleons Battles, Volley & Bayonet and Grande Armee. Fortunately, the 3" square units I have been collecting over two decades fit well with Blucher's scale so I didn't face a rebasing challenge. The Frank Chadwick Order of Battle for 1815 also reads across well, although his rules required many more commander figures and skirmisher bases. I'll have to find a use for all my surplus generals! The main task was to repaint the rear strip of the unit bases from green to earth brown. This was the third colour change since the project began but Earth brown bases seem to be the least intrusive so far. I also bought a lot of mdf dice cells from Warbases and glued one to the back left corner of every unit. The dice would show the number of elan points remaining, while their colour would show what special attributes each unit had. For example, white would be skirmish only; black skirmish and attached artillery; green for conscripts etc. I also wrote these attributes on the unit labels. 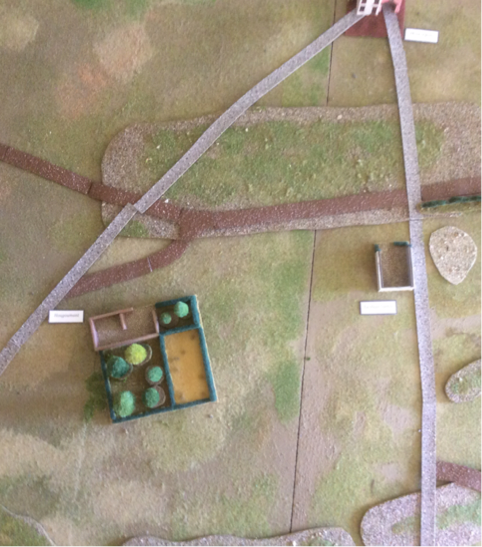 Aerial view of the centre of the table. Preparing the tableMy usual gaming table is 8' by 4'. For this game I added an extension, which took the table breadth to 10'. I thought the map would be easy to translate to the table, but was surprised to find several variations between the maps I looked at. You might expect this battlefield to be so well known that all maps would be identical. I went with the maps in Mark Adkin's Waterloo Companion where there was confusion. With such a large ground scale and 20mm figures, it is a challenge to represent villages. I made a lot of square bases of cobbles, cut from moulded plastic card for model railways. I stuck some low walls around the edges of each base and placed buildings from my 15mm collection on them. Not that impressive to look at but at least the troops are now defending something. I also considered making La Haie Sainte and Hougoumont bigger to accomodate larger bases but decided the space in the Centre of the battlefield was cramped enough as it was, so the chateau and farm's footprints are to scale. This made it impossible to garrison either the farm or chateau with a standard Blucher unit. I created a scenario-specific house rule to handle this, discussed below. As for contours, I wanted to create reverse slopes but not overdo the sharpness of the crest line. I used flat contour shapes, mostly cut from plywood and MDF, to make sure the battlefield has the right rolling feel. My polystyrene hill models are too steep and high for the job. The only penalty the contours conferred would be on line of sight and incoming artillery fire. I wanted to create space to East and West of the field, to allow for possible developments on either flank. For the sunken road, I relied on the distances provided by Adkin. To represent it, I lined the road with a hedge made of cut up pan scourers. This is confined to a few inches eastward from the Mont St Jean crossroads. I kept the oval sandpit from a refight of I Corps' attack a couple of years ago. 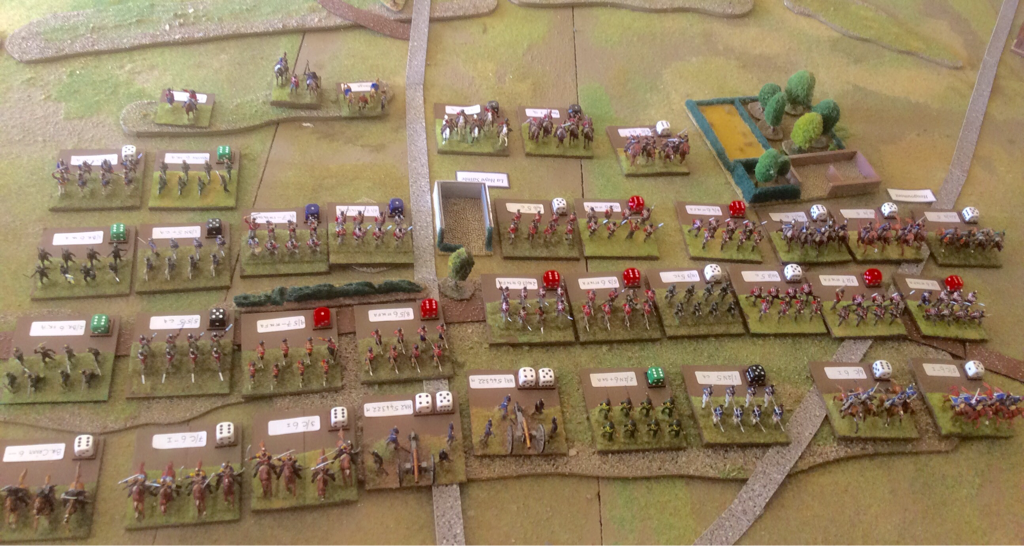 The Allied army The ScenarioThe day was set to run from turn 9 to 36, using the high summer game length in the advanced rules. The French were first side and each side had 3 Momentum (MO) dice per turn. I decided to use the multiplayer rules from the book, where every player on a side keeps a tally of MO use and the turn ends when the first player reaches the MO limit. I decided that the Anglo Allies would mobilise by division and not by Corps. The Corps in Wellington's army of 1815 was more an administrative designation than operational, and it felt wrong to treat it in a way comparable to a French Corps. However, I did allow the Allies to pay only 1MO per unit in an activated division. (If you don't know the rules I've probably lost you. Basically, this meant that an Allied player could not activate more than one division in a round, so mostly in smaller packets than the French). Morale levels were set at one third of army totals, so 17 for the French and 11 for the Allies. Reinforcements to either side would increase this limit, which meant the Prussians would not have their own morale level. I did not give the French a higher level for The Napoleon effect: while hard-hitting, the French army of 1815 was brittle. The Orders of battle we used are on the Napoleonic scenarios page here. For the order of battle, I decided not to tamper with the troops on table on the morning of the 18th. After all, this wouldn't be a Waterloo refight without D'Erlon, Reille and the rest. I did however leave the players to choose their deployment. Also, I wanted to create some uncertainty for both sides over who might appear in the distance and when. I wrote a decision tree which required a dice roll every few turns. The decisions were, broadly in sequence: Will Blucher commit to reinforce Wellington? Will Grouchy begin to move earlier in the day than he did historically? Will Grouchy try to drive through Wavre; seek to reinforce Napoleon directly via a side route or a mix of both? If Grouchy assaults Wavre will his pressure on Thielmann be heavy and if so, will this affect the pace or quantity of Prussian reinforcements arriving at Waterloo? How fast will reinforcements (of either nationality) march towards the sound of the guns? I won't go further into the mechanics but the probabilities varied according to my preconceptions. For example, I wanted there to be a possibility that Blucher would not commit to move to Waterloo, but the chances of rolling this result were very small. The outcomes therefore ranged from the Prussians arriving pretty much as they did, all the way to no Prussians arriving or even a small French reinforcement. But to be frank, the chances were stacked in favour of history repeating itself. The player briefings and battle report are in the next post. 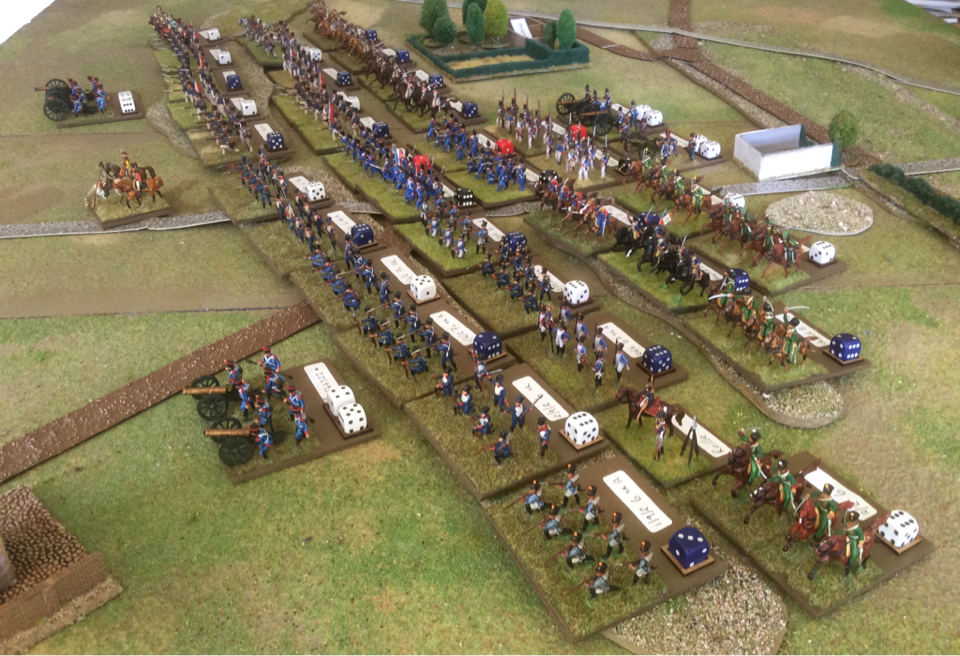 The French army .As a fan of most games made by Sam Mustafa/Honour Games and a keen player of his Lasalle rules for Napoleonic Division level combat, I bought Lasalle 2 on release day earlier this month. I had already pored over the pre-release downloads so had a general idea what to expect, and was not disappointed by the full rules.
Others have described the changed mechanics in detail but in summary, the biggest innovation is a totally new play sequence, in which the clear phases common to most miniature rules have disappeared and the initiative shifts back and forth between the two sides until both have used up their momentum. This approach reminds me a bit of John Hill's board game of Stalingrad, published by SPI back in the 1980s. It is certainly original and looks interesting, but I suspect it will take a few games to get to grips with the subtleties. I hope people give the rules a chance before passing judgement. I have adapted a scenario from the original rules to cover Lasalle 2. It is quite straightforward to do. The scenario is here Reduced by the lockdown to reliving past glories, in my last post I included a link to a Waterloo AAR from 2015. That was the very first report I wrote for this site and I hadn’t yet worked out what readers might find useful, so I didn’t include an order of battle. Steve has asked if I still have this so I have looked out the paperwork from five years ago (remember the golden wargamer’s rule: throw nothing away!).The order of battle, including the reinforcement schedule for the Prussian army, is here. Among the briefing notes and place names in the file box I found some of the messages exchanged between the players during the game. It brought back the jeopardy of a multi player game. As soon as we reach Defcon 1 and are allowed to mingle again, I am arranging the biggest multi player battle my shed can hold! The anniversary of Waterloo is usually an excuse for us to arrange a Napoleonic game. In the past few years we have covered Ligny, Plancenoit, D’Erlon’s assault and two full battles of Waterloo. Sadly we’ll have to pass on a face to face game this year. Instead, I have been busy rebasing my 15mm Napoleonics from Napoleon’s Battles to Lasalle, in anticipation of the release of Lasalle 2 at the end of the year. I have chosen 40mm base widths, with four foot or three horse in line per base. I know it isn’t fashionable but I prefer to base infantry in one rank rather than two. I think this is due to my origins in Bruce Quarrie’s 1970s rules: I don’t like the distorted depth that two-rank bases give to a battalion (although my 6mm Napoleonics are in two ranks). In 2015 I hosted a seven-player refight of Waterloo, which was our first use of Sam Mustafa’s Blücher rules. It was great fun. The report of our game and the preparations for it is here.  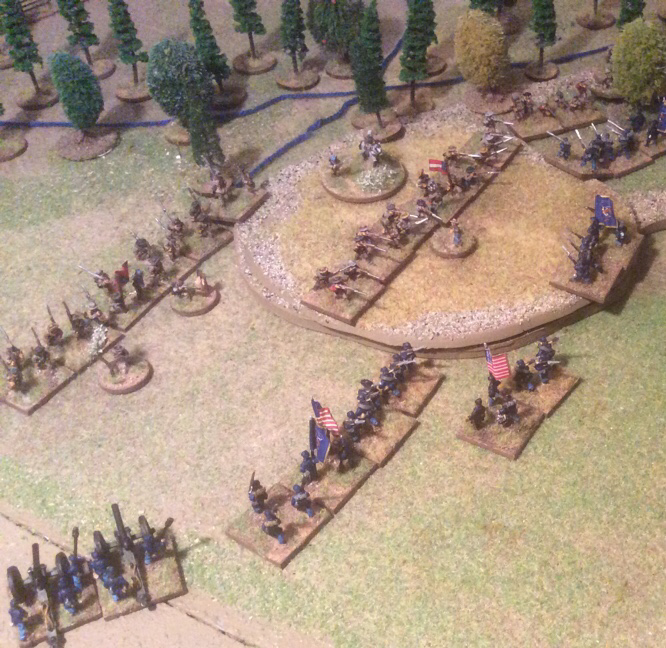 Our ACW campaign has come to a close, with victory for Jackson. The last two turns of our campaign saw Jackson, played by Matt, gaining a significant advantage over Banks’ forces led by Spencer. In the west, Banks’ attempt to outflank the rebels in the valley, which had been so promising after the battle of Franklin, was thwarted when he withdrew a third of the outflanking force just as Jackson was reinforced. The outflanking force was repulsed at the battle of Harrisonburg and then trapped and nearly annihilated between Jackson’s force and General Johnson’s brigades advancing from McDowell. Meanwhile, in the valley, Banks drew in his forces and advanced to Mount Jackson along the Valley Pike, leaving the Luray valley road in the east uncovered. At just this time, Jackson sent two brigades and a strong cavalry reconnaissance through Luray and Front Royal, to find the federal supply line back to Harper’s Ferry exposed. On turn 5 of the campaign, rebel cavalry occupied Strasburg behind the main federal army and captured rear area troops, ammunition and grain supplies. Before he cut the telegraph, Ashby, commander of the 7th Virginia Cavalry, wired the following message to Banks from Strasburg: “From the officer commanding the Confederate garrison of Strasburg to the General commanding, federal forces. Thank you for provisions and ammunition. There is no need to send more as we now have a proficiency of both. Respectfully, Ashby, Lieutenant, 7th Virginia Cavalry.” (I stole this idea from a French bonapartist pamphlet of 1815, in which Napoleon thanks Louis XVIII for the troops he has sent and says he doesn’t need any more). The closing positions of the active game therefore had Banks at Mount Jackson with his supply line cut, and Jackson, reinforced by Ewell, with forces to the south, east and north of the federal army. Banks was still formidable but Spencer decided at this point that he had been outmanoeuvred and conceded to Matt. I played out the following turn myself, presuming Banks would try to escape encirclement while Jackson would attempt to catch him. The only way Banks could get clear was to retreat all the way back to Winchester, while Jackson ended at Kernstown and Middleton. The Federals were back where they had started the campaign, with one very badly mauled division, the other virtually unbloodied and a great many supplies now equipping the rebels. So Banks is still in the valley and will no doubt be ordered to resume hostilities very soon but our small part of the campaign has ended. 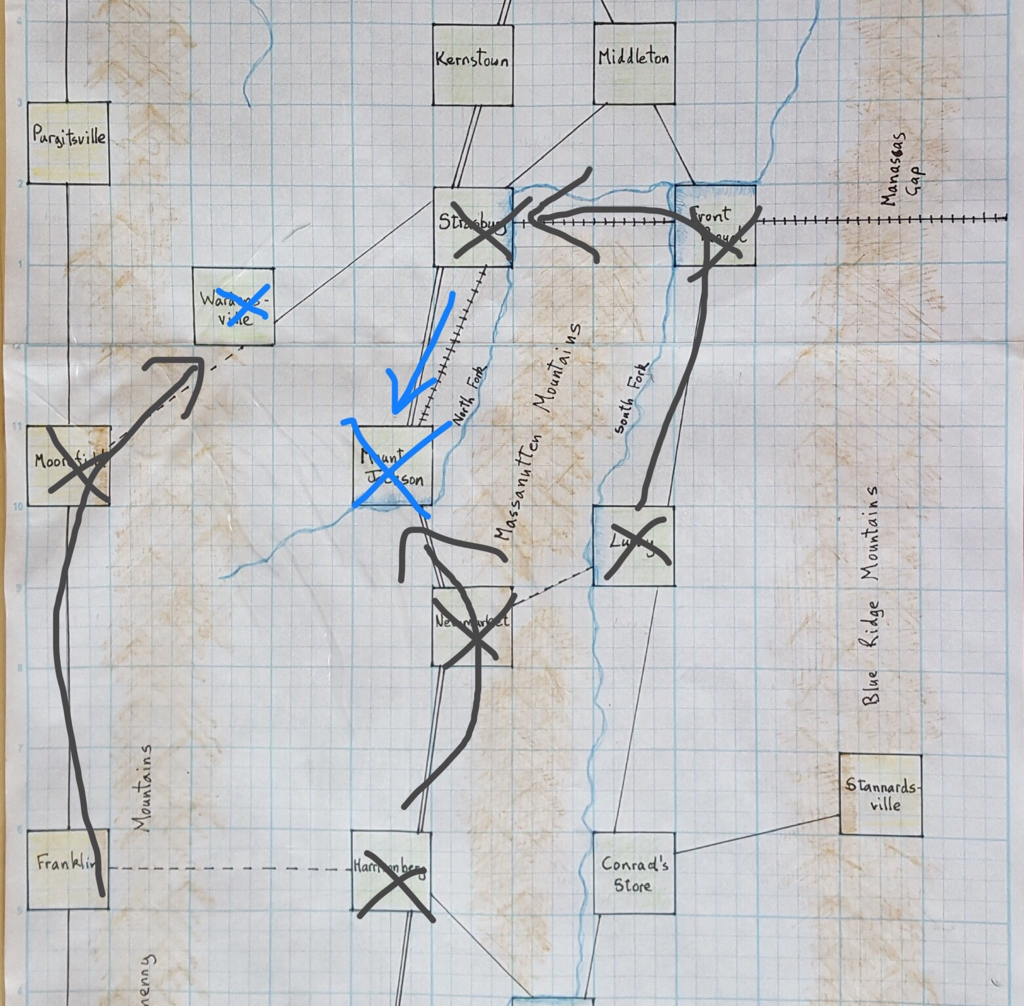 The closing moves saw the Confederates getting around behind the Federal army. The federal troops at Wardensville are no longer combat-worthy after two defeats and a retreat through the mountains. Post campaign analysis: a game of two halves The campaign divided quite starkly into two phases. Spencer started well, with the idea of getting one division around behind the rebel army from the west, while advancing steadily down the Valley Pike with the other division. At this point Matt seemed to lack a plan, for example, sending a brigade westwards only to recall it the next turn. He very nearly lost this brigade between Spencer’s two divisions. The high water mark for Spencer was the Battle of Franklin, ably generalled by Dan as General Shields. Then it seemed the initiative shifted the other way. Spencer recalled one of Shields’ brigades despite ordering him onwards into the rebel left rear. The recalled brigade spent the rest of the campaign marching through the Alleghenies when it could have been critical in helping Shields to deal with Jackson’s reinforced army at Harrisonburg. At the same time, the other federal division stopped its southward march and dug in at Strasburg. This allowed Matt to put greater numbers into the battle at Harrisonburg, while observing Banks with a much smaller force. It is always too easy for an umpire to pronounce on who should have done what. Both players were working with limited knowledge of enemy whereabouts. But I believe that if Spencer had continued to advance his central Division down the valley as the victorious Shields came east from Franklin, Matt would very likely have been doubly defeated. It was the easing of pressure in the centre that allowed Matt to defeat Shields in detail. I also think Matt handled his scouting more effectively, probing for gaps and exploiting the opportunities. Cutting Banks’ supply line was a fine move and, while I made clear that this was not a disastrous development as long as Banks reopened the line, it did mean that Spencer was now having to respond to Matt’s moves. I agree with Spencer that his only real option now would be to retire northwards, staying ahead of the jaws of Matt’s pursuit, and to regroup ready for future operations. I hope the players enjoyed the campaign: I certainly did. While there was no final showdown between two grand armies, we had several encounters between scouts, a running fight through the mountains and two division-sized tabletop games, the first won by the Federals and the second by the Confederates. Given the constraints of lockdown, we couldn’t meet to play these games. I greatly appreciated Dan’s contribution of written orders as proxy commander on both occasions. Dan even responded in real time to an in-game development, allowing me to reflect his instructions for a rearguard action.
All players participated in good spirits and we kept to a pattern of at least one turn a week. Lessons for the future I was happy with the basic game engine. The map is quite simple but it still posed challenges to both players. Submitting orders for three impulses in a turn worked well, as did the limit on how many units may use a road at a time. This slowed the Federals down somewhat while the smaller rebel forces were more agile. In retrospect I should have provided strength points for the fighting units. As the campaign wore on I developed a system of putting minus signs against damaged brigades and the letter F for fatigued units. By the last turn, a couple of brigades were marked ‘- - F F’. I knew what this meant but it could have been clearer for the players. Next time (!) a brigade will begin at, say, strength 4. Permanent losses will reduce that number. Fatigue will continue to be marked by one or more letter F, which will reduce the strength until the unit can rest and recover. So that is that. In case anybody is curious, I have put the campaign rules and map on the ACW scenarios page here. Congratulations to Matt on his win and thanks to him, Spencer and Dan for engaging so readily and cheerfully in this piece of silliness. |
Archives
November 2023
Categories
All
|


 RSS Feed