Tales from a Wargame Shed
  • Home
  • About me
  • Blog
  • Periods played
    • Napoleonics
    • 17th Century Eastern Europe
    • ACW
    • Ancients
  • Scenarios
    • American Civil War scenarios
    • 17th Century scenarios
    • Napoleonic scenarios
    • WW2 Maquis campaign

Blog

​

"Bury these poor men, and let us say no more about it." Bristoe Station 1863

23/4/2017

2 Comments

 
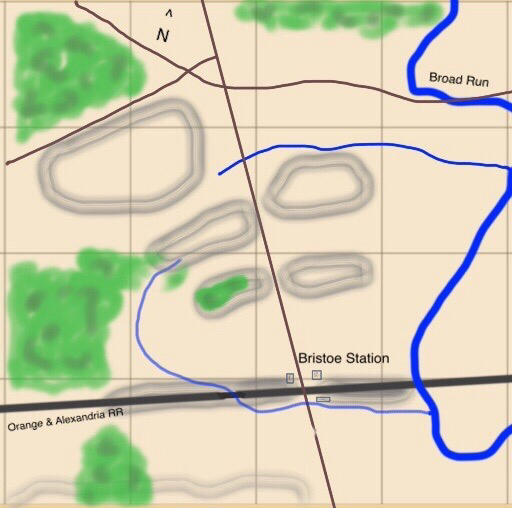
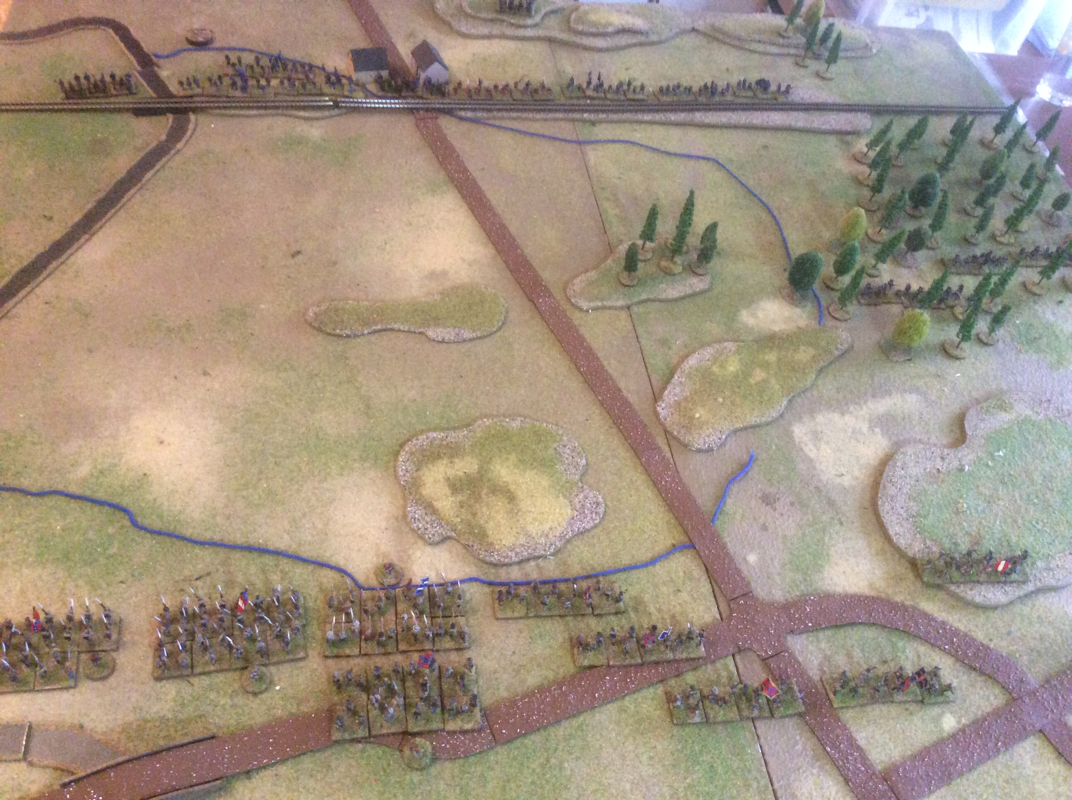
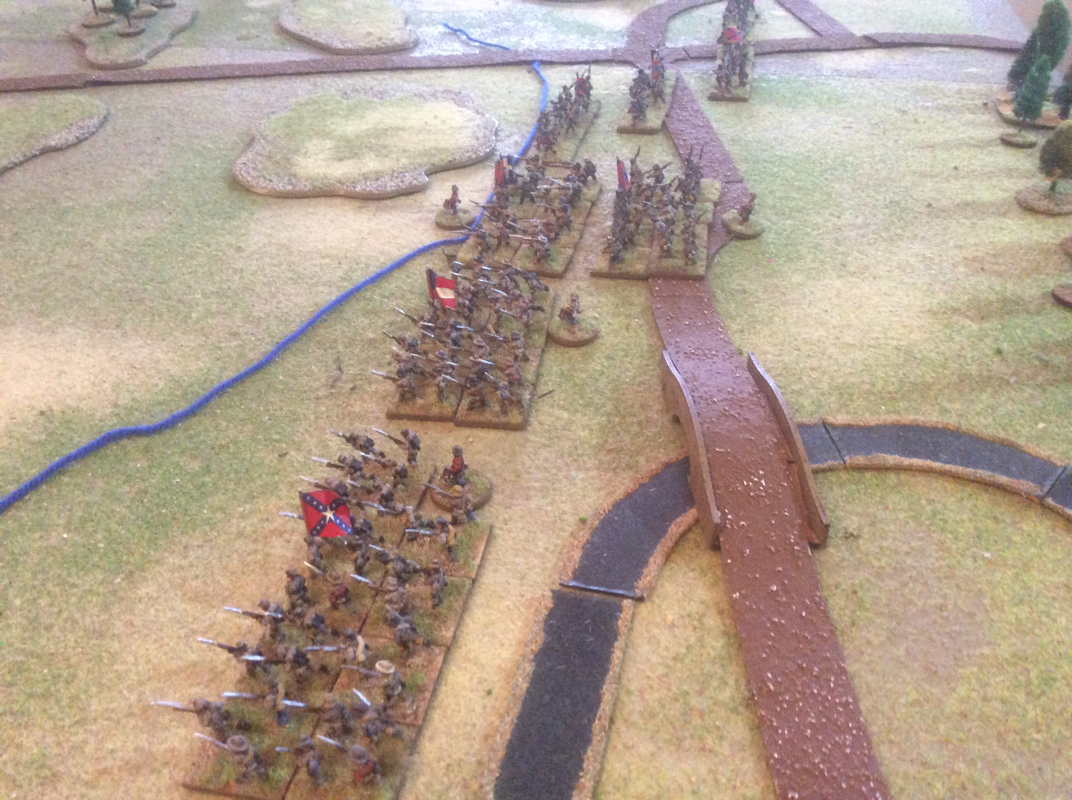
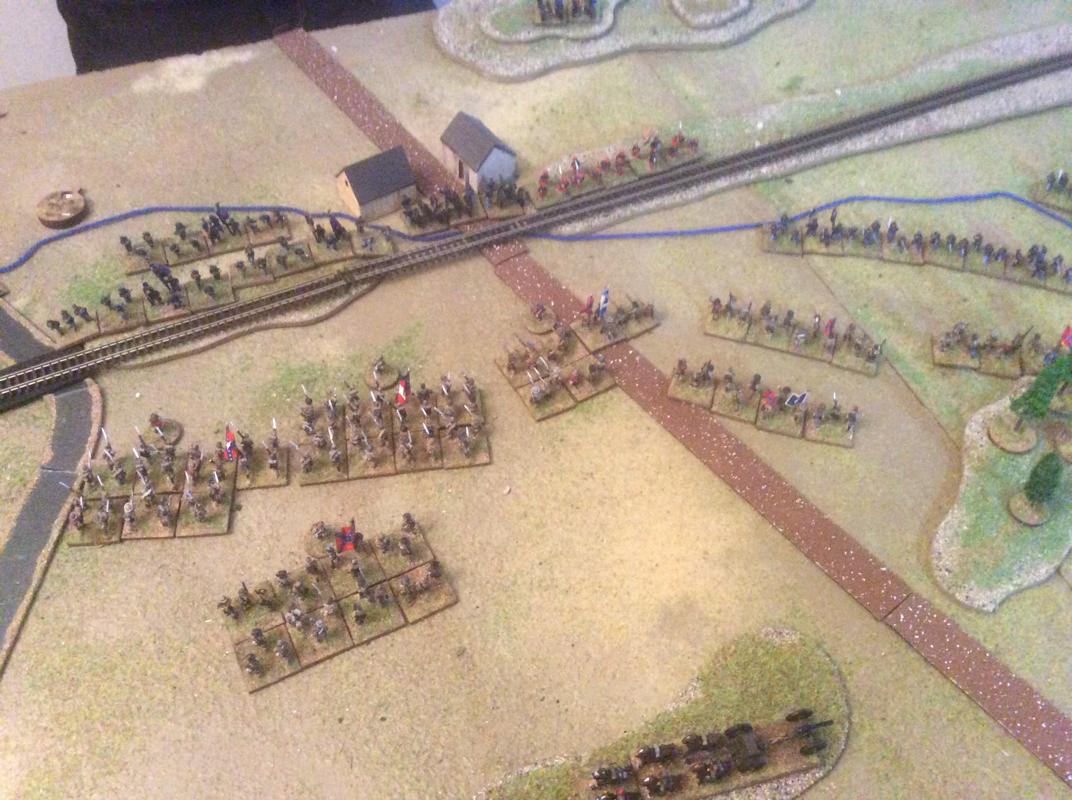
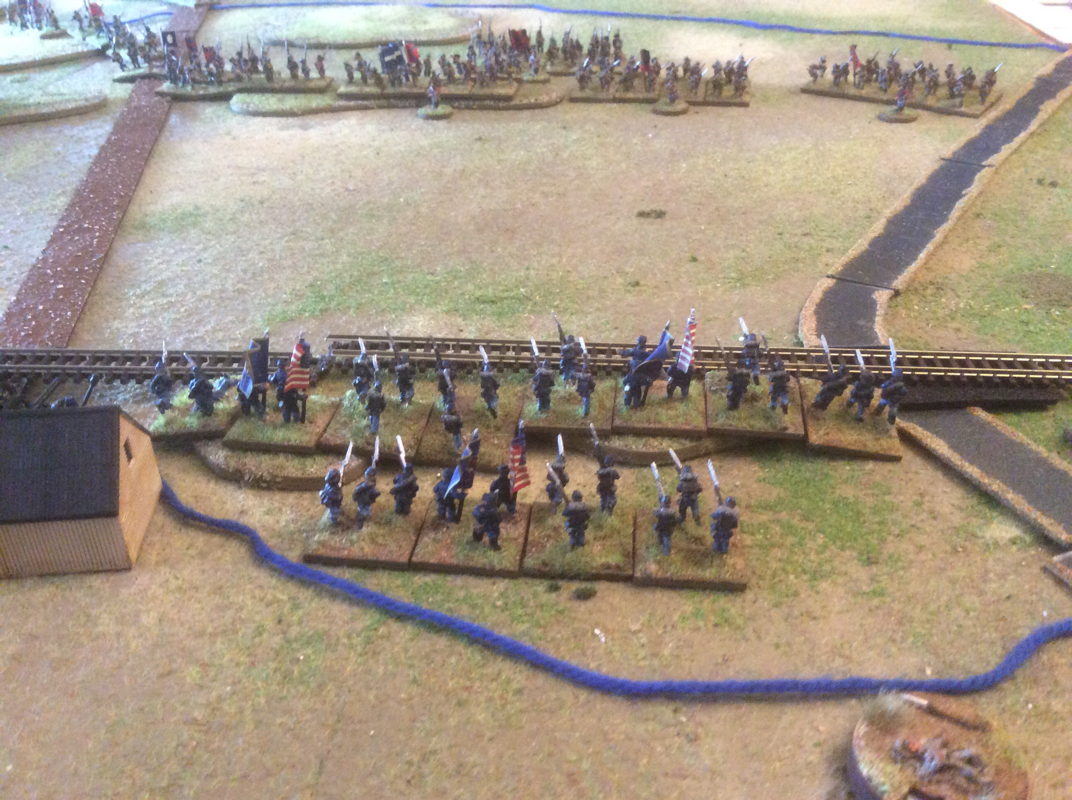
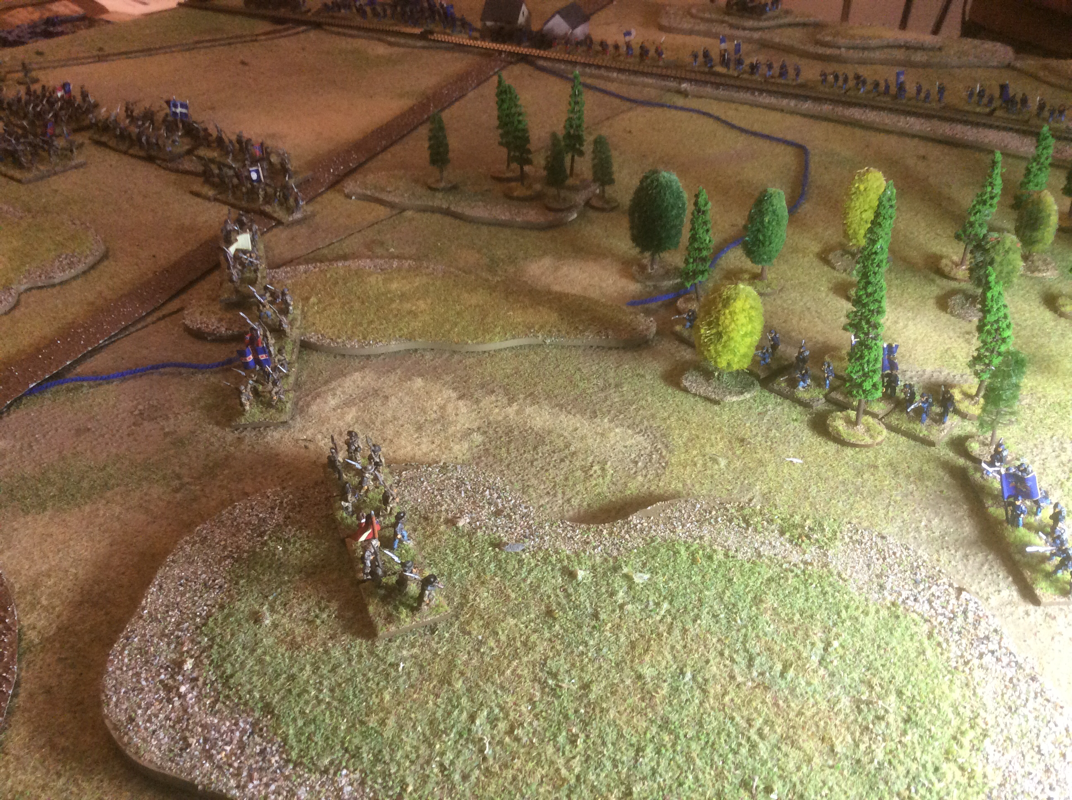
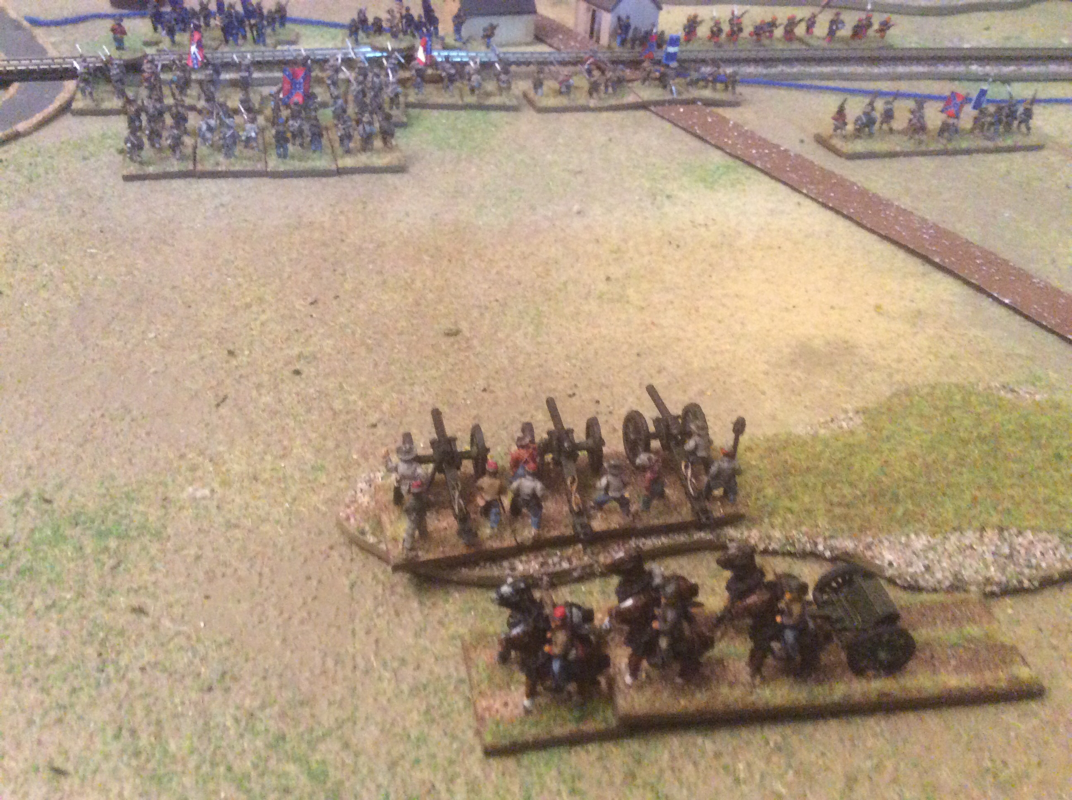
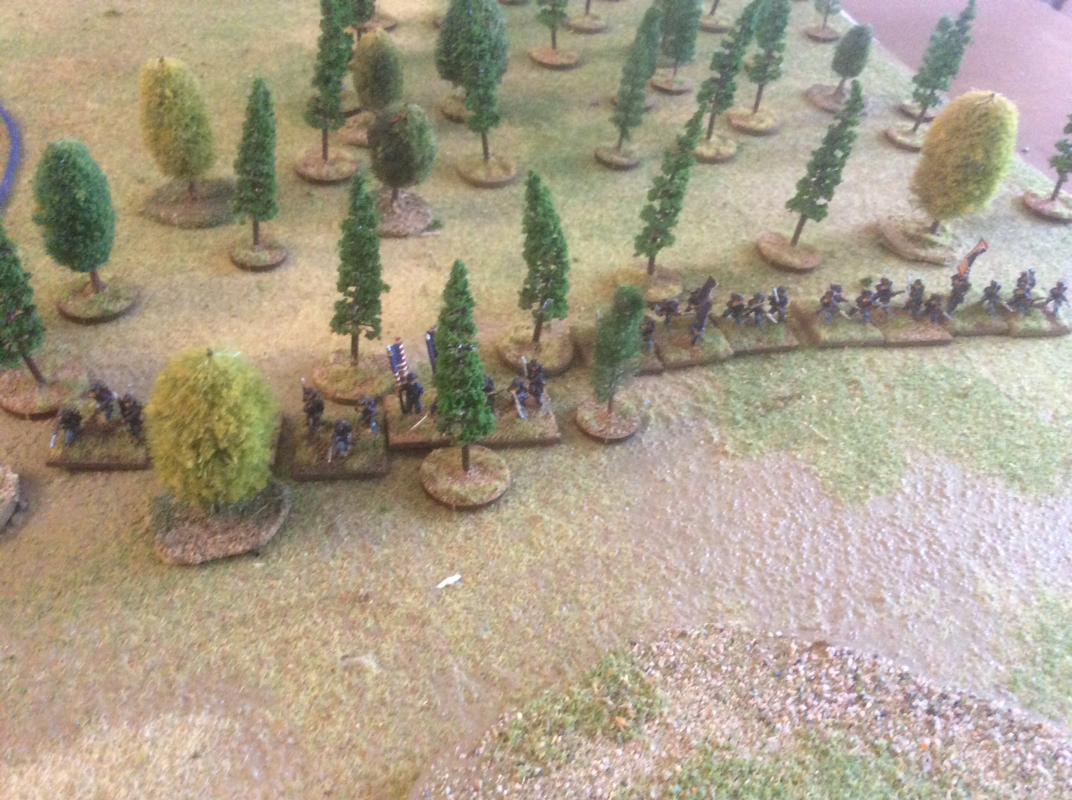
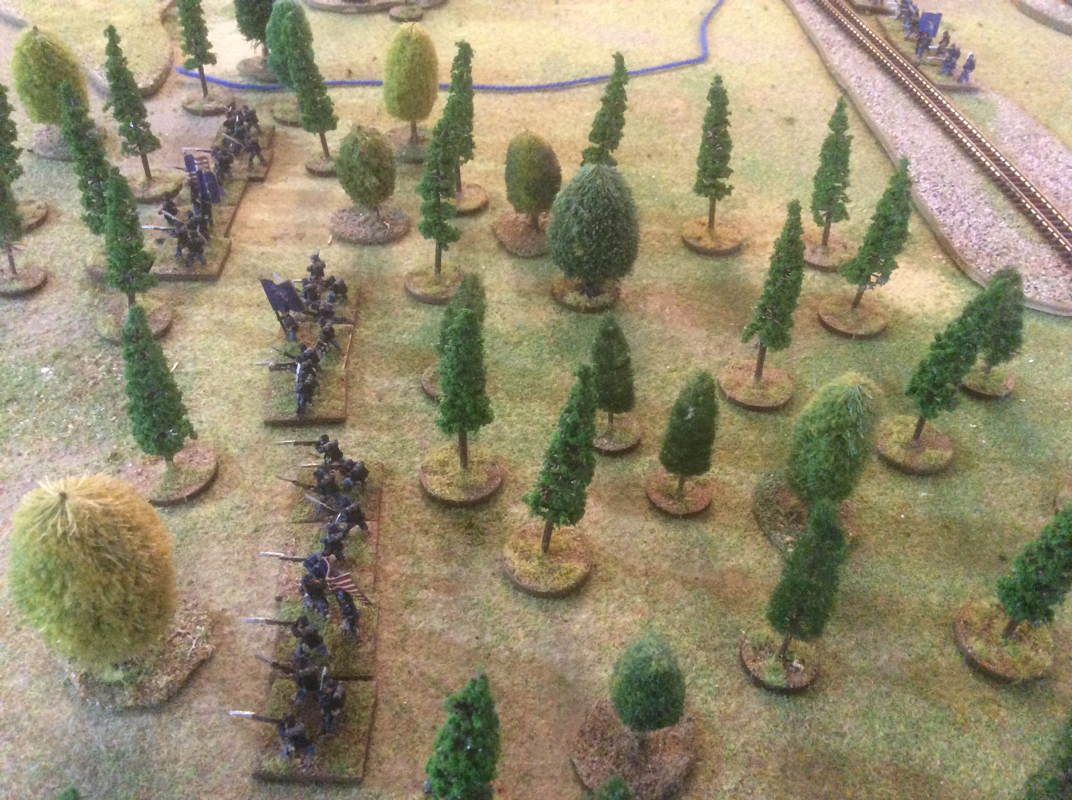
On Friday Keith and I replayed Bristoe Station, using Honour Games' Longstreet rules. The details are on the Scenarios page of this website, here. The game covers the attempt at the start of the combat by Heth's Division to cut off Warren's line of retreat. The shatter point for both armies was 24.
As Warren, Keith deployed his centre and right brigades behind the railway embankment (and so benefitting from cover), and his left hand brigade across the railroad in the woods. He supported his line with three batteries: one at Bristoe Station itself, one on the far side of Broad Run with a good field of fire across his front; and one on high ground behind his front line. As Heth, I put Cooke's stronger brigade on the left and Kirkland's brigade on the right. The front is quite restricted so I deployed Cooke's regiments in double lines.
Picture
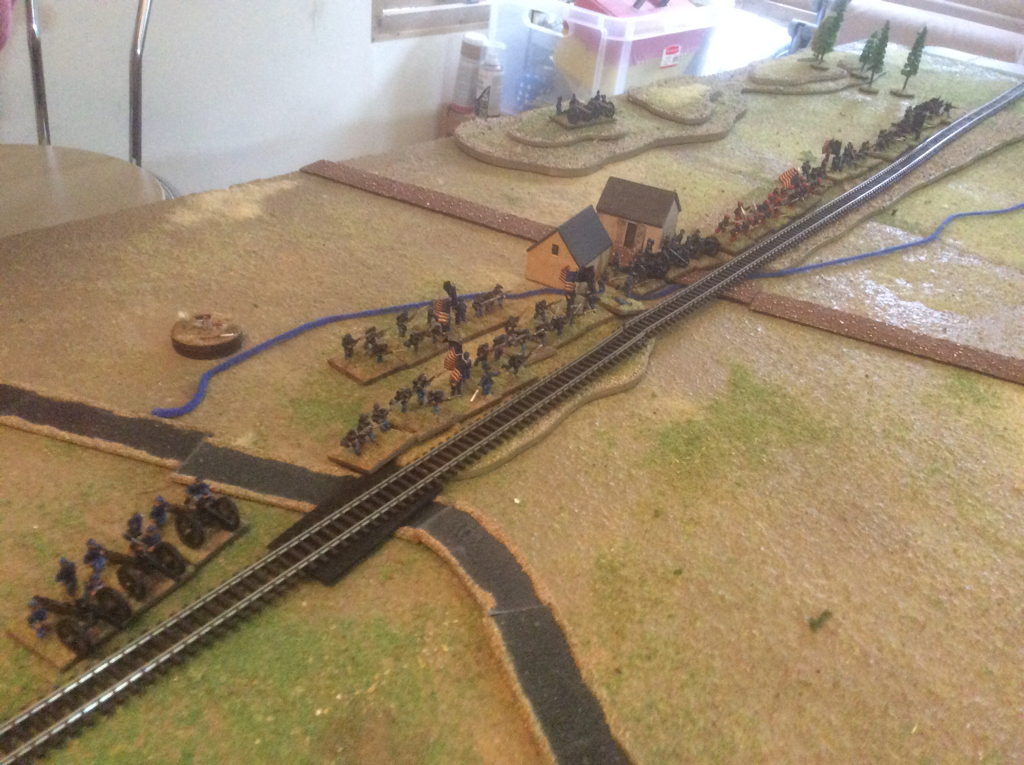
Keith's centre and right, lining the Orange and Alexandria railroad
For the first few moves I tried to close the distance quickly, having nothing to counter Keith's powerful artillery. I used up a lot of morale cards and still lost a good few bases. I also lost an entire turn as Keith shot my general (playing the 'couldn't hit an elephant' card) and rolled 6, wiping out my entire hand. On my right, Keith's brigade in the woods came looking for Kirkland, forcing me to refuse my right. I tried not to divert too many units from the main assault but as Keith reinforced his troops on my side of the railroad, more Confederate regiments got stuck into firefights with Federals.

However, I was pretty happy with Cooke's progress and approached the embankment with promising local superiority over the Yankee right. But my losses rose quickly as we came into small arms range and I was pushed over my shatter point with Cooke just a couple of inches from the railroad.
This was a great game and brought out some of the best aspects of Longstreet. The rules are really easy to remember and strip out unnecessary gloss, but the action cards bring in the flavour of the period- and of the specific stages in the war- perfectly. I came off worse partly due to the Yankee guns card, which made his artillery particularly deadly. Losing 6 Action cards and a whole turn due to my general getting shot increased the time my troops spent in the artillery killing zone.

A good test of any rules is how close a refight comes to what actually happened. Well, we couldn't have got closer to the real outcome. On the day, Heth made it to within yards of the railroad before his men were broken by weight of Union fire. At a couple of points in our game, the positions of the troops almost exactly mirrored the map of the actual battle. Very satisfying. Hats off to Keith who had not read about Bristoe Station but saw and exploited the benefits of the terrain pretty much as Warren did in real life.

I now want to rerun this scenario using Pickett's Charge, which uses the same ground and units scales. To be honest, they'll have to be pretty amazing rules to shift me from Longstreet. Friday's game reminded why Longstreet is still my favourite rule set for any period.
Picture
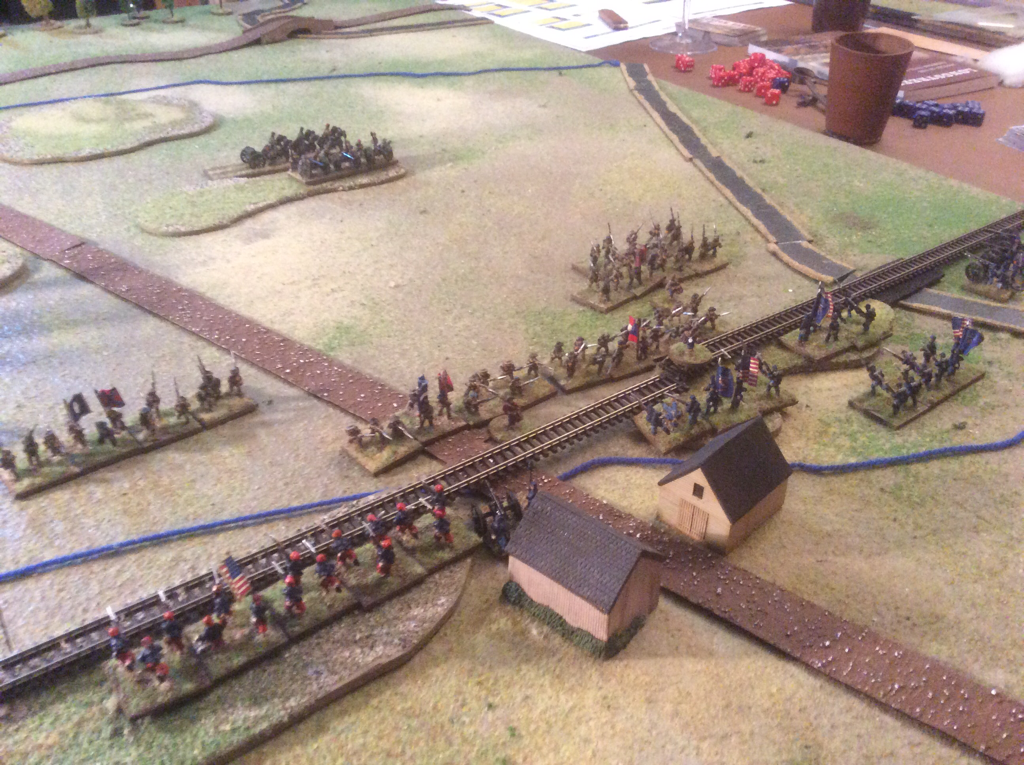
High water mark for Heth. At this point, Confederate losses pushed them over the line and the Union won the Action.
2 Comments
Captain Darling
2/5/2017 01:41:52 pm

Great stuff! Good looking armies as usual.
Thanks for another Longstreet scenario. We'll give it a run.
A pity playing the South and not getting up close enough to use a 'Rebel Yell' card. Situation looks similar to the Railway Embankment game in the rule book, one I've never won as the attacker.
Agree with your assessment of the rules they're great, they are my go to set for ACW brigade level games. If I were to have any criticism of them it would be the lack of regimental morale every unit fights to the (second) last base...
Thanks again!

Reply
Tim
2/5/2017 05:17:53 pm

Thanks! I had that card in my hand all ready to play it, but reached shatter point just at the crucial moment.
I have kept the table up and plan to run the scenario again using the new Pickett's Charge rules by Too Fat Lardies. Same basic scale but more detail, including interesting-looking activation and morale rules.
I have also now reached the account of the battle of Payne's Farm, at the start of the Mine Run campaign, which also looks tailor-made for this size of game.
Cheers!

Reply


Leave a Reply.

      Enter your email address to subscribe to blog updates

    Subscribe to blog alerts

    Archives

    October 2020
    September 2020
    August 2020
    July 2020
    June 2020
    May 2020
    April 2020
    March 2020
    February 2020
    January 2020
    December 2019
    October 2019
    September 2019
    July 2019
    June 2019
    May 2019
    April 2019
    March 2019
    January 2019
    November 2018
    October 2018
    September 2018
    August 2018
    July 2018
    June 2018
    May 2018
    March 2018
    February 2018
    January 2018
    November 2017
    October 2017
    September 2017
    August 2017
    June 2017
    April 2017
    March 2017
    January 2017
    December 2016
    November 2016
    October 2016
    September 2016
    August 2016
    July 2016
    June 2016
    May 2016
    April 2016
    March 2016
    February 2016
    January 2016
    December 2015
    November 2015
    October 2015
    September 2015
    August 2015
    July 2015

    Categories

    All
    ACW
    ADLG
    Ancients
    Battlegroup
    Battle Report
    Blucher
    Bolt Action
    Chain Of Command
    Eastern Renaissance
    Epic 40K
    For King And Parliament
    Games Workshop
    General
    Honour Games
    Lasalle
    Longstreet
    Modelling
    Napoleonics
    Pickett’s Charge
    Polish Armies
    Rules Review
    Scenarios
    Shenandoah
    Space Hulk
    Sword And Spear
    Tercios
    To The Strongest
    Wargame Campaign
    Warhammer
    Warhammer 40K
    What A Tanker
    World War Two

    RSS Feed

General rules

The Map

The map has the following features:
  1. Named towns (large dot)
  2. Named villages (small dot)
  3. Numbered farms (spotted dot)
  4. Forest hexes. Each patch of forest is lettered for identification purposes.
  5. Main roads (dark brown)
  6. Minor roads (tan)
  7. Rivers (blue)
  8. Railway line (black)
  9. Open hexes. Although ‘open’, these still represent farmland with fields and hedges, streams and ditches.

Hex rows are labelled with letters. Individual hexes are identified by counting away from the left of the row containing the letter (including part hexes). Thus, La Redoute is in hex E7; Saint Michel de Livet is in hex J3.

Assets


Each player has various assets, including fighting men and women, vehicles, technical resources and bases. As the campaign is under way at present I am not listing all of these on the website yet. But examples include
  • German infantry section with Opel lorry
  • Osttruppe section
  • Active Maquis cell
  • Sleeping Maquis cell
  • Arms cache
  • Safe house
  • Etc.

Issuing orders

Every turn, each player receives a briefing on events in the previous turn, along with one or more tasks for the turn ahead.

A turn is not a fixed period of time but an episode in which something happens. Each turn, the players will receive a briefing on the situation and should then issue orders to their assets to allow them to deal with the current challenge. Play is similar to a Dungeons and Dragons approach: they will not be constrained by mechanical rules although these exist in the umpire’s set. The umpire will try to carry out the players’ instructions and will report the outcome at the end of the turn.

That said, the players are given some guidelines:
  • Lorries can reach anywhere on the map using the road net. Their passengers can then disembark and move on foot. I will presume that lorry-borne units will return to base at the end of the turn unless a player orders them to stay in another village or town. The gas powered lorries risk breaking down but otherwise are the same as the Opel lorries.
  • The Steyr heavy car and kübelwagen can reach anywhere on the map, not just on the road net.
  • Troops on foot may walk up to 4 open hexes, either from their base or from the point where a vehicle has transported them. I will presume they will return to base at the end of the turn unless a player orders them to stay in another hex (troops on foot can bivouac in non-urban hexes).
  • The tank can travel up to 12 hexes in a turn and will end the turn where it has been sent (ie it won’t return to base at turn’s end). It derives no benefit from roads.
  • Players may issue contingency orders, for example to lie in ambush or to look out for a signal and then take another action..
  • Home
  • About me
  • Blog
  • Periods played
    • Napoleonics
    • 17th Century Eastern Europe
    • ACW
    • Ancients
  • Scenarios
    • American Civil War scenarios
    • 17th Century scenarios
    • Napoleonic scenarios
    • WW2 Maquis campaign