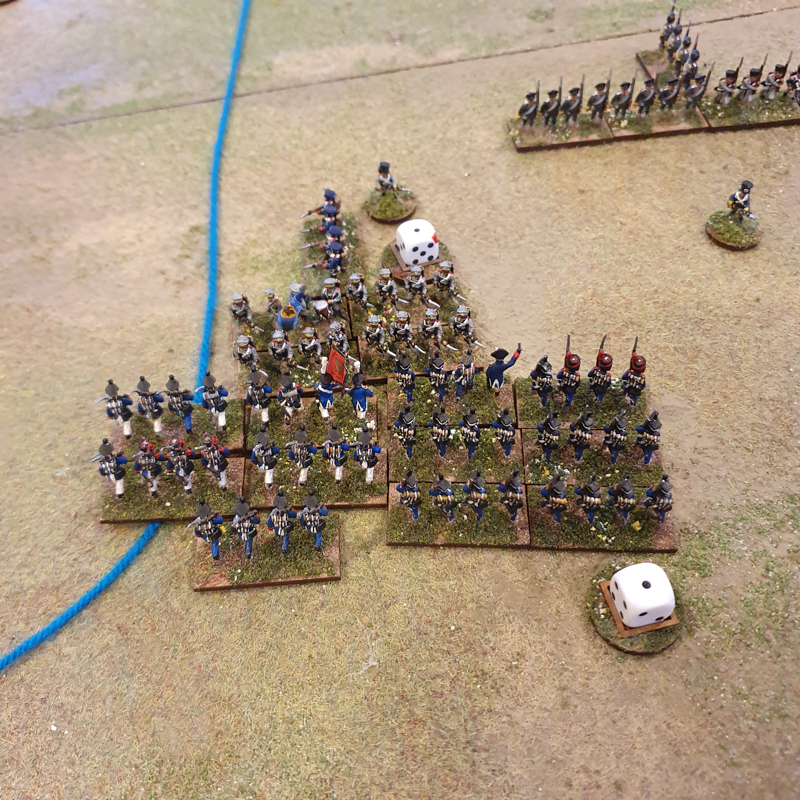
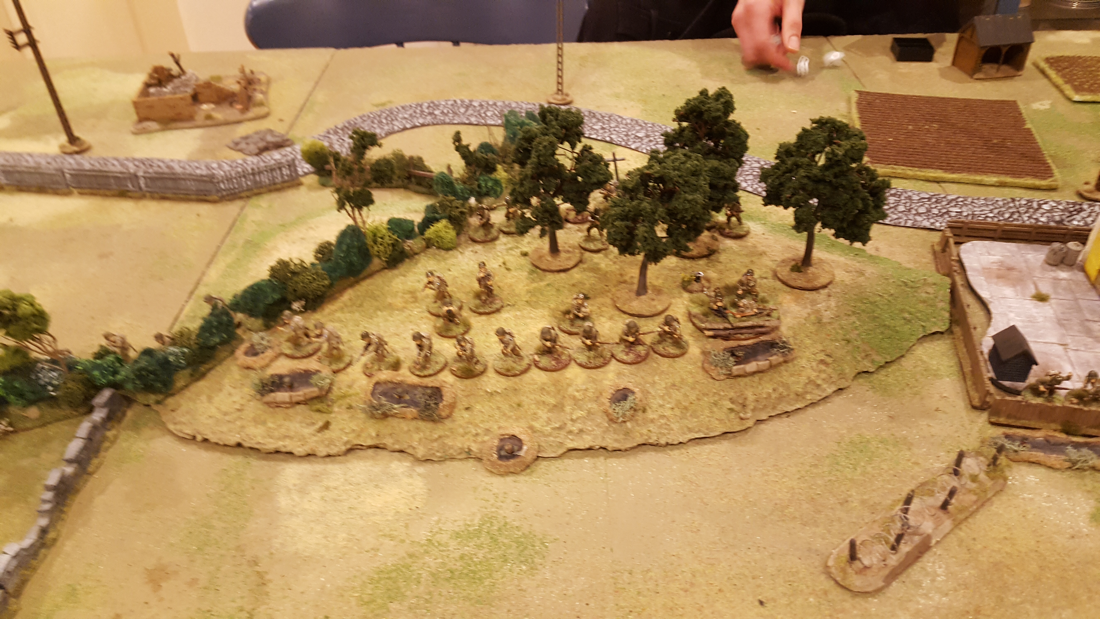
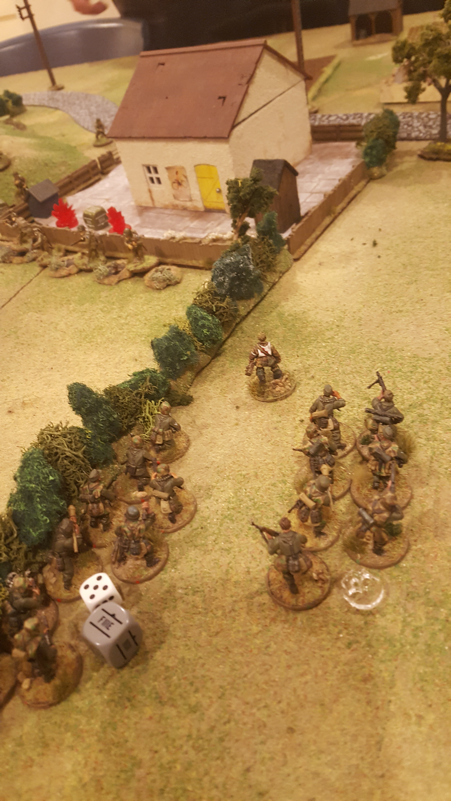
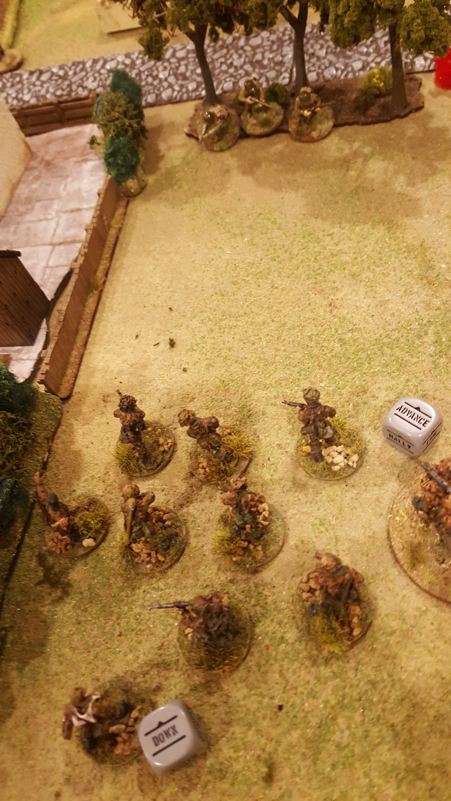
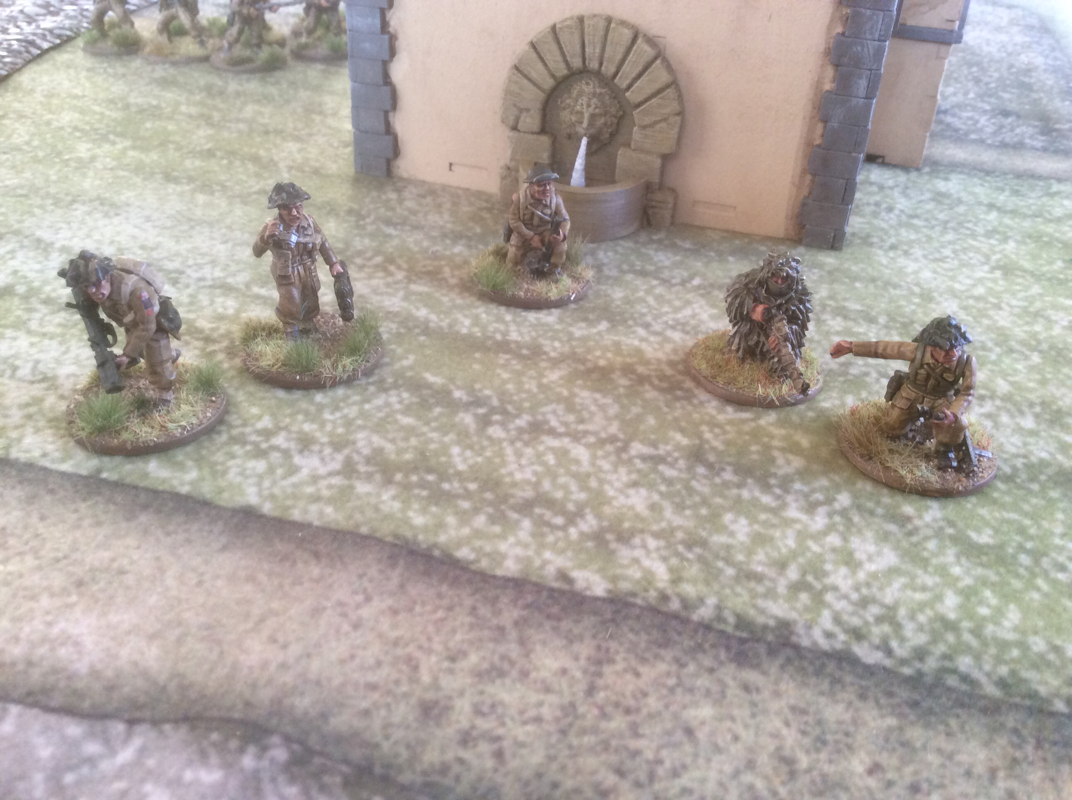
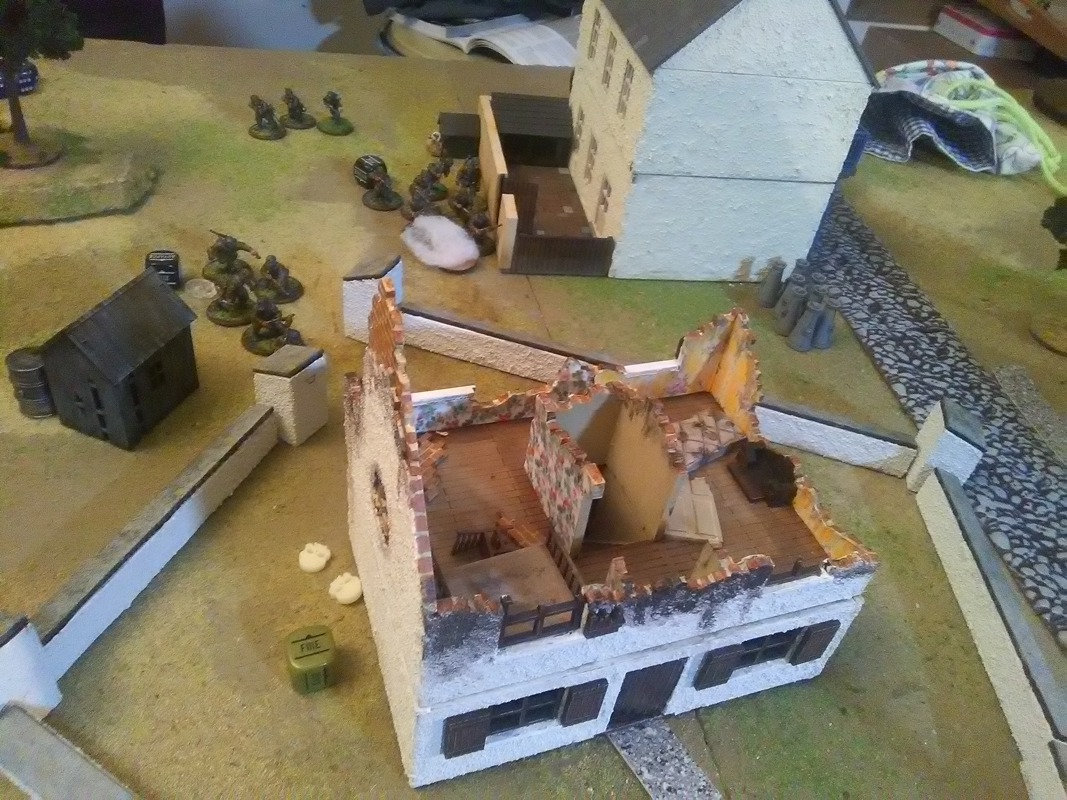
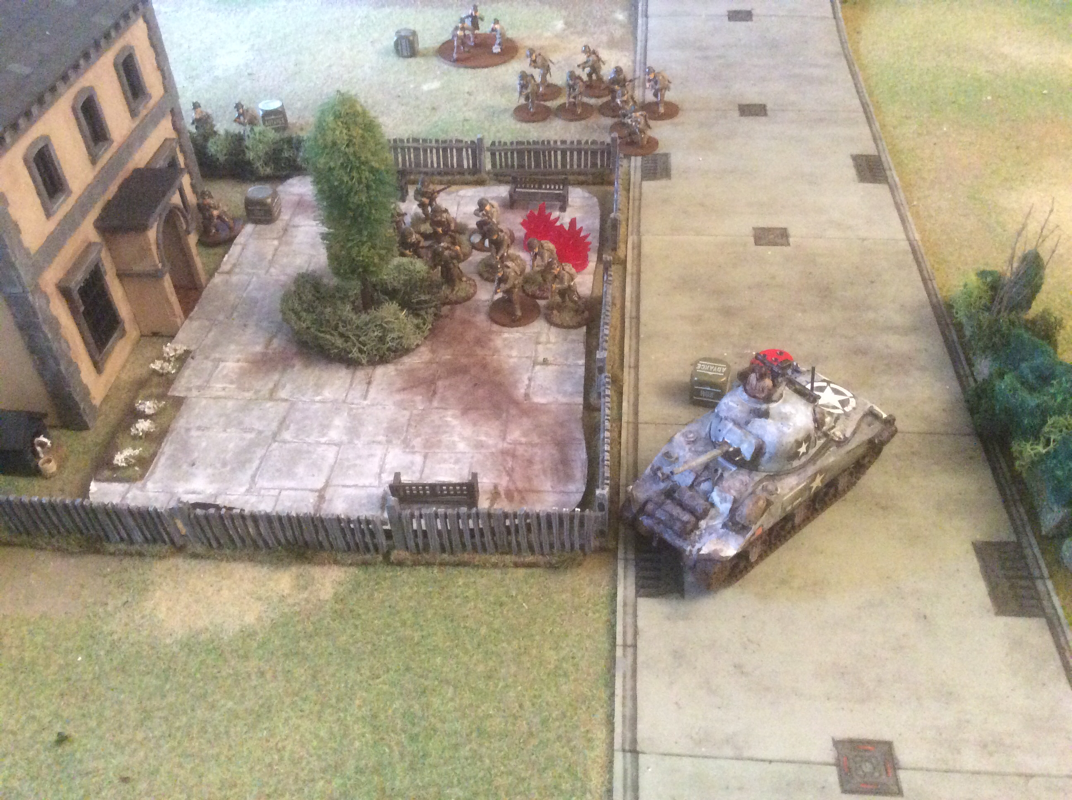
 We recently played our first face to face game of Bolt Action since the Covid outbreak began. It was a tense game, only decided in the final turn. We used the Operation Jupiter scenario from the D-Day British and Canadian campaign book. Dan took the German defenders while Harry led the British, with a 10% points advantage. The British had a guaranteed preliminary bombardment with extra pinning power, to reflect the contribution of nearby naval guns. The scenario required Harry to get troops into the German defence zone, while Dan’s victory points could only come from killing enemy units. The British were a regular infantry platoon with a medium mortar, MMG in Bren carrier and Sherman in support, while the Germans also had a regular platoon, supported by a Command halftrack with light AT gun and a medium mortar. There were buildings in the centre of the table and scattered woods. Dan set up two squads, the Lieutenant, MMG, sniper and Mortar spotter in the buildings in the centre. He placed a third squad in woods on the right, with the mortar behind. His half track was in reserve. Harry’s preliminary bombardment was made even more effective by the additional pin on each unit required by the scenario (those naval guns!). The only casualty, however, was Dan’s medic, to Harry’s profuse apologies. The British arrived in two waves. Nobody came on in the centre; a couple of small teams arrived on the left wing; but the majority of units, including Sherman and Bren carrier with MMG team, arrived on the British right, in a bid to reach the German rear zone before Dan could redeploy his firepower. The plan very nearly worked. Dan’s reactions were slowed by having to roll off pins from the preliminary bombardment, but he was able to shift one squad left and brought his half track on facing the main British attack. The half track was able to knock out the Bren carrier, taking an MMG crewman with it, but was promptly destroyed by the Sherman. A shame for Dan but great narrative! Harry’s FAO called in an artillery barrage against the main German position but this fell long and plastered an empty field. In mid-game, the British right moved steadily forward, sparring with one German squad and the MG42 in the centre. Meanwhile Dan’s right went hunting for victory points. As he gained more VPs for destroying enemy units than Harry, it was cost effective for him to try to mop up the small teams on the British left. The end game saw a bid by Harry to get enough units into the German rear to beat Dan’s VP tally. This involved crossing open ground covered by German fields of fire. Crucially, in the final turn one unit stopped just short of the zone while another failed to move, being unable to shake off its pins from the enemy crossfire. Had these units made it over the line, Harry would have won. Instead, the day went to Dan. The game reminded me why Bolt Action is such great fun to play. There were several nail-biting moments, hanging on the sequence of the order dice draw or critical initiative tests. There were no interruptions to check the rules and no arguments over interpretation. It was a fast paced, entertaining game that reached a clear conclusion in an evening. And when the players bring Brew Dog and crisps, that makes for a perfect evening. 
1 Comment
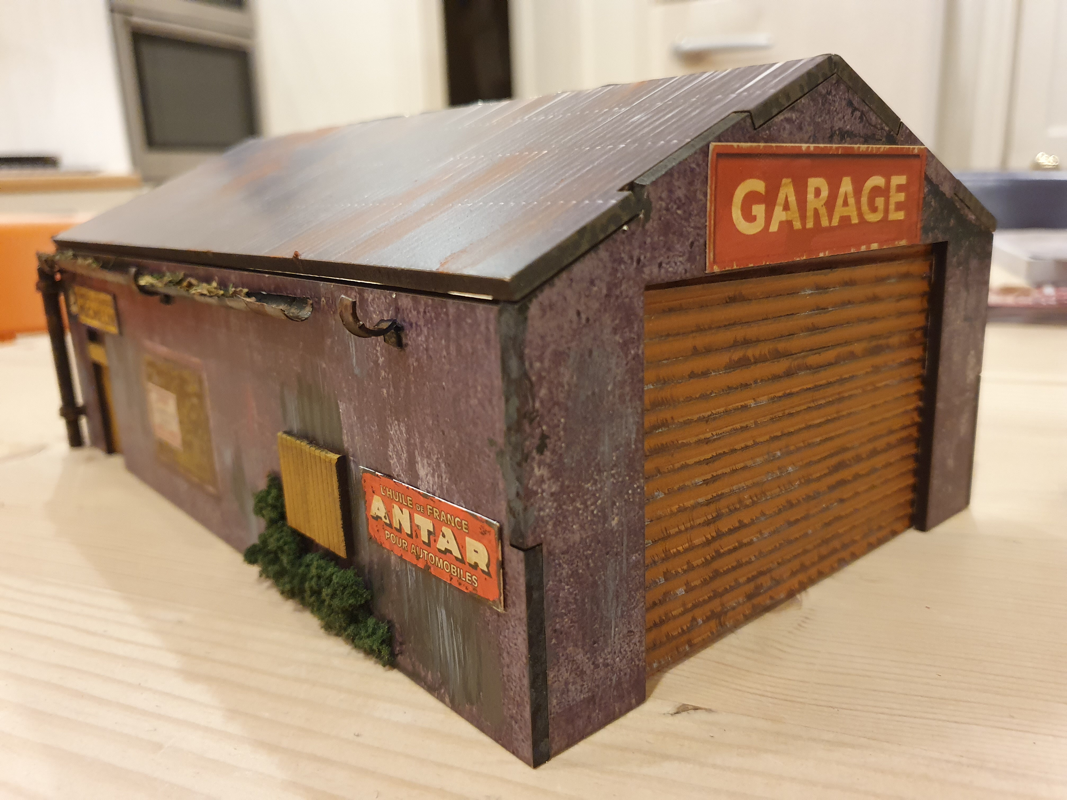
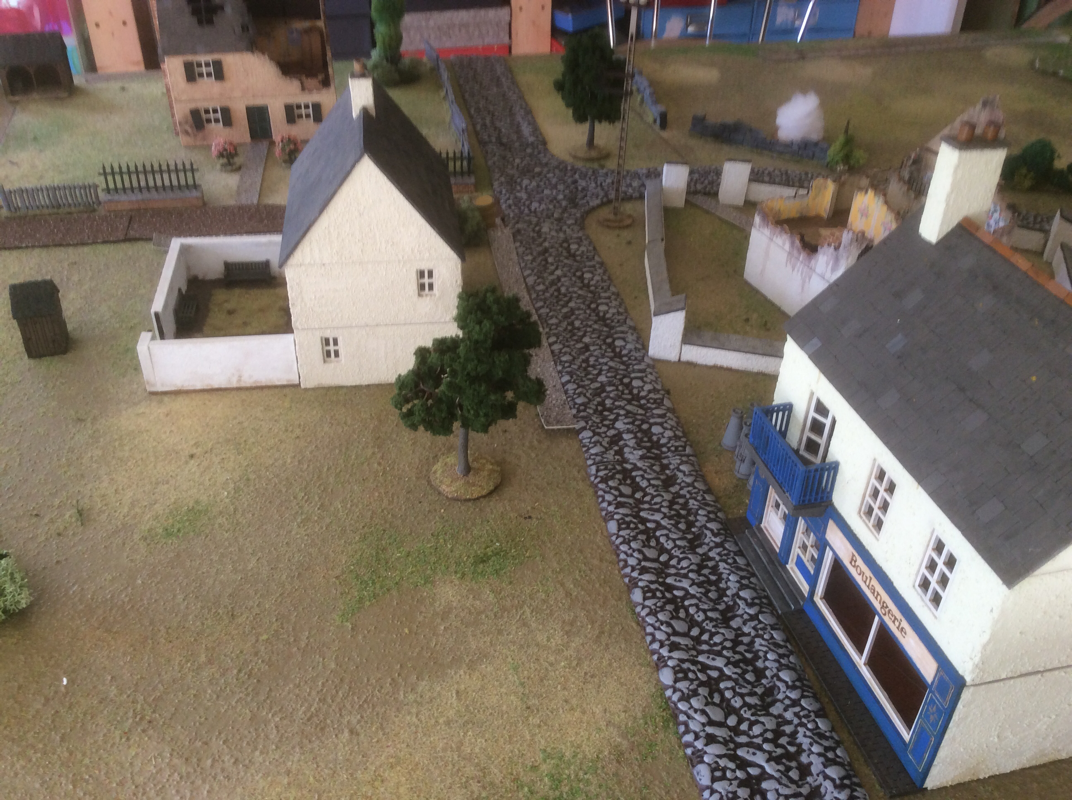
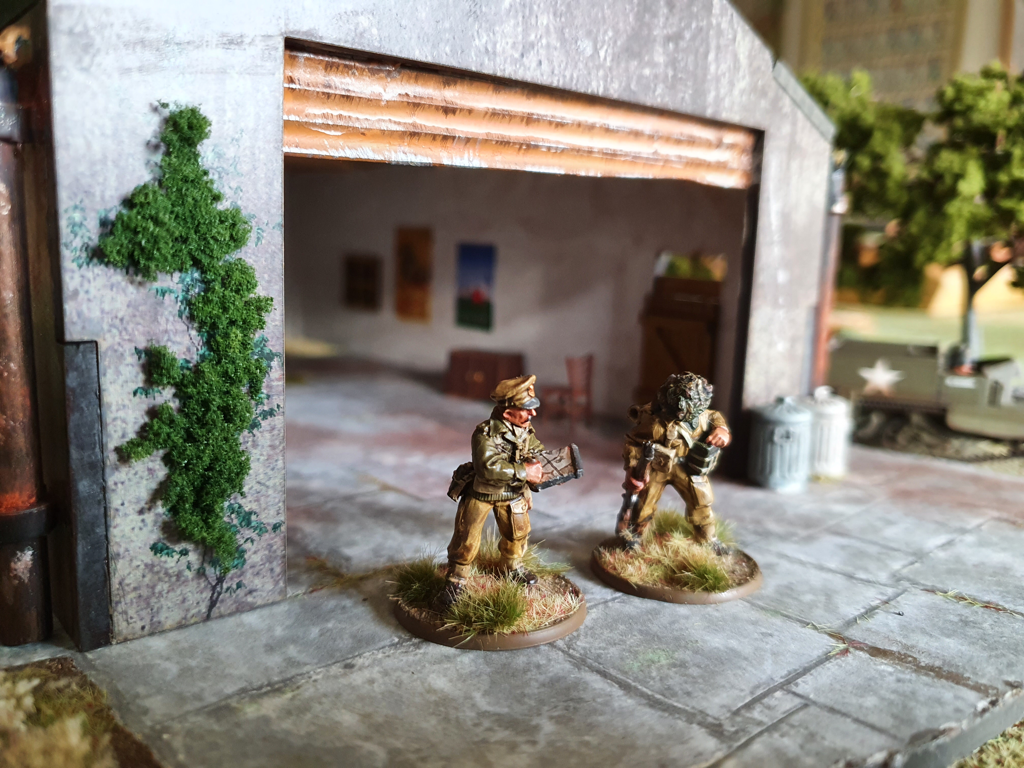 Two weekends ago I spent a happy Saturday at Warfare 2021, held this year at Ascot racecourse. It was a good venue and so great to be at a wargame show again. It was particularly fun browsing the Great Escape Games, Warbases and Caliver Books stalls. I also enjoyed the Extraordinary Laser Company's display of pre-printed mdf buildings, which I hadn't seen before. Ever ready to add to the 28mm terrain collection, I picked up the XLS Garage from their Urban Decay range for £15. I don’t play post-apocalypse-dystopian nightmare games (apart of course from Zombicide - who can resist chainsaws and rollerskates?) but had in mind to adapt the model to make a 1940s industrial unit for Bolt Action. First, take your Bits BoxThe model has a big footprint and could be a good centrepiece for a table layout. I decided to keep it as a garage, but dialled back in time to a small French town in 1944. The makeover involved the following steps:
I’m very pleased with the final model and really impressed by the quality of XLC’s products. The pre-colouring is great and construction is dead easy. I’m now looking through the range for other candidates for a 40s makeover. Oh, and I’m tempted by a new dice tower.
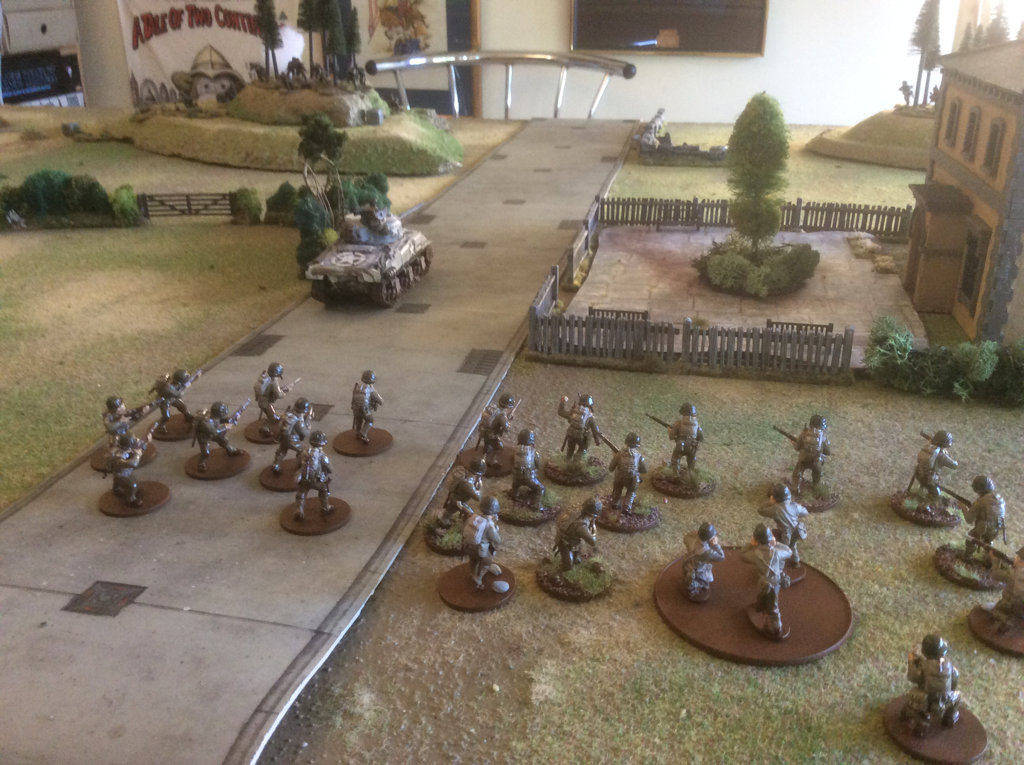
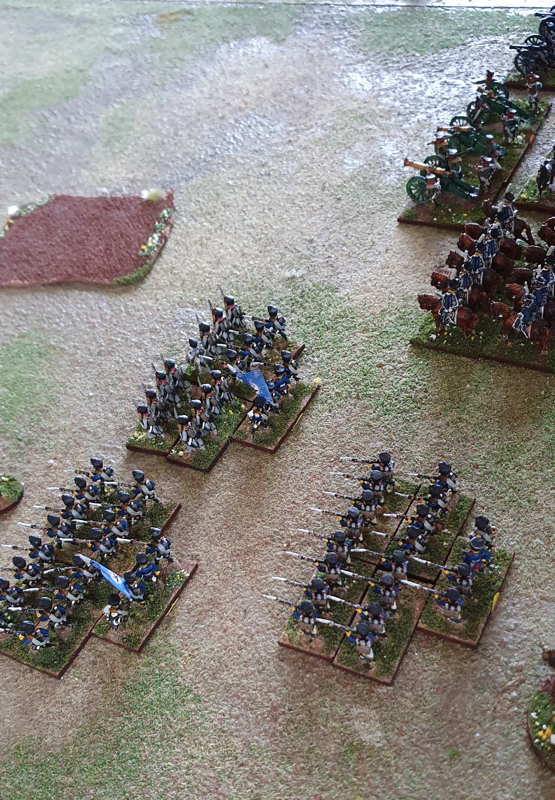
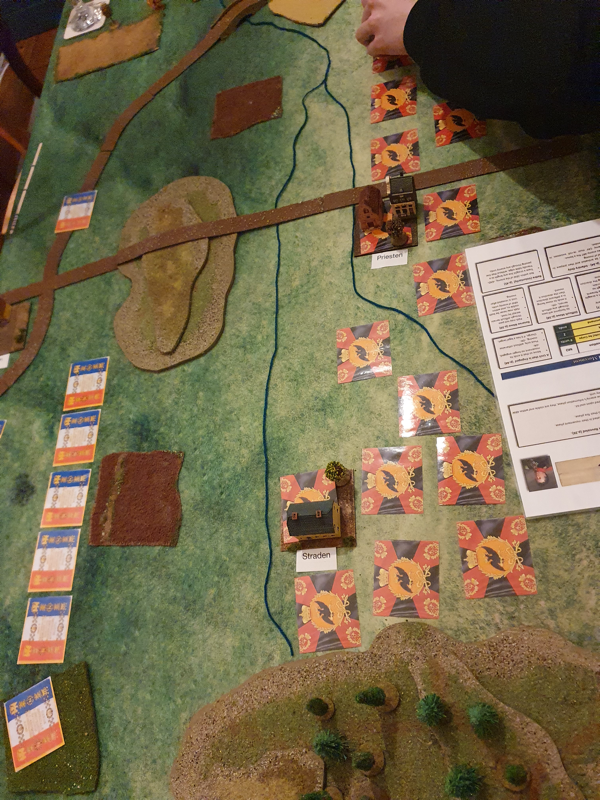
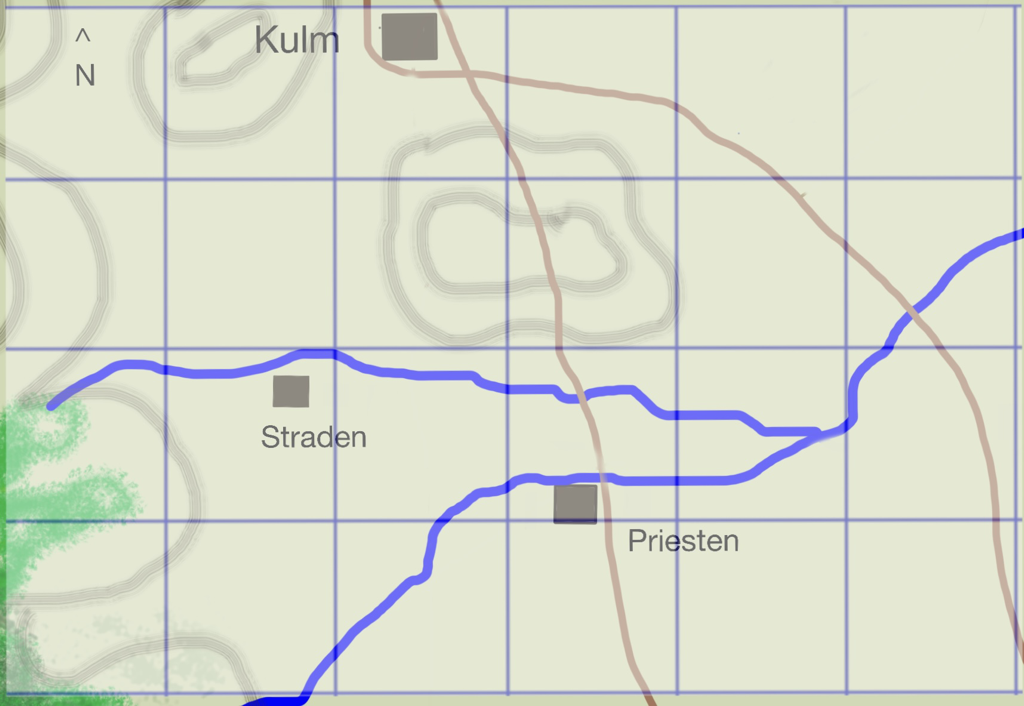
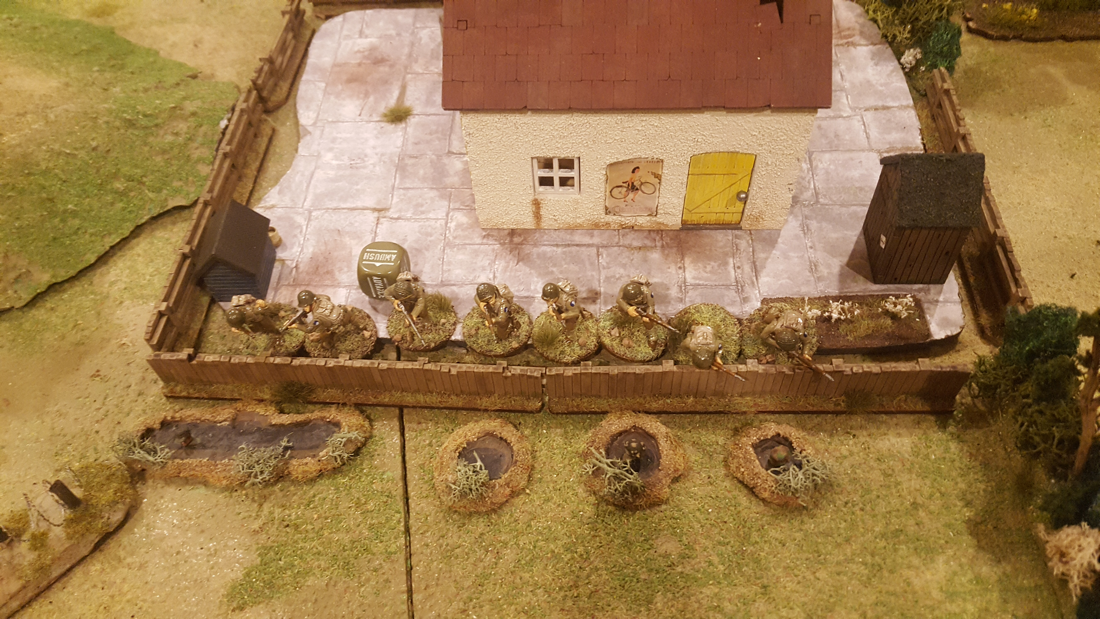
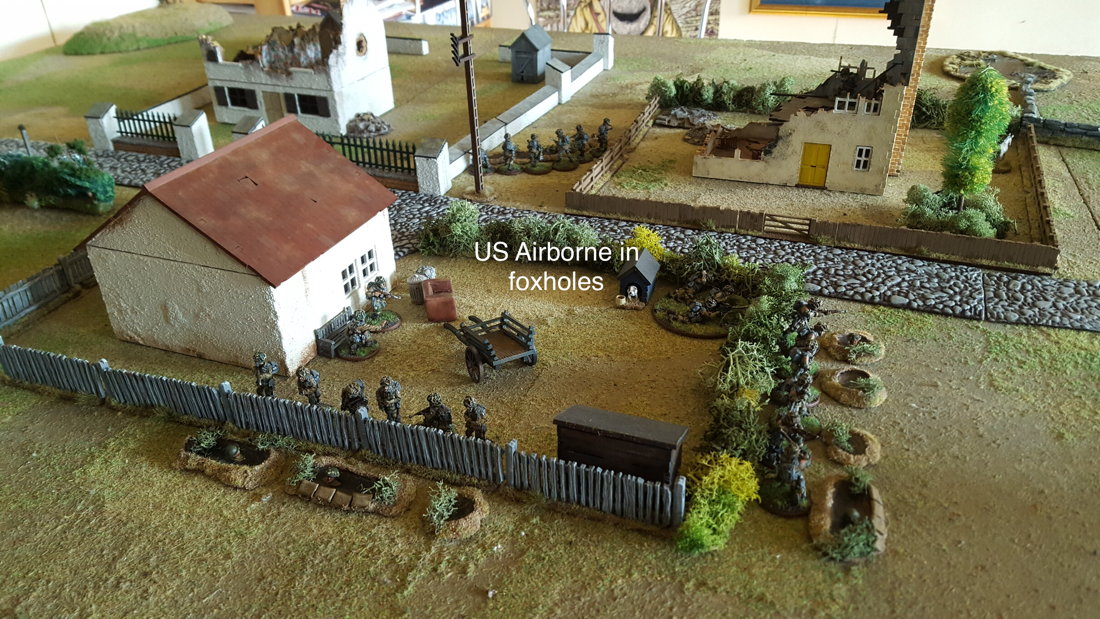
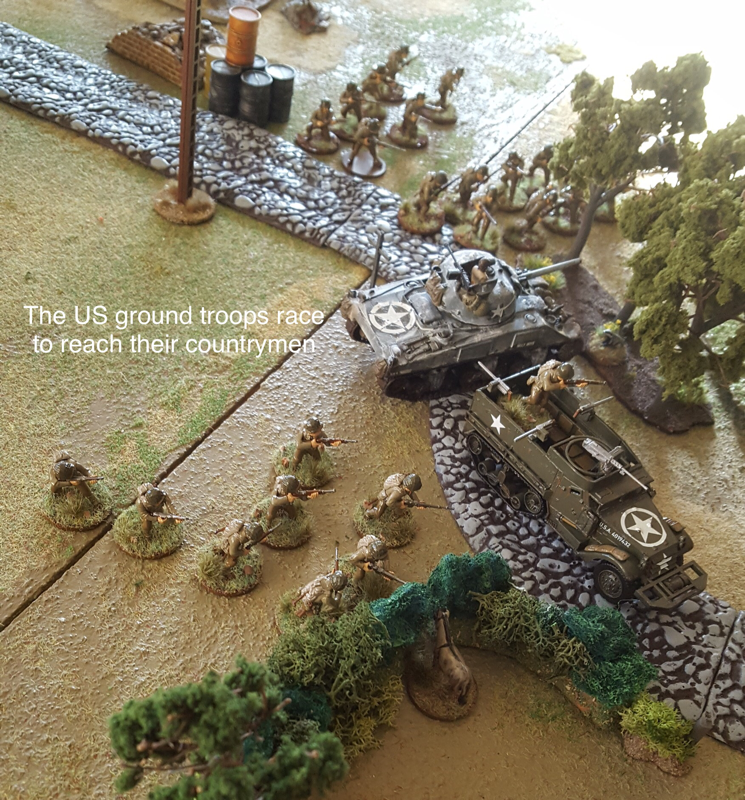
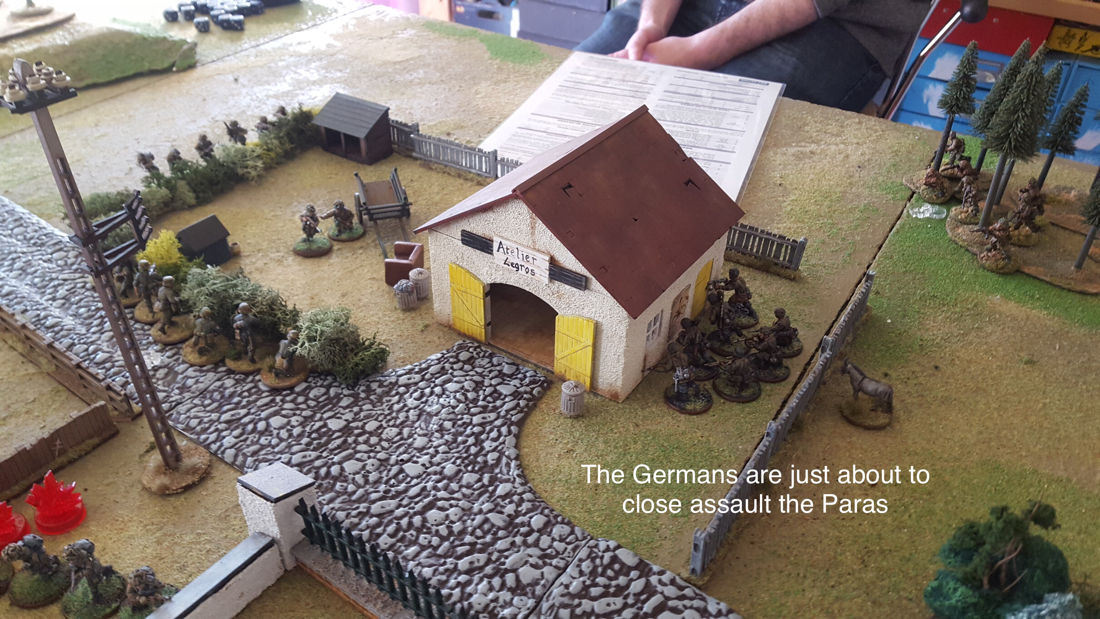
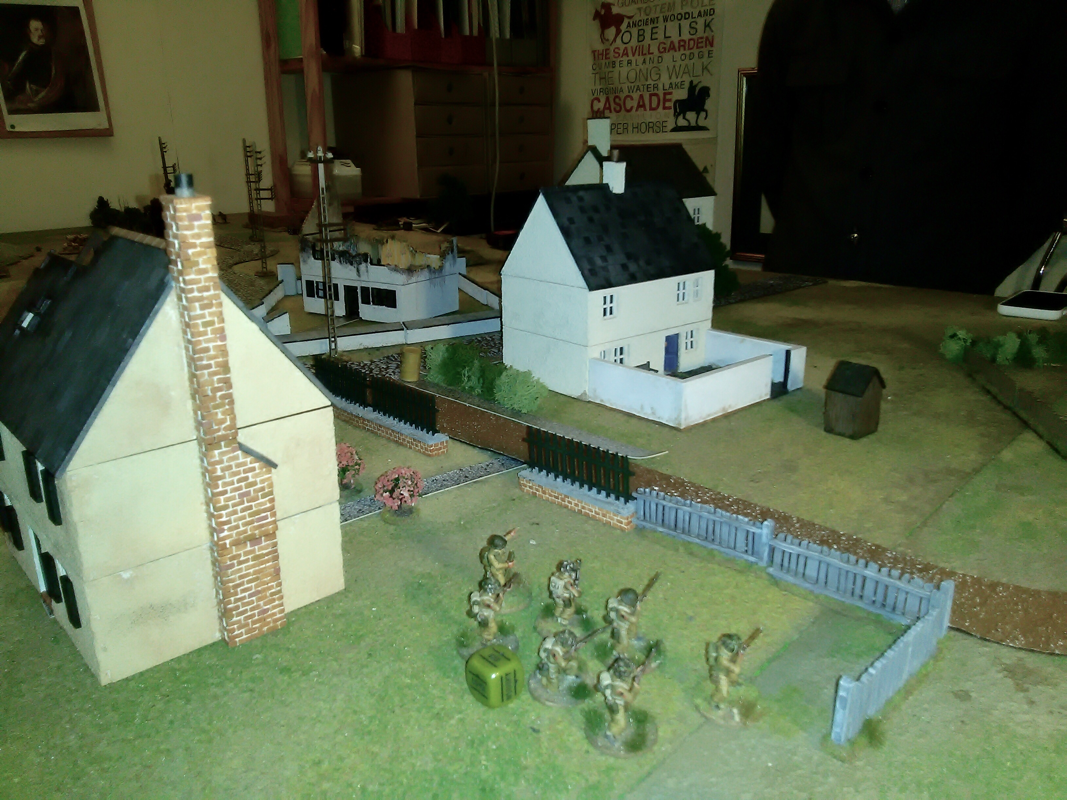
I was mildly disappointed to learn that Warfare will not be at Ascot next year, as it was such an impressive venue. However Reading Wargames Association have explained that Ascot hiked its booking fee for next year by 50%, which seems downright cheeky. So Warfare 2022 will be held in Farnborough instead. I plan to be there.  The US centre, ready to sell their lives dearly Last Thursday we held the “Matt Pendle Farewell Commemorative Bolt Action Battlegame”. After four years of happy gaming, Matt is inexplicably moving away. He said something about jobs, wives and quality of life and I wish him well, but the simple fact is that a splendid opponent is leaving the area. We have played various periods and rules since 2015 but as Matt, Ian and I started out on Bolt Action together, it seemed fitting to return to BA for our final encounter. We were joined by Dan, a player of various games including Star Wars Legions and RPGs. Having watched a Youtube tutorial beforehand on Bolt Action basics, Dan picked up the rules remarkably quickly. We played a 1000 point game with D Day US versus Late War Germans. I wanted a suitably heroic and memorable game so adapted the Hill defence scenario from Battleground Europe, replacing the defending Poles in the original with Matt’s Americans and transposing the setting to operation Cobra. The briefing is set out below. 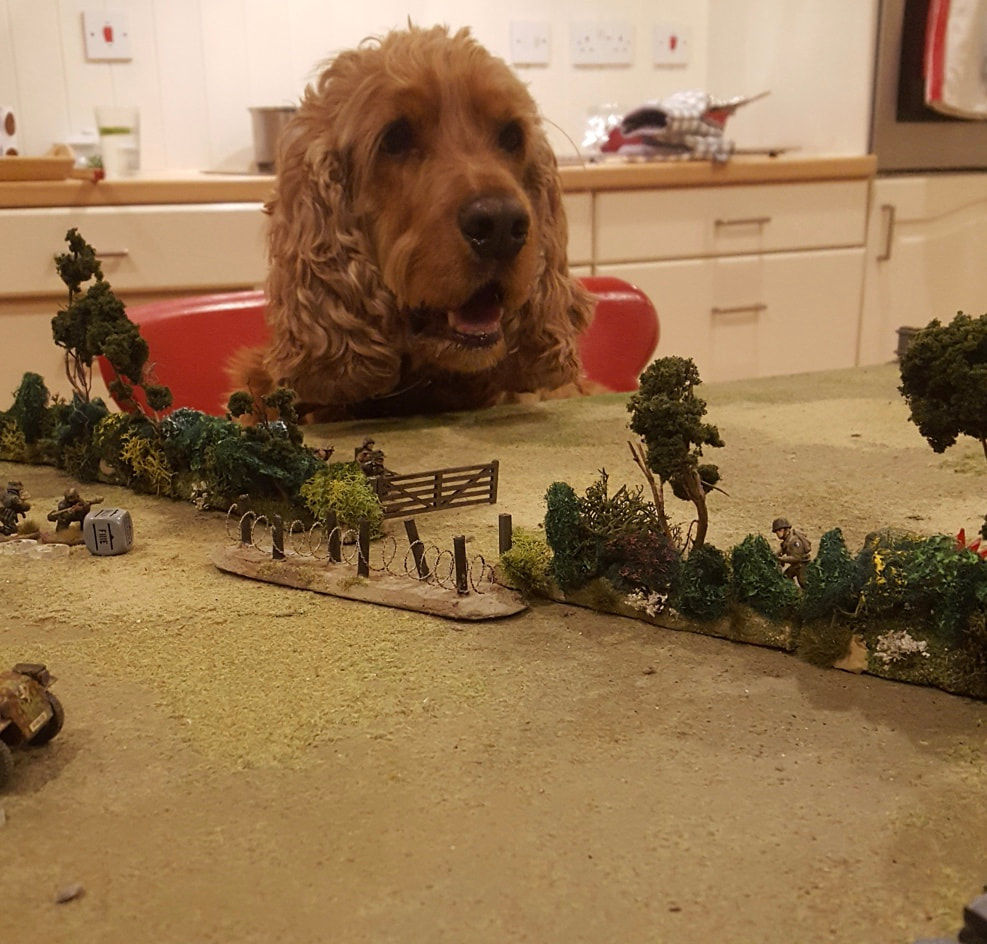 Hauptmann Rotthund surveys the field “Last Stand on Hill TW20 It is the third day of Operation Cobra, the US breakout from the Cotentin Peninsula. General Bradley’s First Army has pierced the German’s Western flank and is advancing south and eastwards into the interior. If the US armour can break out of the bocage country, the German forces in Normandy face encirclement and annihilation. Aware of the stakes, the Germans are throwing everything they have against the neck of the American advance, aiming to cut off the spearhead from its crucial supplies. The corridor opened by the assault is narrow. While the tankers race ahead, it is down to the long-suffering GI to keep that corridor open. Hill TW20 is already behind the US spearhead. It overlooks a key road along which the gasoline and ammunition must flow. It is held by Major Matt “Hedgehog” Pendle and his hard-bitten platoon of veterans. Their task is to hold the hill at all costs. Approaching from the East is a scratch force of German grenadiers, as determined to take Hill TW20 as Matt’s Marauders are to hold it. Their commander, Hauptmann Rudolf von Rotthund, peers at the hill through his binoculars and plans his assault. He is confident of success: what Ami can resist the power of his new dice tower?” Matt set his force up on the hill, minus a half track with infantry section in reserve. He was allowed to dig in his infantry, which he did on his left and centre. Dan and I shared the Germans between us. Matt had a pretty clear killing ground to his front so we agreed that we would try a pincer, Dan on the left and I on the right. How did the game play? Well, I did say I wanted it to be memorable. The first scene unfolded on the German left/US right, as Dan set out to dislodge a US squad behind a row of bocage. This started well, with several useful pins falling on the US squad. Matt regained the initiative with a direct medium mortar hit in its first round, followed by a bazooka taking out Dan’s command halftrack. In return, Dan achieved a first-time direct hit with his medium mortar and started to filter his command squad across to the US side of the bocage. So far, honours were about even. At this point, Matt pulled a very clever turnaround. At the end of one turn he rallied off all of the pins on his right hand squad. When he then drew the first order die of the next turn, he sent the rallied squad smack into Dan’s command squad and wiped it out. Shortly after, Matt’s halftrack arrived and joined in the destruction. From that point on, Dan’s wing was doomed, even with the arrival of a German section from reserve. On the German right, meanwhile, I was footling around behind a hedge, swapping pins with Matt’s MMG and left hand squad in foxholes. Matt shifted his central squad around his left-rear, overrunning as he did so a sniper team that hadn’t even set up for business yet. This was getting embarrassing. With Matt’s encircling squad arriving to my front, I no longer had cover from enemy fire and suffered the consequences. The rest was a blur: some nasty close combat which went in US favour, a last ditch attack by a panzerschrek team using their bazooka as a club, and eventually agreement on all sides that the Germans were unlikely to get a live body onto the hill. After five turns, Dan and I surrendered, first to the inevitable and then to Matt. Blimey! What happened there then? Being a modest bloke, Matt pointed out that the dice had been with him at certain key points, both in shooting and in the drawing of order dice. He argued that had a German die been the first to be drawn in one particular turn, this could have reversed the whole course of the game. Let’s be clear: had the luck been strictly balanced, he would still have beaten us, if perhaps a tiny bit less emphatically. We were beaten - and soundly - by the player, not by any dice gods. This was our first Bolt Action game in several months and I’d forgotten how much fun it can be. The game mechanics are robust, logical and easy to learn: Dan was off and away pretty much from the start of his first ever BA game. There is real suspense in the drawing of order dice and lots of tough choices on who to activate next. There are also moments that may not be historically plausible but are great fun in the game context, often involving success against the odds. And it is the sign of a good rule set that Dan seemed thoroughly to enjoy his first Bolt Action encounter, despite being roundly trounced. On the whole I don’t find the scale distortion in BA troublesome, although I would happily adopt a house rule that while mortars are paid for as usual, the only presence required on the table top is that of their spotter. It did feel quite cramped to have a German and a US mortar within four feet of one another. Inspired by Thursday’s game I have painted a new German NCO and MG42 team, to round out another section of grenadiers. I increasingly feel that the more cost-effective investments for a general scenario are in infantry squads and MMG teams: exotic specialist units that might not get to use their kit are less likely to justify the expense. As for Matt, I hope he was satisfied with the performance of his GIs on their final outing in South East England. What do I mean, final? I am determined to get him back down here for some more games in the future. It would be criminal to lose touch with an opponent who is as sporting, capable and likeable as Matt has been over the past four years. Excuse me for a moment, I have something in my eye…. 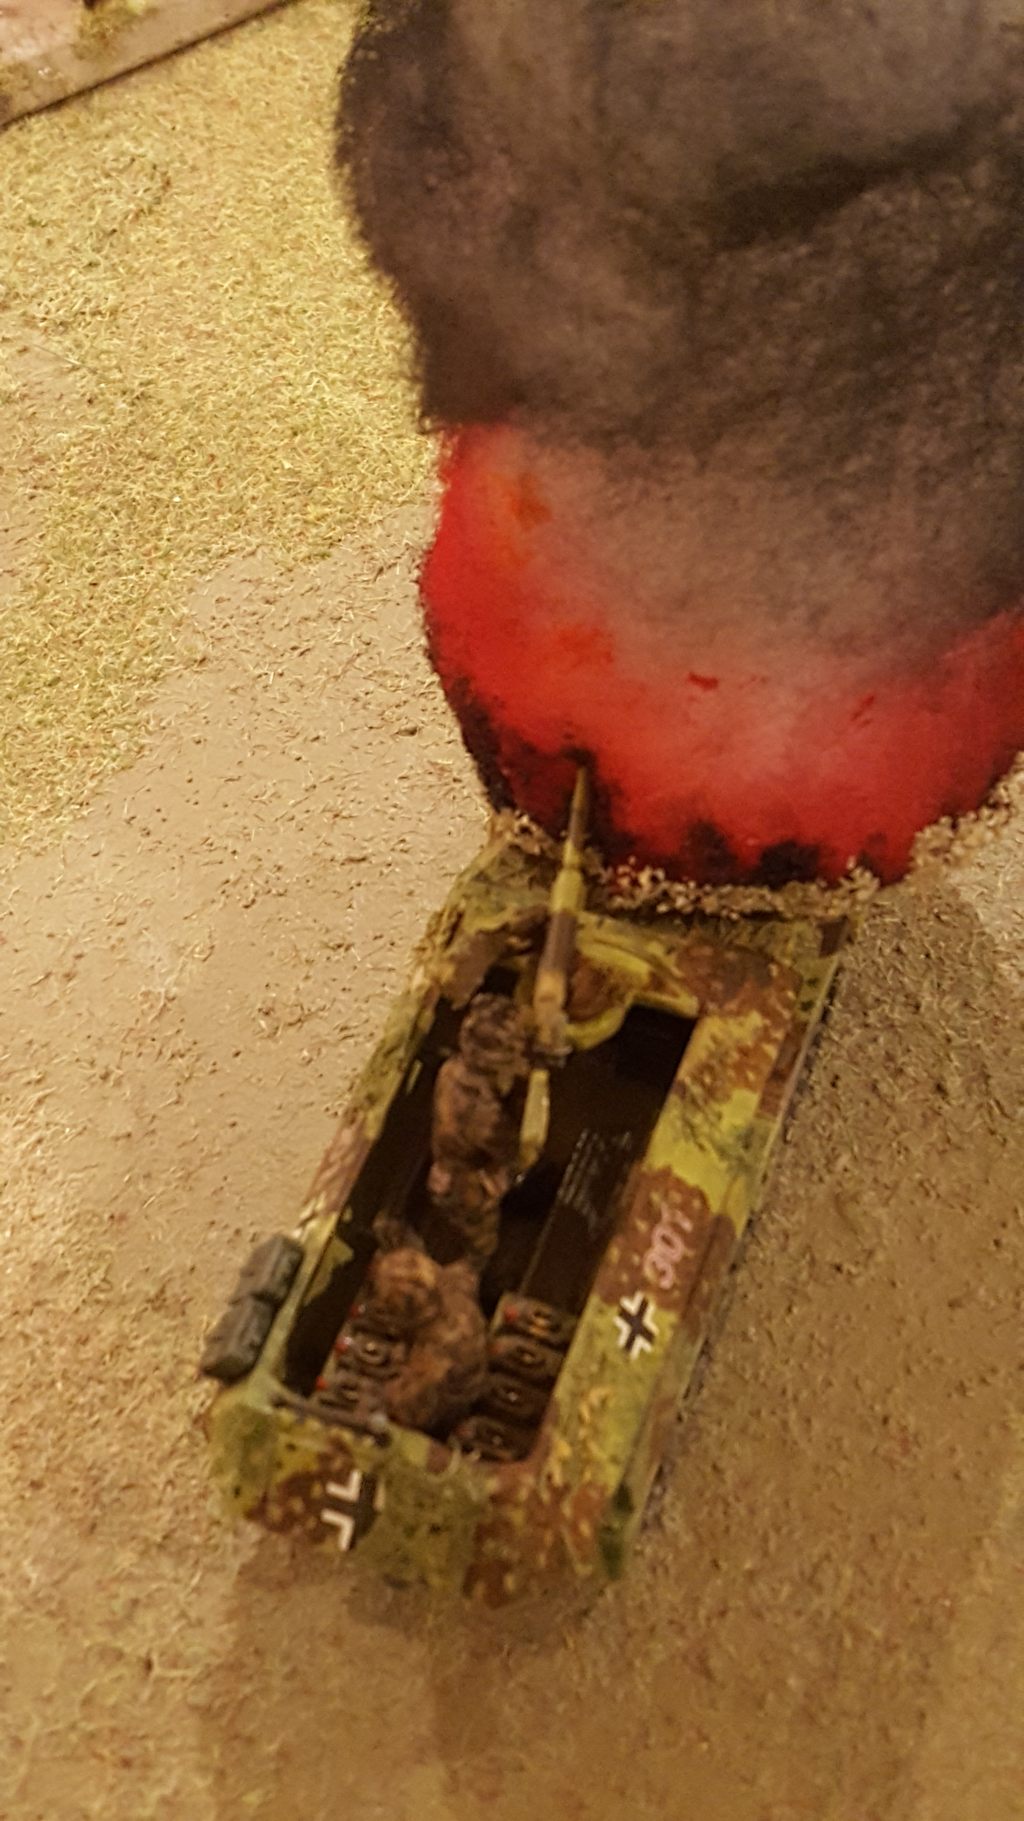  This week I finally played my first game of Chain of Command. I have had the rules for about four years but found them a daunting read and never got around to trying them. Somehow Bolt Action was that bit easier to grasp. Then along came Spencer, member of the Staines Wargamers and keen CoC player, who very kindly agreed to run a game in the shed for me and Matt, who has played it a little but is also pretty much a beginner. What can I say? I am hooked. These rules are so much more intuitive in play than in print. We had a platoon of regulars each, with no supports. Matt took the Brits and I had the Germans. It was a patrol encounter with a twist: there was a crashed kubelwagen near the middle of the table that I needed to control and Matt needed to deny me.  Chain of Command has been around for a long time so I presume it’s main design elements are pretty well known. The salient features for me are the patrol phase, jump off markers and Command dice. Spencer offered some useful tips for using the patrol phase to win ground, which was actually an intriguing game within the game. When it ended, Matt had a row of jump off markers in the centre of the table while I had two markers facing his in the centre and a third a little behind his left. I hoped this would give me a flanking advantage but in the event my daft deployment nearly cost me the game. Once we started placing figures, I quickly got into trouble. I deployed my first squad from the jump off point on my right flank in the open, placing the LMG team on overwatch and going tactical with the rifle team (increasing their cover save). Matt then deployed his first team in the building on his left, fired at my squad and began to dismantle it. Thanks to rolling several sixes, he played three phases on the trot, by the end of which I had lost my LMG team, junior leader and a couple of riflemen. My remaining troopers were pinned in the open. Bummer. 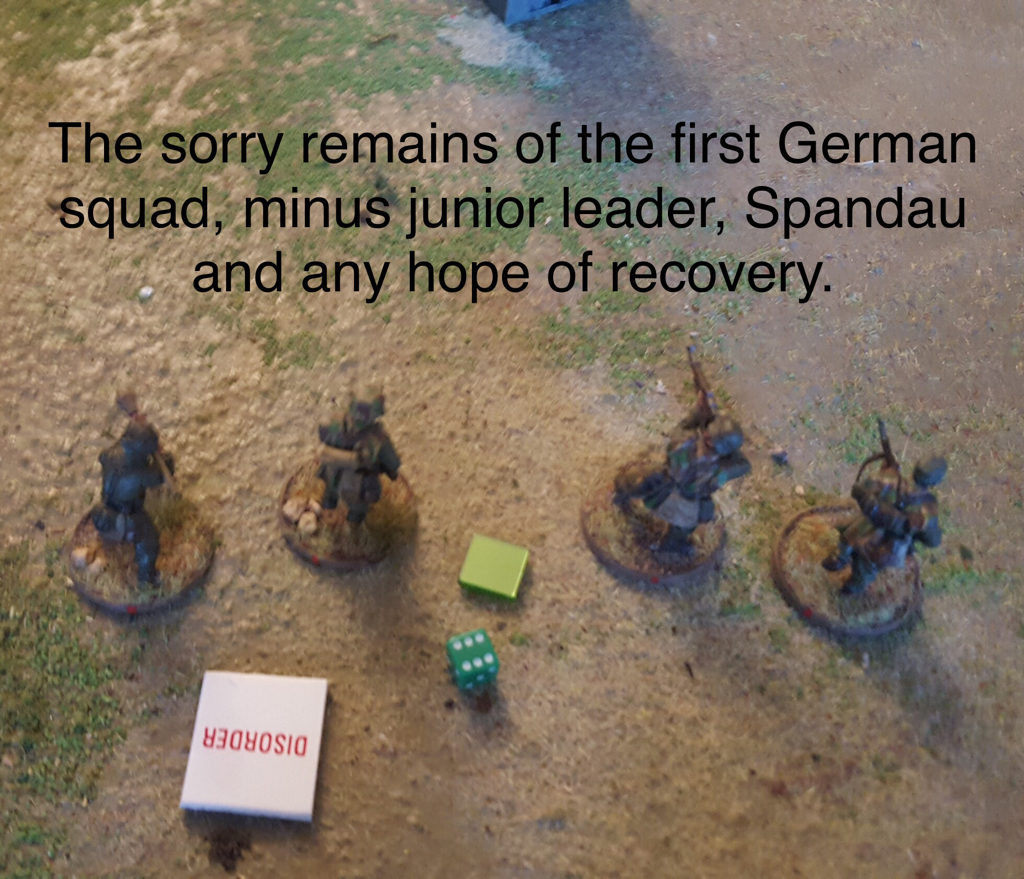 When my next turn came around I could do nothing to help the battered squad so deployed my remaining two squads and senior leader on my centre and left, close to the kubelwagen. Matt meanwhile deployed his second section beside his first on his left and his third section in the centre. I think his decision to reinforce his first section gave me a chance to recover from my stupid first move, as although he could now wipe out my first squad, I had more weapons firing at his troops in the centre than he had firing at mine. To cut a long story short, my left hand squad and senior leader reached the kubelwagen and lined a hedgerow, from which they won a duel with Matt’s third section; Matt moved his second section forward but they were pinned by my central squad; and he took his first section out of their building to put an end to my first squad and neutralise its jump off point. By game end, I had lost one squad and a jump off point, but Matt had lost two sections, two jump off points and control of the kubelwagen. I used my first and only Chain of Command die to end the turn and Matt’s force morale fell to zero. The game was exciting throughout and I only just managed to swing the win. The dice favoured Matt at the start with his series of rolled over phases but later on, I had some well above average shooting results, so (as always) the luck evened out. Spencer was an excellent tutor and umpire, advising us both on rules niceties and options. I found the rules far easier to absorb in play than they had been while reading the book. I think this is true of all rules to an extent but I do find Lardies rulebooks especially hard to navigate. As for subtlety, I am sure it will be several games before I start to get the hang of how to play properly. Having played a great deal of Bolt Action, I suppose I am bound to compare the two rules. BA is easy to learn and plays quickly. It has lots of tension and is always fun. It can however see some pretty unlikely tactics, the ranges are way too short and a lot of hardware appears on table that should be a long way away. I also hate the fact that some players create gamey army lists to get a killer - but unhistorical - army, but that isn’t the fault of the rules themselves. By contrast I think Chain of Command will take longer to master, even with the help of Spencer. But it will be worth the effort. CoC is definitely exciting to play. I really like the friction and uncertainty from the Command dice; the combat mechanics are not that complicated once you learn them and the players are faced with a wider range of tactical choices than with BA, both in what their figures can do and how they can operate. Of course, the most important factor to affect enjoyment in any game is the other player. Matt and Spencer were great company and the evening flew by. Spencer has recklessly agreed to come again. Before he does I’ve got some jump off points to build.   Moises has asked what became of my planned Bolt Action British force that I was building in 2016. I have collected pretty much everybody I need for a reinforced platoon. I like to play them as regulars, with three full ten-man sections. The MMG appears in most games along with the PIAT, although I have not so much as dented a German tank with one yet. I also tend to take one or both mortars, which rarely kill many enemy but do oblige them to change position, which is useful against a well placed team weapon. I also picked up the Warlord sniper in a gilly suit, mainly because it is such a lovely model. Also, while I like the 6 pdr, I don’t field it too often as unless I am expecting to defend against armour, it is rather too easy to ignore. I have used the Bren carrier to carry weapons teams, which adds some mobility. The Cromwell has come out from time to time but represents a big investment in the size of game we mostly play.  The current army looks like this Officer plus two men 95 (first lieutenant) Medic 23 3 x ten man infantry sections 369 (each with lmg and smg) MMG team 50 PIAT team 40 Sniper team 50 Light mortar team 35 Medium mortar team 50 QF 6pdr antitank gun 75 Bren carrier 60 Cromwell tank 205 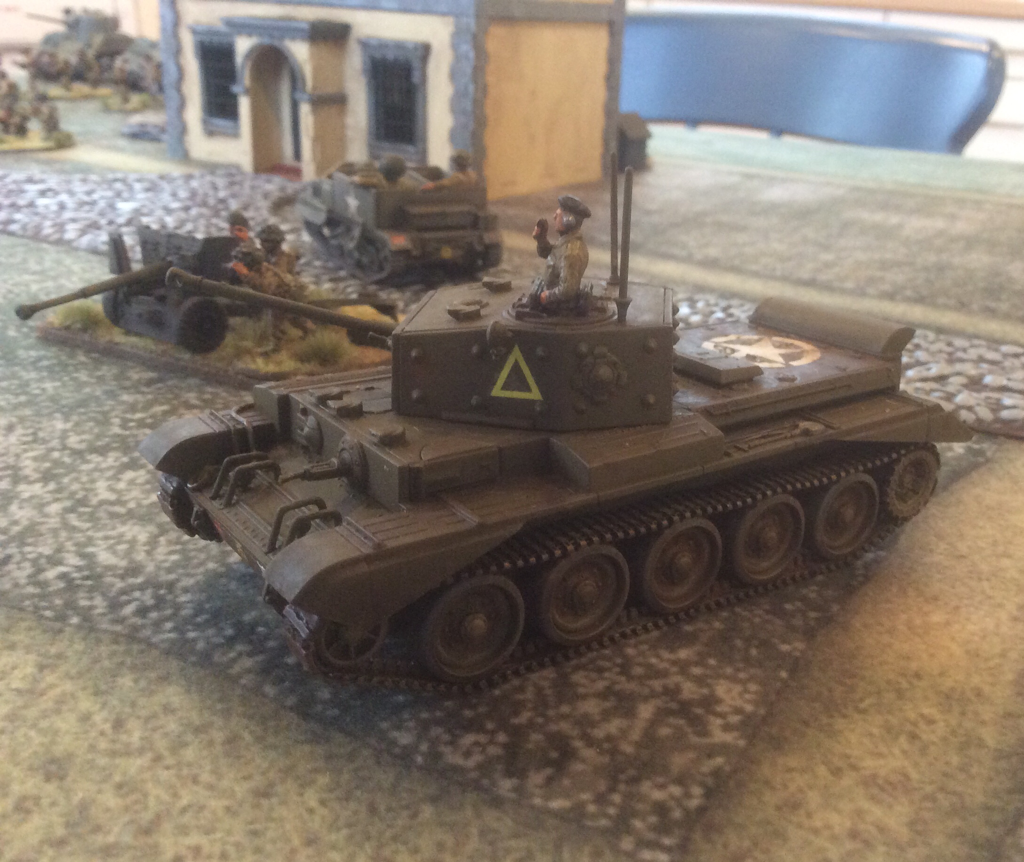 In a mad moment I bought the TankWar starter set so also have three Shermans painted as Guards Armoured Division. They have only seen action in a few Tank War games but I like to know they’re there. I don’t have ambitions to add to the army at present, except to get some new Bren teams if I find some I like by another manufacturer. I just can’t get excited about the plastic Warlord Bren teams: they are too hard to distinguish from the other plastics. I’d like some Bren teams firing prone or something similar. I have also got an M10 Achilles waiting for assembly. I don’t exactly need it but I’ve liked the Achilles since I had a Minitank model of one many years ago. I like to build both sides for a period so have a late War German force, that again is about at its limit I think. As Matt, my most frequent current opponent, runs Americans, I have tended to play the Germans more often than the Brits for some time now. But after getting these lads out of the toy cupboard, I’m thinking they need another outing soon. 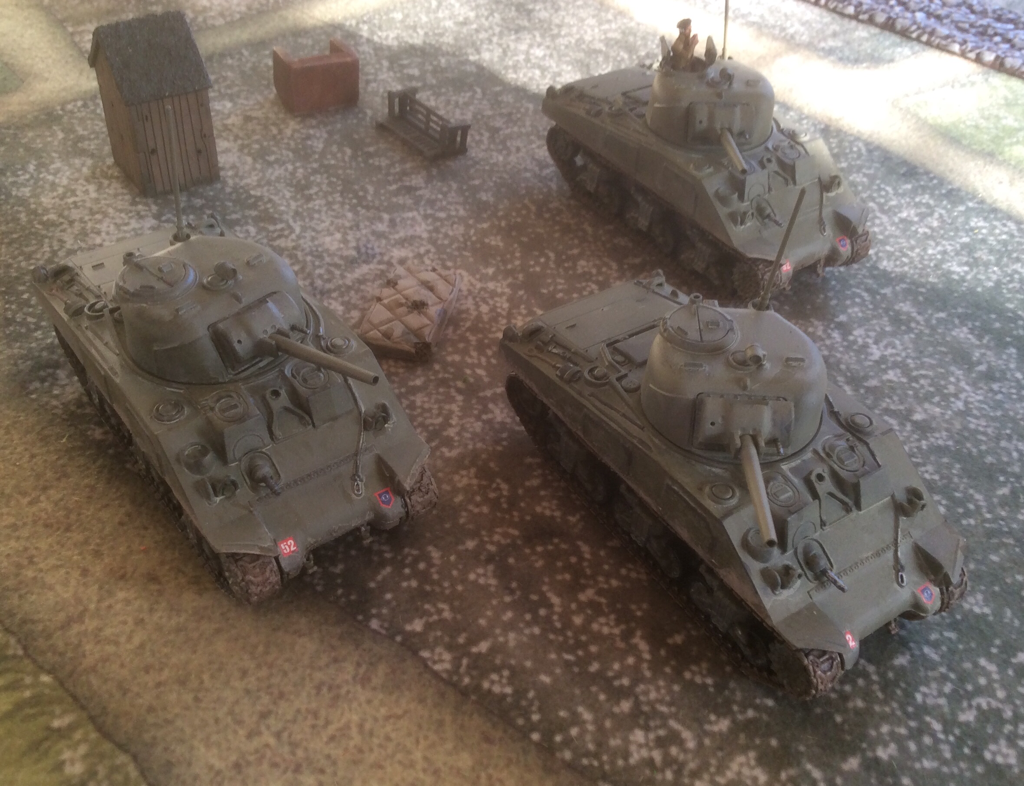 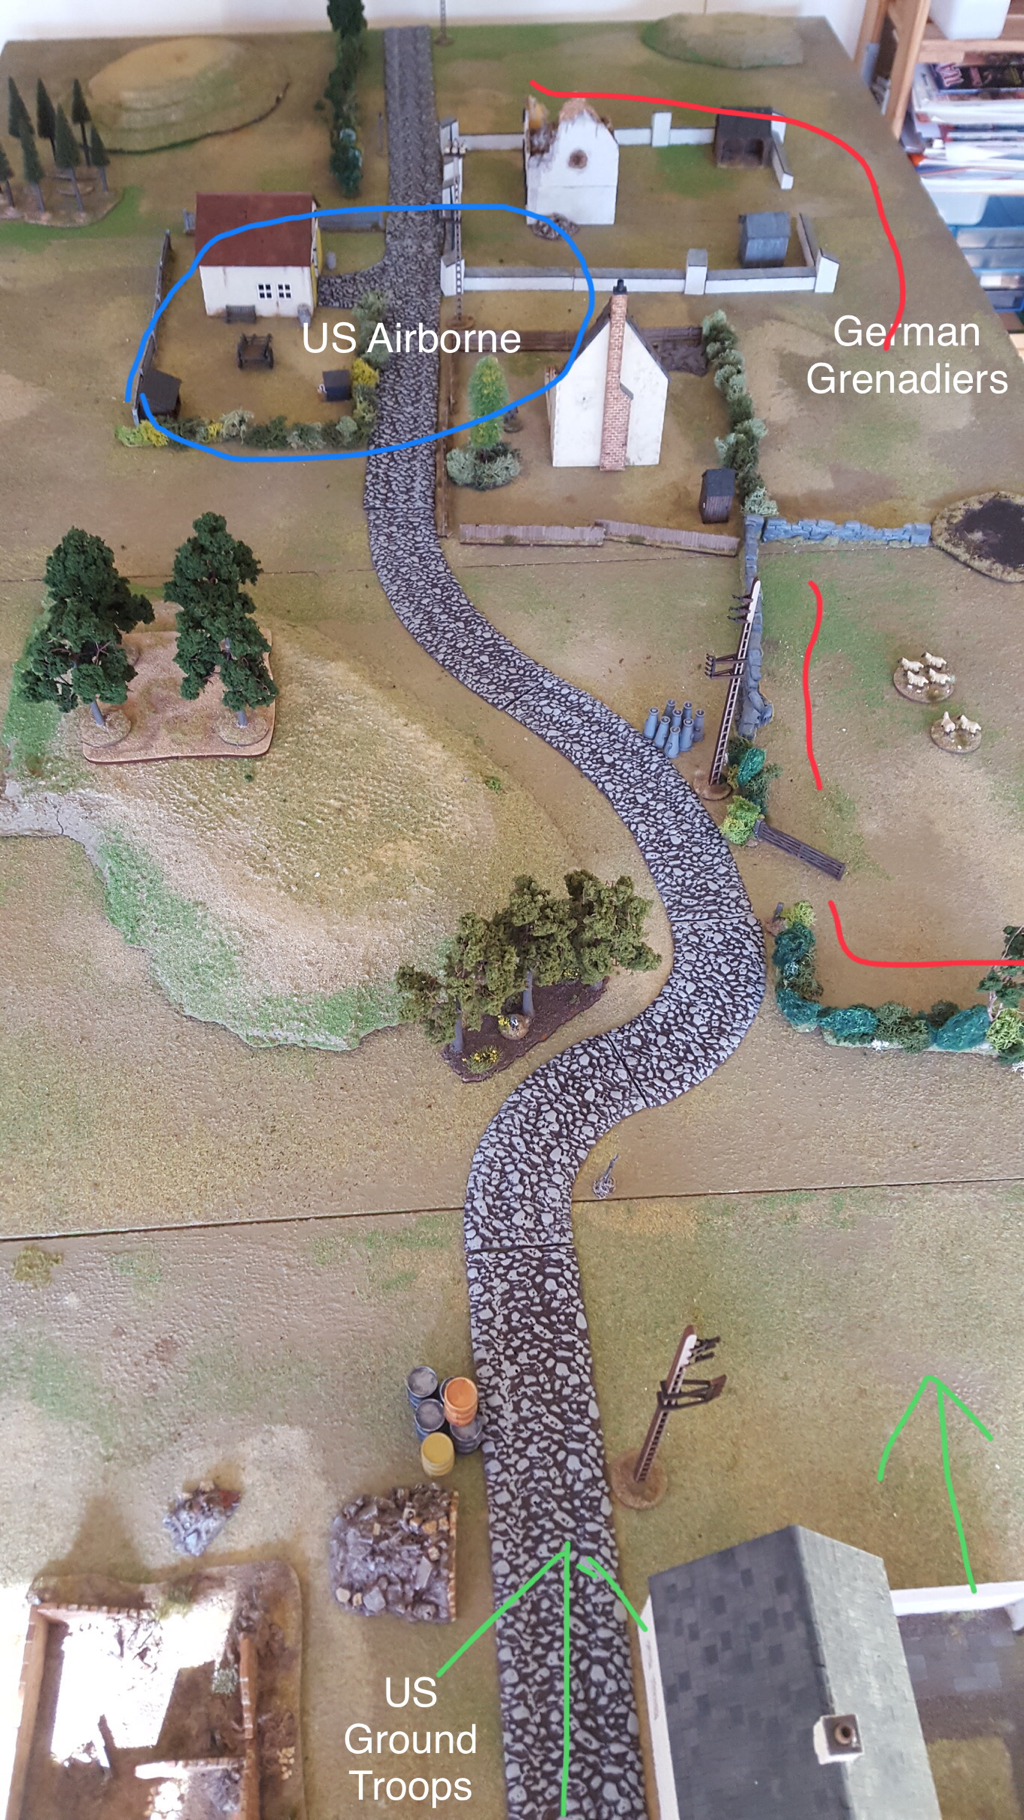 We played a three handed daytime game of Bolt Action on Saturday, to mark the first visit by Ian since he left for Asia in December. It was good to be back in BA after a run of Ancients games. Ian brought down his US paratroopers and Fallschirmjaegers and I wanted to include them in the game so I prepared a 1500 Point scenario very loosely based on Market Garden, as follows: “The 101st Division has been holding the road open to Eindhoven, the first piece of the airborne carpet over which 30th Corps plans to roll in its drive to cross the Rhine. Delayed from the start, the Armoured column is struggling to stick to its timetable. The German forces have reacted faster than the Allies expected and are pulling together an increasingly powerful defence. Place 3 objective markers along the main road, at 18, 36 and 54 inches from the Southern table edge.
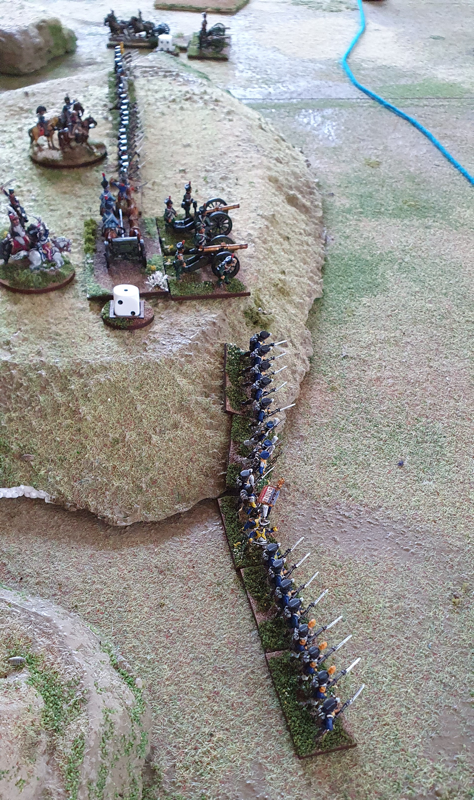
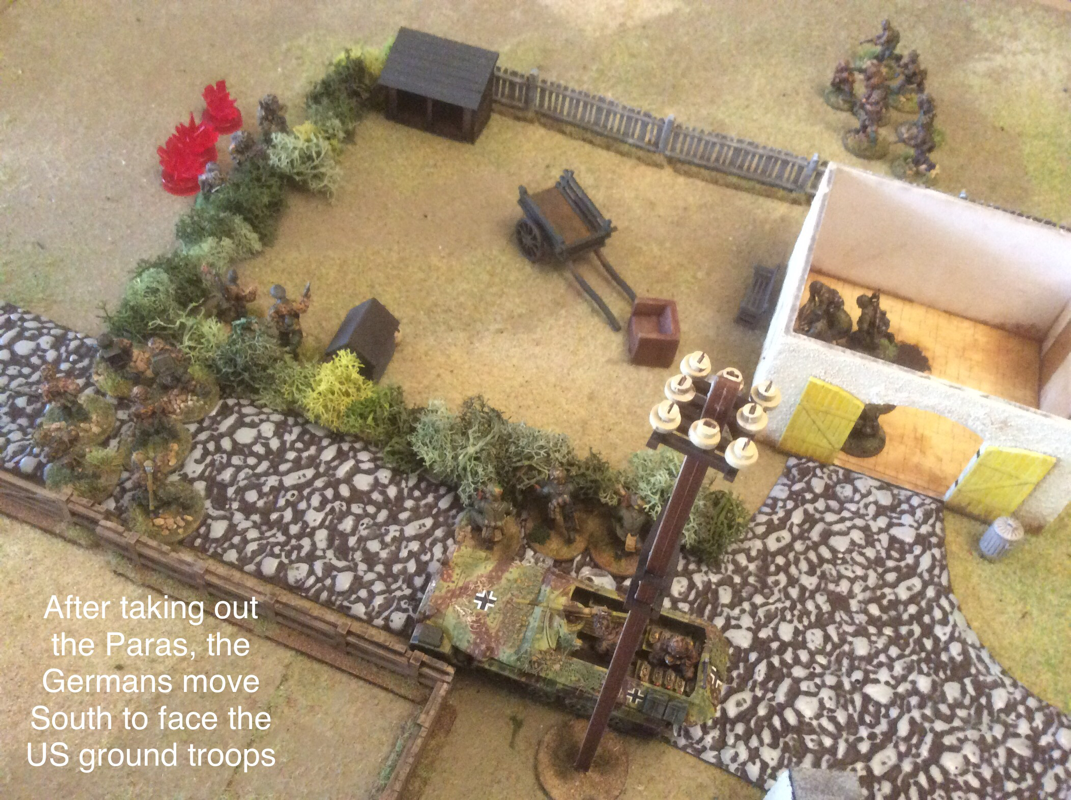
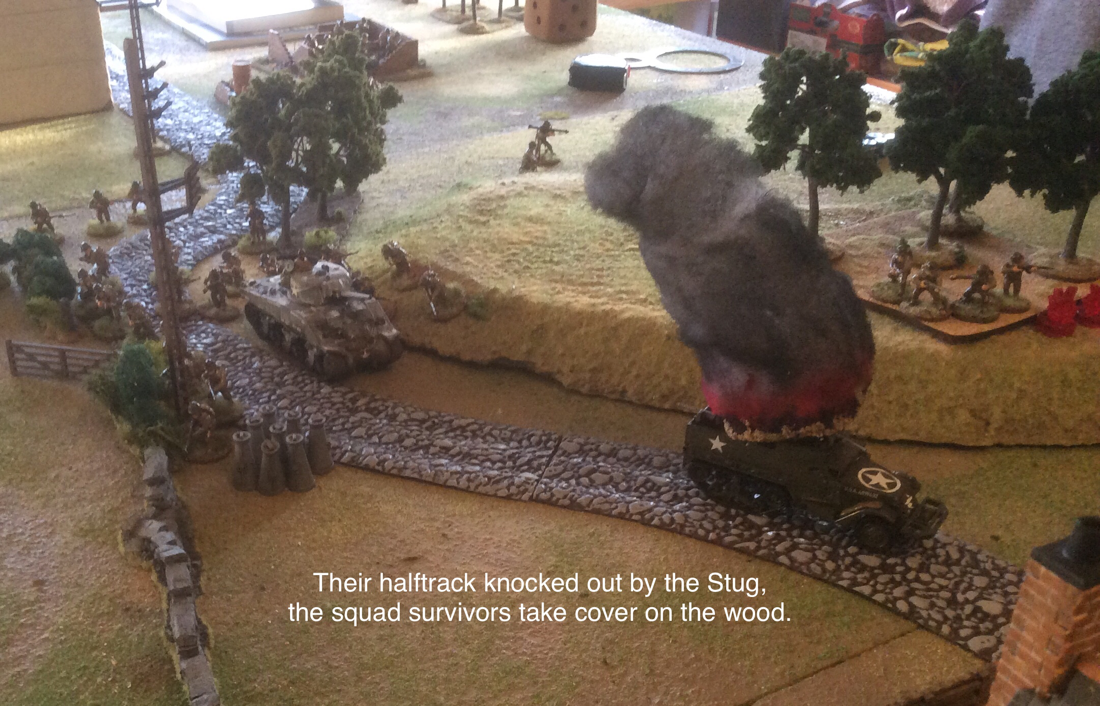
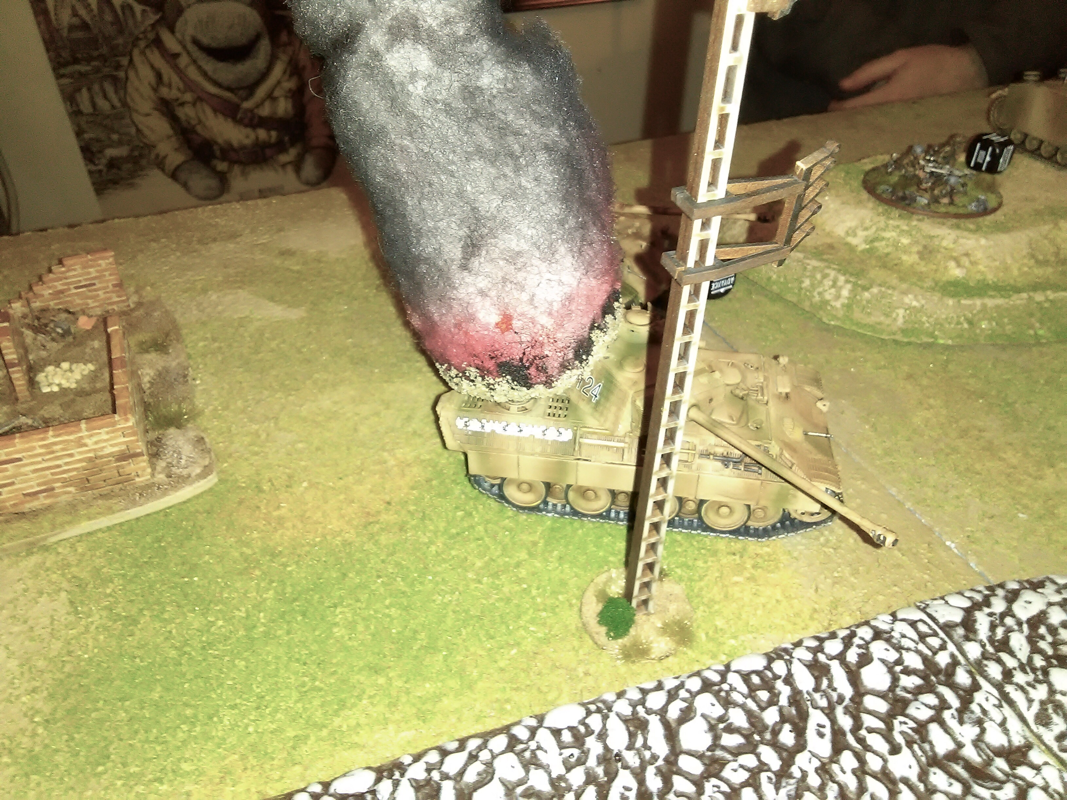
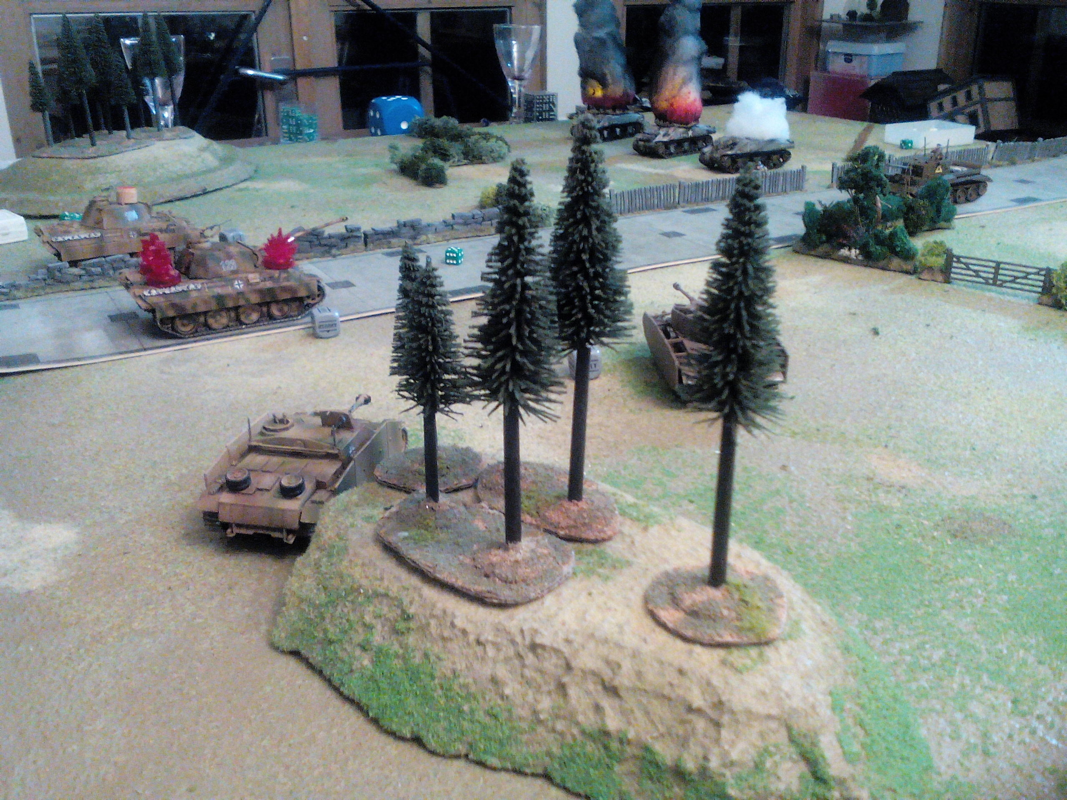
The game lasts 6 turns, with the possibility of a seventh on a roll of 4,5,6. 1 VP for each enemy unit destroyed; 2VP for each objective controlled by troops within 3”. Matt used his US troops as the relief force, with a Sherman, half track-mounted squad and an infantry platoon. I created 750 points of Heer Grenadiers for the on table Germans and a selection of Waffen SS and Fallschirmjaegers squads, a Stug and a panzer grenadier squad for the reinforcements. The objectives were represented by oil drums, milk churns and a dog kennel. The US paras set up in foxholes around the bicycle workshop and the dog kennel objective. The on table Germans all set up to the East of the road, with two squads and an MMG behind a hedge facing South and the rest facing the Paras to the West. In the first stage of the game, Matt’s relief force attacked the German hedge line while the rear area Germans, reinforced by two arriving squads, attacked the US Paras. In the second stage, the relief force destroyed the hedgerow Germans and advanced on the second German line, while the rear area Germans tightened their grip on the Paras. In stage three, the relief force was stalled by the destruction of an M3 halftrack, and held up long enough for the US Paras to be badly mauled and dislodged from the dog kennel objective. The game ran to a seventh turn and ended with the Allies holding 2 objectives for 4VPs, plus 3VPs for German units destroyed. The Germans meanwhile held one 2VP objective and destroyed 6 US units. So a German victory at 10 VPs to 7. The game was closer fought than the final score suggests. The US Assault on the first German line was quick and effective, destroying a 10 man squad and an MMG in short order. The second German line held well however, and was helped by the arrival of the Stug which first destroyed the halftrack then placed itself in ambush round the curve of a hill, threatening to enfilade a further US advance northwards. As it happened, when the Sherman did move into view the Stug only managed a ‘crew stunned’, but this bought enough time for the Germans to wipe out the US Paras. 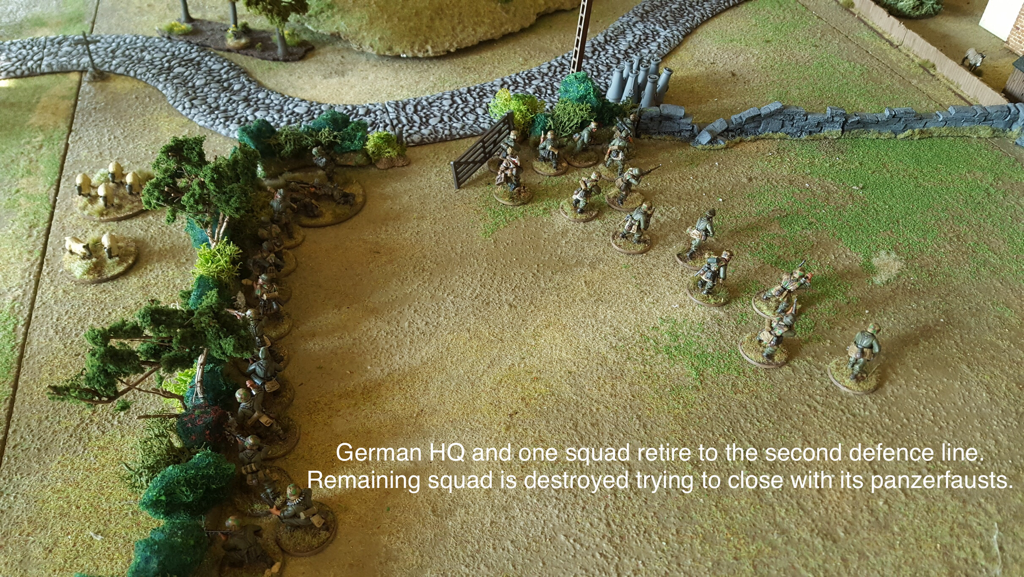 Anybody else know the song Roads to Moscow by Al Stewart, circa 1974? A rare rock song about WWII that isn't thrash metal. Every time a German tank dies in a game, I think of the line:" Two broken Tigers on fire in the night." I was humming it last night. Ian and I played a game of Bolt Action Tank War. We had 2,200 points each on an 8’ x 4’ table. This was the biggest game we have played so far, with every tank we could get our hands on. Ian’ Germans had 2 Panthers, a Panzer IV, a Stug and a Puma, plus 520 points of Fallschirmjagers. My British had a Cromwell, 6 Shermans and 500 points of infantry. All tanks on both sides and the British infantry were regular, and Ian's Fallschirmjagers were veteran. I began with 14 dice and Ian with 11. The table was quite busy to ensure we didn't have too many uninterrupted lines of sight. It was divided up the middle by a cobbled road, on one side of which were the outskirts of a village and on the other, more open farmland. We rolled four objectives which we placed in a rough line, lengthwise down the middle of the table. Three of them were in the village, which was on Ian's left and my right.  The view from the German centre. On turn 1, Ian placed a lone Puma on his extreme left; his Panzer IV in support of most of his infantry in the centre, then his remaining armour, along with a single infantry squad and an MMG, in the fields on his right. I sent all my infantry into the village in the centre, one Sherman into the open ground on the left and the rest of my armour behind the village and on my right. I struck lucky early on, knocking out the Panzer IV and a Panther in turn 2. My dice rolling balanced out later when my armour repeatedly failed to damage Ian's vehicles, but it was a great advantage to roll so many high numbers in the opening stages. The game split into three combats: on my left, the Remaining Panther and Stug duelled with 4 Shermans (quickly reduced to 3); in the centre, our infantry fought for control of two objectives in the village; and on my right, the Cromwell and 1 Sherman played peekaboo with the Puma. Early luck tipped the scales in my favour and by game’s end Ian had lost every tank but his Stug while I had lost just the one Sherman. With two objectives apiece at the end of turn 6 we counted points and I got a ‘clear victory’. I think this was my luckiest wargame for a very long time. Did skill come into it? A bit, perhaps. My tanks used cover more than Ian, who confessed he had put his faith in the superior armour of his Panzers rather than tuck them behind walls. In truth, an awful lot of my fire did bounce off harmlessly but if you take enough shots even a 75 will get through eventually. I also think it helped to keep my infantry in mutual supporting distance. But if truth be told, I won because I had a big fat slice of improbable luck. Bless him, Ian stayed cheerful until the last 6 was rolled. He used his Puma to tie down three tanks for much of the game: I almost regretted knocking it out on turn 6. Almost. And at least his Stug shrugged off every single attempt to pierce its armour. 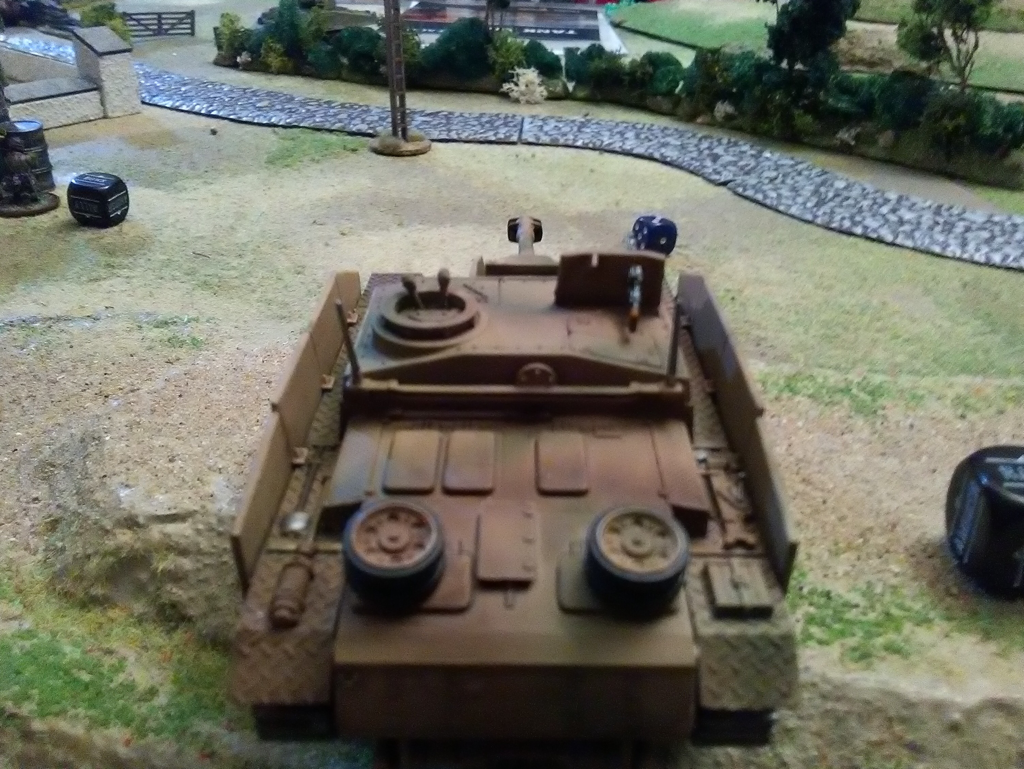 Last German standing We had another 500 point Bolt Action game last night. Matt and his GIs attacked Ian's Fallschirmjägers, tasked with capturing two objectives (a milk churn and a telegraph pole). Ian had three small infantry squads, an MMG, flamethrower, sniper and 2nd lieutenant. He placed two squads and his officer behind bocage on his right; the third squad, MMG and flames in ruins in his centre-left and his sniper in more ruins in front of his centre. 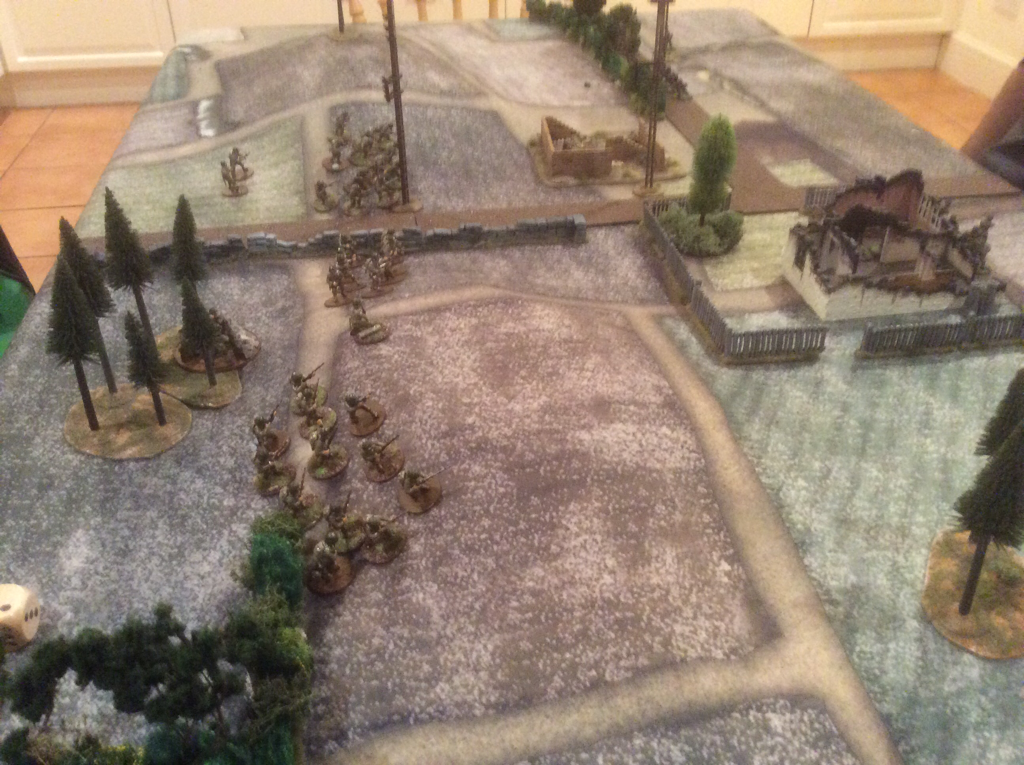 Matt led three strong squads, a medium mortar and a 2nd lieutenant. His preliminary bombardment inflicted a few pins but not much else, besides killing the sniper’s spotter. He then brought his force in close together, leaving Ian’s right uncovered and pointing two squads at Ian’s left. The game played out interestingly. Matt closed to close quarters as fast as he could, incurring some risks in the process. His tactics nearly paid off handsomely. The end result saw Matt in firm control of the objective on Ian's left but Ian was hanging on to the one on his right. Matt had got his forces at right angles to, and behind Ian’s cover (a stretch of bocage). He looked in control and had the game lasted another turn, Ian would have been hard put to hang on to the second objective. As it was, the game ended in a draw on turn 6. There were some tense moments. True to previous form, Matt scored an early mortar hit on Ian's MMG, reducing it to paste in two rounds of firing. His mortar spotter knows his job. Make that ‘knew’ because Ian's sniper took him out soon afterwards. Matt fudged a move with one squad, but when Ian's flamethrower tried to capitalise on the mistake, it missed. We discussed after the game whether a veteran force can perform well at 500 points since the numbers are so few. We concluded that it can, but that at this game size, one chance event can have a bigger effect on the outcome than in a game of 1000 points or more. So the running total of BA games played looks as follows: Matt: played 4. Won 2. Lost 1. Drew 1. 5 points Ian: played 5. Lost 2, Drew 3. 3 points Tim: played 5. Won 2, Lost 1, Drew 2. 6 points. Before Matt joined us, Ian introduced me to 8th edition 40K. I had lost interest when 7th edition came out, mainly because the small forces we had built up with previous editions stood no chance against monster models like Imperial Knights, Stompas or whatever. It was great fun. Ian bundled an Ork mob, some stormboyz and a warboss down the road into my Cadian squads, sentinel, Company commander and commissar. I really liked the streamlined rules. Age of Sigmar turned me right off, partly because of the rubbish back story and some silly new models (a dwarf riding a dragon? Come off it! They will always be race enemies in my head). I loved the Old World and was sorry GW abandoned it. But 40K 8th edition seems to have improved play without ruining the universe. I will play this again.
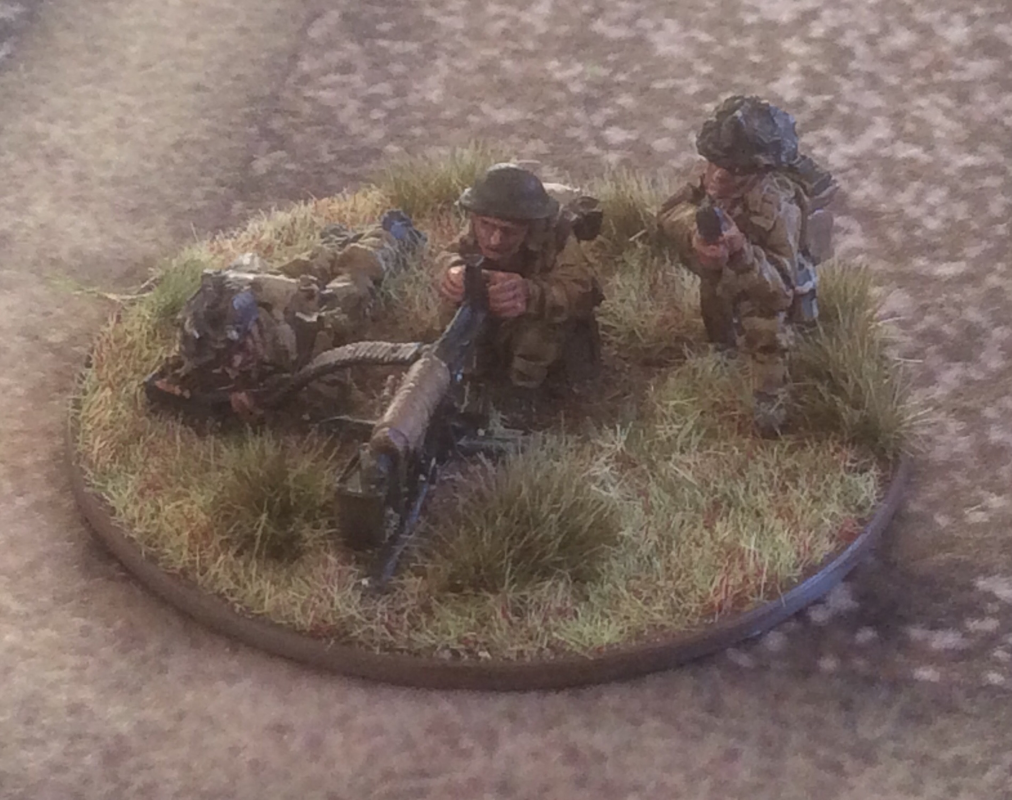
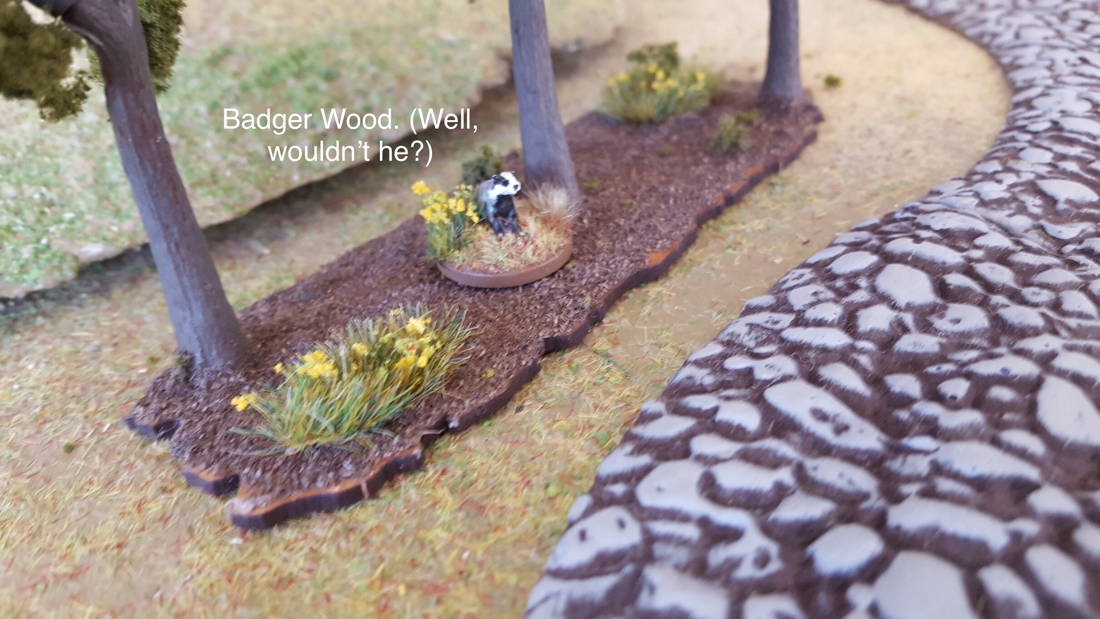
 On Wednesday we played another two games of Bolt Action. The first was the latest in our three-way escalation campaign. In this, Matt's Normandy US assaulted my German grenadiers. We played 750 points a side. Matt had a discount if he took armour and so deployed a Sherman alongside two regular infantry squads, a veteran engineer squad, a medium mortar, a medic and a First lieutenant. I brought three squads, an MMG, a medium mortar, officer and Sdkfz 251/10, all regular. Matt would score vps for destroying my units, having units in my 12" deployment zone and exiting units off my table edge. I would just score vps for destroying units. I could start hidden and place one squad in fox holes. Matt rolled pretty poor dice for preliminary bombardment, except against my very last unit, a half track with anti tank gun. He promptly converted his 6 to a knock out so I was down one half track before the game even started. This was my only ranged anti tank weapon although fortunately I had allocated a panzerfaust to each infantry section.  I set up my three squads from left to right across the table, the left two on wooded high ground and the third in fox holes on the flat. My MMG sat behind a stone wall in the centre, facing down the road against the advancing Americans. Matt brought most of his force on table on his right, throwing his Sherman down the road and gathering his infantry sections in the grounds of the house. His Sherman and mortar were the most active in the early turns, while his infantry crept closer. Matt also brought his engineers across from his left, concentrating his whole force in the right half of the table. With no enemy in front of them and no anti tank capability besides the panzerfausts, I sent first my right hand squad, then the centre squad forward to close with the US left and try a bit of tank hunting. Both our mortars inflicted some tidy casualties from mid game having ranged in, but Matt's hits were more effective as they reduced my left hand squad to nothing, just as his right wing assaulted my left in the closing two turns. Matt mounted a concerted attack on my left, with an infantry squad and his Sherman entering my deployment zone. I had the satisfaction of knocking out the Sherman with my centre squad's panzerfaust but when the game ended at the end of turn 6, Matt had a 3 point advantage so won the day. It was a really close and enjoyable game. Our campaign results so far are: Matt: played 2. Won 2. 4 points Ian: played 3. Lost 2, drew 1. 1 point Tim: played 3. Won 1, lost 1, Drew 1. 3 points. So Matt is the man to beat, out in front with a game in hand. We then played a game of Tank War. Ian and Matt led two panthers, a Panzer 4 and a STUg to an easy victory against my three Shermans, Cromwell, 6pdr anti tank gun and infantry in a half track. Aww crap. With no need or incentive to close the range, the Germans sat on their baseline and took out my units one by one as I tried to get near enough to inflict damage. I did manage to jam a Panther's turret and my fire dice could perhaps have rolled higher, but I was basically doomed! At least it was over quickly.... still, the table looked good, and as Matt pointed out, it was probably an accurate outcome. I have three more Shermans on the paint bench and maybe next time, we can get enough Allied tanks into killing range before the German cats take them all out. No, I'm not bitter. Well, maybe a little... 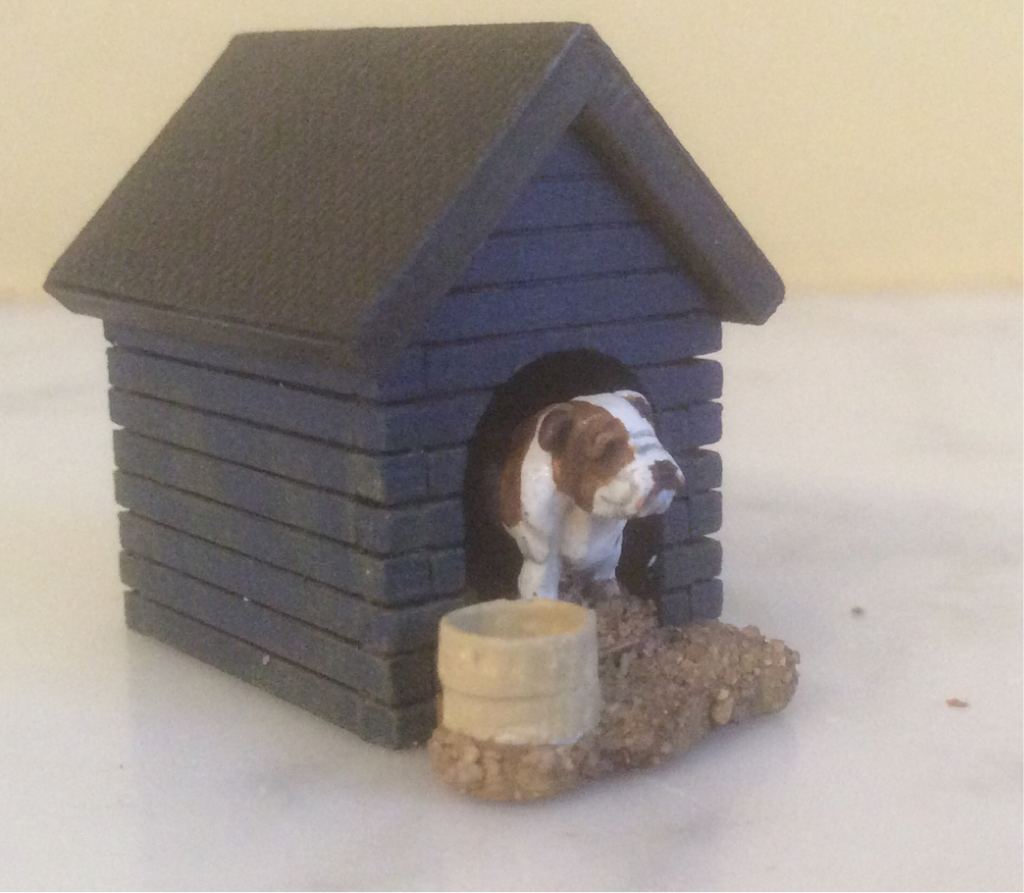 I've just finished this kennel and bulldog from Warbases, to add to our BA table. Fun to paint. |
Archives
November 2023
Categories
All
|


 RSS Feed