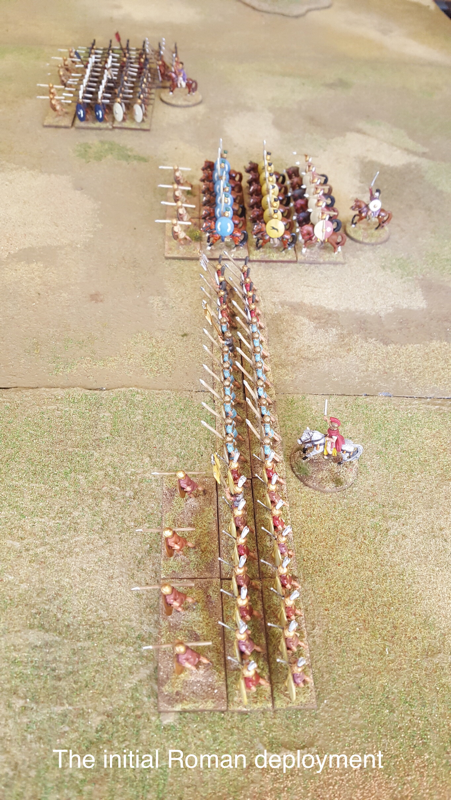
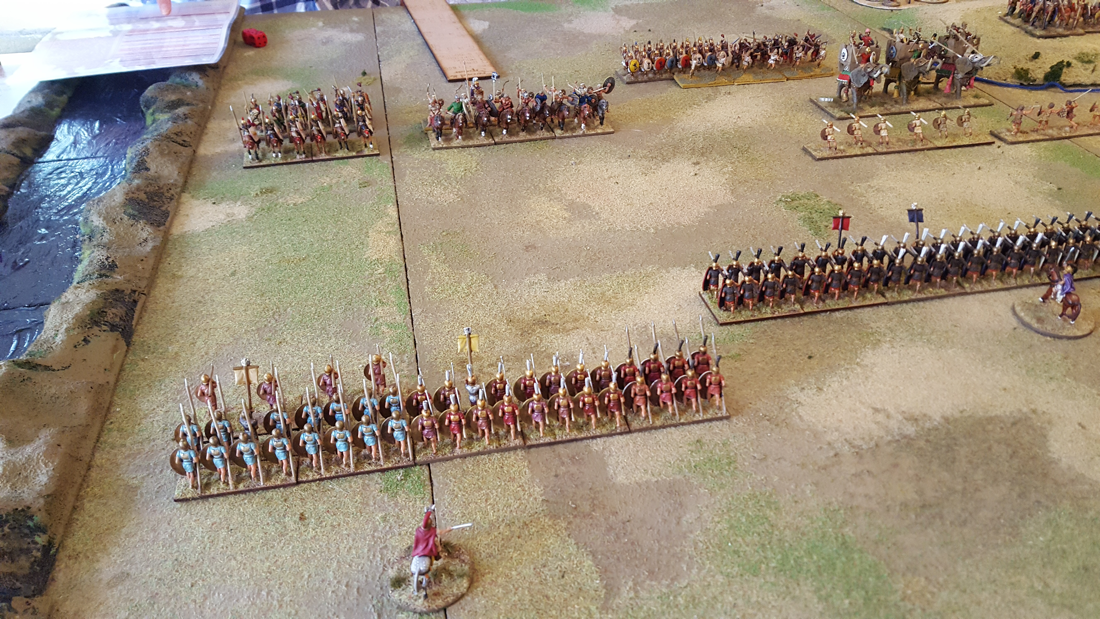
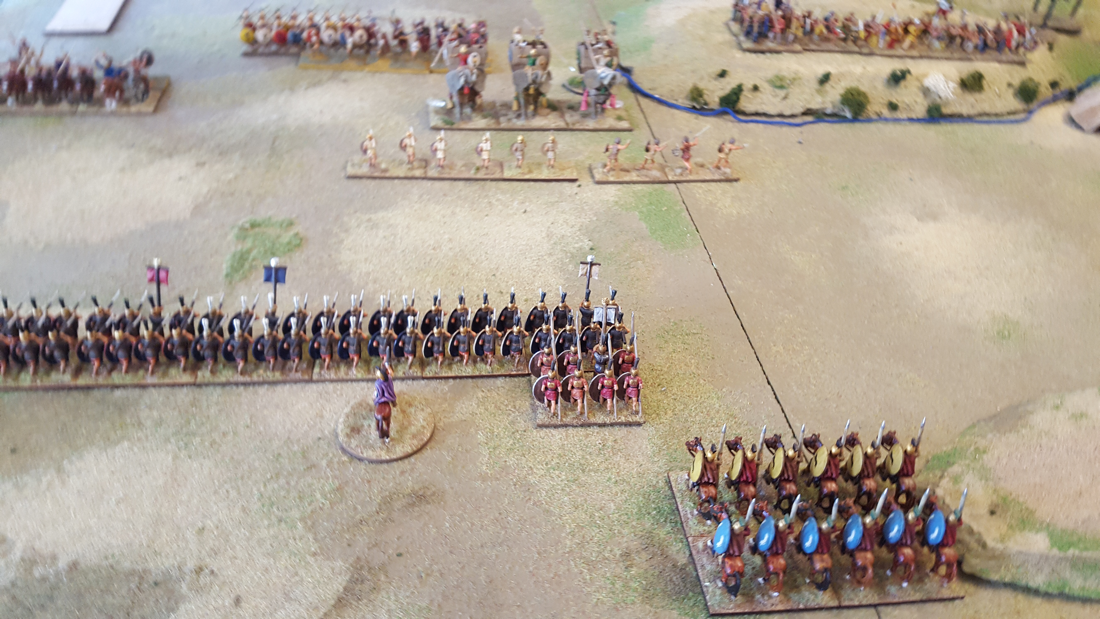
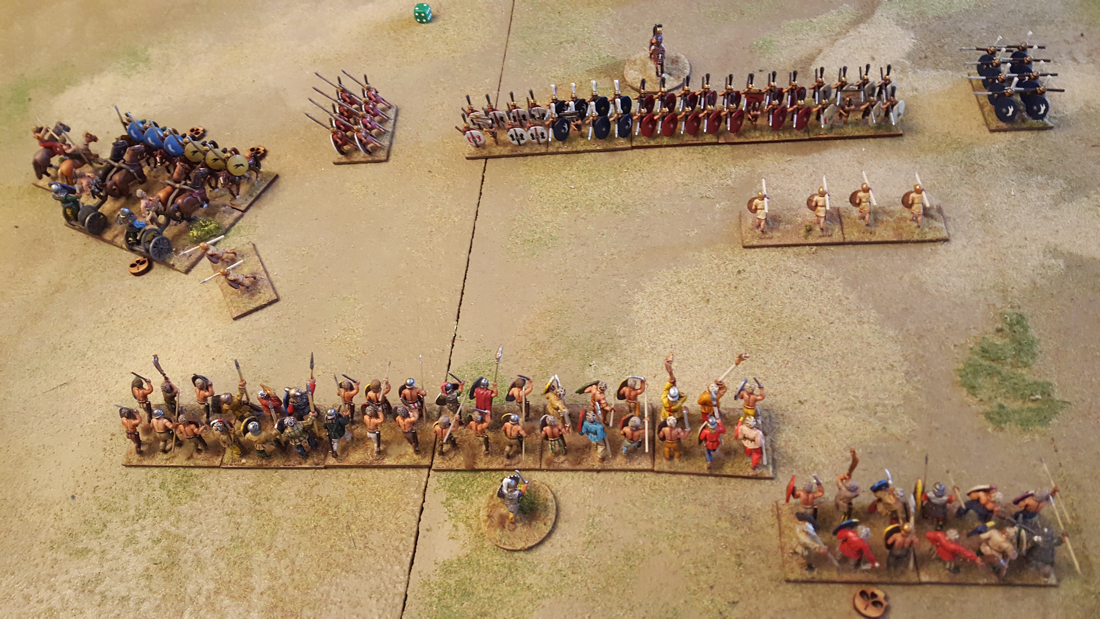
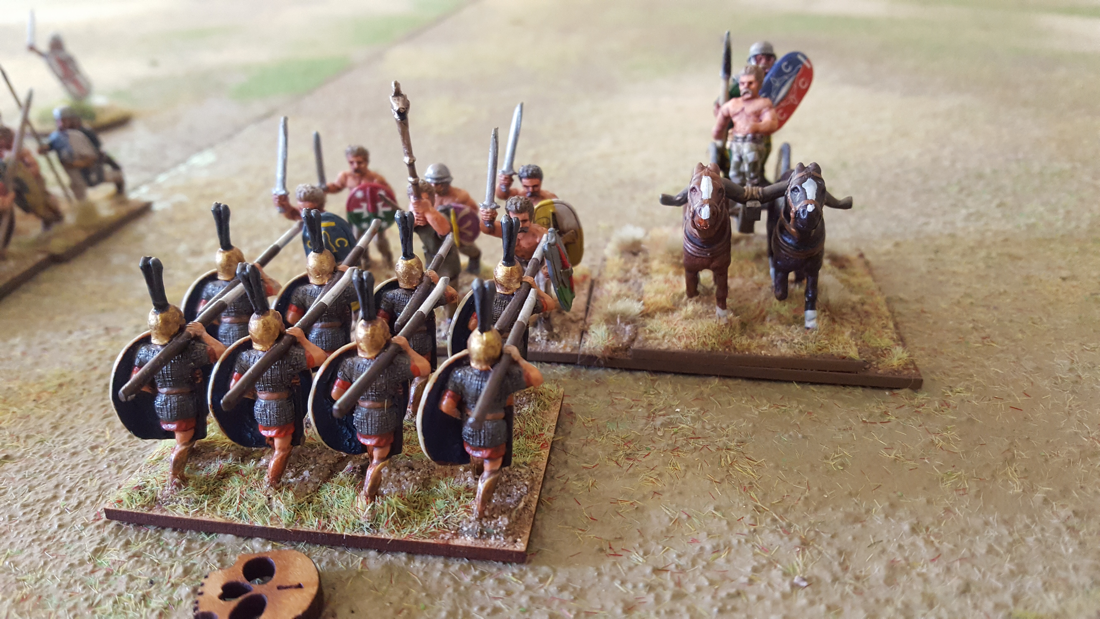
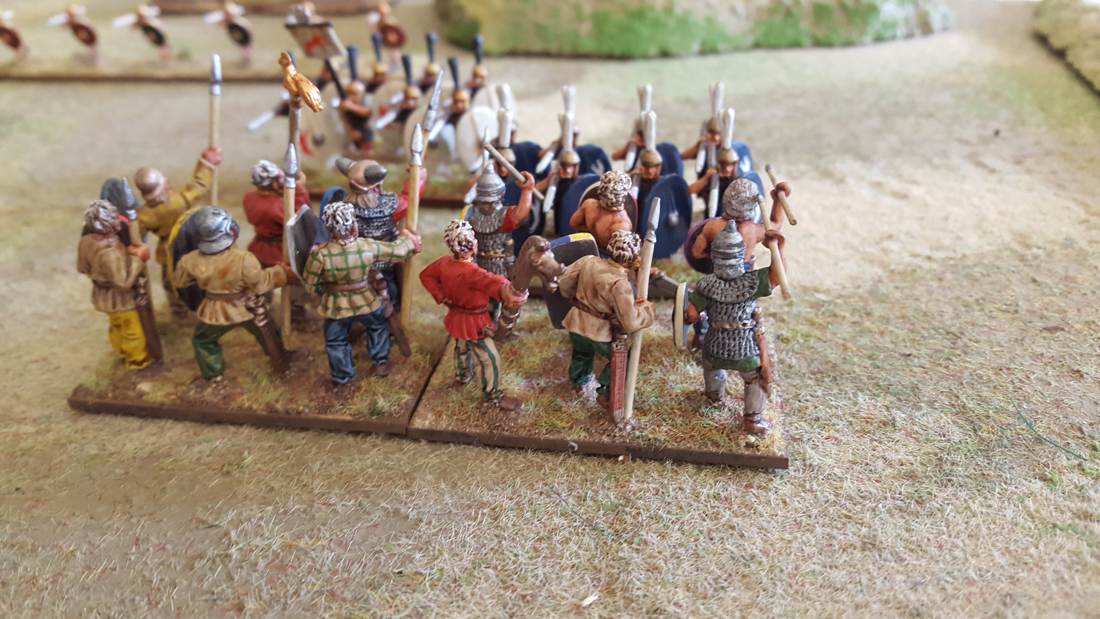
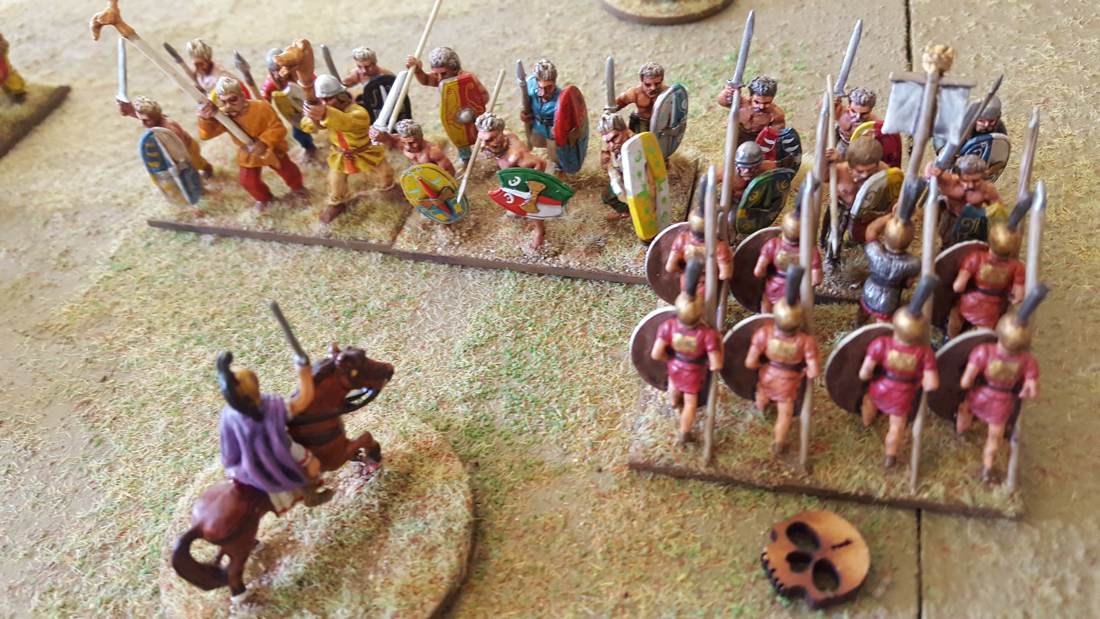
SummaryThese are a great introduction to Ancients wargaming, especially if you want a fun game with not too many figures, They also offer a lot to the more experienced Ancients player: the mechanics are solid and you can increase army size for some truly satisfying big battles. Last week Harry, Dan and I played a game of Wars of the Republic by Eric Farrington, published by Osprey in their ‘blue’ series. Harry had picked them up after reading an encouraging review in Wargames Illustrated, along with his first instalment of 28mm figures for a Republican Roman Legion. While waiting for his 21st century miniatures to be painted, we used my 25mm Minifigs Romans from the 1970s. The rules are basing agnostic as all the factors, including losses, are dealt with at the unit level. The author describes using ten-figure units on individual bases but the photos throughout the rulebook are of some lovely Aventine Miniatures, mostly based in two ranks of four. My ancients are on 60mm wide bases, so we used two of these bases per unit, giving 8, 12 or 16 infantry and 6 or 8 cavalry figures depending on type. The only requirement is to be able to show when certain units are out of their optimal fighting formation, which we did by putting the bases out of kilter. The mechanics are mostly tried and tested, with shooting and combat resolved by throwing a number of dice, succeeding on 4s and above. Declining fighting power is represented by loss of Courage points. Morale is handled through discipline tests which, if failed, can cause a unit to waver, which worsens its fighting power and puts it out of formation, - particularly bad news for legionaries and phalangites. The stand-out feature of the rules for me is Commander’s Gaze, a pool of points that can be spent each turn to perform special actions, which include the adoption of optimal formations (e.g. legion and phalanx) and, perhaps controversially, the throwing of pila. How the game wentFor our first game, Harry gave us the battle of the Bagrades River from the first Punic War. Dan took the Romans while I had the Carthaginians, under the Spartan Xanthippus. Dan had a river at his back but the terrain was otherwise featureless, save a bit of undulating ground. Both armies conformed to the army list in the rulebook, which gave quite small armies: Dan had 8 units and I had 7. I’ll come back to army size later. Dan put his Cavalry on his left and his main infantry in a single line with velites in front. I had Punic cavalry on the right, Numidians on the left, elephants in the centre and the main infantry behind the elephants. The game moved smoothly and the result was certainly emphatic. After an initial, inconclusive clash between our main cavalry on one flank and some mostly ineffective javelin throwing by my Numidians on the other, attention focussed on the centre, where my elephants clashed with Dan’s velites, drawing both of our infantry lines into the fight thanks to the support rules. As this was a learning exercise, we rewound the action a couple of times, once we realised how the rules impact on play. For example, we learned that it isn’t sensible to support light infantry with heavy, since the heavies only contribute 2 dice to the outcome and are at risk of immediate destruction: when the elephants destroyed the velites facing them, this would have also removed the supporting hastati. We agreed to rerun the combat without the support of the hastati, - and to remember that it is far preferable to support heavies with lights! Our game ended with a Carthaginian victory, thanks above all to the elephants, who punched their way through the Roman centre with barely a scratch. First impressions: a lot of positives…There is a lot to like about Wars of the Republic. I especially enjoy the Commander’s Gaze system, which gives the players interesting choices and keeps both involved throughout the turn. The factors used to describe each troop type work together well and allow the game to reflect a broad range of troop types. The combat mechanism feels right for an ancient battle. A front line heavy infantry body is more likely to crumble under pressure than to break suddenly, so frontal clashes are liable to drag on unless/until one side’s flanks or rear are threatened. Then, once things start to go wrong, collapse can spread quite rapidly. All good stuff and great fun. 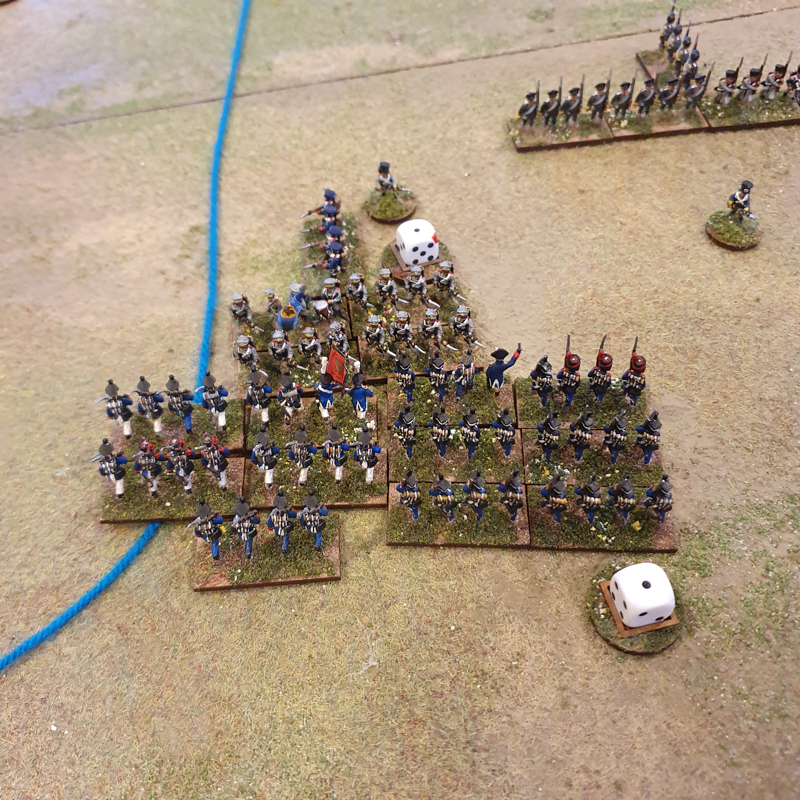 …and a few reservations. Can we fix it?The rules could be better laid out but that comes as standard with Osprey rules. For the price tag, I'll accept that. But I do have two main issues. First, the army lists. I have seen a few criticisms of these rules in hobby chatrooms and media for using too few figures. The author wants players to be able to fight ancient battles without having to collect masses of figures. I absolutely get the appeal of recreating biggish battles with small armies, both to those with less space and to attract people over from skirmish games like ‘Infamy! Infamy!’ or ‘SPQR’. It is certainly possible to have a fun game with 7 or 8 units in an army. However, it strikes me that a consequence of keeping army size small is that some support troop types take on disproportionate significance. For example, my one unit of slingers had a far bigger effect on the game than they would have had in history. Look at the armies in the the scenarios offered in the rulebook: they are far too small to give a convincing impression of history! My second reservation with the rules as written is with some of the unit statistics. Some units are over-, and some under-powered. Had we not made an in-game adjustment of the armour of Roman Equites, they would have been wiped out by the first hail of slingshots from my Balearic islanders. Also, I love my elephants but even I felt guilty that they were basically unstoppable, with no downsides to their use. Yes we can!Both the cramped army lists and occasional wonky unit stats can easily be fixed to satisfy self-important Ancients players like me. If unit minima and maxima in the army lists were adapted and recommended army sizes were increased, support troops could become a smaller proportion of the total and the emphasis would focus more properly on the troop types that really influenced the outcome of a battle. And unit stats can be fine-tuned by changing a factor here and there, without in any way breaking the game’s basic mechanics.
Why bother when so many other Ancient rules sets are available? Because these rules work very well as a game and are fun to play. In conclusion, I think they could become an ideal entry point into Ancients gaming.
2 Comments
 A bit of August LardI’ve always liked the look of rules by the Two Fat Lardies but until recently I’d only played Chain of Command, What a Tanker and Pickett’s Charge (which while excellent isn’t exactly a full Lard experience). Lately I have started visiting Staines Wargames Club on a Friday evening, where Lard games are popular. So in the space of a fortnight I had my first taste of Infamy! Infamy! and of Sharp Practice. Both games were great fun. Arresting the Chief’s sonIn my first game of Infamy! I was required to take my Roman patrol to a Gaulish village to arrest the chief’s son for unspecified anti-Roman activities. The men of the village were out hunting at the time my force arrived. Chris had set up an atmospheric village with huts, vegetable patches, sundry rubbish and a palisade wall, surrounded on three sides by forest. I had to check each hut for the presence of the chief’s son, as quickly as possible because Ian’s hunting party was due back at any moment. The patrol found the suspect in the hut furthest from the village entrance, protected by a group of elite Gallic warriors. Luckily the search party were veteran legionaries and after a tough fight, the chief’s son was in custody. Meanwhile the hunting party had started to arrive. Fortunately for the Romans, no Gauls arrived between the patrol and its line of retreat. The patrol started to retire from the village, pressed by a growing band of angry Gauls. Had the chits been drawn differently, the captive would have been freed but I was fortunate to get enough distance between the patrol and its pursuers that we concluded the arrest had been carried out successfully. This was a tense and engaging game which really benefited from the storyline. Alas, I was too busy searching huts to take photos but the pretty table and lovely figures were a big contributory factor. Crossing the NiagaraThe following week Chris hosted a game of Sharp Practice, set in the War of 1812. Paul commanded his own British force while I had Chris’ Americans. The scenario was Crossing the Niagara from the War of 1812 Sharp Practice supplement, which involved a US force landing on the Canadian bank against British/Canadian opposition. Again the table was very fine, with some particularly lovely buildings (and this time I have the photos to prove it).  The US forces landed by boat in two waves, One group of British regulars were on the scene at the start while Canadian militia and an artillery piece arrived during the game to reinforce them. The challenge for both sides was to get their troops organised and firing before the opposition managed it. In our game, my US troops were able to form a firing line first and forced the forward-most British unit to retire. The US force maintained this edge for the rest of the game but did not dislodge the British entirely from its positions at the end of the table. Nevertheless the umpire concluded that the US beachhead was secure and so awarded the US a winning draw. I come late to Sharp Practice and there is nothing original I can add to the reviews already out there. I will say that I enjoyed it very much. The movement and firing mechanisms couldn’t be more straightforward. I love the random sequence of play, which gives suspense to every chit draw. I particularly like the rule that made it difficult to stop my militia from blazing away once they started firing. These rules are great for narrative play and Chris managed the story very well. On the strength of these games I have bought a pdf of Sharp Practice and some movement trays to use with my 15mm Napoleonics. I have a lot of individually based skirmishers on 20mm round bases and just need to add more command figures. I did briefly consider a 28mm contingent but my investment in 15mm is too big, both in figures and scenery. I have a lot of surplus skirmishers since changing rules from Lasalle to Lasalle 2. Plus, I should be ready to game with them months earlier than if I started on 28s. Being an impatient Wargamer, that is a big advantage!   Over the Easter weekend I was able to play two socially distanced wargames with my son Nick, using the To the Strongest rules (TtS) by Simon Miller. We play TtS with 25mm figures on a 6” grid. The figures are a mix of ages and manufacturers, some of them dating back to 1981 when, aged 21, I started collecting Classical Greeks by Minifigs and by the long-defunct Rospaks. I have added to the collection over the years, with both modern sculpts by First Corps and Newline Designs and older models picked up through eBay or gifted by a friend who has downsized to 15s. I now have Greeks, Macedonians, Gauls, Iberians, Carthaginians and Republican Romans. The Romans are an entire army of very early Minifigs from the collection of a gamer who had passed away. I felt honoured to re-home them. Their spears are like telegraph poles and sculpting definition can be fuzzy but they have great character. And unlike so many ‘heroic’ scale figures, their proportions are realistic. To my eye, too many 28s today look like Space Marines in togas. But I digress! 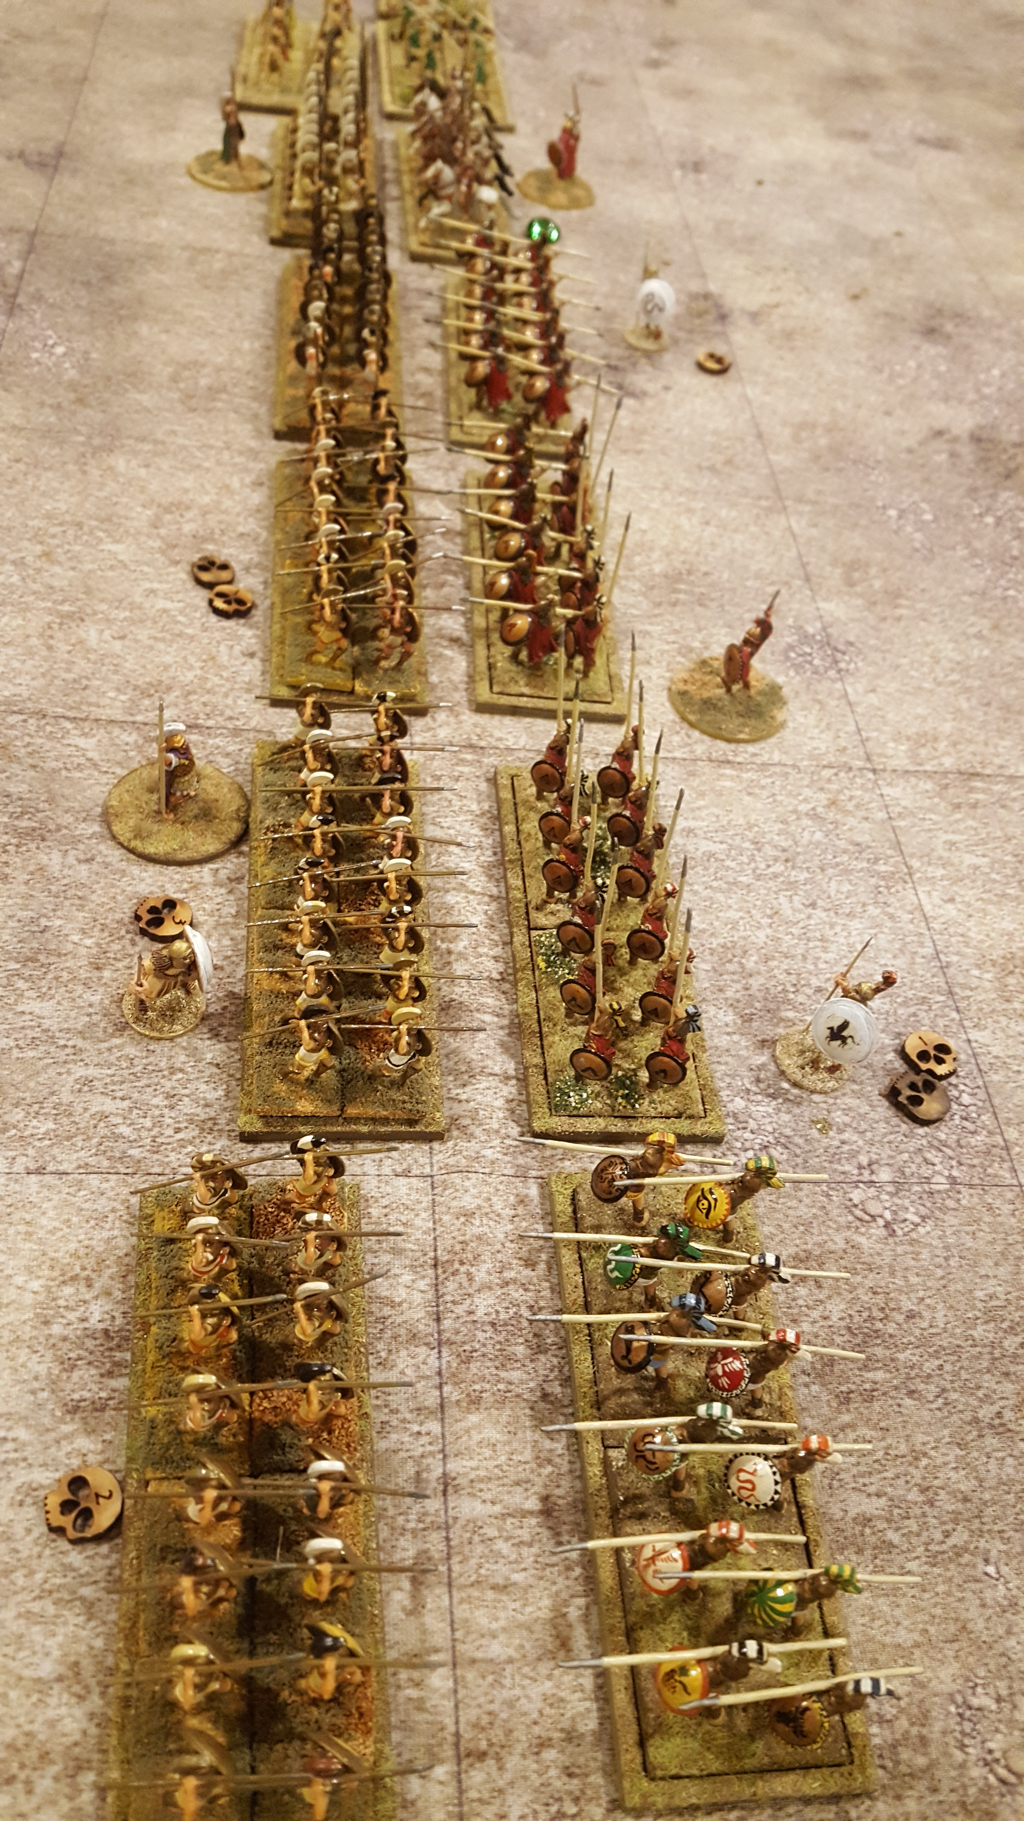 The death of LeonidasOur first game was a battle between my Athenians and Nick’s Spartans. His hoplites had the qualitative edge while I had more lights. While the two flanks bickered, our centres got stuck in, with Nick’s lads doing marginally better. We both had success with our left flank forces, so as the fight developed, each of our right flanks had to deal with the danger of being rolled up. I was losing victory medals faster than Nick but then had the good fortune to kill his heroic general, which brought our losses into balance. The cards went my way next turn, destroying one more Spartan hoplite unit and the battle was mine. The whole thing was very close however and at game’s end I had only one victory medal surviving. Still, a win is a win! The game felt very satisfying as a clash between two hoplite armies, with no fancy manoeuvres and no detached generals. Our lights kept busy fighting each other but the game’s outcome was decided by the hoplites.  Hannibal ad portasGame two was between Nick’s Carthaginians and my Romans. I was seriously outnumbered and Nick set out to envelop my army. On the other hand my infantry were rock hard and their pila gave them an edge on the first turn of combat. I set out to demolish Nick’s centre while I refused both of my flanks and kept my triarii back to act as a fire brigade. Nick placed all his cavalry on his right flank and two units of elephants on his left, along with some high quality Iberian Scutarii. My centre started well, doing serious damage to some Gauls and wiping out a unit of citizen spearmen. However, the general in command of my centre then missed a turn at a key moment when he drew two aces in succession on his first activation. This allowed Nick time to patch up his centre while his left wing trundled down as far as my baseline and turned to face inwards. I squandered my next turn in a bout of tunnel vision, trying multiple activations on one unit so it could destroy a double-disordered unit of Gauls. Of course I failed the third activation on my unit and so ended the turn without activating a single other unit in the Command. I know, I know! Basic mistake and I should never be so dumb, except I was so fixated on the opportunity to destroy the single enemy unit I was attacking that I completely forgot my own advice. Meanwhile Nick’s left wing started grinding down the troops defending my right rear, as well as threatening my front line from the side. At this point our lines were in an ‘L’ shape, with particular pressure on my units in the angle. Then in one turn, a flurry of high card hits by Nick, met with low card failed saves by me, took him comfortably over the victory line. To his only slight disappointment, he had won without his elephants actually fighting anybody. But we agreed that they had done great work forcing me to conform to their advance.  Nick’s Carthaginians How (not) to play Republican RomansThat didn’t go well for me, but as we played we agreed some resolutions for the next time the Romans fight. Ideally, we would seek to use terrain to negate the enemy’s numerical advantage. In this game, it was Nick who exploited rough ground to shelter his advance down his left flank. Next, the Roman shouldn’t wait around to be outflanked by a bigger force: the heavy infantry should get stuck in quickly and try to eat up the enemy centre before the flanks and rear are threatened. Once engaged, the first priority each turn must be to use the Romans’ special line exchange rule for every unit that is disordered (representing the fresh principes replacing the tired hastati in the front line). This is a really powerful advantage but I lacked the discipline to sort out the line before other activations. At least twice, my command’s turn ended before I had attempted a line exchange. Finally, we decided that if possible, every command should have just one main function. My centre command Included both front line units and my reserve. Besides making it a very big command, I was trying to deploy the triarii to face Nick’s flank attack and to fight his centre to the front. Too often, the command’s turn ended before one group or the other had completed its tasks. It is of course one thing to draw conclusions after a game but entirely another to remember them next time I play. And in case I haven’t made it clear: I didn’t ‘throw’ the game. Nick conclusively won it, making great use of his army’s strengths and obliging me to respond to his movements. A classy win for Carthage. 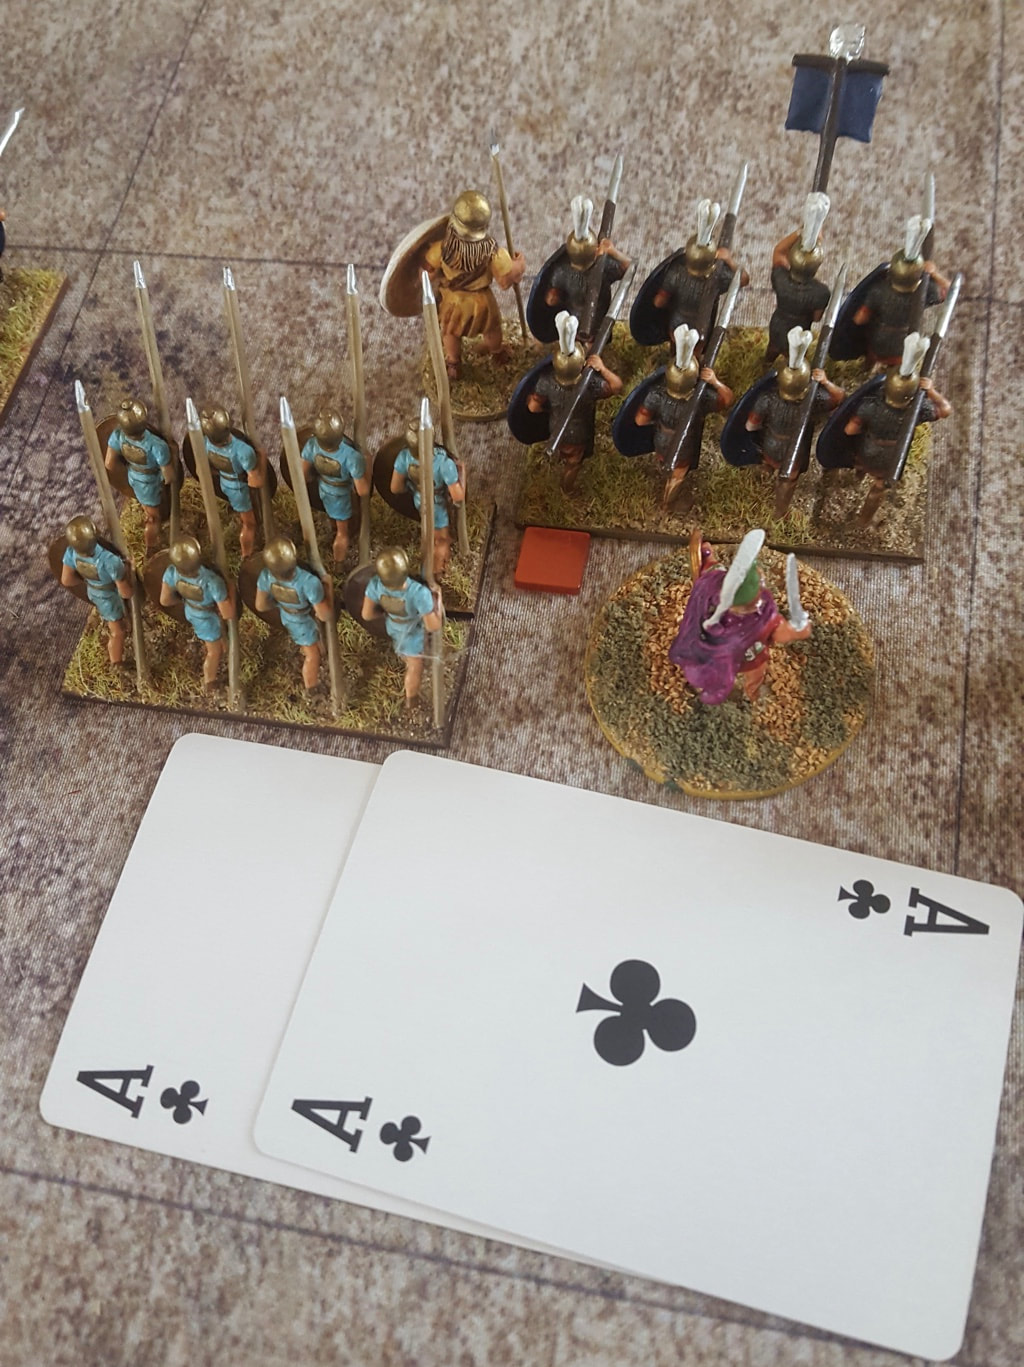 Aww, nuts! Turn over before it begins Out of lockdown with To the StrongestThe second game was much more fluid than the hoplite encounter had been and it felt a bigger challenge for both of us. The card activation system in To the Strongest is inspired. A sensible player can minimise the risk of their turn ending prematurely but very occasionally, as when I drew two aces in succession at the start of one turn, bad luck just happens. Fair enough. On the other hand, it is all too easy for an idiot like me to get drawn into the drama of a single combat and completely forget that I should be taking care of other activations before trying again with the critical combat. I reckon a game that draws me in so completely is doing something right.
I remember that when I first read the TtS rules, I wondered if units had enough hits/lives to sustain a good game. I also worried that a squared grid might be too restrictive on movement. Neither concern survived contact with actual play. I very soon concluded that these rules are perfectly gauged to give an exciting and rewarding game, with the strong sense of what I would expect from an ancient battle. They are also so easy to learn and (crucial at my age!) to remember during play. After months and months without a face to face game, it was wonderful to be playing again. Fingers crossed, if the road map out of lockdown stays on track, we can soon play a great many more. 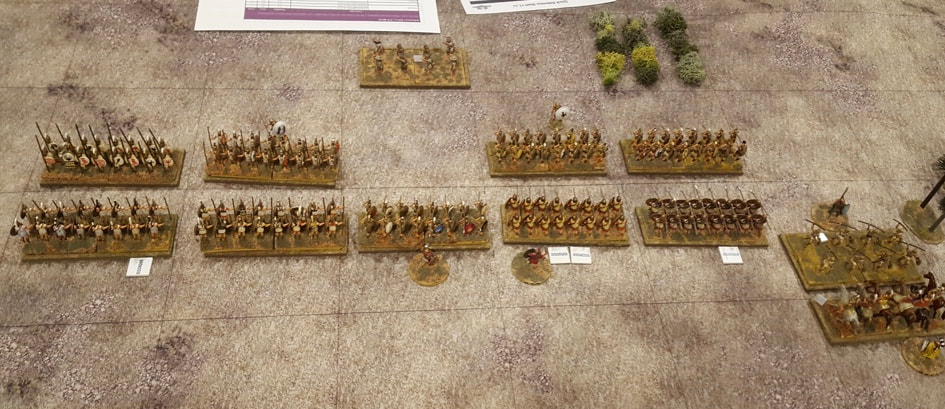 The other day, Dan and I played our first game of To the Strongest, the card-driven Ancients game by Simon Miller. I had picked up the rules at Salute the year they were published and liked the look of them but hadn’t got around to playing them. In recent years our group started using L’Art de la Guerre for Ancients games and it seemed better not to confuse things with a different set. However when I later bought, played and greatly enjoyed Simon’s and Anthony Brentnall’s ECW set For King and Parliament, I was keen to give TtS a go. As Dan is a committed classicist but new to Ancient wargaming, he was the ideal partner for the first game. TtS already has a loyal following but deserves to be better known. The designer’s notes explain that it was designed to be learnt easily and to play smoothly and quickly. With these aims in mind it uses a square grid and normal playing cards, which are used to regulate all actions and outcomes. It achieves its objectives beautifully. That said, I have read that both the grid and playing cards have put some people off trying it. If so, that is a shame: to my mind, the square grid helps constrain the players to a more plausible range of tactical choices than the fast and loose manoeuvres one sometimes sees with other rules sets. As for the cards, if they are a problem, they can be replaced by ten-sided dice without changing the mechanics at all. Using playing cards does however allow spectators to see what is going on and I am quite happy to stick with them. We kept things simple with a 100 point battle pitching Peloponnesian War Athenians against Spartans. I hoped the limited range of troop types involved would ease us into the game, without too many special rules to remember. Of course, we did need to assimilate the key Hoplite rule (no diagonal left movement; diagonal right counts as a simple move). I also lacked the quantities of javelin-armed light infantry required for two Hoplite armies, so over the two days preceding our game I frantically completed three new 8-figure units. Not the prettiest paint jobs but serviceable. One of these units, 8 plastic peltasts by Rospaks, had been waiting unpainted in my projects box since (can it be true?) 1982. Proof that the incentive of a looming game can unblock the tightest of painting jams. Dan took Athens while I led Sparta. In general, I had a better quality phalanx while Dan’s light troops were mostly superior to mine. We each placed our single cavalry unit on our right, with light infantry shared between the flanks. In the opening phases, the lights sparred on the wings while our hoplite lines approached each other. Dan’s cavalry overran the light javelins on my left and went deep, capturing my camp, destroying its ammunition reserves and losing me 3 victory medals. At about the same time the centres clashed. Obviously the memo about Spartan quality hadn’t reached the card deck as for a good two turns, I drew high when I wanted low and low when I needed high. Fortunately hoplites need three disorders to die and I did start landing blows before disappearing, although a disordered unit has a much reduced chance of hitting in melee (8+ instead of 6+). Dan chose to take his cavalry out of my camp to attack my centre from behind and I was able to retake it. I took back the 3 victory medals but not the ammunition supply, as it seemed likely that this would have been lost in the plundering. I did get a breathing space from my recovered medals and then, when I was fortunate enough to kill one of his generals, it seemed for a moment like I might retake the lead. But then I lost an allied hoplite unit in my centre, which allowed Dan to break into my line and take all my victory medals. It was a deserved win.
We enjoyed the game thoroughly and agreed that the rules are very quickly absorbed. The battle also felt right for a clash of two hoplite armies. Our light troops were all a bit crap, as they should have been, apart from Dan’s Cretan archers. The Hoplites had the resilience one would expect to see, combined with a satisfying lack of manoeuvrability. Fond as I am of L’Art de la Guerre, I do not think ADLG gives either the look or the feel of a hoplite encounter: too many gaps appear in the line and too many mini-units zip around into enemy flanks and manage other moves that are way too complex for this period. TtS felt more convincing, but still gave the choices and challenges that make a wargame enjoyable. The figures used are a mixture of old plastic Rospaks and Minifigs. The oldest were painted in 1982, when I was more frivolous about accuracy (if you look carefully you will spot both Snoopy and Charlie Brown on the Athenian shields). I am so happy that during the many years I spent away from Ancients, I didn’t find these armies a new home. Since our game I have been painting more Gauls, with a view to seeing how they play with TtS, against either a later Greek army or Republican Romans. Poor Dan is in for some more Ancients gaming very sooon. We played a 200 point game of Art de la Guerre on Wednesday, with Spencer and Matt pitting their Early Imperial Romans against my Ptolemaic army. Both of them are building their own Roman armies, Spencer’s set a little earlier than Matt’s so with oval shields. Together, they fielded ten bases of legionaries, one of equites and two light infantry bases, supplemented by some Hellenistic horse and medium infantry. My Ptolemaics had six bases of pikes, four of thureophoroi, five of xystophoroi, two Nubians and a bunch of light infantry. The Romans fielded two commands entirely of infantry and put all their cavalry in their right hand command. The Ptolemaics had the pikes in the centre with cavalry and light infantry divided more or less evenly between the two wings. The Roman plan was to avoid the front of the pikes by drawing their centre back and to the left like a matador’s cloak. Meanwhile their horse would crush my left wing horse and fall upon the rear of my pikes, while their left would fend off my right wing. 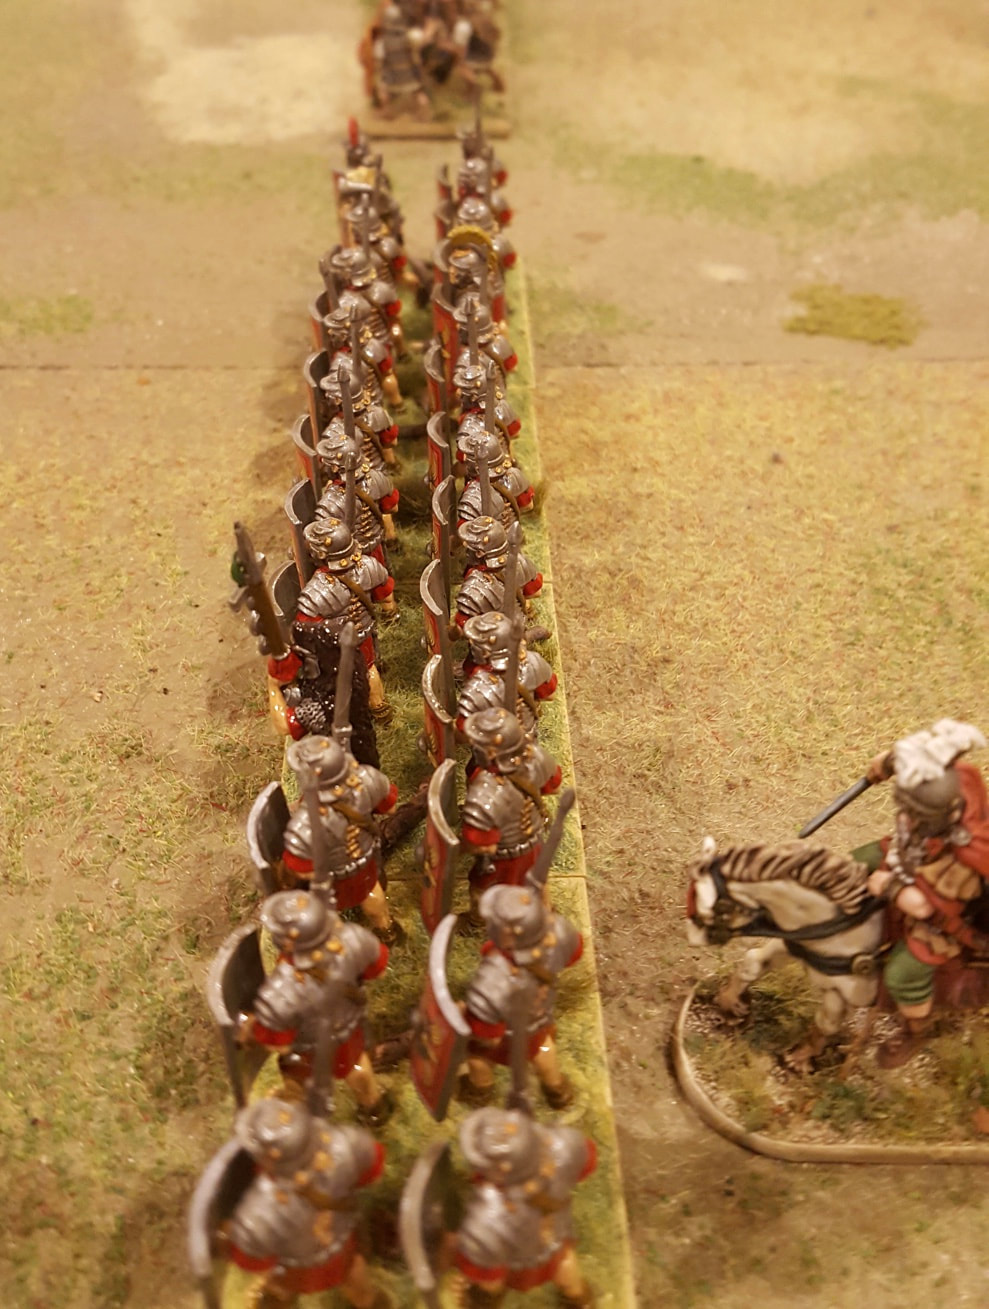 The legions advance  The Ptolemaic centre To begin with, the Roman plan went well. Their right wing drove my Nubian horse right off the table. But as they turned to engage my centre, their commander threw himself into a melee with some thureophoroi in which he was killed. From then on, the Roman right had to operate with no command roll modifiers and a 2CP cost for each order. Meanwhile, my pikes were able to close with the Roman centre before it could get out of the way. On the Roman left/Ptolemaic right, the Greek/Macedonian horse faced off against Matt’s legionaries with neither side closing.  Stand off on the Roman left The combat in the centre went well for the pikes, as their Roman opponents were out of position. Even so, the Romans were a tough nut to crack and took time to wear down. On the unengaged flank, the Ptolemaic horse finally charged the Roman left but there followed several rounds of inconclusive combat. Eventually, the uneven struggle in the centre tipped too far in Ptolemy’s favour and the Roman army broke.  The Roman right goes deep, but will shortly lose its commander The game ran at a fair pace. We are all now more familiar with the rules although still needed to do some checking here and there. There were various points to note for future games. One is the powerful combination of an elite unit with armour. The armour rule really reduces the chances of an emphatic or rapid result. Another is the crippling effect of losing a commander. Before you get stuck in with a general, make sure it’s worth the risk of losing him. Another thought is that the threat of combat can be more effective than charging in. For most of the game my right wing was facing off against the Roman left, stopping it from turning to attack my centre from behind but without actually charging it. With hindsight, I needn’t have charged at all since my victory points were coming from elsewhere. Once we did start fighting on this wing, all I really did was increase the risk that poor dice rolling might give the Romans victory points unnecessarily. It is always tempting to get stuck in with everybody but in some situations, I don’t think this is a smart option. 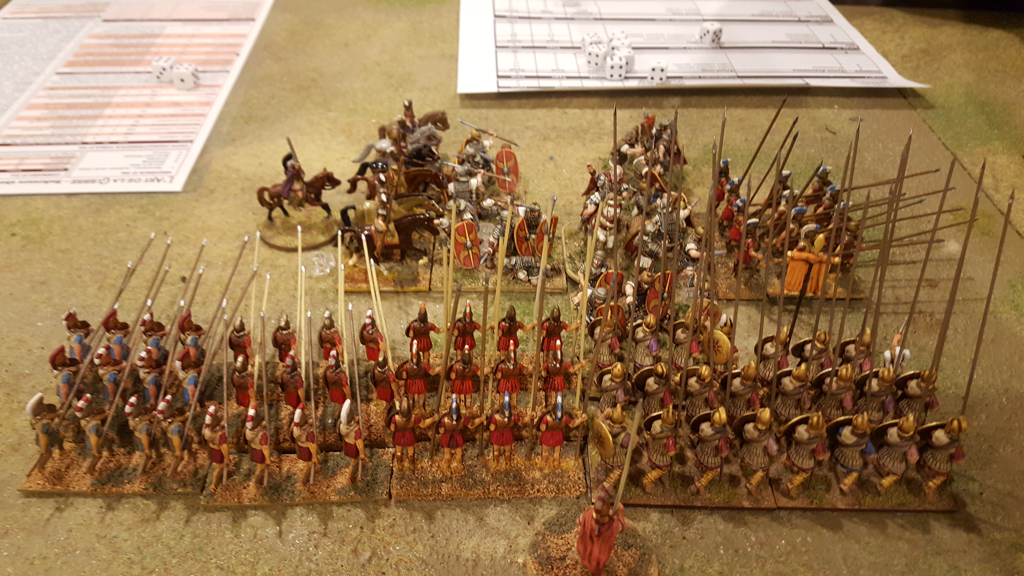 The end of the Roman centre, fighting to front and both flanks (those pikes on the right are facing the wrong way so the bases can touch...) As usual with these opponents, the game was played in a generous and cheerful spirit. Special mention must go to Spencer’s handiwork on his legionaries. Exquisitely painted and posed, each base is a vivid little diorama. He isn’t exactly a fast worker but the results are splendid.
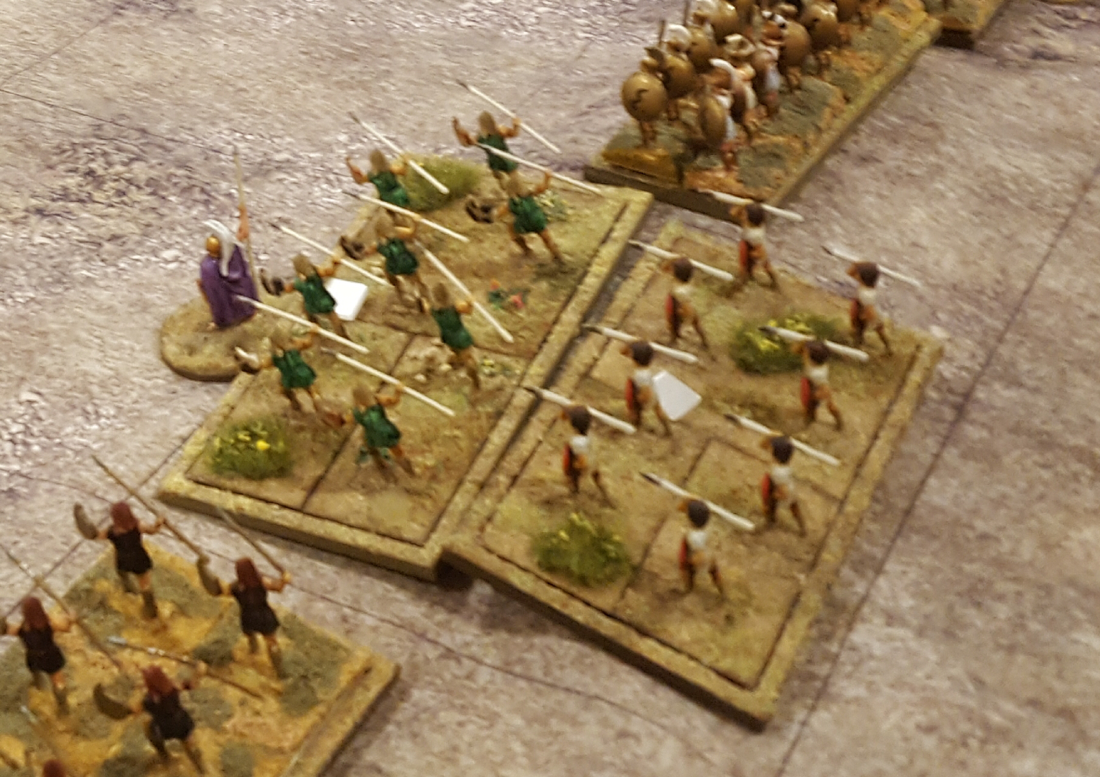
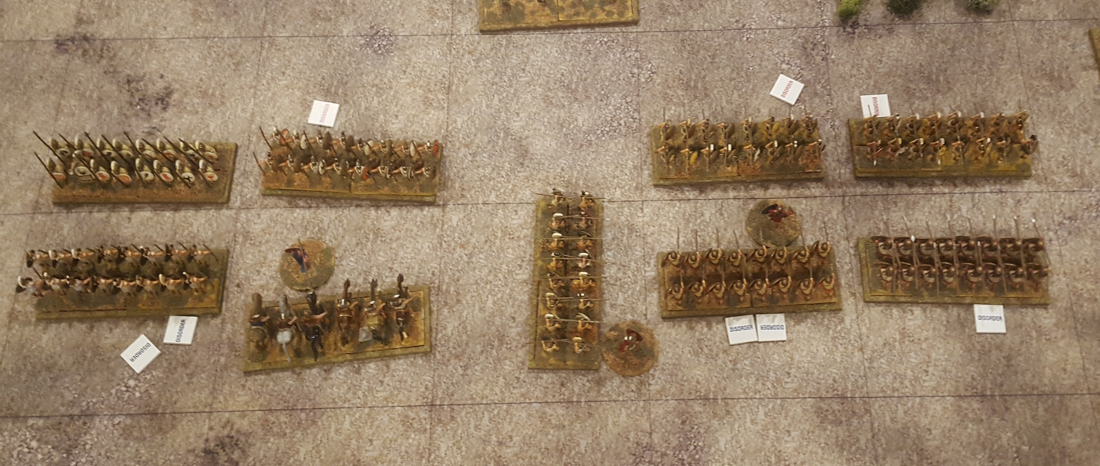
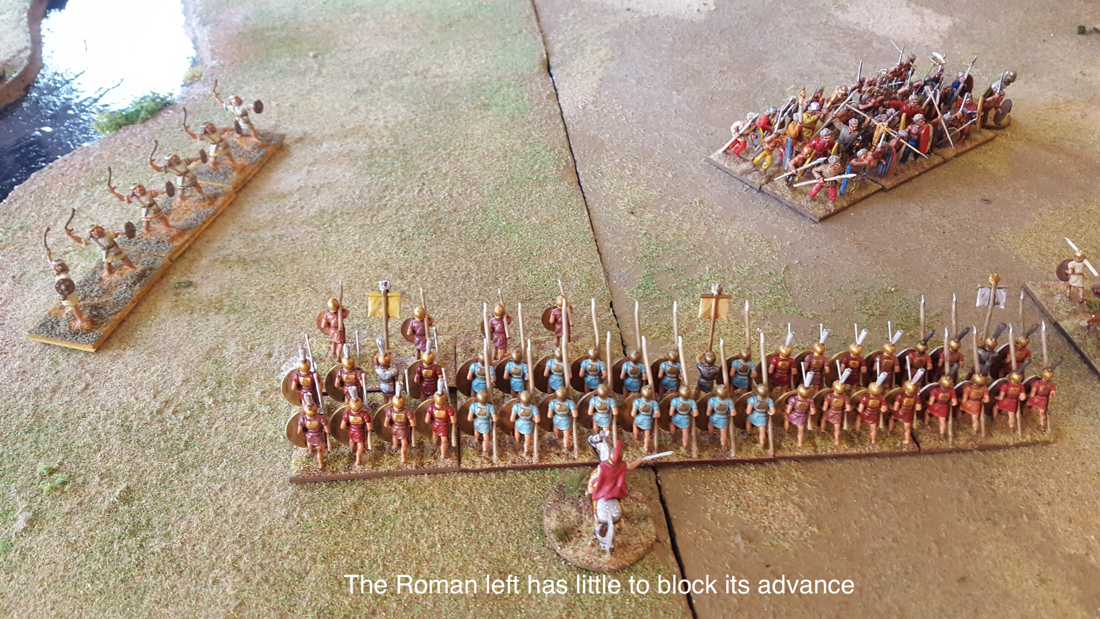
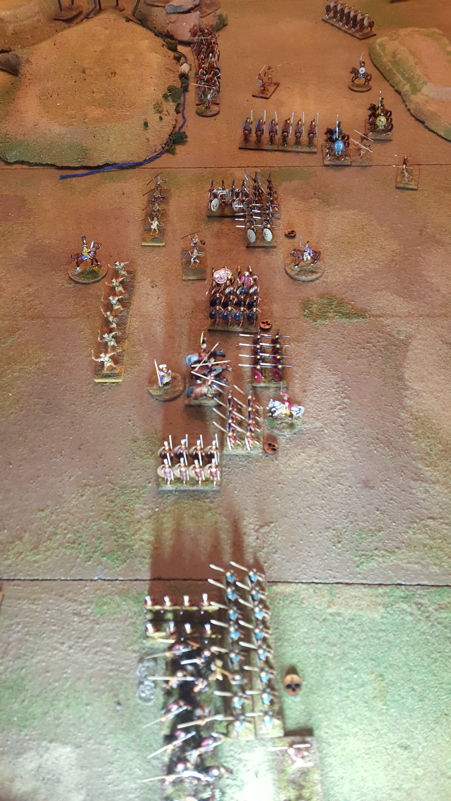
The figures on the table were a mixture of Heroics and Ros plastics, Minifigs, First Corps, Victrix, Warlord and Black Tree Design. Oldest painted in 1981 and newest finished last Tuesday. We played a 200 point game of Art de la Guerre last Saturday. Spencer having confessed a weakness for elephants, I revisited the lists for the battle of the Metaurus that we used a year or so ago. Spencer took the part of Hasdrubal, arriving in Italy to reinforce his brother Hannibal, while Matt led the combined consular armies of Nero and Salinator. The army lists were adapted in two ways to reflect the scenario. First, the Gauls in Hasdrubal‘s army were made mediocre and not impetuous, to reflect their poor quality (Roman accounts say they were drunk, but more likely they were just disaffected and wobbly). The Romans were not told about this drop in quality until the Gauls’ first combat. Second, the cavalry limit for the Romans was increased as Nero’s highly irregular decision to join Salinator had given the Romans cavalry superiority, an unusual situation in the Punic wars. The battlefield was flanked by the river Metaurus on the Carthaginian right, with open plain in the centre and rising ground on the Carthaginian left/Roman right. A hill with a steep ravine at its base ran in front of the Carthaginian left while a more gentle hill faced it on the Roman side of the table. To reflect the fact that Hasdrubal had been retreating and turned at bay when his pursuers got too close, Spencer was obliged to set up his entire army first. He placed his cavalry on his right, his Gauls in the centre and his Spanish and elephants on his left, including on the hill protected by the steep ravine. Matt set up with Nero’s infantry on the left, his combined cavalry in the centre and Salinator’s infantry (his largest command) on his right. However, instead of matching Spencer’s frontage, Matt deployed in some depth and his extreme right set up opposite Spencer’s centre. This left the Spanish on the hill with no opposition to their front. Matt’s plan was to grind down the Carthaginian right and centre before Hasdrubal’s left could engage. As the need arose, he was ready to peel off troops from behind Salinator’s front line to hold off Hasdrubal’s left wing if and when it did reach his flank. On seeing the Roman deployment, Spencer began racing his cavalry to the left behind his front line, in an attempt to get around the Roman right flank. However the gap behind his line was narrow and Matt charged this horse as they tried to pass. The horse managed to evade but now found themselves penned in behind the Carthaginian centre. Thwarted in their plan, Spencer’s cavalry then returned almost to their starting position on the right flank and got stuck in. It was a valiant attempt to seize the initiative but Matt had neutralised it by maintaining his objective, ploughing forwards and restricting Spencer’s room for manoeuvre. Unusually for a game of ADLG, we ran out of time before a clear victory was won. A points count gave a draw, although we agreed that the moral victory was Matt’s. Certainly for most of the game, the Romans chewed up their opposition and caused much more serious losses than they incurred. However in the later stages, when Spencer’s cavalry stopped manoeuvring and started fighting and his left wing engaged Matt’s right, Roman losses rose quite fast. The outcome seemed much less certain at the point when we finished than it would have, had we stopped three or four turns earlier. Even so, I think Matt would have carried the day as he still had more hitting power in a position to do damage. It’s always interesting to see how players interpret their brief. Matt took a risk by deploying on a narrow but deep front. At first it looked like he was inviting a Cannae-style envelopment. Had the terrain been more open he would have been in serious trouble. But the ravine-fronted hill on Spencer’s left, while strong defensively, would also impede a Carthaginian advance to envelop the Roman right. It was probably this fact that prompted Spencer to try to send his cavalry around Matt’s right. He nearly succeeded but Matt fended off the attempt with his steadily advancing legionaries. When Spencer did advance his left and it eventually made contact, it did a lot of damage but too late in the game to swing the balance. It was fun playing a scenario as opposed to a straight points battle. At least, I found the narrative more compelling for knowing who the players were supposed to represent. As usual, the players were great company and courteous to a fault: maybe next time we should play something from the Lace Wars so each can invite the other to shoot first... Figures are a combination of 25mm Minifigs, Garrison, Newline, Black Tree and First Corps. The Roman army in their entirety are very old Minifigs and they really can’t combine with other ranges, but I am very fond of them, telegraph pole spears notwithstanding. 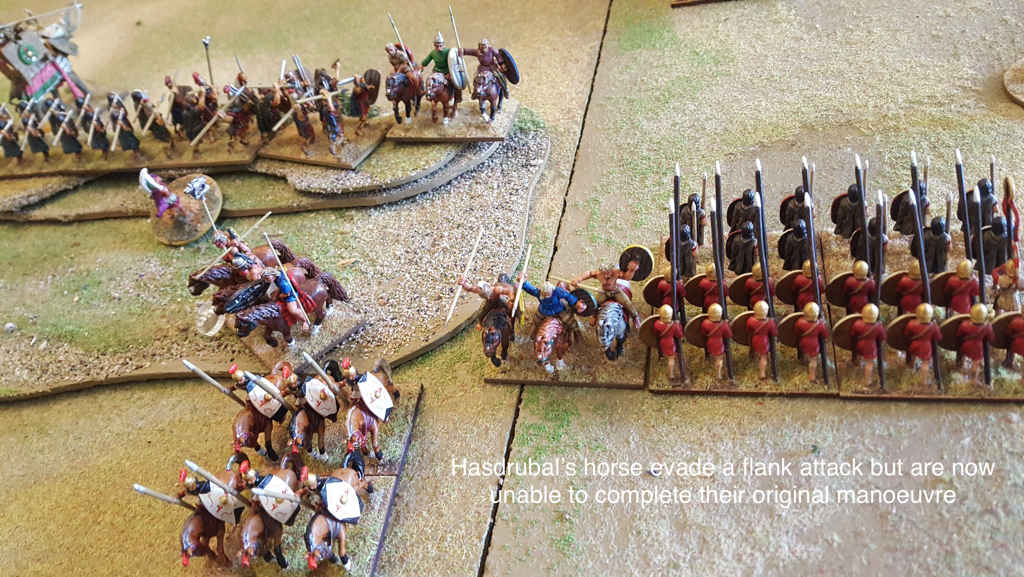 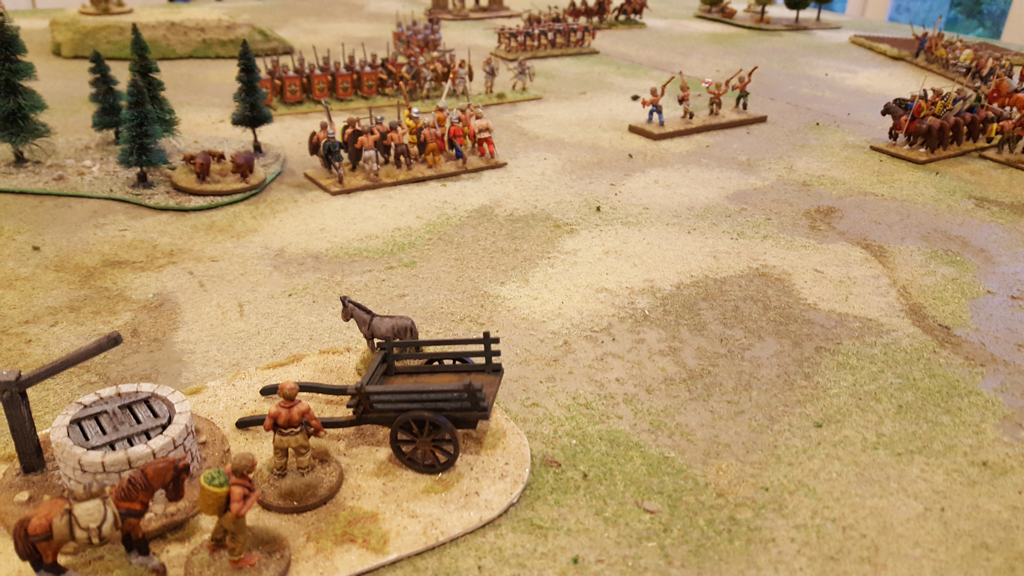 On Monday evening we played two 100 point games of Art de la Guerre. The aim was to introduce these rules to Spencer, in return for his recently introducing us to Chain of Command. It was also Matt’s first outing with his early Imperial Romans. He hasn’t painted 100 points’ worth yet so we supplemented his army with Iberians. Spencer led a horde of impetuous Gauls. I haven’t known him long but somehow I knew they’d suit him. After a couple of turns learning the ropes, Spencer got into the swing and sent his lads flying every which way, marching down his right flank, moving up the middle and sending a very cheeky scout around Matt’s right to capture his camp. The Gauls also had the better of combat and this, plus the VPs for plundering the Roman stockade, won Spencer a rapid victory. Game two was a different proposition. Spencer tried again to distract Matt with his light cavalry but they were quickly chased off the field. As the centres closed, a Gallic chariot charge on their right nearly succeeded but as more supports were committed, Matt won that combat. In the centre the Gauls (mostly) bounced off legionaries and in relatively short order, Matt had his revenge. One game all. 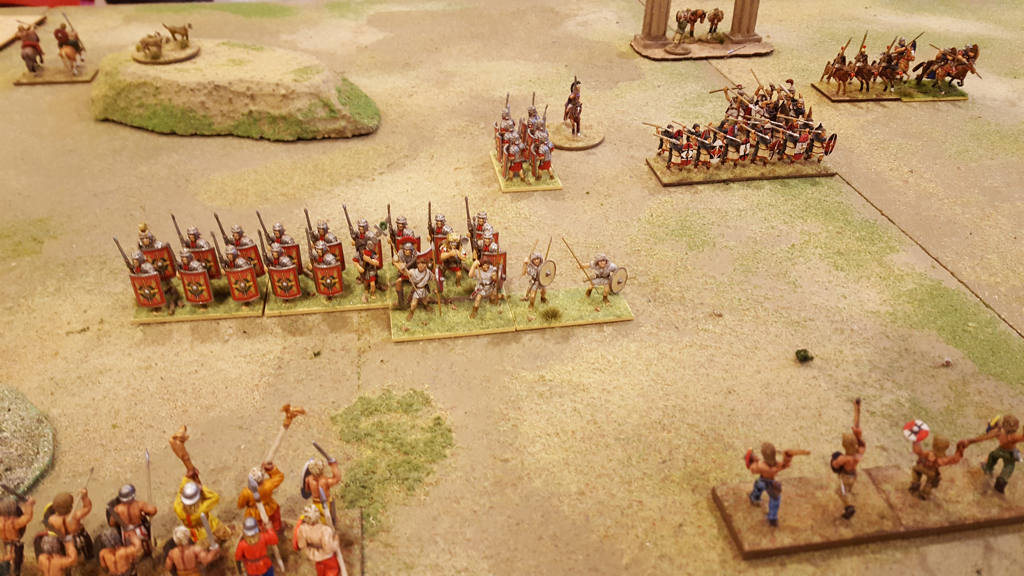 The Roman line is all over the shop The difference between the two games was interesting. In the first one Matt came forward, making it easier for Spencer to swamp his position. In the second he held his line back, with woods on his left and a difficult hill anchoring his right. On this more constricted front, the Gauls couldn’t get the overlaps and in a straight face to face contest, the odds favoured Rome. Both games were good fun and I think we’ll get Spencer back to try ADLG again. For the second game we allowed each side a few rerolls as suggested in the optional rules. Matt had observed that a bad roll in a critical moment can be devastating, especially in a 100 Point game, and the rerolls did help here. Next time,we will field 200 point armies as they do make for a more varied game. ADLG is an easy rule set to learn and it delivers decisive results. Light troops work very convincingly and the evade rule is particularly effective. But I have two low level grumbles. The first is the rules for flank and rear attacks, notably when gaps appear, which for the life of me I can’t retain in my head. Did they have to be so fiddly? The second is the appearance of the table in the closing stages of a game, when the battle lines end up looking like a mouthful of broken teeth. It may be simpler and make sense in gaming terms to remove bases in the middle of the line while their neighbours plough on, but this doesn’t fit my imagination of a line slowly crumbling until everybody goes. I think this is probably just me and I still enjoy the mechanics, - but the game gets less photogenic as play wears on. That said, any rules that permit two satisfying games on one weekday evening have to be doing something right. 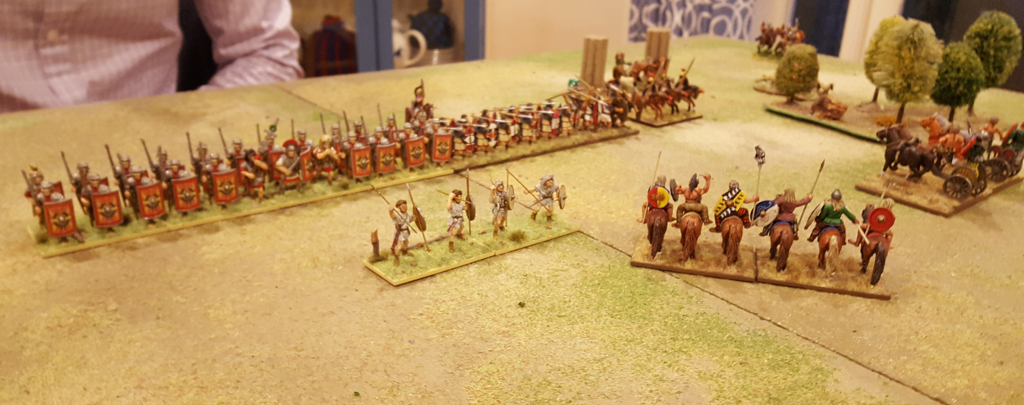 That’s more like it! The Roman line in game two 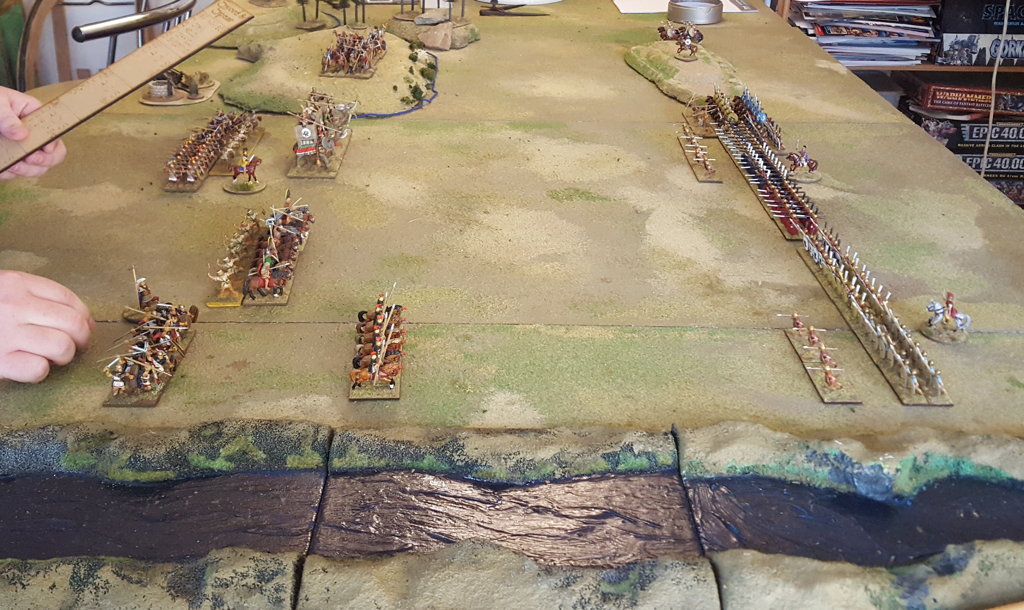 Hamilcar on the left, Nero and Salinator on the right Gaming the Metaurus My previous blog post explained how we created an ADLG scenario for the battle of the Metaurus. This post tells you how the game went. Ben took the role of Hamilcar and Matt commanded the Romans. Ben followed Hamilcar’s deployment, putting his Gauls on the high ground protected by a strip of difficult terrain. He put his elephants in the centre, with Spanish and African foot behind them, and his cavalry on the right, supported by two more stands of Spanish foot. Matt deployed one infantry command on his left, the other in the centre and his cavalry on his right. Phase one of the game saw Ben’s elephants crash into Matt ‘s centre and pretty much slide off. We had expected them to be destroyed while disrupting the Roman centre but they barely made a dent. Matt’s dice rolling was consistently luckier than Ben’s, setting the pattern for the evening. On the Carthaginian left the Gauls and Roman cavalry looked at each other, while by the river, Ben’s cavalry advanced on Matt’s infantry but wisely chose not to attack. 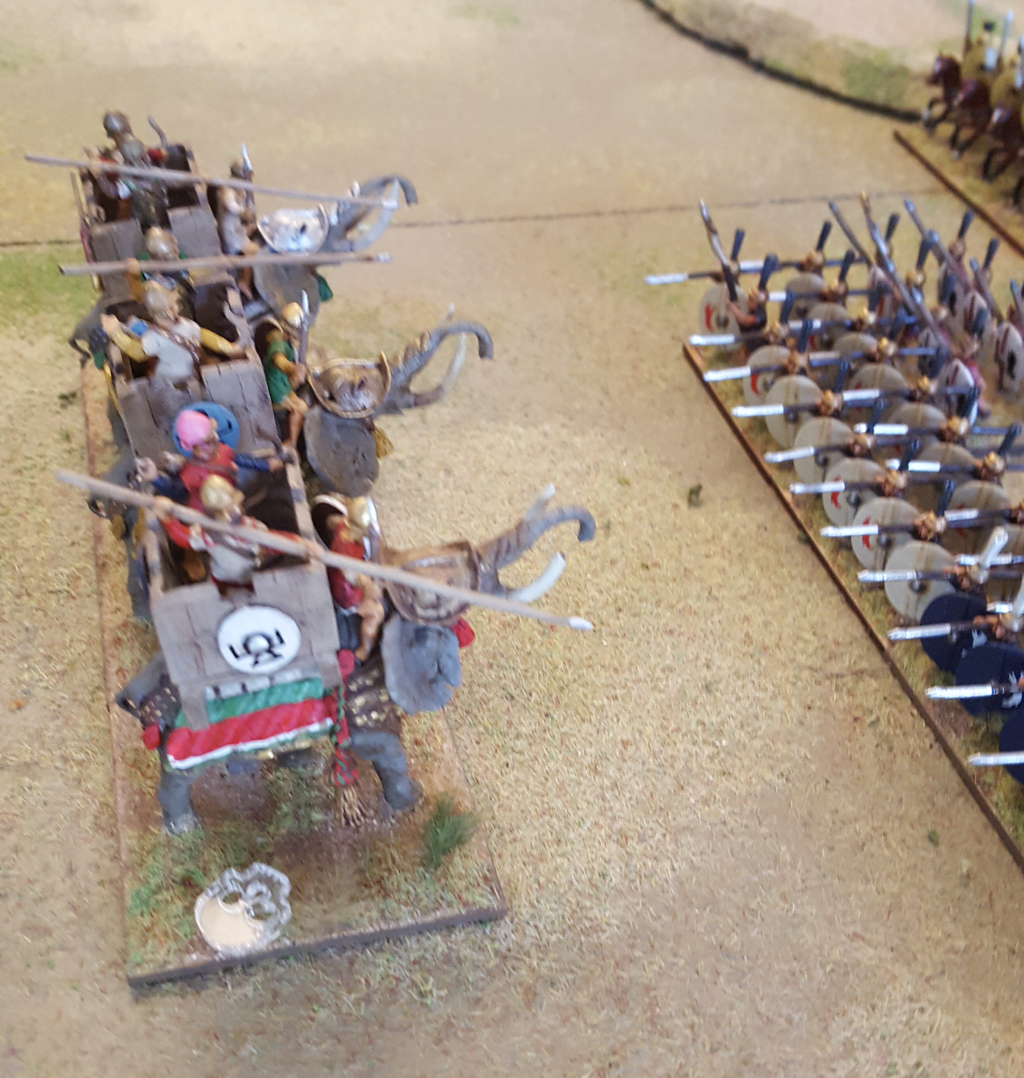 The elephants looked imposing but melted fast In Phase two the two centres came to blows. Ben’s troops fought rather better than their elephants had done and the fight was quite balanced. Meanwhile a couple of stands of Gauls came off the high ground, to be mauled by Matt’s cavalry. Then, Ben decided to launch his cavalry at Matt’s unruffled left wing. Matt again rolled some lucky dice but he also had the edge in modifiers all along this combat. Ben lost several stands in one combat phase, taking him perilously close to break point. In the final phase the rest of Ben’s Gauls came down from the high ground, too late to have an effect on the battle. His cavalry nearly all routed and his centre started to crumble, mainly because his Spanish MI were less resilient. The game then ended as Ben’s morale losses hit 26. At that point Matt’s losses were only 9 points, of which only 4 were due to units routing. Measuring up to the history
According to the generally accepted account of the battle the Carthaginians deployed pretty much as Ben did in our game. The Romans on the other hand placed their cavalry by the river, Salinator in the centre and Nero on the right. Phase one of the battle saw the Carthaginian elephants attacking in the centre, with similar unimpressive results to what happened in the game. On the left the cavalry wings clashed and the Romans began to push the Carthaginians back. The infantry in the centre then closed, with neither side gaining the advantage. On the right Nero soon abandoned any intention to charge the Gauls, who were too well positioned on the high ground. He then marched his wing around the rear of the Roman line to the left and assaulted the Carthaginian centre in its right flank. With this, Hamilcar’s army collapsed and he spurred his horse into the melee. The first Hannibal knew of the defeat was when his brother’s severed head was catapulted into his camp. The big difference in our game was of course Matt ‘s deployment of infantry on his left and cavalry on the right. This made Nero’s manoeuvre impossible. I could, I guess, have imposed historical deployment on both sides but would argue that the more restrictive the setup, the less satisfying the game. To be frank, I was surprised by Matt ‘s deployment and wondered at the outset if he was squandering his cavalry by placing it facing the Gallic Hill. As things turned out, I couldn’t argue with his emphatic victory so what do I know? Nevertheless his cavalry played only a bit part in that victory. I think he was helped by Ben’s decision to charge Roman heavy swordsmen with medium cavalry, rather perhaps than to shift this cavalry to face the Roman horse. In the last turn Ben had to take a survival roll for his C in C when the unit he was with routed. He passed it, so at least our Hamilcar kept his head We played a 200 Point game of ADLG last night. I always enjoy a game more if it is linked to a real battle (however fuzzily) and I wanted to see if I could fit a historical scenario into a ‘legal’ ADLG format. I chose the Battle of the Metaurus, 207BC, fought between Hamilcar Barca and a consular tag team of Salinator and Nero. This post is about turning a historical battle into a scenario. The next one will report how the game played. Background The Metaurus campaign was perhaps the last chance for Carthage to defeat Rome in Italy. After years of stalemate on the peninsular, Hamilcar had crossed the Alps with an army to reinforce Hannibal. Rome was determined to prevent the Barca brothers from joining forces and a lucky piece of intelligence revealed Hamilcar’s planned route. Nero, commanding the consular army facing Hannibal, took a picked force and rushed to join his colleague Salinator in front of Hamilcar. From being outnumbered, the Romans now had at least parity with Hamilcar and for once, seemed to have an advantage in cavalry. The Romans tried to hide the arrival of Nero and bring on a battle but Hamilcar realised that he was facing two consuls, supposedly because his scouts heard two trumpet calls in the Roman camp. Hamilcar withdrew along the river Metaurus, looking for a crossing point. However he was unable to cross and as the Roman pursuers came closer, he resolved to offer battle. There are different versions of this story in the sources and the debate goes on about the location of the battle, nature of the field and forces involved. I chose what seems to be the current majority view, which results in the following elements: Because he has turned to face his pursuers, Hamilcar deploys his whole army first. The river Metaurus runs down one flank of the table. It is impassable. Hamilcar deploys with his right wing on the river. Next to the river is a strip of open ground. Hamilcar’s left deploys on high ground, with a steep defile in front that will seriously disadvantage an attacker. The Roman side of the field has a low hill towards the rear, opposite the high ground. Otherwise it is featureless. After Hamilcar has deployed, the Romans deploy using the standard deployment rules, except that there is no ‘dead zone’ next to the river so troops may deploy adjacent to it.  The battlefield viewed from the river. Hamilcar will deploy on the left and Nero on the right The Armies
I created two 200 Point ADLG armies, using army lists 53 and 55. All troop types were picked straight from the lists except the Gallic foot. Hamilcar’s Gauls were recently recruited. Some stories say they were drunk at the battle but it is also possible that they were just disaffected and shaky. Either way they fought badly and Hamilcar deployed them on the high ground to make the best of a poor contingent. I decided they would be mediocre heavy swordsmen and not impetuous, reducing their points cost accordingly. Hamilcar’s army contained 6 stands of the mediocre Gallic Heavy swordsmen; 4 of Spanish medium swordsmen; 2 of African spearmen; 2 of Spanish medium cavalry; 3 of Gallic medium cavalry; 3 elephants; 3 Libyan light infantry with javelins; and 3 of slingers. Hamilcar was brilliant and his two subordinates were competent. Break point 26. Nero and Salinator commanded 10 stands of hastati/princeps heavy swordsmen; 5 of light infantry velites; 2 of Allied light infantry; 2 of triarii elite heavy spearmen; 4 of Roman medium cavalry and 2 of Allied heavy cavalry. Nero was brilliant and Salinator and Licinius were competent. Break point 25. Ben and Matt faced off on Wednesday evening. Their exploits are reported in my next post. Matt and I played a 100 Point game of Art de la Guerre on Wednesday. Matt commanded Republican Romans while I had a Gallic army. This was the first time we have played with impetuous troops and with light chariots. I had hoped to field enough Gauls for 200 points but was 30 odd points off. I need to get my last bare metal Gauls onto the painting table. Matt won the initiative roll and chose to attack. The field had two gentle hills and a field, all spread around the table edges. The middle of the table was completely flat. Matt placed his cavalry on his right and rested his left on hills. I put my medium cavalry on the right and light chariots and scouts (javelin armed light cavalry) on my left. 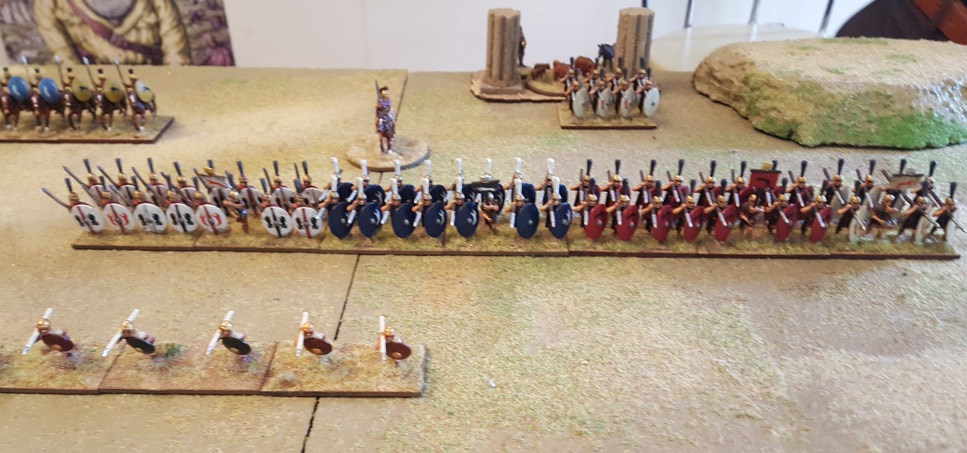 My plan was to hold back the centre at the start and send my mounted troops forward. The chariots were to attack the Roman horse on my left. On the other flank my Medium cavalry were to go deep right, to discomfort the Roman centre but wait for the Gallic foot to advance and then join the attack. I reckoned that the first turn disadvantage against Roman swordsmen needed offsetting with some combined arms combat. My right wing cavalry galloped down the field and onto the first hill. I faced them at about 1 o’clock and then turned my attention to advancing the left and centre. Matt meanwhile peeled a base of hastati off his centre, turned them to face my cavalry and began to advance. I had a turn to react but chose not to. On his next turn Matt charged my cavalry in the flank. I elected to evade, in the expectation that I could travel deeper towards the Roman rear. However, the rules revealed that evading troops must make a 90 or 180 degree turn before scampering off. Instead of going down the table, I had to face the side. Even had I rolled a 1or 2 I’d have still left the table. Idiot. I deserved that three times over. First, I should have chosen my position and facing more carefully. Then, I had time to respond to Matt’s threat but didn’t. Finally, I chose to evade without knowing what that means in the rules. Accepting the flank attack would have been expensive but at least I might have done some good. As it was, the hastati had time to rejoin the main line having done their job of chasing away the threat. I won’t do that again. Probably. Anyway. On the Gallic left my chariots attacked and got the better of the Roman cavalry while my centre advanced. In the event, the first clash of the heavy infantry went the Gauls’ way almost everywhere. Despite the Gauls losing impetus against the Roman swordsmen, the Gallic dice just rolled higher. The luck evened out in following rounds but my first round advantage held and the Romans broke three points before mine did. The last few turns were tense and Matt’s victory point tally nearly overtook mine. But if I won the game, he got bragging rights for chasing off 14 points of cavalry with a base of hastati. I like ADLG. The rules are clear and I find them a lot more enduring than the entry level DBA. I do however wonder about the wide range of outcomes possible in a combat round. This victory felt unjust. Matt‘s swordsmen should have had the edge over my Gauls but the dice rolled well for me and poorly for him. Perhaps this was more noticeable because we were playing a 100 Point game: my luck probably wouldn’t have been so great with more combats to resolve in the centre. Perhaps we should focus on 200 Point Battles in future. So I’d better get all my Gauls painted. 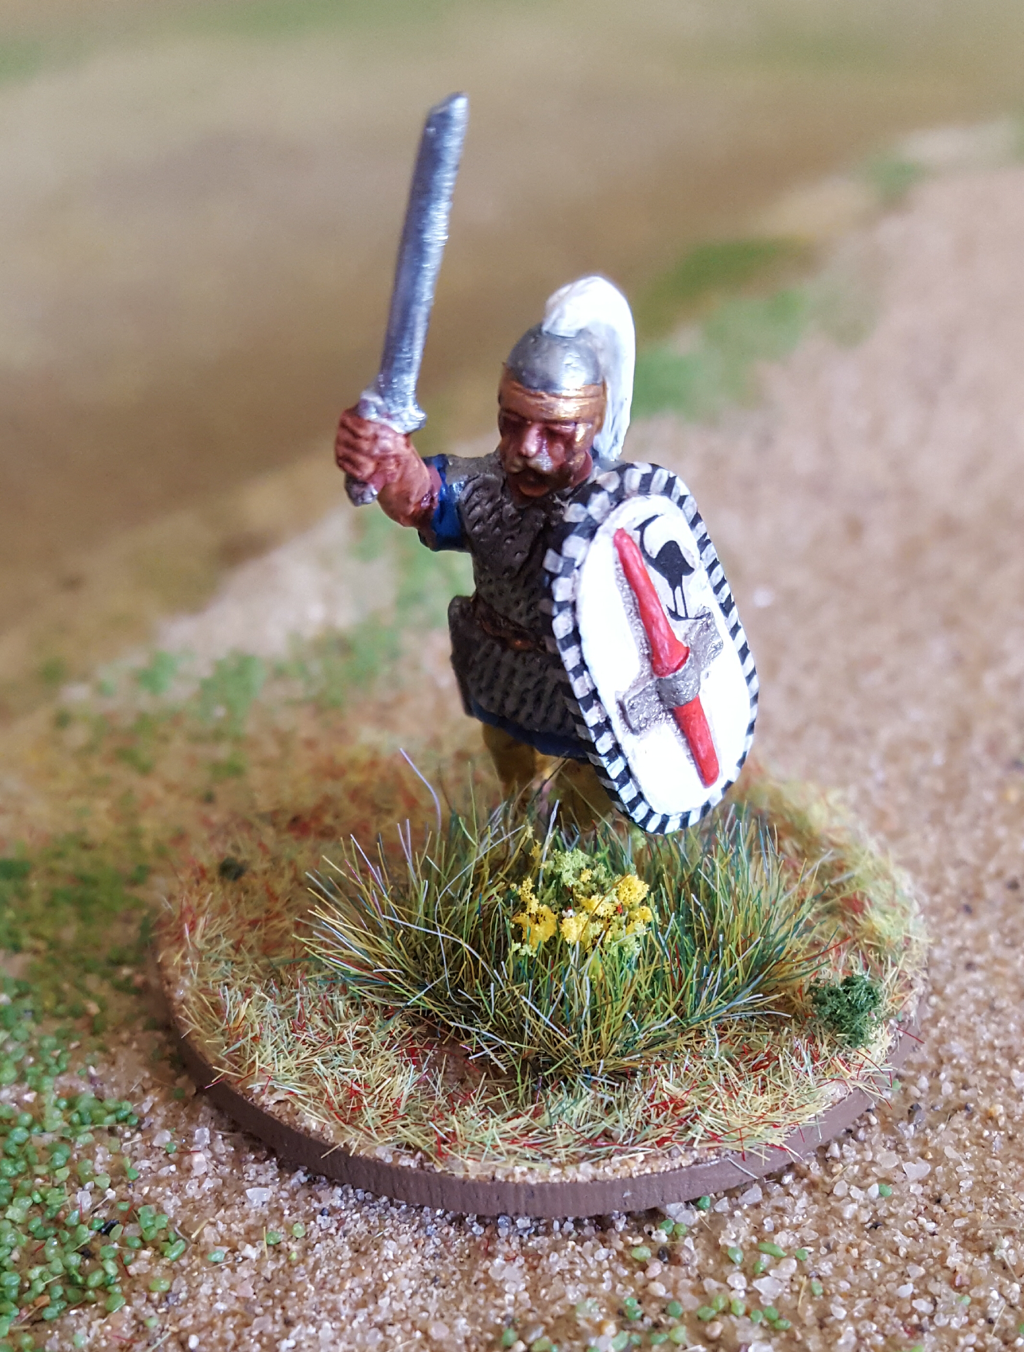 The victor, Fulliautomatix the Gaul |
Archives
November 2023
Categories
All
|


 RSS Feed