|
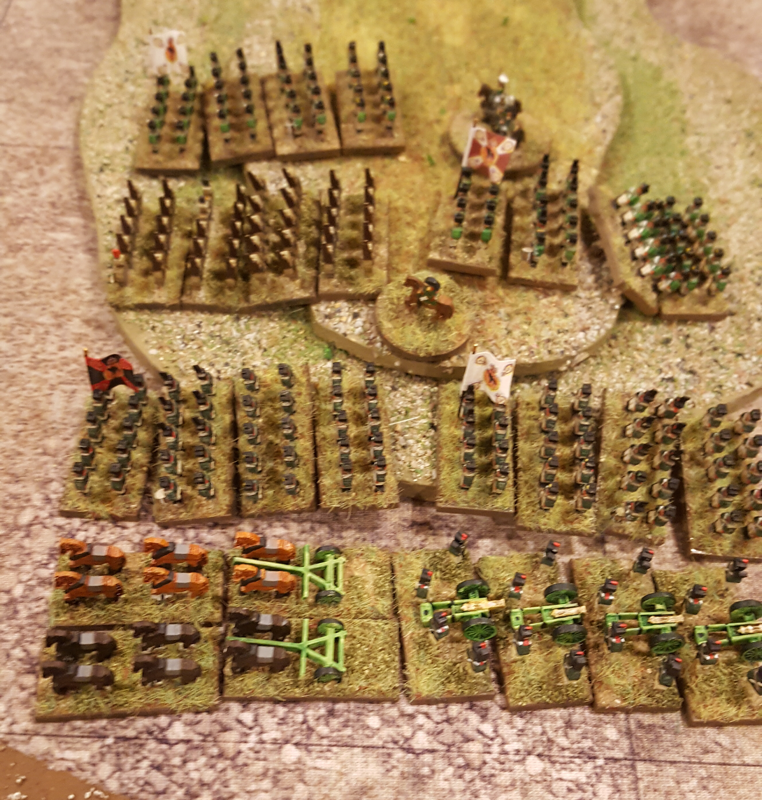
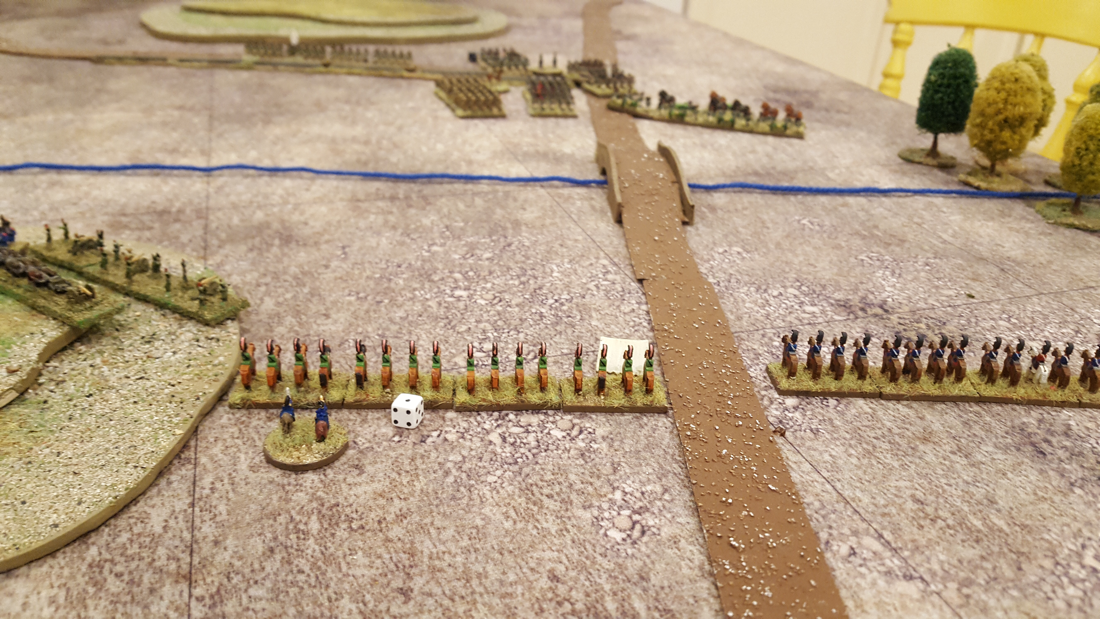
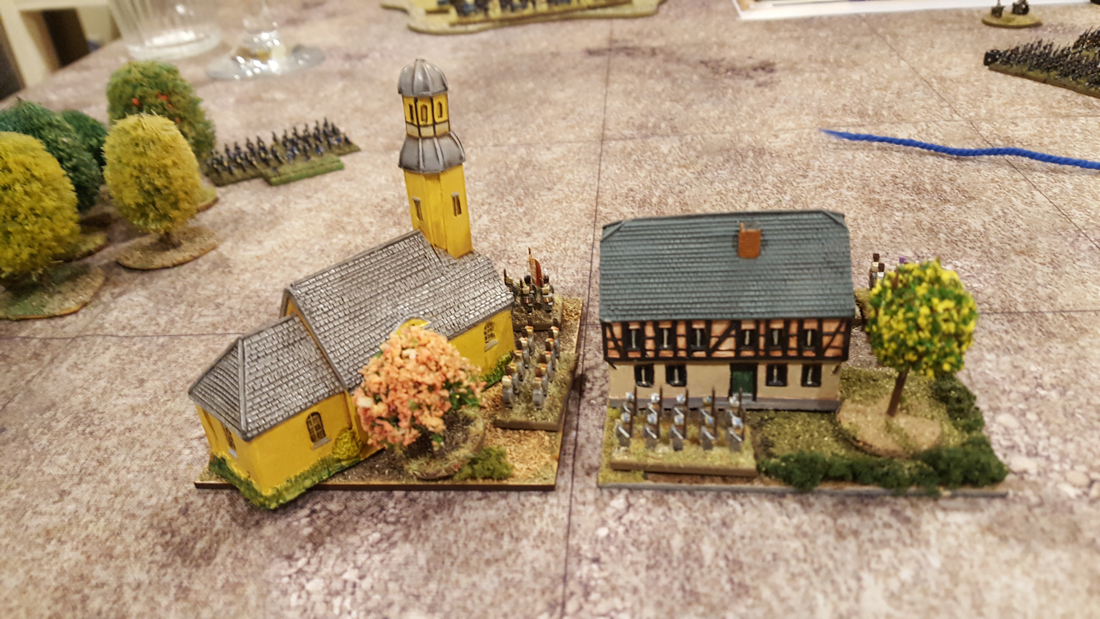
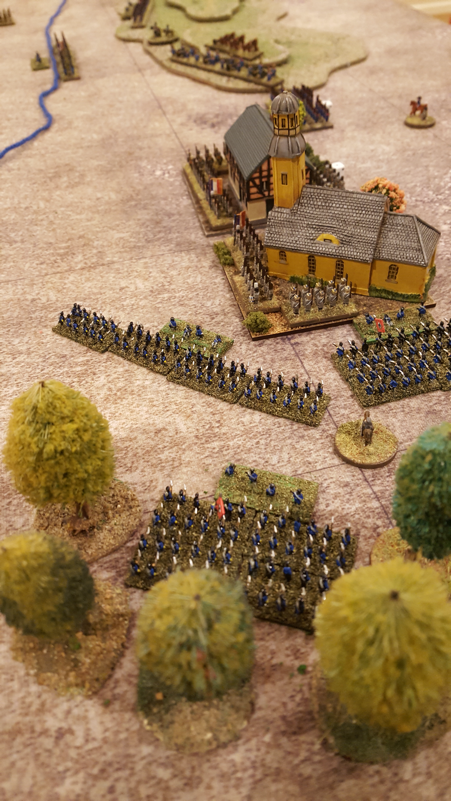
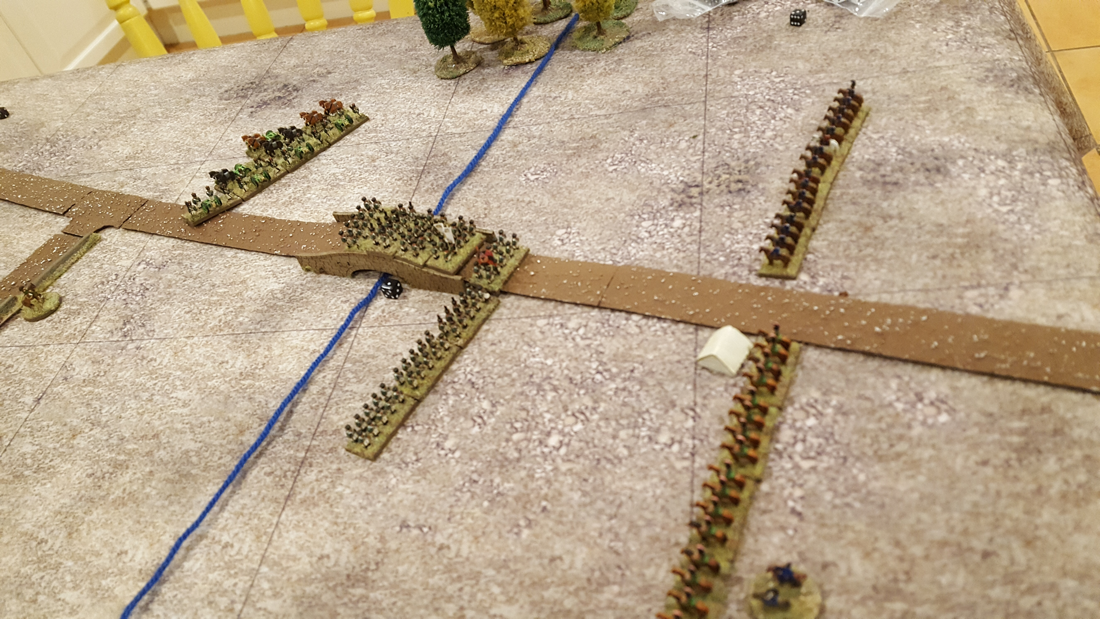
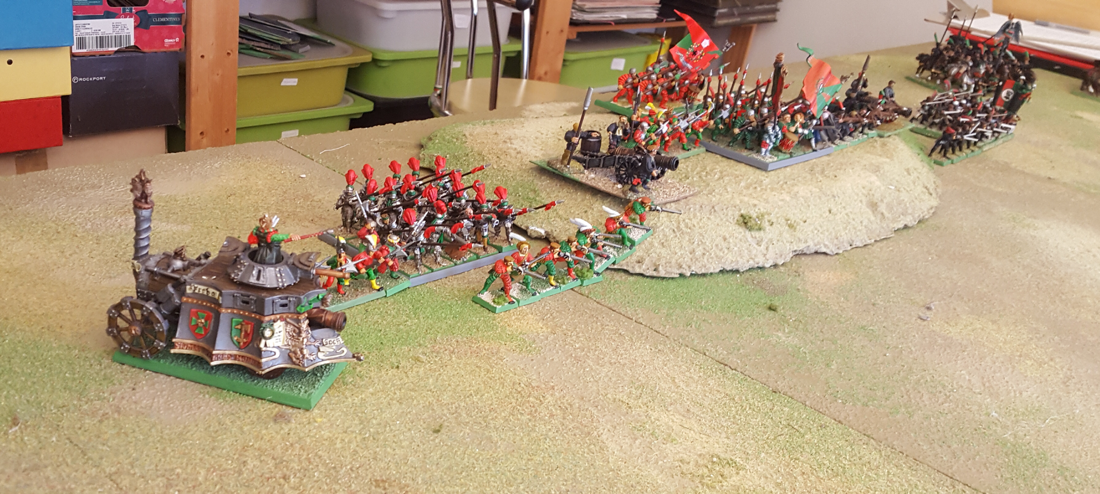
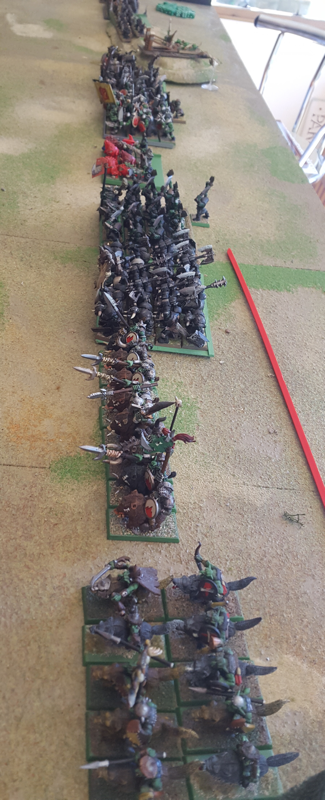
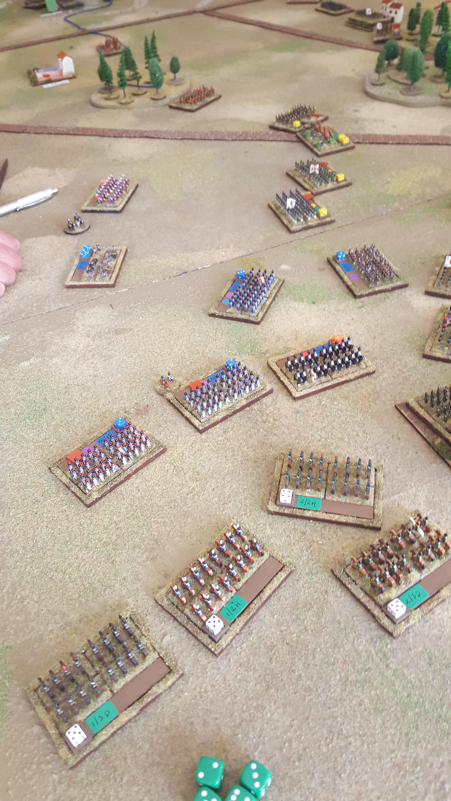
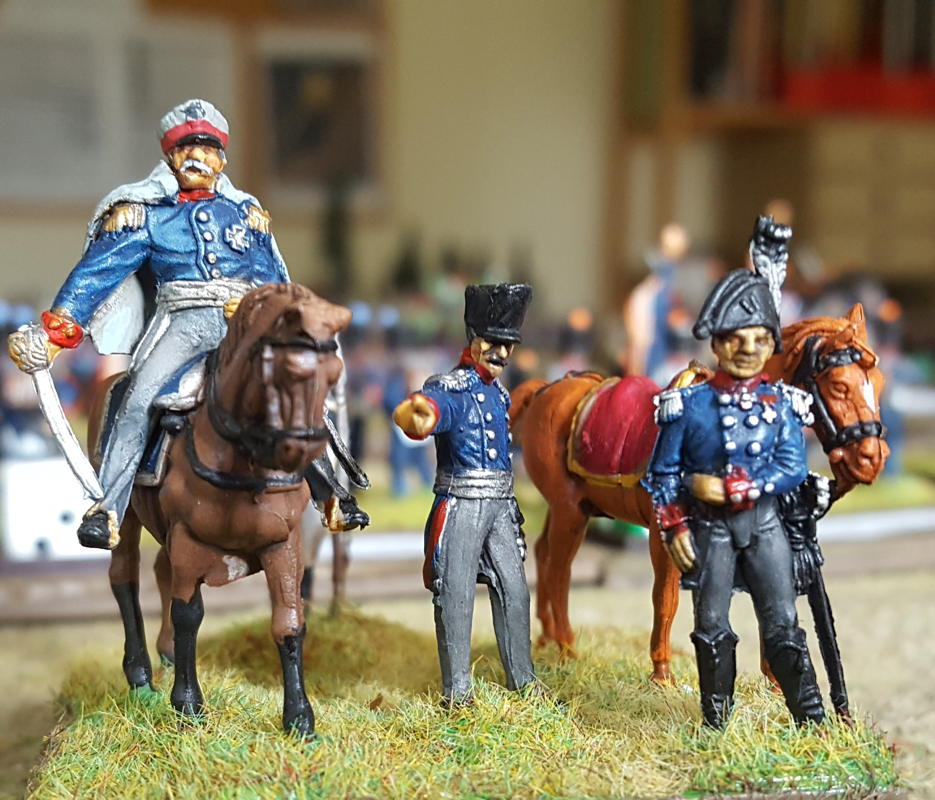
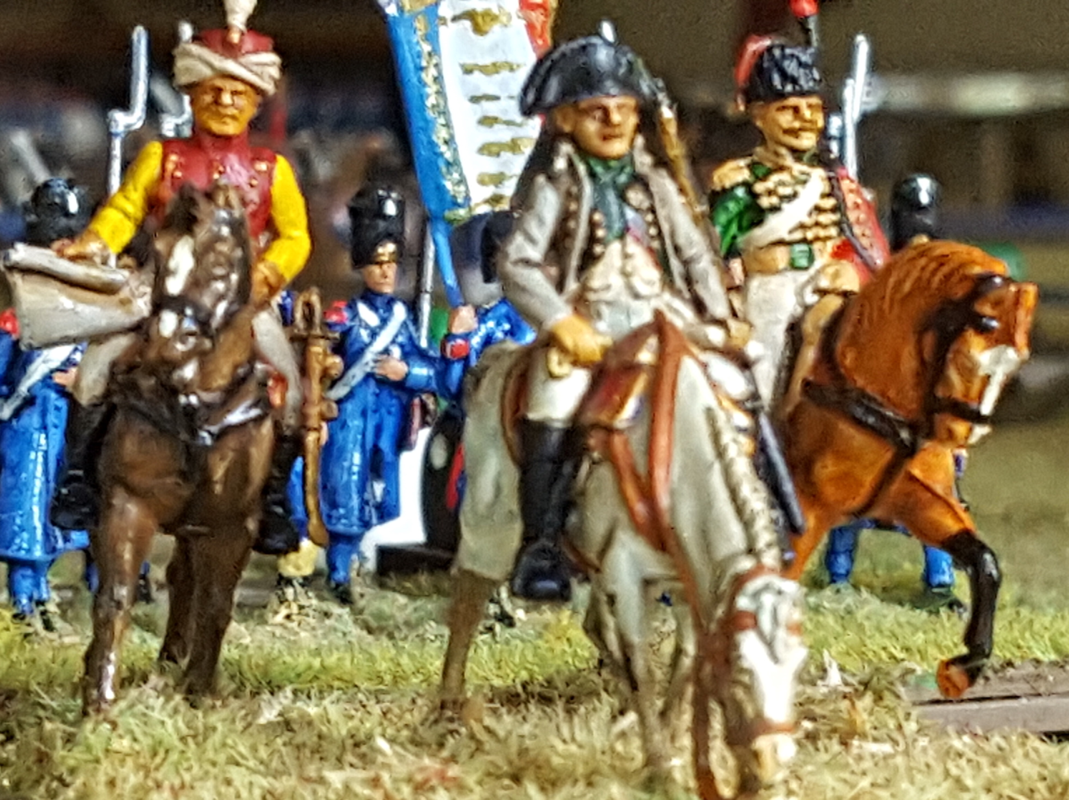
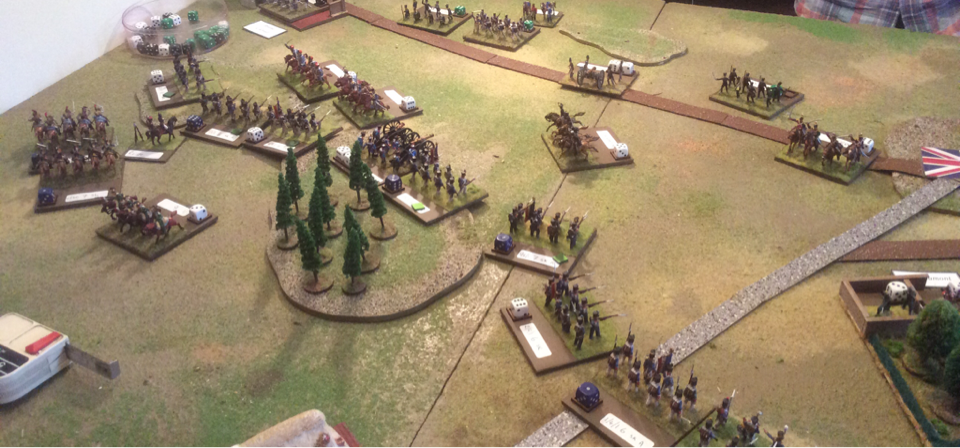
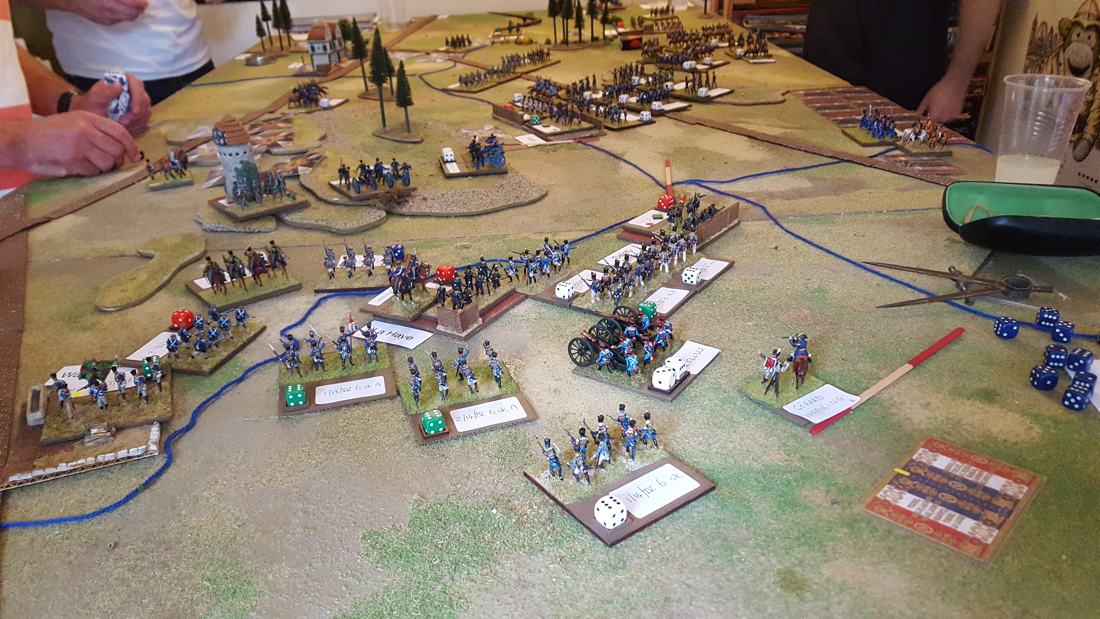
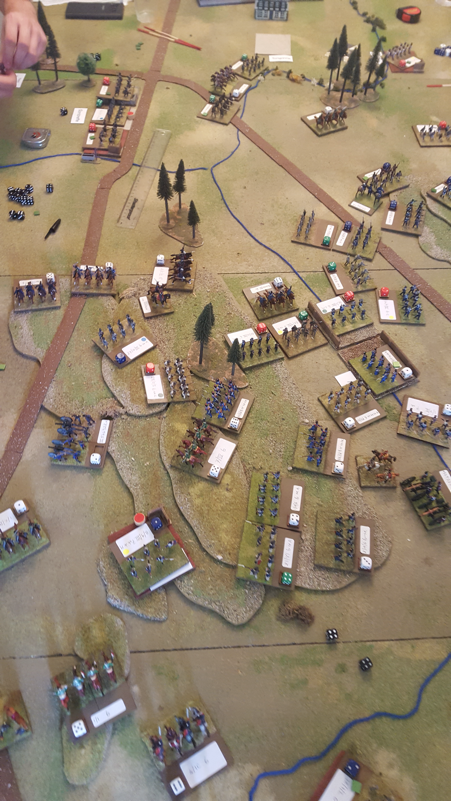
This and the next blog post contain the first battle report I wrote when I created this web page. New to the whole blogging business, I put it on a standard web page where it didn't really belong. I am now tidying up the site but didn't want to lose the report so here it is again. The 20 year Waterloo projectIn 2015 we played a refight of the Battle of Waterloo, using Honour Games’ Blücher and a figure collection that started in 1995. Back in 1995, I had just picked up Frank Chadwick's Napoleon Returns, his 100 Days Campaign book for Volley & Bayonet. At the time all our Napoleonic armies were in 15mm and I didn't have any Anglo-Allied figures at all. I thought it would be quicker and cheaper to create the Order of Battle for 1815 using plastic 20mm figures. My older son was showing interest in toy soldiers and the slightly larger figures appealed to him more than the 15s. To spread the budget, I based only 8 foot or 4 horse on each 3" square base, with a bare strip at the back for an information sticker. I set out to paint in a toy soldier style and was helped in the early stages by my sons. The project got off to a good start but was mothballed as my sons and I fell heavily for Warhammer and WH40K. We spent many happy years building and fighting with Games Workshop armies while the 20mm project gathered dust in the attic. Then in 2009 I chanced upon Sam Mustafa's Fast Play Grande Armee and dug the plastics out of the roof space. There were now many more plastic figures on the market than in the mid 90s and some were very fine sculpts. By summer 2010 I had painted the Order of Battle for Quatre Bras, which my friend Mark and I played to test the rules. A few months later four of us played a refight of D'Erlon's attack at Waterloo. There followed breaks for the 17th Century, then the War of Spanish Succession, tactical Napoleonics and the ACW, but in between other periods, I kept adding to the Napoleonic collection. With the bicentennial looming I decided it was time I finally put all the figures on the table and so I invited my regular opponents to a Waterloo multiplayer refight on 12 July 2015. 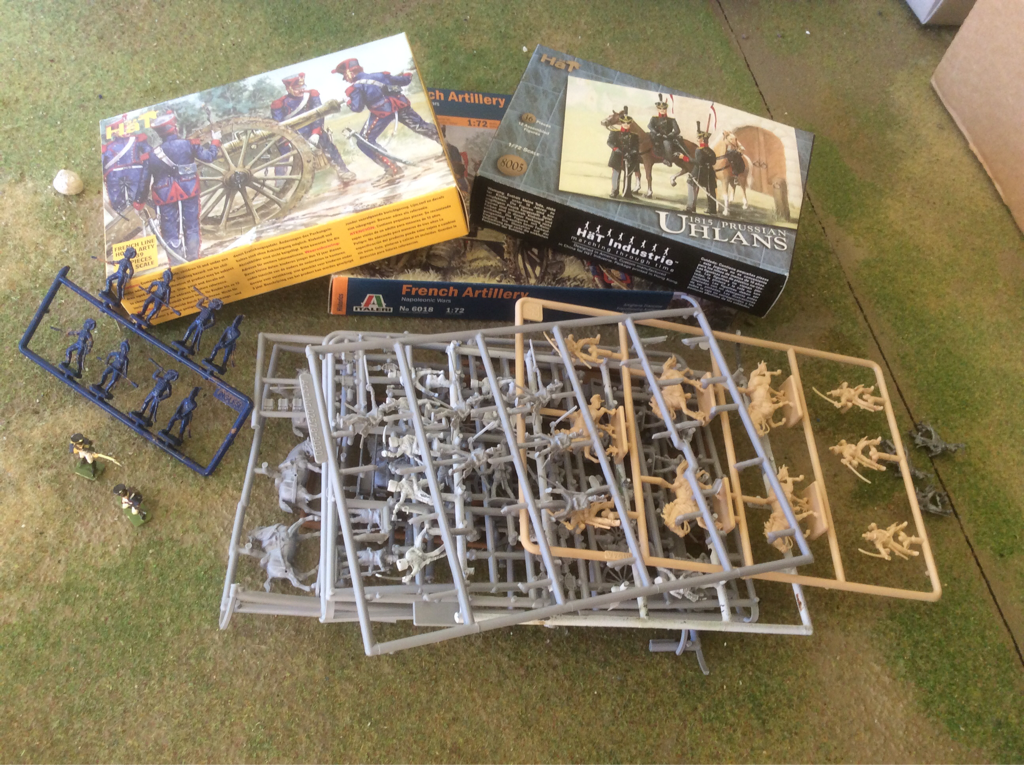 The raw materials Which rules?The first options for a whole battle refight were Napoleon's Battles, Volley & Bayonet and Grande Armee. We still play Napoleon's Battles occasionally but they don't please everyone and can play a bit slowly unless the players know the rules really well. Both Volley& Bayonet and Grande Armee give a faster game. But a new rules book had just been published that settled the decision for me. In early 2015 I acquired Sam Mustafa's new Big Battle rules set, Blücher. We have already played a lot of Sam's rules, especially Longstreet and Lasalle as well of course as Grande Armée. Blücher has not disappointed. For our first game We played a Franco-Austrian 1809 fight for a group of friends who game regularly but didn't know historical Wargames. It worked a treat: four complete beginners fought a large battle very happily inside one day. Keith (my longest-serving opponent) and I then played Plancenoit twice, using Sam Mustafa's 100 Days unit cards. Both games were tense and rewarding. So Blücher it was. A unit in Blucher mostly represents a brigade although some French Cavalry units represented whole understrength divisions. Each unit starts with a number of élan points (typically 6) that reflect its fighting quality. These determine how many dice to roll in fire and hand to hand combat. The dice can also be affected by attributes such as a good skirmish ability; attached artillery; shock power in the attack and so on. Élan is lost through combat and when reduced to 1 élan point, a unit dissolves. Blucher rewards the side that keeps fresh troops to throw in when the enemy is wearing down. The mechanics of the whole game are simple but subtle. Blücher is relaxed about figure and ground scales, encouraging players to adapt to the battle in question and the size of their collection and games table. In this case, I went for one inch to represent 100 yards and one unit to be a brigade. This scale, is already used in Napoleons Battles, Volley & Bayonet and Grande Armee. Fortunately, the 3" square units I have been collecting over two decades fit well with Blucher's scale so I didn't face a rebasing challenge. The Frank Chadwick Order of Battle for 1815 also reads across well, although his rules required many more commander figures and skirmisher bases. I'll have to find a use for all my surplus generals! The main task was to repaint the rear strip of the unit bases from green to earth brown. This was the third colour change since the project began but Earth brown bases seem to be the least intrusive so far. I also bought a lot of mdf dice cells from Warbases and glued one to the back left corner of every unit. The dice would show the number of elan points remaining, while their colour would show what special attributes each unit had. For example, white would be skirmish only; black skirmish and attached artillery; green for conscripts etc. I also wrote these attributes on the unit labels. 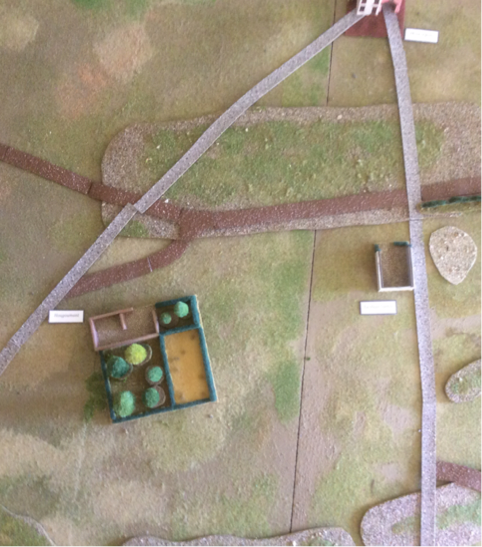 Aerial view of the centre of the table. Preparing the tableMy usual gaming table is 8' by 4'. For this game I added an extension, which took the table breadth to 10'. I thought the map would be easy to translate to the table, but was surprised to find several variations between the maps I looked at. You might expect this battlefield to be so well known that all maps would be identical. I went with the maps in Mark Adkin's Waterloo Companion where there was confusion. With such a large ground scale and 20mm figures, it is a challenge to represent villages. I made a lot of square bases of cobbles, cut from moulded plastic card for model railways. I stuck some low walls around the edges of each base and placed buildings from my 15mm collection on them. Not that impressive to look at but at least the troops are now defending something. I also considered making La Haie Sainte and Hougoumont bigger to accomodate larger bases but decided the space in the Centre of the battlefield was cramped enough as it was, so the chateau and farm's footprints are to scale. This made it impossible to garrison either the farm or chateau with a standard Blucher unit. I created a scenario-specific house rule to handle this, discussed below. As for contours, I wanted to create reverse slopes but not overdo the sharpness of the crest line. I used flat contour shapes, mostly cut from plywood and MDF, to make sure the battlefield has the right rolling feel. My polystyrene hill models are too steep and high for the job. The only penalty the contours conferred would be on line of sight and incoming artillery fire. I wanted to create space to East and West of the field, to allow for possible developments on either flank. For the sunken road, I relied on the distances provided by Adkin. To represent it, I lined the road with a hedge made of cut up pan scourers. This is confined to a few inches eastward from the Mont St Jean crossroads. I kept the oval sandpit from a refight of I Corps' attack a couple of years ago. 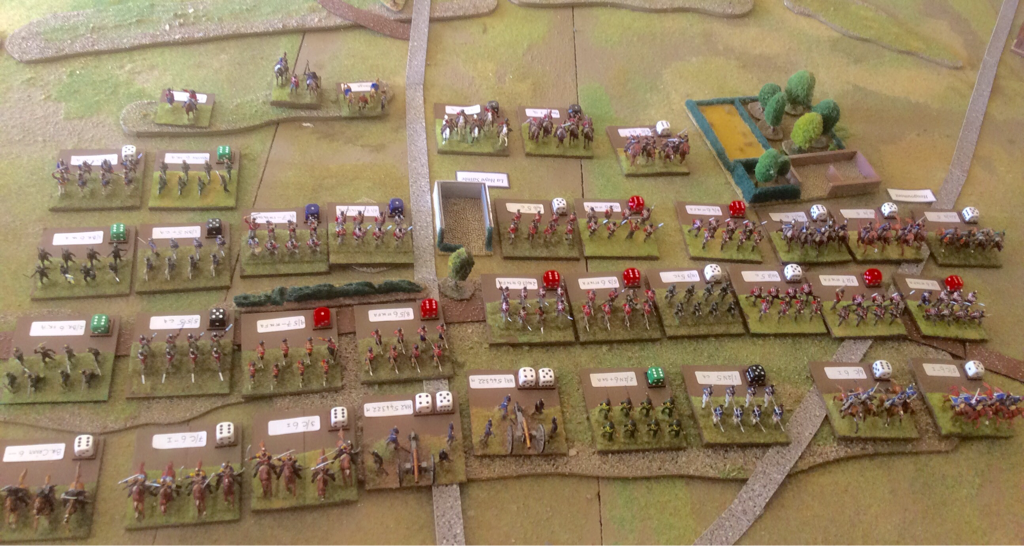 The Allied army The ScenarioThe day was set to run from turn 9 to 36, using the high summer game length in the advanced rules. The French were first side and each side had 3 Momentum (MO) dice per turn. I decided to use the multiplayer rules from the book, where every player on a side keeps a tally of MO use and the turn ends when the first player reaches the MO limit. I decided that the Anglo Allies would mobilise by division and not by Corps. The Corps in Wellington's army of 1815 was more an administrative designation than operational, and it felt wrong to treat it in a way comparable to a French Corps. However, I did allow the Allies to pay only 1MO per unit in an activated division. (If you don't know the rules I've probably lost you. Basically, this meant that an Allied player could not activate more than one division in a round, so mostly in smaller packets than the French). Morale levels were set at one third of army totals, so 17 for the French and 11 for the Allies. Reinforcements to either side would increase this limit, which meant the Prussians would not have their own morale level. I did not give the French a higher level for The Napoleon effect: while hard-hitting, the French army of 1815 was brittle. The Orders of battle we used are on the Napoleonic scenarios page here. For the order of battle, I decided not to tamper with the troops on table on the morning of the 18th. After all, this wouldn't be a Waterloo refight without D'Erlon, Reille and the rest. I did however leave the players to choose their deployment. Also, I wanted to create some uncertainty for both sides over who might appear in the distance and when. I wrote a decision tree which required a dice roll every few turns. The decisions were, broadly in sequence: Will Blucher commit to reinforce Wellington? Will Grouchy begin to move earlier in the day than he did historically? Will Grouchy try to drive through Wavre; seek to reinforce Napoleon directly via a side route or a mix of both? If Grouchy assaults Wavre will his pressure on Thielmann be heavy and if so, will this affect the pace or quantity of Prussian reinforcements arriving at Waterloo? How fast will reinforcements (of either nationality) march towards the sound of the guns? I won't go further into the mechanics but the probabilities varied according to my preconceptions. For example, I wanted there to be a possibility that Blucher would not commit to move to Waterloo, but the chances of rolling this result were very small. The outcomes therefore ranged from the Prussians arriving pretty much as they did, all the way to no Prussians arriving or even a small French reinforcement. But to be frank, the chances were stacked in favour of history repeating itself. The player briefings and battle report are in the next post. 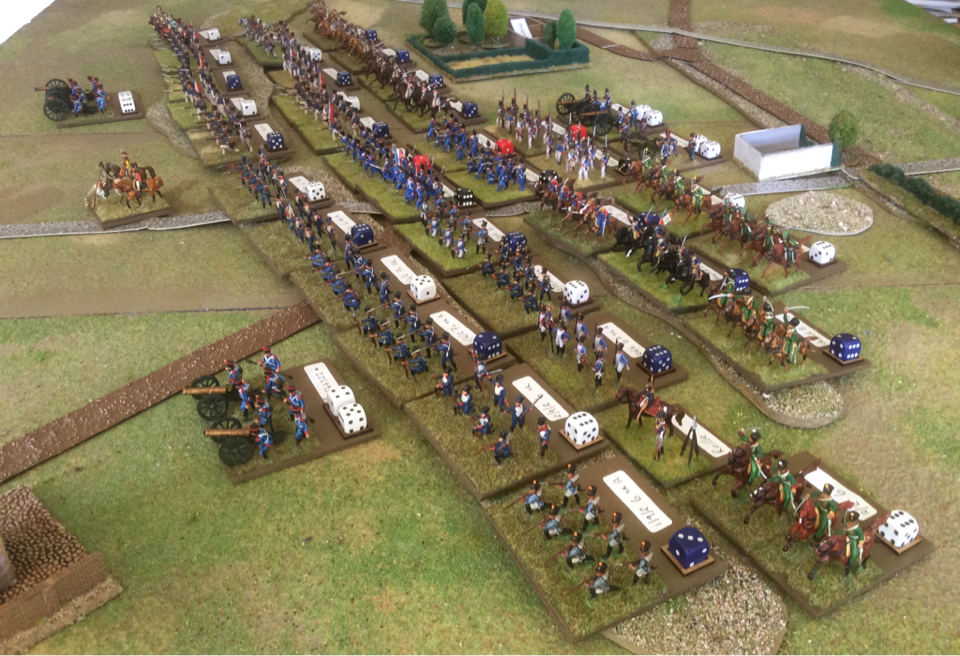 The French army
0 Comments
.As a fan of most games made by Sam Mustafa/Honour Games and a keen player of his Lasalle rules for Napoleonic Division level combat, I bought Lasalle 2 on release day earlier this month. I had already pored over the pre-release downloads so had a general idea what to expect, and was not disappointed by the full rules.
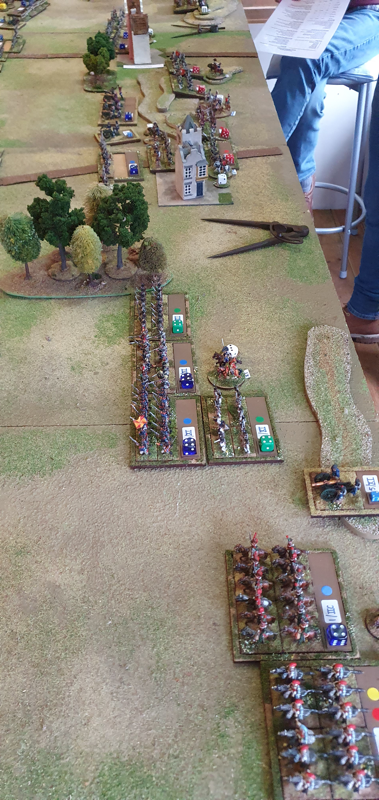
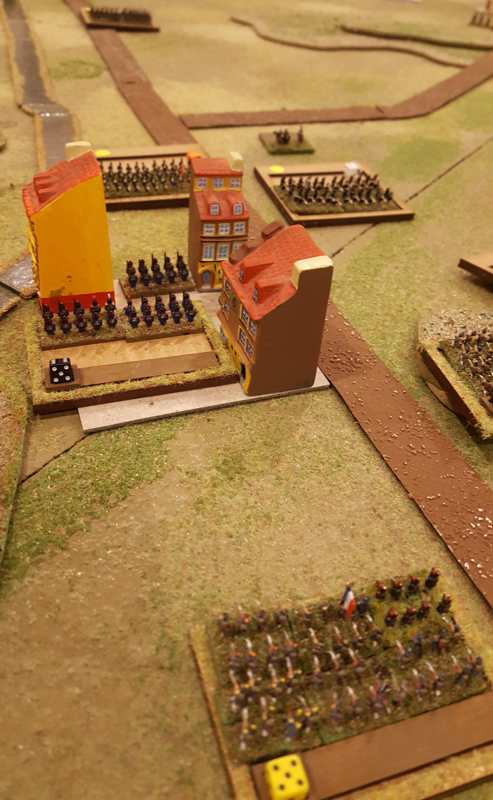
Others have described the changed mechanics in detail but in summary, the biggest innovation is a totally new play sequence, in which the clear phases common to most miniature rules have disappeared and the initiative shifts back and forth between the two sides until both have used up their momentum. This approach reminds me a bit of John Hill's board game of Stalingrad, published by SPI back in the 1980s. It is certainly original and looks interesting, but I suspect it will take a few games to get to grips with the subtleties. I hope people give the rules a chance before passing judgement. I have adapted a scenario from the original rules to cover Lasalle 2. It is quite straightforward to do. The scenario is here Reduced by the lockdown to reliving past glories, in my last post I included a link to a Waterloo AAR from 2015. That was the very first report I wrote for this site and I hadn’t yet worked out what readers might find useful, so I didn’t include an order of battle. Steve has asked if I still have this so I have looked out the paperwork from five years ago (remember the golden wargamer’s rule: throw nothing away!).The order of battle, including the reinforcement schedule for the Prussian army, is here. Among the briefing notes and place names in the file box I found some of the messages exchanged between the players during the game. It brought back the jeopardy of a multi player game. As soon as we reach Defcon 1 and are allowed to mingle again, I am arranging the biggest multi player battle my shed can hold! The anniversary of Waterloo is usually an excuse for us to arrange a Napoleonic game. In the past few years we have covered Ligny, Plancenoit, D’Erlon’s assault and two full battles of Waterloo. Sadly we’ll have to pass on a face to face game this year. Instead, I have been busy rebasing my 15mm Napoleonics from Napoleon’s Battles to Lasalle, in anticipation of the release of Lasalle 2 at the end of the year. I have chosen 40mm base widths, with four foot or three horse in line per base. I know it isn’t fashionable but I prefer to base infantry in one rank rather than two. I think this is due to my origins in Bruce Quarrie’s 1970s rules: I don’t like the distorted depth that two-rank bases give to a battalion (although my 6mm Napoleonics are in two ranks). In 2015 I hosted a seven-player refight of Waterloo, which was our first use of Sam Mustafa’s Blücher rules. It was great fun. The report of our game and the preparations for it is here.  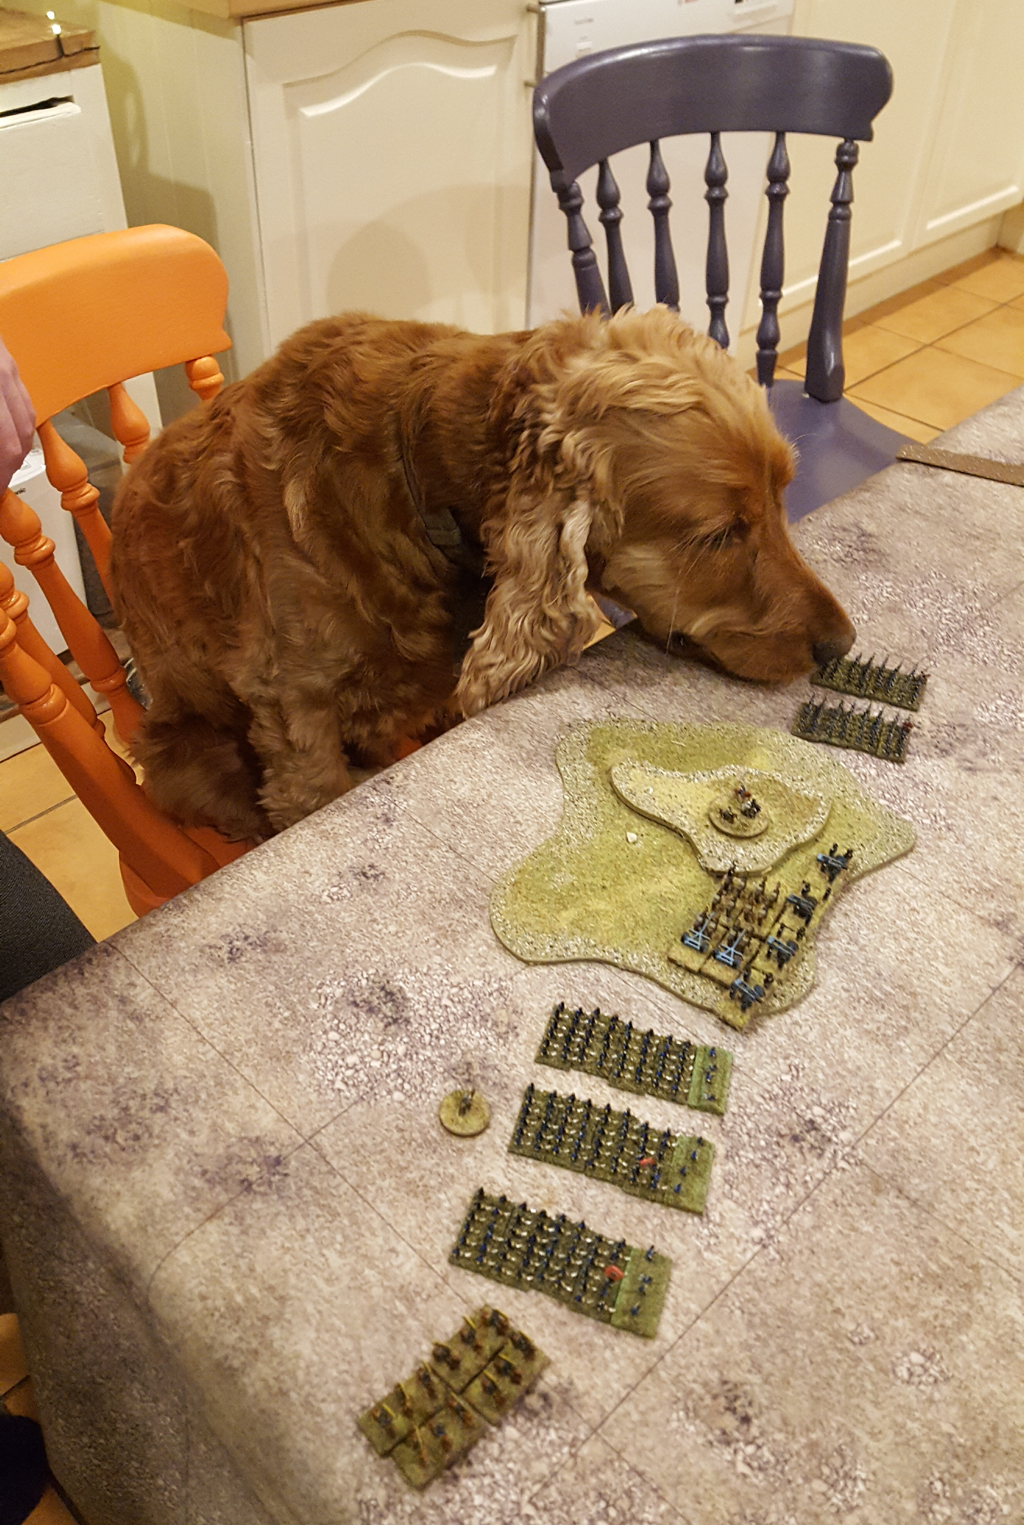 Copper the spaniel gives personal orders to the colonel of the Prussian Landwehr The other evening Dan and Spencer played their first game of Lasalle, leading a Liberation era force of Prussians and Russians in an attack on my French defenders. Little did we know that this is likely to be our last face to face game for some time. Spencer’s Russians consisted of solid infantry and a position battery, while Dan had a mix of good Prussian regulars and unpredictable Landwehr, a foot battery and some Landwehr cavalry. My infantry was half Marine Infantry (Experienced/reliable) and half conscripts (the army list suggests they be Amateur/reliable but I’d made them Amateur/shaky by mistake. That’ll teach me not to check the lists!). I also had a foot and a horse battery and two regiments of mediocre Württemberg chevauxlegers. My position consisted of a central hill with a two-base town to its left. My centre and right were covered by a stream, over which a road ran from the Allied position. Fans of the Battle of Leipzig may notice the broad similarity of troops and terrain with the combat at Mockern on 16 October 1813. I plan to run a multi-player LaSalle refight of Mockern later in the summer and would like the players to be familiar with the rules. I deployed first, putting conscripts in the two town bases with a battalion behind; a battalion of Marines to their right; the two batteries and two more Marine battalions on the hill; and the cavalry on the right covering the bridge. Dan placed his battery on his base line, his regulars and cavalry on his extreme right and his Landwehr on his left. Spencer formed a compact block in march column, above the bridge. I thought from their opening turns that the Allied plan was to mask my centre and assault the town on one flank and the bridge on the other. To stop me from leaving the hill, the two Landwehr battalions were sent to threaten it. Both Dan and Spencer advanced in march column, bringing several battalions within range of my artillery, which received double dice against such juicy targets. The Russians had the benefit of a stone wall to their front which negated this advantage, but the Prussian Landwehr advancing in the centre were seriously disrupted. Meanwhile Dan bombarded my conscripts in the town as his right wing came down the flank to assault them. Spencer crossed the bridge and formed line on my side of the stream with his lead battalion. But he also started siphoning his rear battalions off towards the centre, which now looked like a serious advance on the hill. I’m not sure if this had always been the plan or it was a decision on the hoof. It certainly glued my central battalions to their position. After a couple of checks, the Prussian assault on the town made good progress, taking full possession by the end of the game. Dan’s Landwehr cavalry snuck in past a battalion square and charged my foot battery in front. The guns’ point blank canister emptied too few saddles and in the ensuing combat, the cavalry wiped them out. On the right, we had an interesting test of Russian nerve that paid off handsomely. I declared a cavalry charge against the battalion in line and Spencer elected to give fire as a reaction rather than form square. He inflicted 2 disruptions by fire and then in the ensuing combat, I only achieved an inconclusive victory despite my advantage in dice, which required me to fall back. A bit miffed, I charged with the other cavalry regiment and Spencer again stayed in line. This time the cavalry wiped him out. That’ll teach him! Or will it? He promptly marched another battalion forward to fill the gap. I declared another cavalry charge and, you guessed it, they met me in line. You also guessed it again: I lost the combat and my cavalry broke. It was getting late by this stage and the loss of the cavalry took me to my break point. Although under the rules this does not automatically end a game, we agreed to stop there. The game flowed very well considering two players were new to the rules. It would have gone even faster had we not digressed at various points to discuss everything from NapoleonTotal War to Zulu, my favourite film of all time. But what would be the fun in that? A wargame is at heart a social occasion and Spencer is irrepressible! As for the game narrative, we agreed that mostly, the rules produced plausible outcomes and we did not feel they imposed unreasonable constraints. The successful Russian decision to receive cavalry in line did make me wonder if the rules are too favourable to this gambit succeeding. The issue hasn’t arisen before: in my previous games of Lasalle, players have tried to form square because they knew that this is what the infantry would have done. But Spencer has long experience of assessing rules and is willing to test their limits. He looked at the odds and decided he liked his chances of shooting my cavalry away without forming square.. This worked for him two times out of three. Now, the recorded cases when unsupported Napoleonic infantry in line successfully repelled cavalry are very few. A battalion commander threatened by cavalry would not check his chances in the rule book: he would follow protocol and try to form square. Nor would his division commander be involved in that decision. I don’t like it when rules are too strict but I also don’t like it when a unit can perform outside the character of the period. I need to ask my statistician son to check how flukey the Russians were in this game but if the standard odds of the infantry in line succeeding against cavalry are good, then I fear we have a problem. I would see two possible options: either infantry in line charged by cavalry must always attempt to form square, or its firepower against enemy cavalry in contact should be reduced, for example hitting on 5s to reflect its nervousness about the impending clash. My third option of course is to wait for version 2 of Lasalle, which Sam Mustafa has promised will appear in 2020. I look forward to that release very much. Since we have been deprived of the chance to meet again for the time being, I am going to crack on with painting more figures for the refight of the battle for Möckern. With luck, we can hold this before the end of the summer!  Matt and I played an impromptu game of Blücher last Wednesday, having established that this really would be our last chance for a wargame before he moves away. I already had units based and labelled for the Waterloo campaign, so we played a game loosely based on the first Prussian attack against Plancenoit. Matt commanded two brigades of the Prussian IV Corps plus Corps cavalry, while I had the French VI Corps, plus Domon and Subervie’s cavalry brigades. Matt’s IV Corps artillery and the French Young Guard would enter as reinforcements. We had two MO dice each. The terrain was impressionistic but not too far off the real geography. Matt’s Prussians emerged from the Bois de Paris on the Eastern table edge, to find VI Corps deployed on high ground to the north east of Plancenoit. The Lasnes stream bounded the southern table edge. The village of Plancenoit was an objective for both sides and victory would go, either to the side occupying it at game end, or to whichever broke enemy morale first. The village was unoccupied at the start. 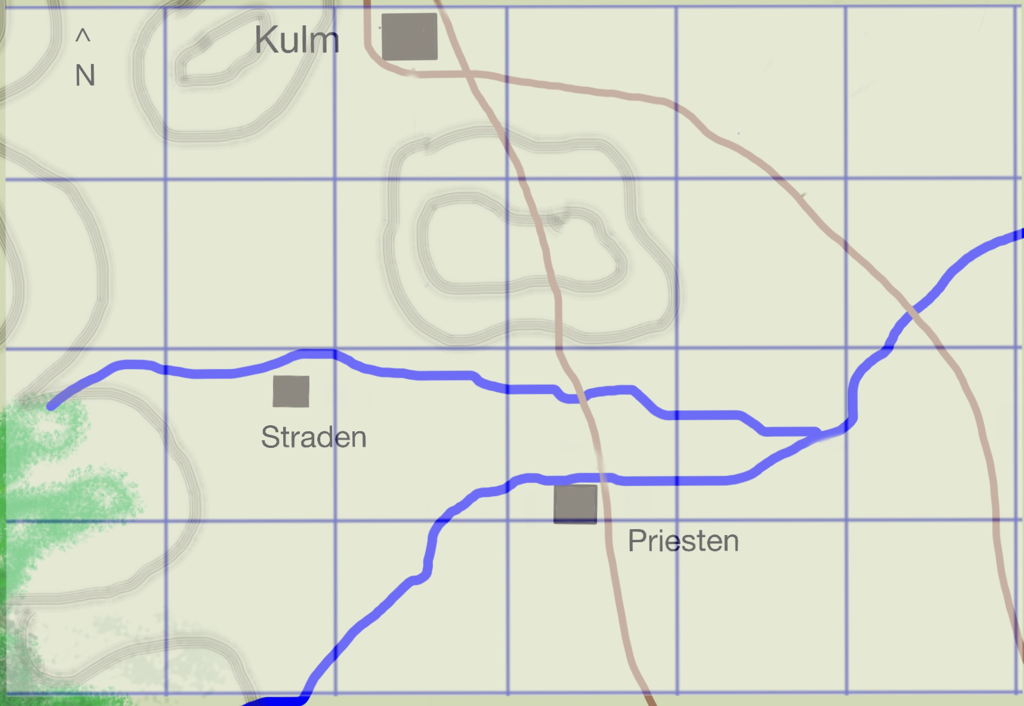 The French VI Corps are about to be ejected by the Prussians I realised before the first turn that I had already broken the scenario, as the Blücher reserves rule meant that Matt could bypass VI Corps and walk his whole force into and around Plancenoit on his first turn. He is too canny a player to miss an open goal like that. As we were trying to recreate at least the flavour of the historical encounter, we agreed that Matt should treat the village as notionally occupied by the French, meaning that no unit on reserve movement could approach closer than 4BW away. Matt began the game by advancing on Plancenoit on his left with one brigade while screening my French on the high ground with the other. In response, I shifted some of VI Corps to my right, sending one unit into Plancenoit. This had time to form garrison but would soon be ejected by a combined attack by two Prussian units. Meanwhile Matt tried to cut the village off from the rest of the French force by sending cavalry against my centre. The results there came out about even but I was left with a dent in the line. The French Young Guard then arrived and assaulted Plancenoit, failing to break in on the first attempt but kicking the Prussians out with the second attack.  The Young Guard arrives to retake Plancenoit (the units with red dice) Matt’s IV Corps artillery arrived and I started to pull back my left hand infantry unit, which had started to look shaky due to Prussian gunnery. On reflection this was a mistake as the unit soon found itself caught between enemy infantry and cavalry, with no support within reach. By now the turns were running down and Matt concluded he couldn’t eject the Young Guard with his depleted left wing units. Instead he drew back his left and focussed on reducing my morale before the turns ran out. I would have been wise to move back my own command and play for time, since Plancenoit was firmly mine. All I needed to do was hang on for a couple more turns. However we were both one morale point away from defeat and I thought I might break Matt as well as holding the village. What a glorious victory that would be! Of course it went wrong and Matt broke my morale first. Gamer, Know your limits! 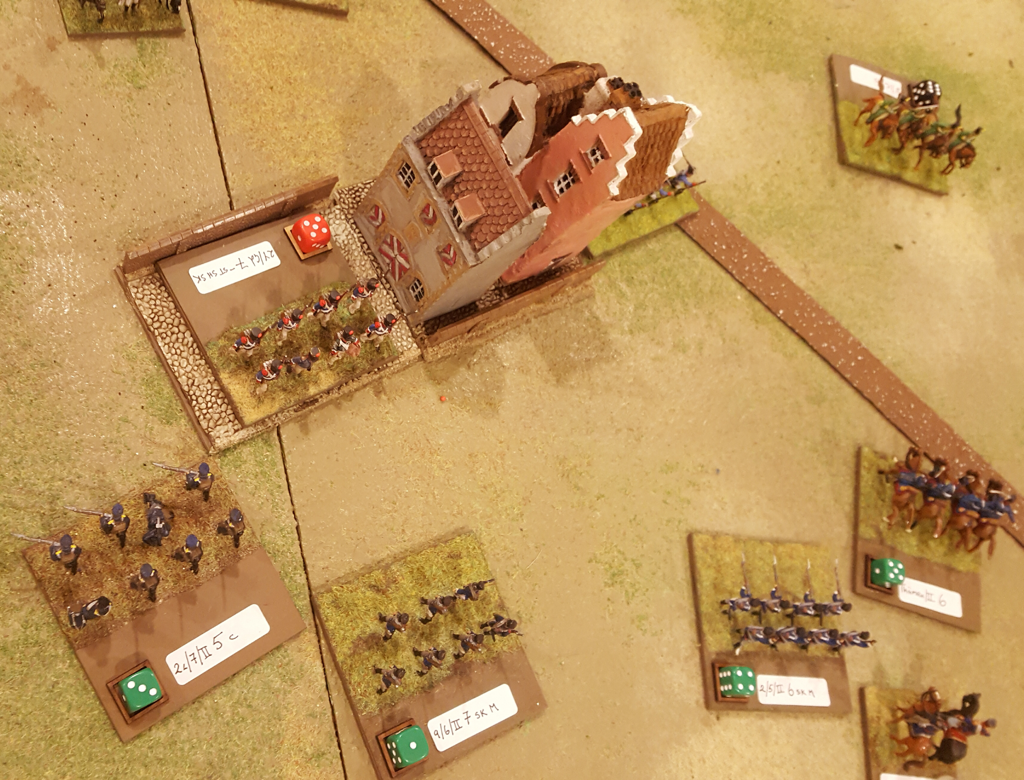 So the game ended with Matt victorious. VI Corps was badly battered and the Young Guard held Plancenoit, while the Prussians were stood off from the village, with one brigade nearly used up but the other still in goodish shape. Historically the Prussians would soon be reinforced and retake Plancenoit, only to be ejected again by French Old Guard, before the weight of Prussian numbers, combined with the failure of the Middle Guard to break Wellington’s centre, would oblige the French to give up the village for good and join the general retreat.
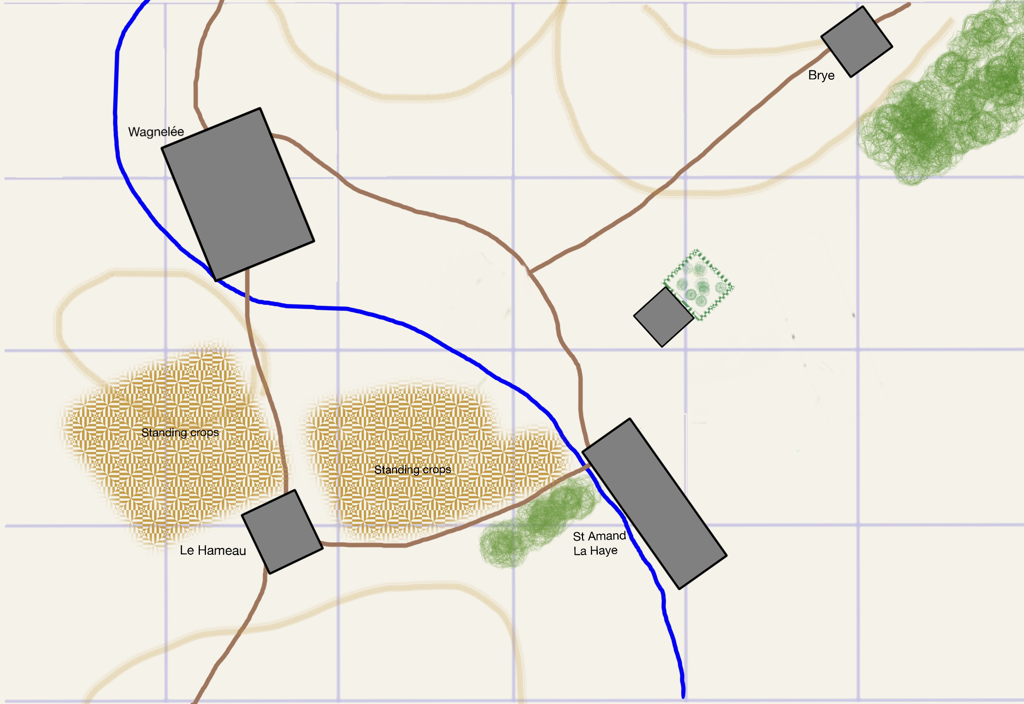
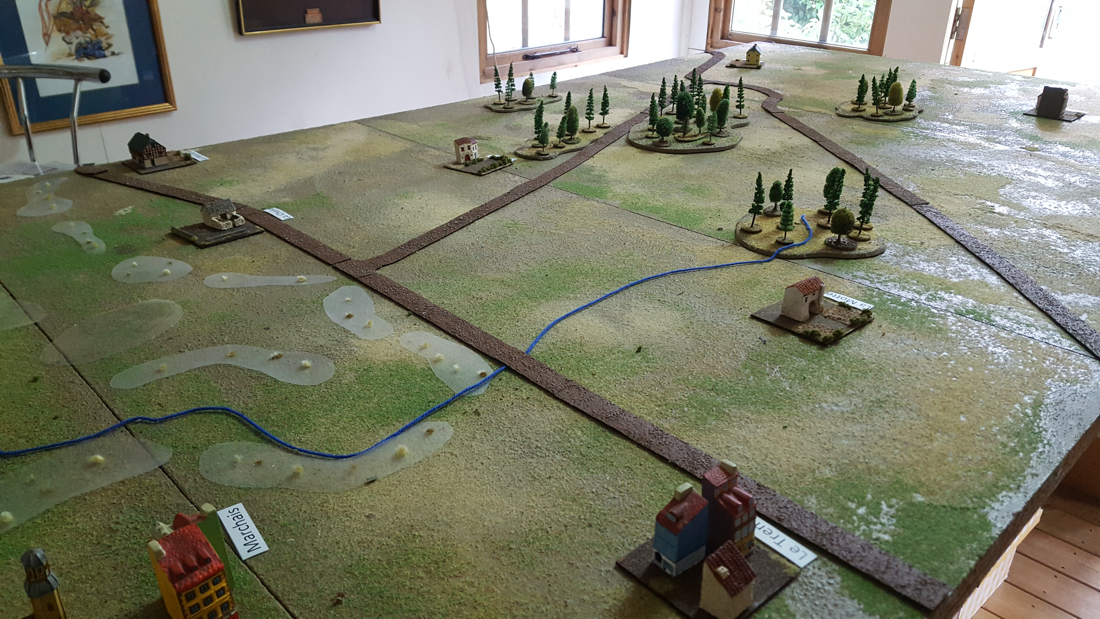
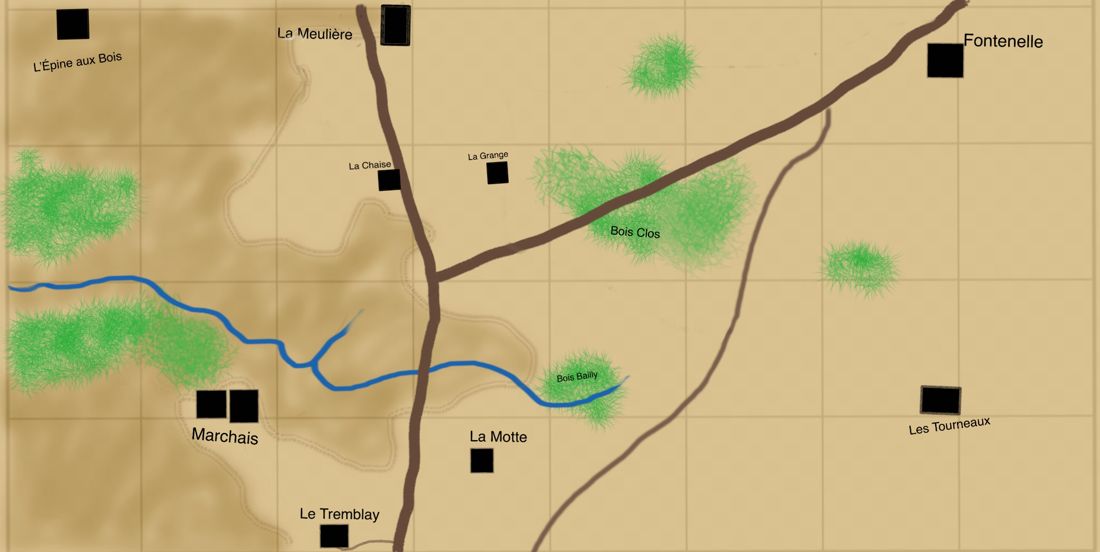
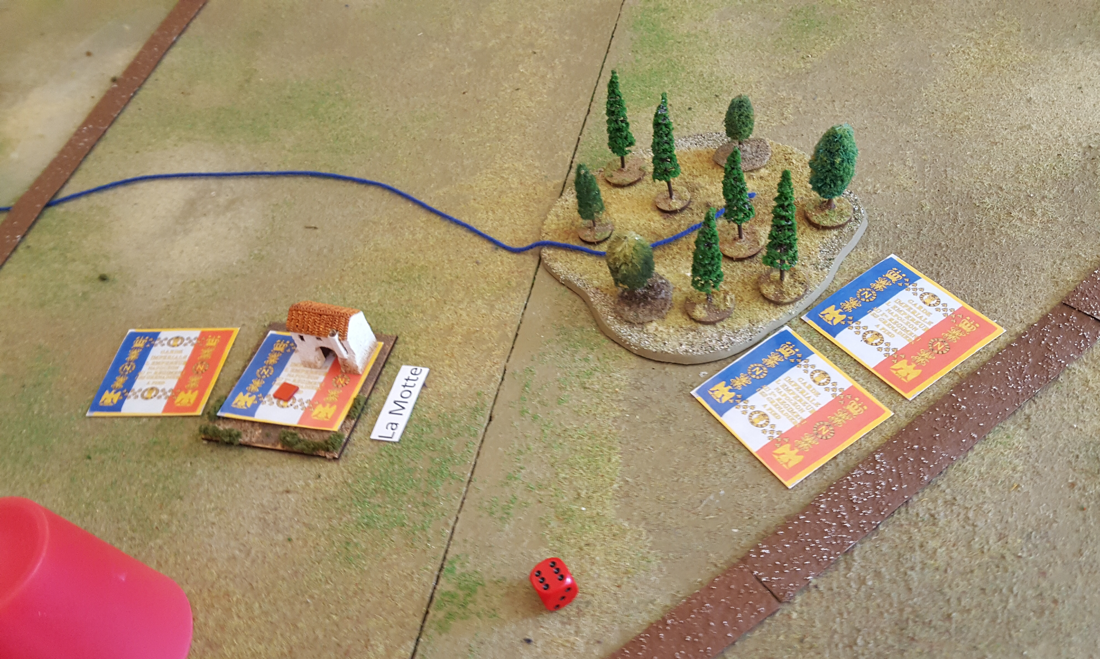
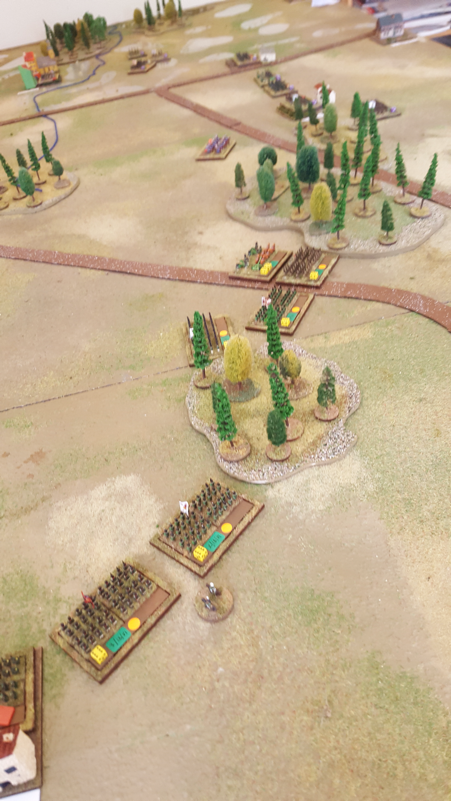
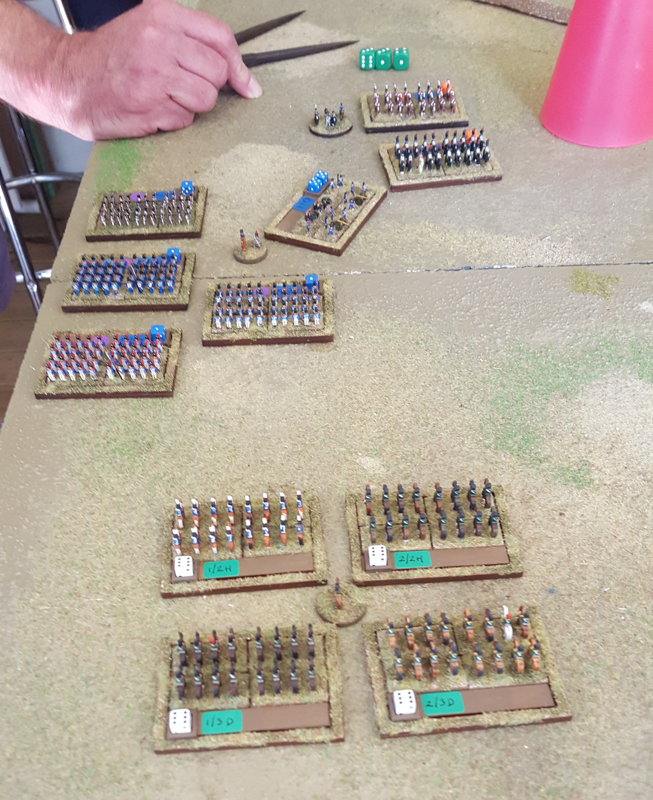
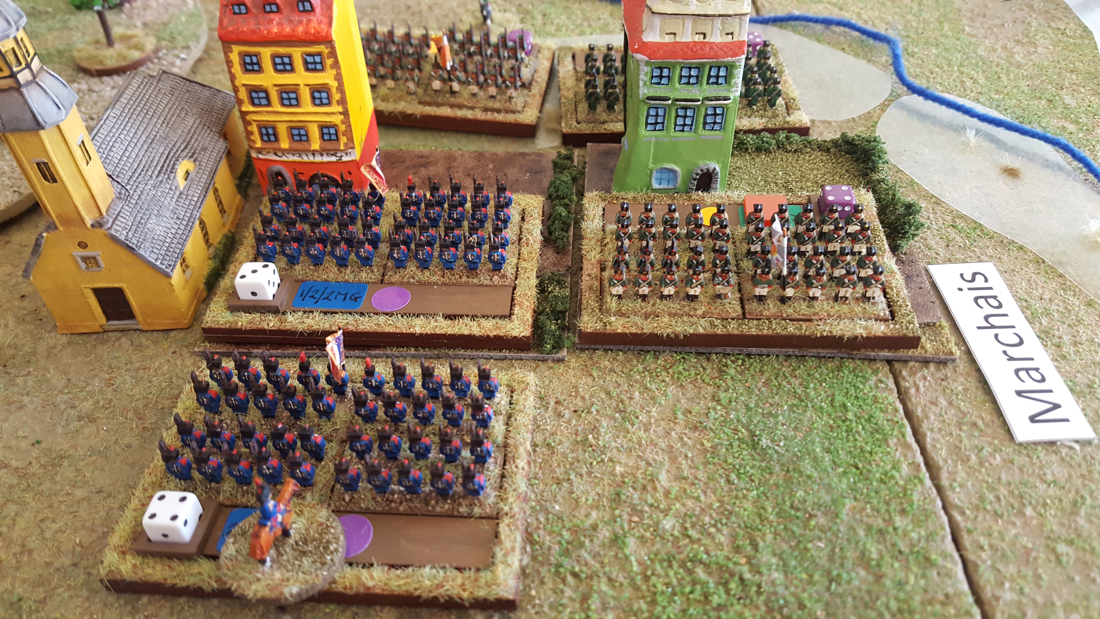
This was an exciting and absorbing fight, despite its last minute arrangement and the small number of units. Rarely for me, I still haven’t felt the temptation to fiddle with the rules, as they continue to give plausible outcomes and to be great fun to play. With time for preparation I would have checked the map more carefully and given the scenario a dry run, which would have highlighted the risk that the reserves rule could be used to change the nature of the encounter. I could address this by changing French deployment to allow them to occupy Plancenoit at the start, even though this wasn’t actually how VI Corps initially deployed. Alternatively, we could decide that the Prussians cannot take a reserve move because they have been force marching all day from Wavre. The figures we used are a mix of 1/72 scale plastics, which I have collected over many years to create the whole 1815 order of battle, originally based for Volley & Bayonet and Grande Armée. The number of figures per base is a bit sparse but I started this project on a budget. For games set in other campaigns besides 1815, I do prefer 6 or 15/18mm. All in all, our impromptu game was great fun and I’m glad we were able to fit it in. On 16 August we played a 6 player game using Sam Mustafa’s Blucher rules and 6mm figures, mostly produced by Commission Figurines. The battle was Montmirail, 11 February 1814, using the small scale variant in the rules. Montmirail is an encounter battle in which the French are heavily outnumbered at the start, while the Russians are present in their entirety from turn 1. It is a chance to use the French Guard, who actually constitute the majority of units, and to pit smaller numbers of high quality troops against a numerically superior opponent. But the Russians are no pushover: all their infantry count as steadfast and so are tough on the defensive. Scenario and Setup The scenario, now in its third version, can be found here. The original was a two player scenario at ‘normal’ scale, so one base per brigade. I expanded this to ‘small’ scale, roughly doubling the number of units, but then after a dry run I added a few more, based on a new guesstimate between the different sources. I stuck with the original decision to leave the Young Guard out because only Allied accounts said they were present and Allied witnesses were not great at recognising enemy units (cf mistaking naval artillery for marines of the guard at Leipzig). French accounts were clear that while the Young Guard’s then commander, Ney, was present, he had left his troops behind. If they did reach the field at all, I believe they will have done so after the battle was over. The battlefield was mostly easy to depict. As accounts of the battle say the roads were bad due to heavy rain, I only showed the two main roads: the East-West Little Paris road and the road going north to Chateau-Thierry. I also struggled over how to depict the waterlogged low ground on the Russian right/French left. After first trying to work out a way of modelling the contours here, I concluded I didn’t need to: the issue that affected the battle was the state of the ground, not line of sight. In the end I cut out several irregular pieces from a clear plastic wallet and placed these on the table to represent the area of low marshy ground. It looked quite effective and had the desired effect on play, making the fight in this area an infantry-only affair. How it Played Matt took the role of General Sacken, while Chris was Von Lieven, commanding XI Corps. Keith played Napoleon, Spencer was Ney and Nick was Nansouty. I umpired at the start and came on in the last quarter as General Yorck. At game’s start, the whole Russian army was on the field, facing (count them) four French units. Matt and Chris used the first turn to advance as far forward as possible and close down French options. Chris on the right assaulted the village of Marchais, a struggle that would last all game. Matt advanced his left almost as far as the French baseline, thereby threatening Nick’s flank. Nick slipped a brigade of conscripts into Marchais and tried to look brave with his cavalry. One of these units was almost crippled by Chris’s artillery, which had a couple of high rolling turns. Luckily for the French, Keith and Spencer then arrived with the Old Guard and some more cavalry. Spencer’s Old Guard expanded his room for manoeuvre by assaulting Matt’s cavalry on the Russian left. He pushed Matt back but with heavy losses. Infantry pay a high price for attacking cavalry, although if it is worth the gamble with anybody, the Old Guard is probably the best formation to try. Matt’s cavalry still being potent, Spencer now formed square with two Guard units and sent the other two against the left wing Russian infantry. At this point Napoleon himself joined one of these units and disappeared into the smoke, presumably ignoring the pleas of his aides to move himself out of danger. So what happened next? The French Left and Russian Right fought stoutly over Marchais, which changed hands twice before ending the day in disputed possession (one town base occupied by French and the other by Russians). This denied either side victory points for the town. At the other flank, the French assault chewed up several Russian units but used themselves up in the process. Yorck arrived late but in time to eliminate an exhausted Old Guard unit and to fill gaps in the Allied line. In the Centre, Chris launched an attack on La Motte which was only thinly held by the French, but just too late in the day. Darkness fell with the Russians nearing their break point but still hanging on. With possession of Marchais still in dispute, and to my private disappointment as I dislike a hung result, the day ended in a draw. What might have been Hindsight is a wonderful thing. The Russian Left did well to take territory and let the French try to dislodge them. On their Right, Chris handled the assault on Marchais well but Nick made good use of his conscripts and the arrival of the Middle Guard allowed him to deny Chris undisputed occupation of the town on almost the last turn. I think, had Chris attacked La Motte sooner, Nick would have been stretched too thin and the outcome at Marchais could have been different. Between the two commanders in chief, Matt stayed in control of his battle while Keith got too involved in the assault by two Old Guard units and lost his overall grasp. Although a drawn battle according to the rules, I consider Matt was the better CinC on the day. By general agreement, Nick made good use of his meagre numbers. Twice in the last turn of the game, the Russians were within an unlucky dice roll of reaching break point. Fortunately for them, they didn’t. This was also fortunate for me, as after the game ended I realised I had made an umpiring mistake. Around a quarter of the way through the game, I had allowed Nick to send a cavalry unit into the rear of a Russian artillery unit, wiping it out. When I checked the photographs and reread the rules the next day, I found that this charge had been illegal, since the artillery’s rear had been protected by the 1BW zone of control of a neighbouring infantry unit. If it charged anybody, the cavalry should have charged this unit. So I apologise to Matt and Chris for my error: you were two units away from breaking at nightfall, not one. I hope the team enjoyed the game. There’s more to be explored in this scenario and I have kept the stickers on the units, in case we can have another go at it some time. It’s curious that wargamers don’t often replay the same battle with miniatures, whereas it is common to play the same board game several times over. I try to arrange a couple of multi player wargames a year and have started thinking about a theme for the next one. Period Choice of period mostly depends on what I have read most recently. This time I have gone Napoleonic, as I am thoroughly enjoying John R Elting’s Swords Around a Throne. This period is also a reliable choice for most other players. Rules Sam Mustafa’s Blücher rules have proved a good set for our multi player games, being easy to learn yet still atmospheric and satsisfying to play. Choosing a Battle I have selected Montmirail, 11 February 1814, the middle and largest engagement of the 6 Day campaign. We played and enjoyed it in the 1990s using Napoleon’s Battles. It is a three way battle with the French heavily outnumbered at the start, with numbers increasing through the day. It is also notable for the preponderance of Guard units in the French army so actually gives you a chance to use all those guard units in anger. Sources I started with F Loraine Petrie’s Napoleon at Bay, a clear and balanced analysis of the campaign. I also have the French language Napoleon, 1814 by Jean Tranié and JC Carmigniani. On line, I found an excellent source called les batailles, website address http://www.lesbatailles.com/page9/page9.html. This has a detailed and careful account with extensive orders of battle and clear maps. The Wikipedia article on Montmirail is ok but this includes some mistakes about the units present and its account of the battle is less clear. Creating the scenario At the standard Blücher game size, Montmirail comes out as a small engagement with few manoeuvre units on either side. But using the option for small scale scenarios, it becomes more interesting. Sam Mustafa is not worried by the constraints of fixed ground and time scales in Blücher but I still want a framework for scenario planning. Fortunately his previous grand tactical set, Grande Armée, was clearer on these issues so when Blücher is unclear I refer back to them. Since this is a small scale battle I settled for 1BW to equate to 150 yards. For time, I decided one hour would be represented by 4 game turns each. This is important for planning the arrival of reinforcements. The playing surface came out as follows on an 8x4 feet table, with 1BW of 150 yards being 3”. The Allies deploy at the top of the table and the French reinforcements arrive at the bottom. The grid is read as lettered columns and numbered rows (thus, Fontenelle is in box G1). The darker areas to the left are lower than their surroundings although the only time this matters is when units cross the contour line. 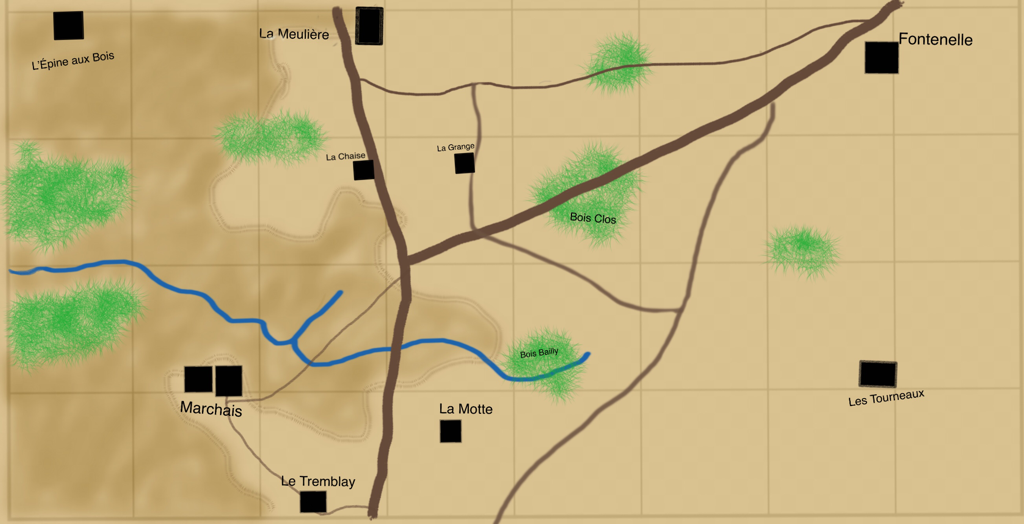 Creating a reliable OOB is difficult at the best of times but even more so for 1814, when some Allied strengths had fallen drastically and bookkeeping for all armies, but especially the hastily assembled French forces, was sketchy. Accounts differ radically but I decided to trust the Batailles website as this seems very well sourced and argued. It also, to be frank, produces a game OOB that seems nicely balanced, which is important for player satisfaction. I accepted the seemingly majority view that there was no Young Guard at the battle. Marshal Ney, commander of the Young Guard, was present on his own and led Friant’s division with distinction, but his young guardsmen were several kilometres short of the battlefield.
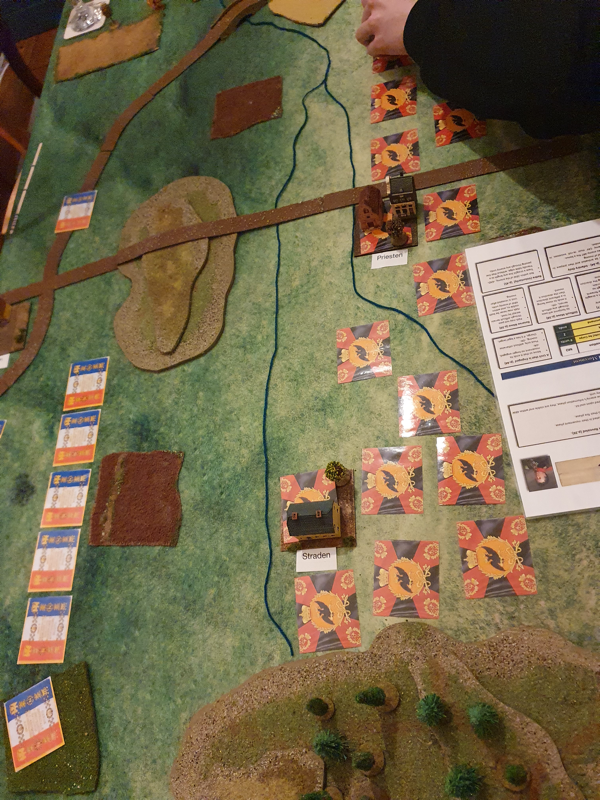
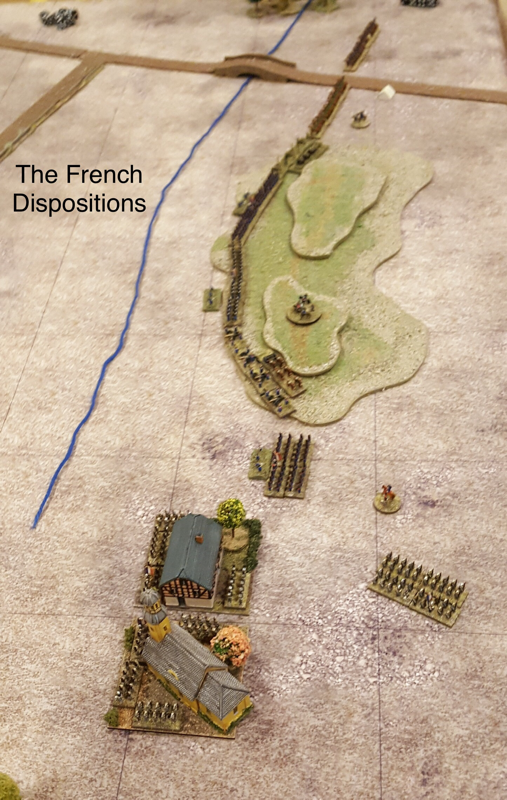
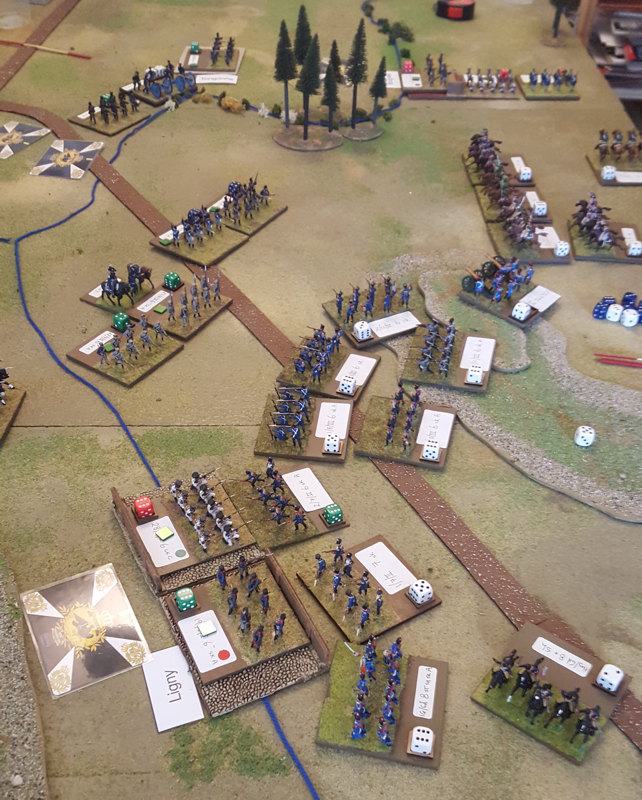
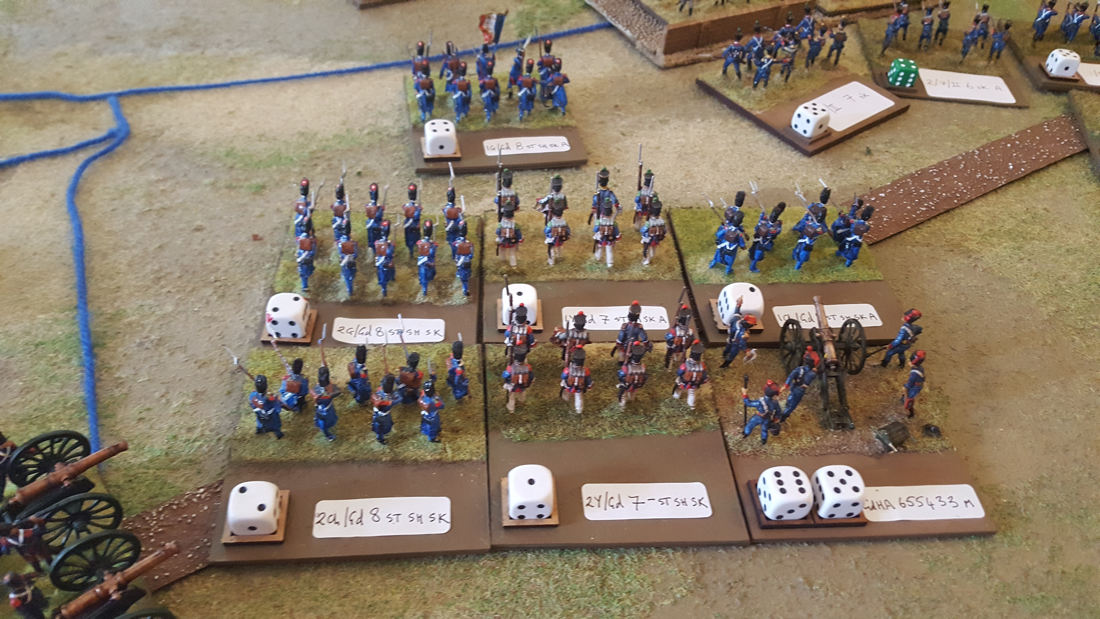
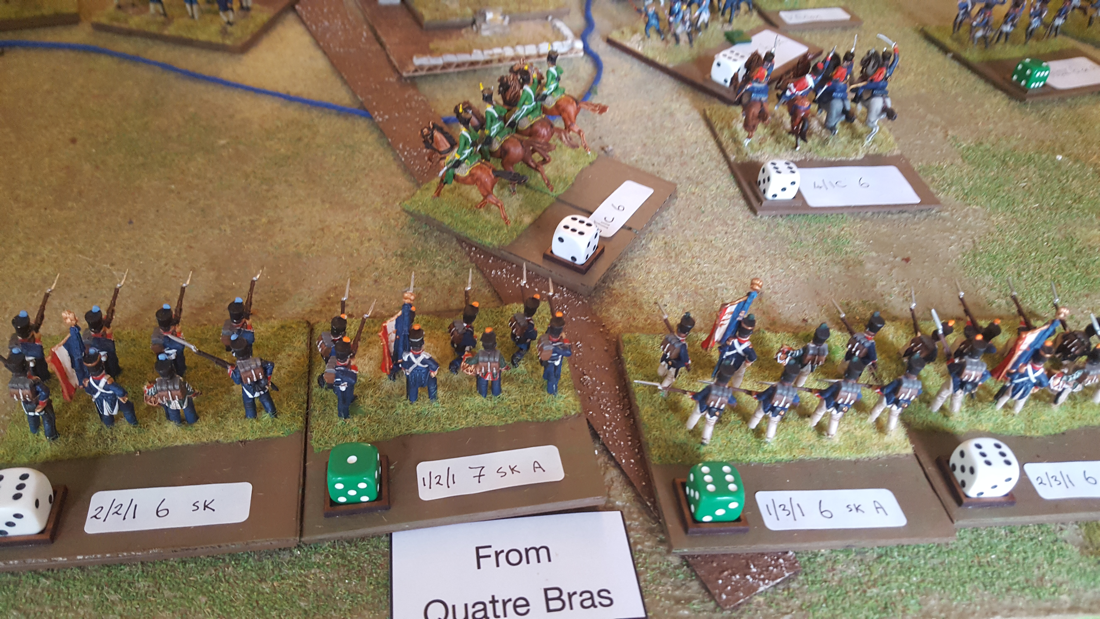
In the next post I will discuss choice of figures, summarise the events of the real battle and upload the final scenario. I had a gaming-heavy weekend last week, starting with the annual trip to Warfare in Reading. This continues to be my favourite show on the circuit. The stalls seemed pretty busy and I hope the traders made enough to come back next year. I picked up some 20mm AFVs and scenery bits for Battlegroup, a copy of the Lardies’ What a Tanker! rules and a lot more MDF 6mm Napoleonics from Commission Figures. I bought my first Commission figures at Warfare 2017 and am really impressed with them. At playing distance they are indistinguishable from metals and at £2 for 96 infantry, they are fantastic value. My friend Keith came up to Warfare from Devon and stayed overnight. We played a game of Blücher when we got back from the show. I’d written a scenario for Möckern, the northern battle on the first day of the battle of Leipzig, 16 October 1813. I had first planned to use 15mm figures but realised I had enough 6mm figures to play it at that scale, provided I paint up a couple more French units. I wanted to see how 6mm units affected the feel of the game so after a couple of evenings with the paintbrush I had the full order of battle. The two extra units were of the French Naval Artillery, who wore blue greatcoats with red epaulettes and were mistaken by their opponents for sailors of the Guard. 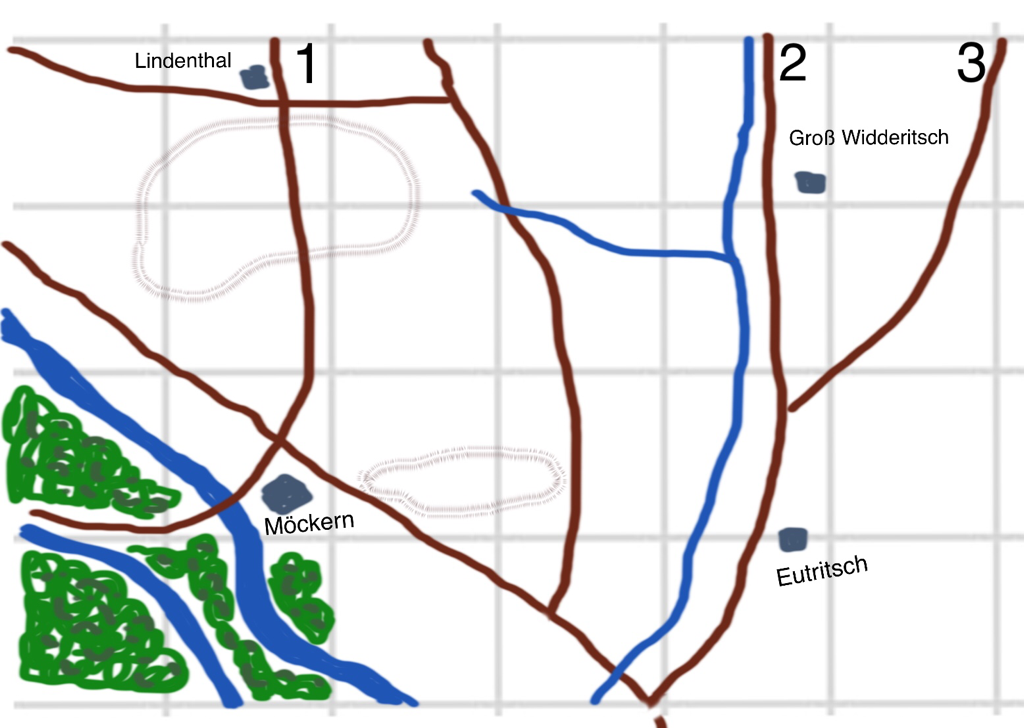 The scenario is on the Napoleonic scenarios page here. The background to the battle is as follows. On 16 October 1813 Napoleon’s army stood at bay in the city of Leipzig, surrounded by advancing Allied armies. Napoleon’s plan for the day was to strip his northern flank to reinforce an attack by his troops facing Schwarzenberg’s Army of Bohemia to the South. He ordered Marmont to take his VI Corps out of its entrenchments north of Leipzig and set off southward. However, after Marmont had abandoned his position and was approaching Leipzig, Blücher’s Army of Silesia appeared from the North. On his own authority Marmont halted his retreat and took up a defensive position before the city, with his left flank resting on the village of Möckern. Thanks to Blücher’s aggressive advance, Napoleon would now have fewer troops at his disposal against Schwarzenberg. Moreover, his northern flank was significantly at risk from Blücher’s advancing army. Fortunately for Napoleon, Blücher did not take full advantage of his opportunity on 16 October. Blücher believed that significant French forces were approaching from the North East and he feared an assault on his left flank. He spent most of the battle on that side of the field and he held back much of his army in anticipation of an enemy attack that didn’t happen. The burden of the day’s fighting consequently fell most heavily on Yorck’s First Corps. 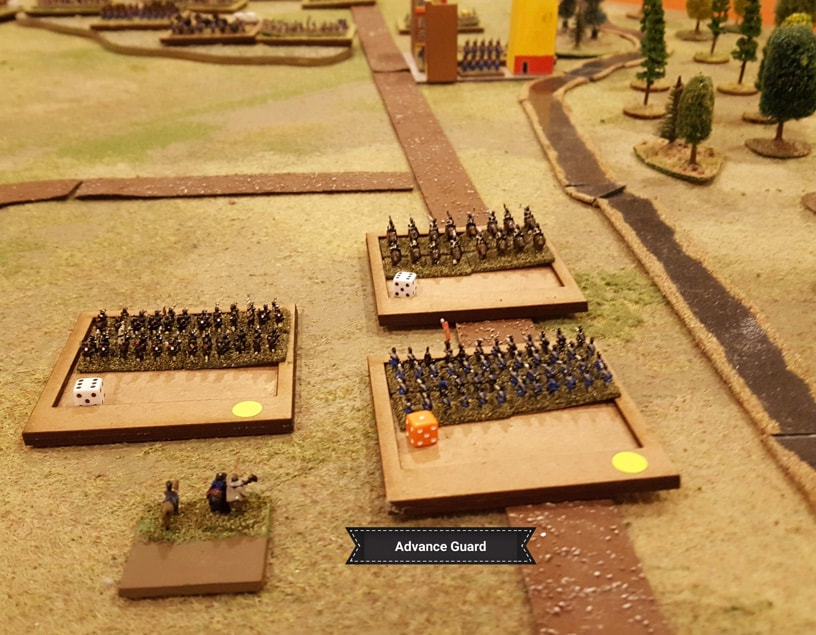 The scenario gives the Allies only those forces that were committed early enough to affect the outcome. By doing this, what would otherwise be a walkover becomes a tense contest. As the Allied commander, Keith began the game with an attack by Prussian Grenadiers on the village of Möckern, which was held by a Naval artillery brigade. The Grenadiers were his best troops but the odds were still against them. Even so they kicked my troops straight out of the village. My reserve brigade pushed the Prussians out in my next turn but Keith’s second brigade was on hand to bundle out my troops again. By this time his main body had come up and assaulted my centre. Now that more of my units had been pinned by this advance, I had no more reserves to retake Möckern. Before long I reached my morale limit and the day was lost. The game followed the events of the historical battle pretty well. I might have hoped to hang on to Möckern for a bit longer at the outset, as the dice were firmly in my favour. But it was fitting that Prussian Grenadiers should roll the best possible result. I particularly like the way Blücher handles fighting for built up areas. Victory goes to the side with the last formed reserve. If you want to hang on to a town it is vital to have fresh troops in support within a Charge move away. The new occupants will be easier to evict if you don’t give them the time to form town order. In hindsight I made two important mistakes. One was to open fire with my artillery at too long a range and against the wrong targets, thereby wasting shots. The other was to advance cavalry to engage the enemy near his baseline. Thinking about it after the game, I should have held all my force back to wait for the enemy assault. A cavalry unit is if anything more dangerous when uncommitted. I was already outnumbered and there was no merit in reducing my strength still further. 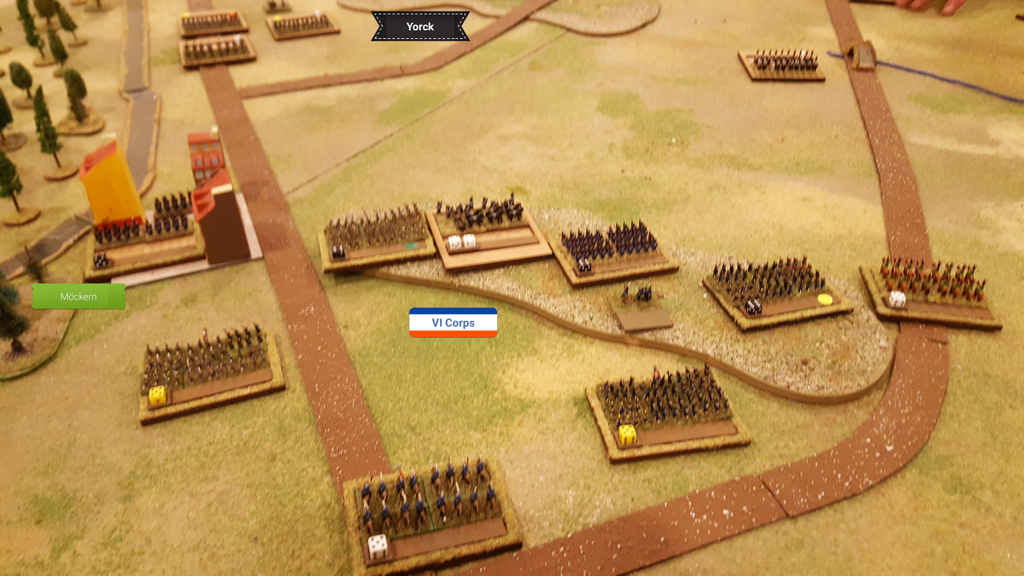 How did it feel using 6mm figures? Very satisfying. We liked the impression of distance and the look of the table was more convincing than with my 8-man-per-brigade 20mm armies. I had to make do with some unfinished movement trays that weren’t quite the right shape but I was still happy. I am now waiting for pay day to order a new batch of proper-sized trays. I love this hobby! On 18 August we played a day-long refight of the battle of Ligny, using Honour Games’ Blücher rules and 20mm plastic figures. We began around 10 and finished at 6, with the French just meeting their victory conditions. Oddly, the Prussian players seemed happier at the end of the day than the French. Rules, figures and scales Blücher is a grand tactical rules set where each unit represents roughly a Brigade. It focuses on the level of detail that would interest an army commander rather than a brigadier or battalion commander. It’s pedigree is excellent. Sam Mustafa’s first grand tactical set was called Grande Armée, which came out some years ago. He then produced the simplified Fast Play Grande Armée, which dropped a lot of detail. Finally came Blücher, which stripped back the detail even more. At each stage the rules have become more elegant but they keep a period feel and are a subtle challenge to master. Blücher’s ground scale is adaptable but I use 1” to 100 yards, the scale of Grande Armée, Volley & Bayonet and Napoleon’s Battles. This produces 3” Square unit bases. The figures are all plastics by various makers, collected over many years, with quite small unit sizes. This was a deliberate choice, partly to save cost and partly to encourage my sons who were young at the start of the project. Most of my Napoleonics are 15mm but I have never collected figures for the Waterloo campaign in the smaller scale. Keeping the players guessing Three of the players know the Waterloo campaign very well so I had to set up a way for them genuinely not to know whether either side would be reinforced from Quatre Bras, where Marshal Ney faced Wellington’s steadily reinforcing army. I wrote a decision tree for the events off table, which could have ended in a range of outcomes, broadly: French reinforcements, Allied reinforcements or nobody, at least in time to affect the game. Huw took the role of Napoleon, supported by Tim (Gérard) and Ian (Vandamme). Keith was Blücher, with Matt (von Zieten) and Nick (von Pirch). I like each player to have a characteristic so made Tim inspiring, Ian vigorous, Matt steadfast and Nick heroic. If you don’t know these rules, these traits translate as good on the attack, good at getting troops moving, good on the defensive and capable of rallying lost combat power. Napoleon was a legend but not on his usual energetic form; Blücher was also a legend and mobile, which made it easier for him to send in the troops than a standard C in C. Being a legend improves your army’s break point. For orders of battle I used a few histories, mainly volume 1 of Peter Hofschroer’s Waterloo Campaign and a French language history of Ligny by Alain Arq and others. For starting strengths and general organising I used the 100 Days unit cards, released by Honour at the same time as Blücher. These cards make sorting out and deploying the army very easy. Deployment The Prussians were obliged to deploy 1 Corps first, strung along the river Ligne. The French were then to deploy 3 and 4 Corps and their three cavalry corps anywhere on the field up to 4 base widths from a Prussian unit. Finally the Prussians deployed 2 and 3 Corps then the French had the first turn. How it went The game began with Tim/Gérard attacking the Prussian right, while Ian/Vandamme screened Ligny along with the three cavalry corps. Evidently the French didn’t want to get bogged down fighting for this village. However the screening force was much the biggest French formation and while it sat watching Ligny, Tim bled his Corps dry on the French left. The Prussians meanwhile made several counter attacks against Tim, then Keith sent Nick/Pirch over the Ligne on the Prussian left to put pressure on Ian. This worked well as it constricted the French position and put their right wing on the back foot. As the elan of Tim’s units ran down trying to dislodge Matt and Ian’s wing faced off against Nick, Huw was reinforced by the Guard and, not long after, by 6 Corps. We learned after the game that Huw had ambitions to use the reserve rule to deliver a wide flanking attack with these reinforcements, but felt thwarted by his narrow deployment zone and after a couple of turns’ delay, he launched an attack up the Prussian centre. Meanwhile, off the table... Each French turn after turn 11, I rolled on the decision tree. Every roll went in favour of reinforcements arriving with Napoleon. In summary, the story grew as follows. Ney began his assault on Quatre Bras early. He kept his whole command together (meaning no enthusiastic ADC gave D’Erlon verbal orders to march eastwards) and used both 1 and 2 Corps to overwhelm the Netherlands contingent before it could be sufficiently reinforced. He then carried out his original instructions from Napoleon and directed D’Erlon towards the Ligny battlefield. Rolling for losses and delays, I concluded that in the end two divisions and the Light cavalry of D’Erlon’s Corps would arrive at Ligny, late in the afternoon but in time to influence the outcome. News reached Huw that Ney had taken the crossroads at Quatre Bras and despatched D’Erlon towards the Ligny battlefield. When these arrived on the table he gave their command to Tim, who found the fresh troops a great boost. With the revelation that he would not be reinforced by Wellington as expected, Keith took stock. His left was doing well against the French right, which continued to retire before 2 Corps. But the right was now paper-thin, facing fresh troops, while the centre was buckling under the punch of the Imperial Guard. Keith ordered his army to withdraw, under the cover of 2 Corps. When we reached the last turn of the gaming day, the Prussian line had started to contract from the right and rotate clockwise, as it withdrew on Sombreffe. The French meanwhile had finally cracked the Prussian centre and were advancing to cut off the Prussian right. The Prussians were close to their break point and the day went to Napoleon. Hail the happy losers And here is the curious thing. The French victors seemed to feel a bit flat as the day ended, whereas the Prussian team was brimming with good humour and pleased with its performance. Why was this? Well, I think the players on the side that lost in history may feel less pressure to win the game: the Prussians did very well and cooperated effectively, with messages flying in all directions throughout the day. They didn’t win but were well placed to fight another battle. The French on the other hand came close to a bigger victory than they achieved: an earlier assault by the Guard could have cut off half the Prussian army. Also, I fear that Huw felt thwarted, not by the performance of his side but by the scenario and rules. His first hope was to send the Guard on a sweeping reserve move to fall upon a Prussian flank, but the field was constricted by the table edge and he couldn’t calculate a ‘legal’ route that would deliver his units unobserved on the enemy flank. I do sympathise and can’t change the fact that the table was 4 feet wide so he did not have space at the rear to flank March. That said, the French right could have deployed much further forward than they did and on top of that they were then soon retreating from their starting positions. When the umpire’s happy, everybody is happy Overall I was very pleased with the day. I think the game was well balanced and both teams played in good spirit. The decision tree for events at Quatre Bras gave a plausible result and I will use the idea again. I think the Blücher rules are perfect for a multiplayer game like this. Between 1030 and 6pm with a break for lunch, we played the full 28 turns and had very few rules quibbles. We had all played the rules before but not for some time and they came back easily. My note to self for future games is that I should check in with Commanders in Chief a few times during play, to check if they feel able to do what they wish. It hadn’t occurred to me until he said it at the end that Huw felt unable to act because of the table size. Had he told me his outflanking plan I could have worked out a way to make it possible or to explain why it wasn’t. When the game isn’t a tournament, I think the umpire should show a bit of flexibility if this helps the story to flow. I was grateful to all six players for giving up a summer Saturday and pitching in with such good humour. Multiplayer Wargames are a rare event but they have to be my favourite part of the hobby. 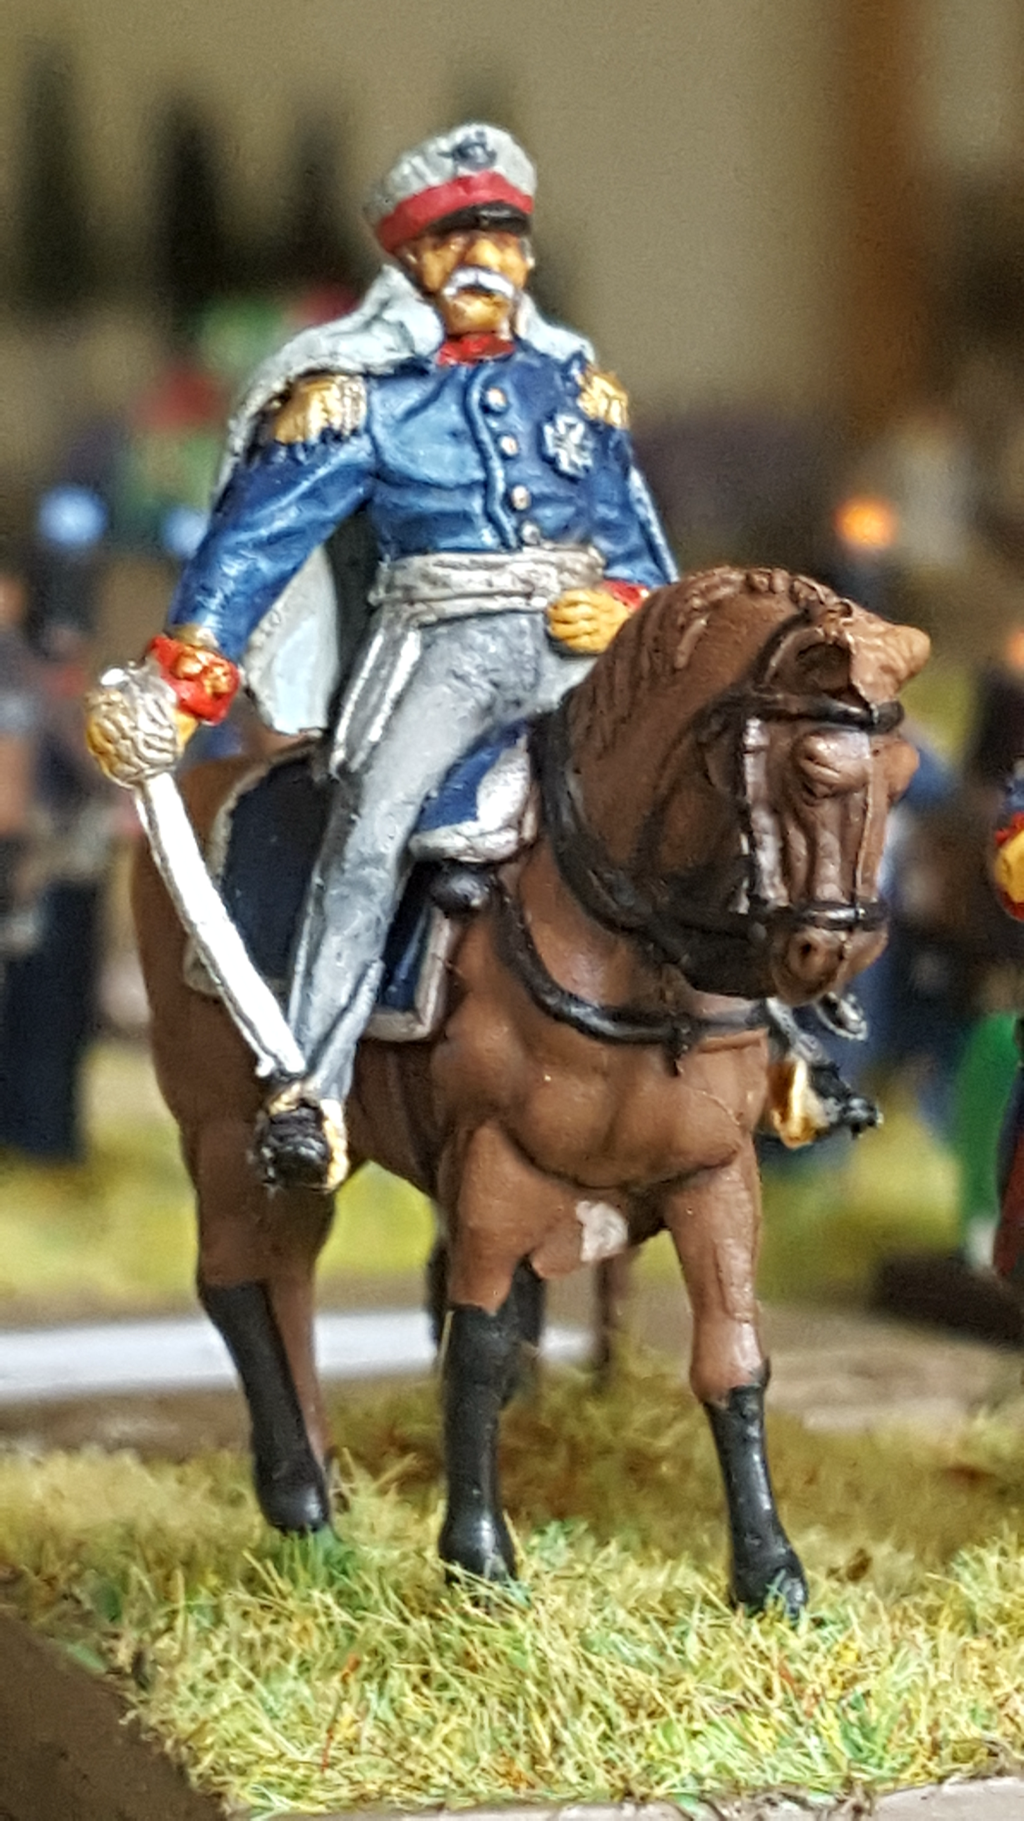 |
Archives
November 2023
Categories
All
|


 RSS Feed