|
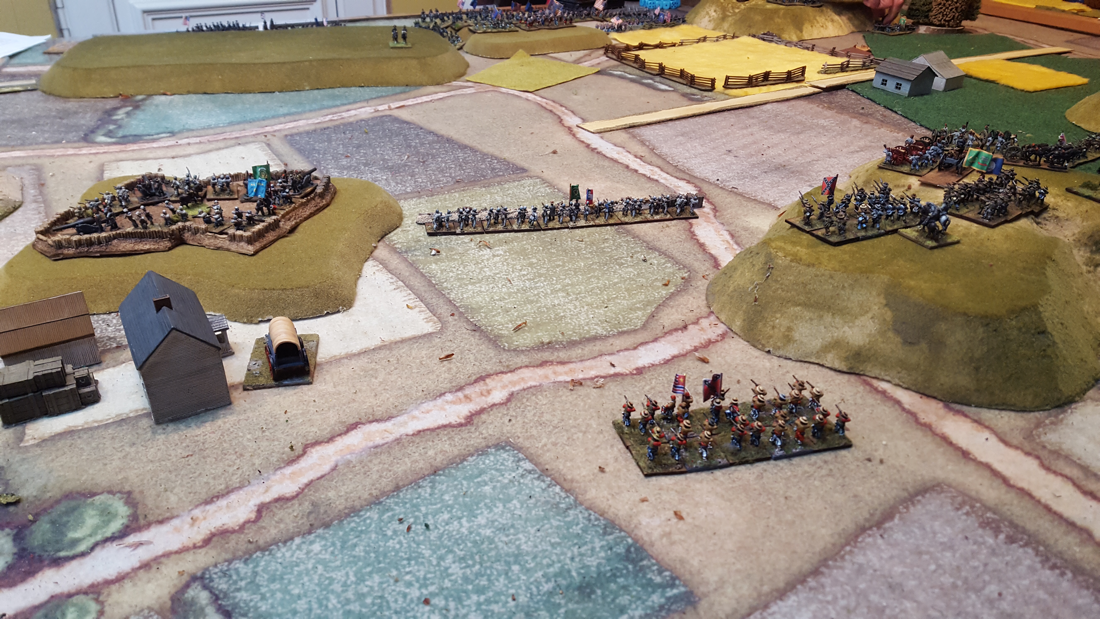
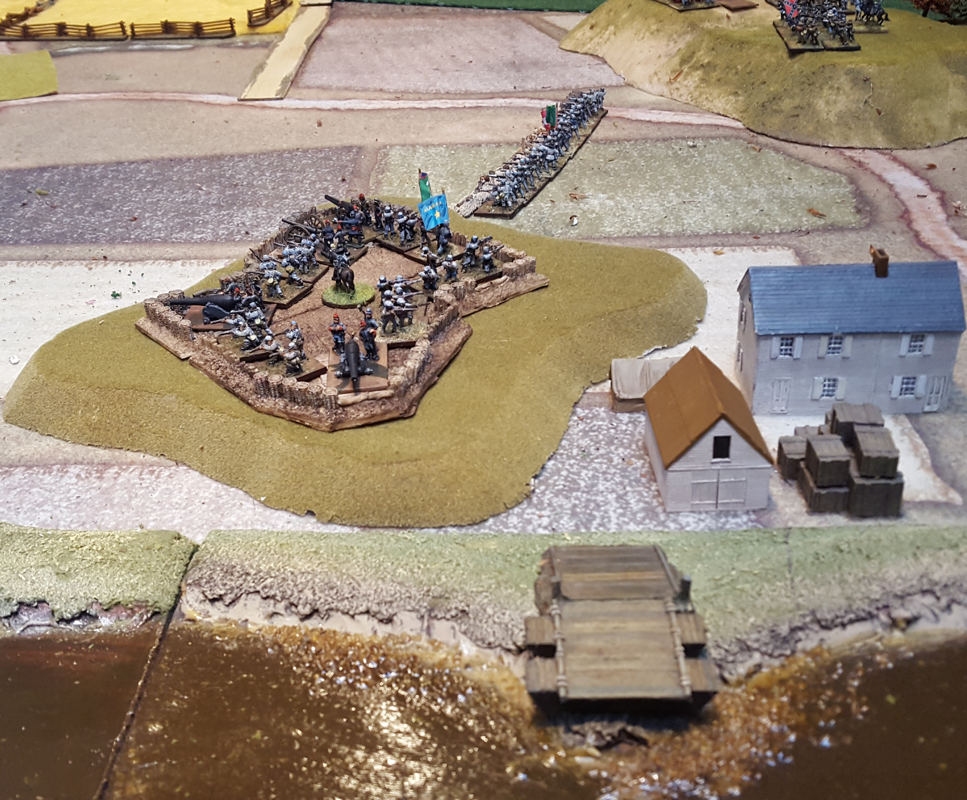
While in Devon last weekend I played a game laid on by Keith, my ancient and constant wargaming opponent. He had set up a scenario for Longstreet, adapted from Warlord Games’ Glory, Hallelujah! ACW supplement, in which a Federal force of two divisions has the job of capturing a Confederate-held riverside fort, itself supported by two field brigades. I think the original scenario is called Wright’s Farm. I took the Confederates and Keith the Federals. Both of our break points, based on my outnumbered force, was 44. If Keith captured the fort, it would be worth an additional die towards rolling for my demoralisation. Keith had the option of bringing a steamer down stream to bombard the fort, although this would bring it in range of my heavy guns. Keith set up on a chain of hills overlooking the fort. I put a regiment in garrison with four heavy rifled artillery pieces in the fort on my left. The valley between the fort and the hill in my centre was filled with an entrenched regiment, then I placed one brigade in the centre and the last on high ground on my right. The frontages of our two forces were therefore about equal at the start, although Keith was deployed in more depth. In summary, the game began with Keith marching out all along his line, with a little more pace on his two flanks. His right wing assaulted the fort three times and each attack was repulsed. On his left, shortly before his line came within small arms range, I withdrew my right hand brigade and started moving them to reinforce my centre and left. I wanted the Union left flank to land its punch into mid-air and then be too far away to affect the fight for the fort. This nearly worked perfectly except Keith played a Confusion card on my rearmost regiment, which allowed him to catch and maul it. Apart from this I was pleased with the timing and execution of the withdrawal. In the centre, Keith’s initial intention had been to screen but he attacked four of my regiments at the same time as his last assault on the fort. This turn increased my losses but my line held. Shortly after, a very successful round of Confederate shooting pushed Keith over his morale limit and the game ended. The steamer never arrived to bombard the Confederate shore. This was a tense and fun game. I didn’t fancy my chances at the start since I was so heavily outnumbered but the fort was tough and I was able to inflict a lot of damage on the assaulting troops as they closed. 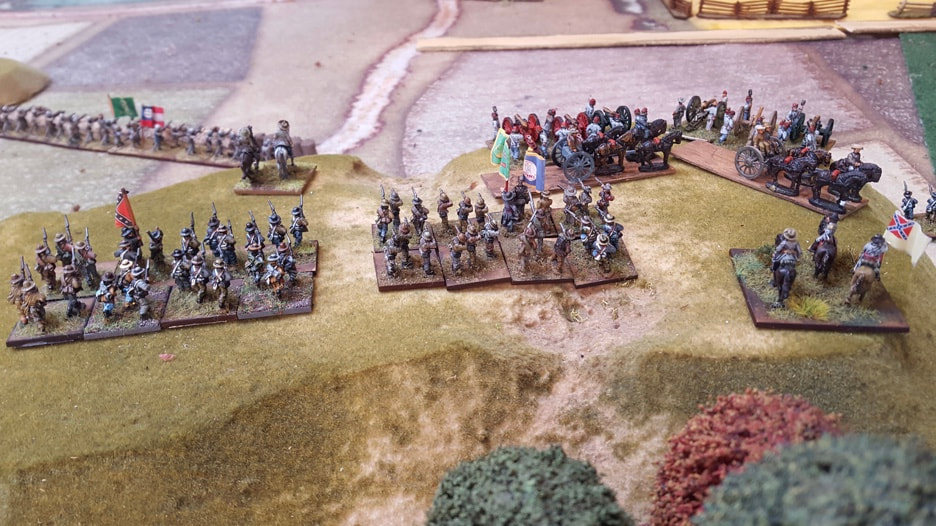 The centre of the confederate line As ever, the Longstreet cards dealt some memorable incidents that few other rule sets can allow unless they have an umpire. Foremost was the catching of my retreating right wing, which I would not have allowed to happen without the interference of an Interrupt card. Keith also inflicted a ‘couldn’t hit an elephant’ card (ie general hit by enemy fire) that removed 5 cards from my hand in one terrible turn. The Longstreet cards are a finely balanced device, keeping uncertainty high but never overwhelming the mechanics with too much arbitrary luck. Throughout a game, you still play your opponent rather than the system. I have said this before and it is still true: Longstreet is my favourite rules set, for any period. These simple, taut and flavour-filled rules are just masterful. Longstreet is quite hard to come by these days, at least in the UK. That said, the introductory rules and cards are still available to download for free on the Honour Games website. The combat rules are only slightly less comprehensive than the main rules, although they lack the campaign system. But the free rules and cards are still a great starting point. 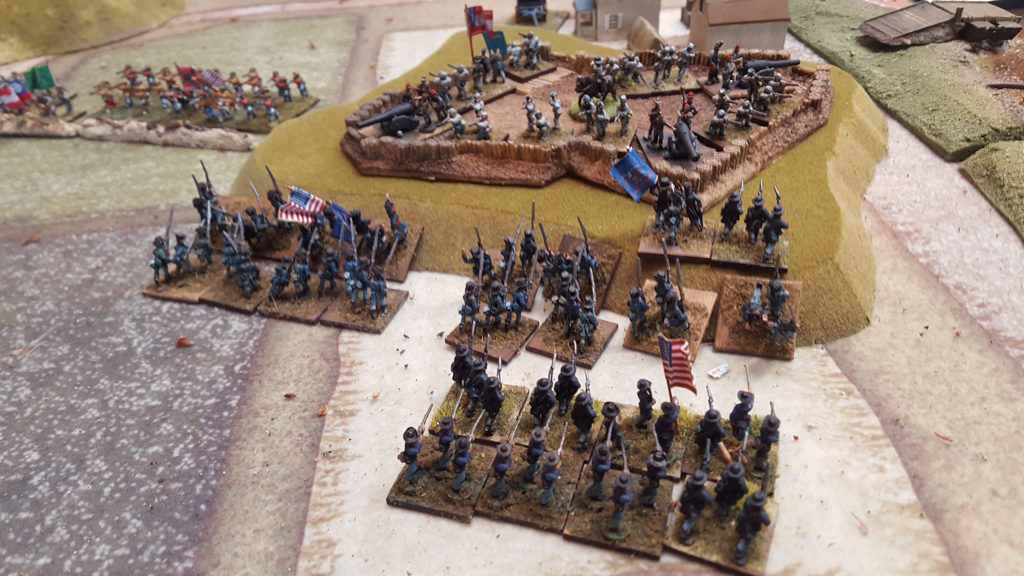 The third and last unsuccessful assault on the fort. The figures were from Keith’s 15/18mm collection, mostly by Peter Pig. Buildings by Timecast and cloth by Cigar Box Battles. 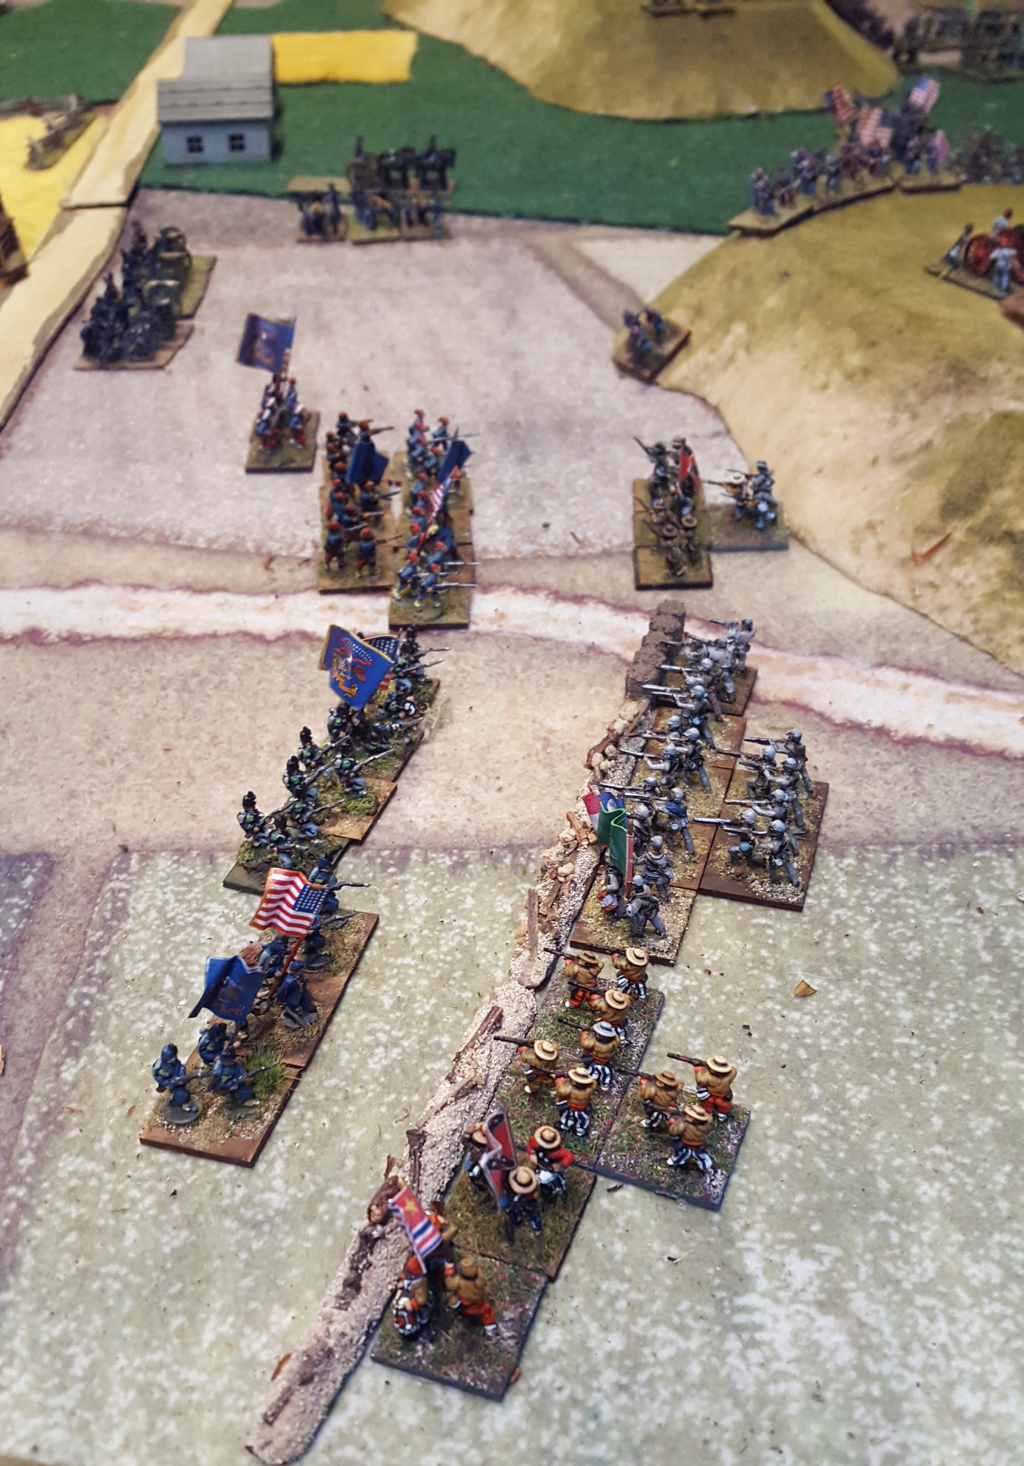 The centres engage.
0 Comments
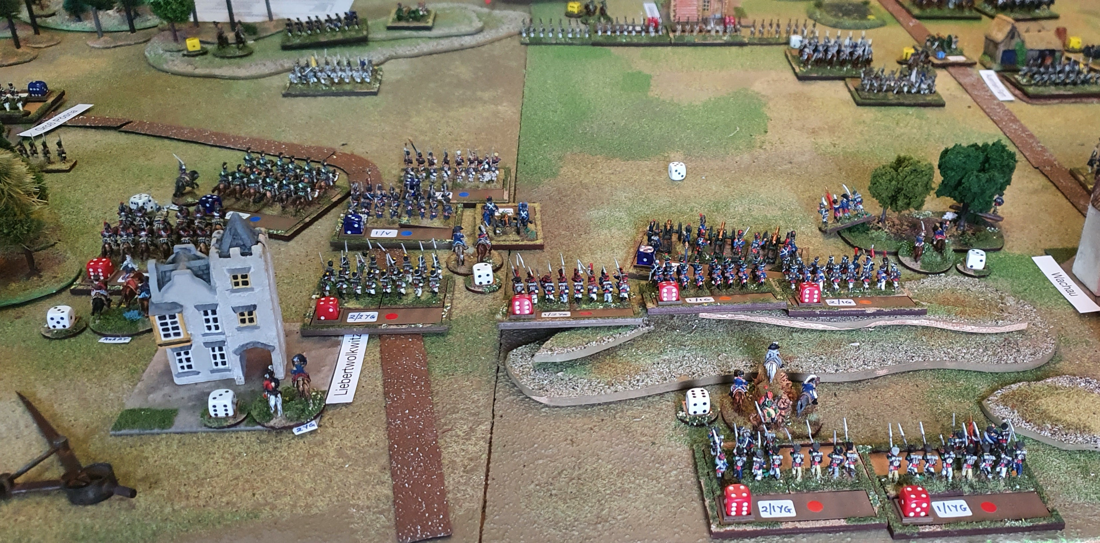
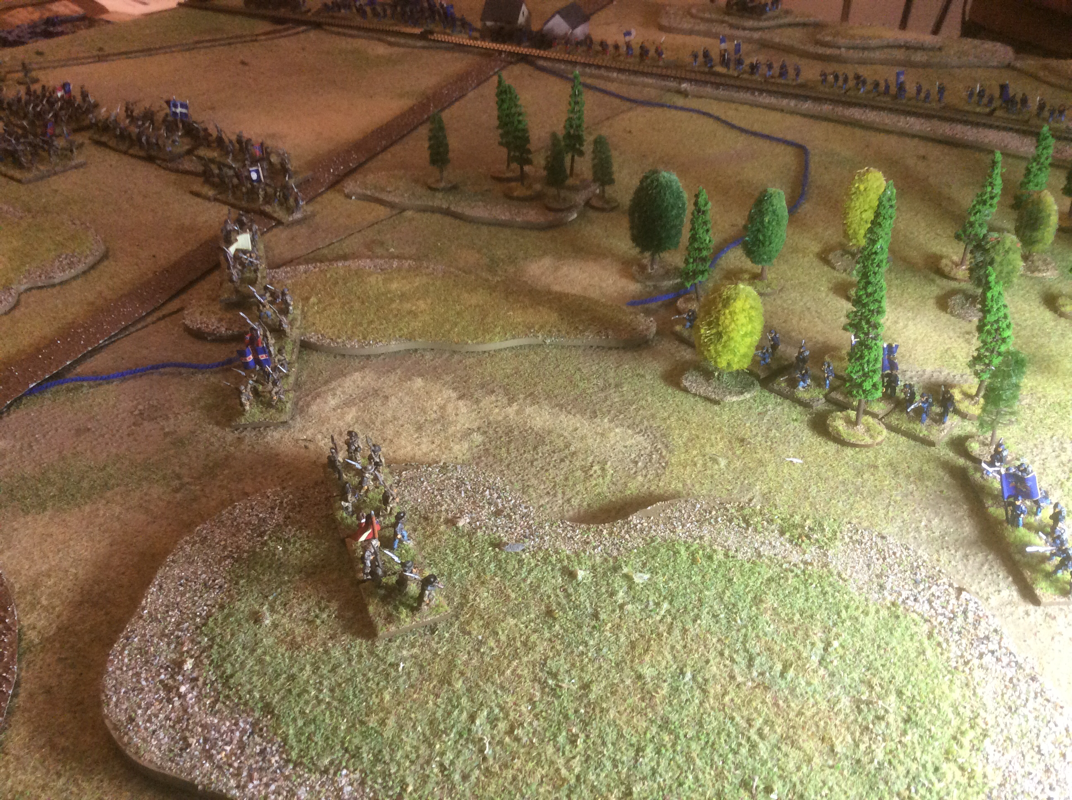
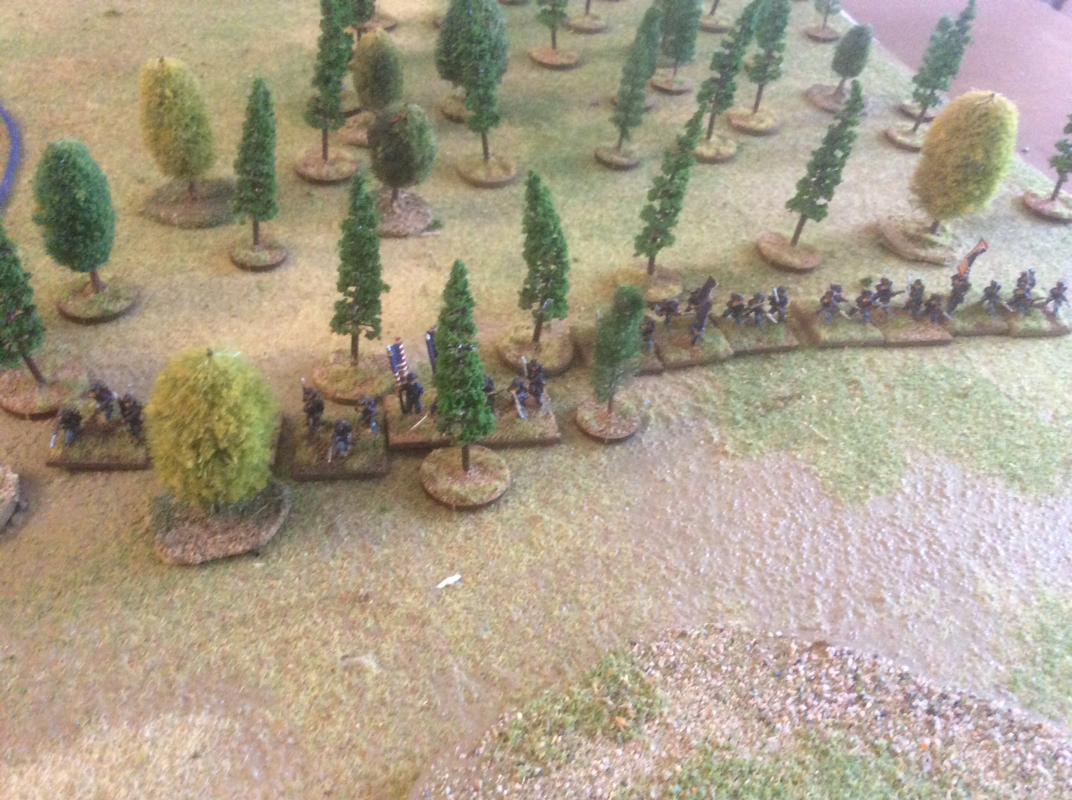
We played our first game of Pickett’s Charge last Saturday evening. I bought the rules soon after their release and made up some casualty markers, but somehow didn’t get around to trying them. I think I was daunted by the four pages of charts and tables and when the chance came to play our next ACW game we went with the tried, tested and much loved Longstreet. However, a visit by Keith coinciding with Warfare 2017 at Reading provided the incentive to try out the new set. Keith and I have broken in a great many rules sets over the years and generally manage to work out what we should be doing.  The scenario was Payne’s Farm, November 1863, the most lively encounter during the Mine Run campaign. In this operation, Meade set out to turn Lee’s right flank while Lee hurriedly shifted round to his own right to stop this happening. At Payne’s Farm, Meade’s right hand Corps under French and Lee’s left hand division under ‘Allegheny’ Johnson came to blows as they both converged on the same road junction. French had superior numbers but his advantage was largely cancelled out by the close wooded terrain, his own hesitancy and by Johnson’s aggression. Only later in the battle did Federal numbers start to count and night fell before they could make a decisive difference. I originally wrote a scenario involving Johnson’s whole command and the 2nd and 3rd divisions of French’s Corps. I’d hoped we could have a four player game but in the event, only Keith and I played so I cut the forces to the 2nd Federal division versus Steuart’s brigade of Johnson’s Division, plus a battery of Andrew’s artillery battalion. We started the game at the point where Steuart’s rearguard Brigade, strung out along the Racoon Ford Road, faced left to confront Prince’s division as it approached down Jacob’s Ford Road. Steuart’s task was to hold up the Federals while Johnson brought back his other three brigades from further along the Racoon Ford Road. 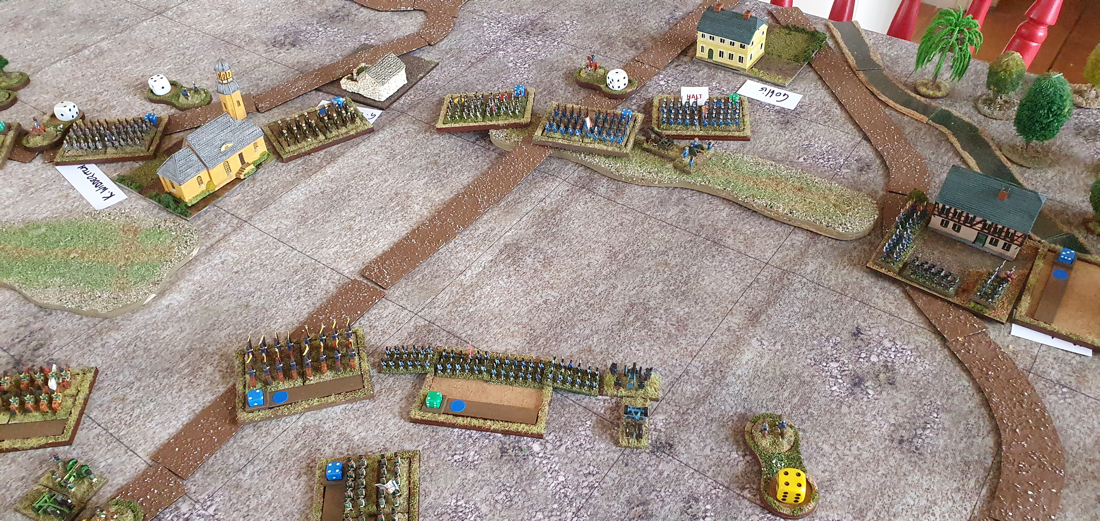 Keith’s Front Brigade advances on my line while the second Brigade moves around to outflank me In our game Keith’s Federals mounted a rapid assault on my Rebels. While his leading Brigade attacked along Jacob’s Ford Road, he moved his second Brigade in column around his left, using staff officers to move it double quick. I advanced my two left regiments to threaten his right. My centre held for a time but Keith’s second Brigade deployed at right angles to my line. I turned my right hand regiment to face it but it was pushed back on the centre, just as the centre itself gave way. End of game. The Confederate reinforcements would arrive on the scene to find French already advancing along Racoon Ford Road. I really like these rules. In spite of the four pages of charts, they played smoothly and we quickly got the hang of the sequence of play. Staff officers are a great device. Frankly our game was a bit small to really benefit from them but I can see them posing some interesting choices in a bigger action. Brigade morale is handled simply and effectively. Shooting has the particularly interesting result of loss of Fire Control, representing the degeneration of firing into an ineffective firefight. Melee (or the lack of it) is especially well handled: a competitive dice roll produces a range of results, most of which involve one side giving way without actually fighting hand to hand.
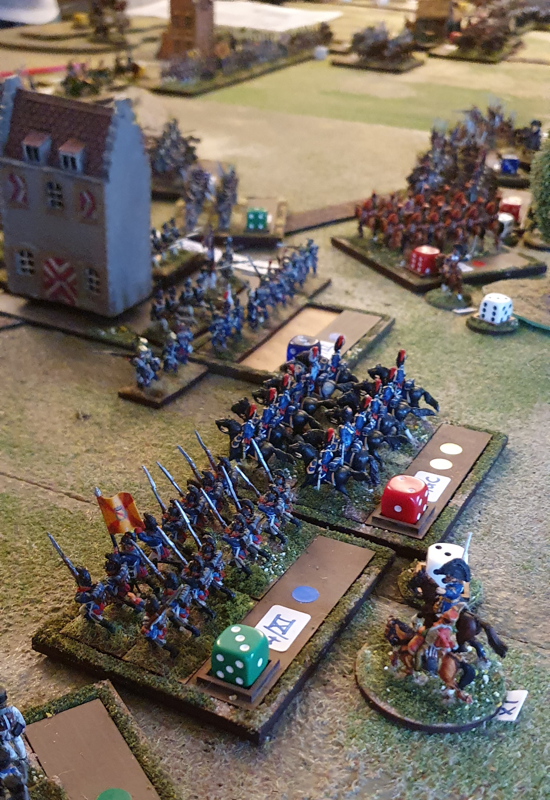
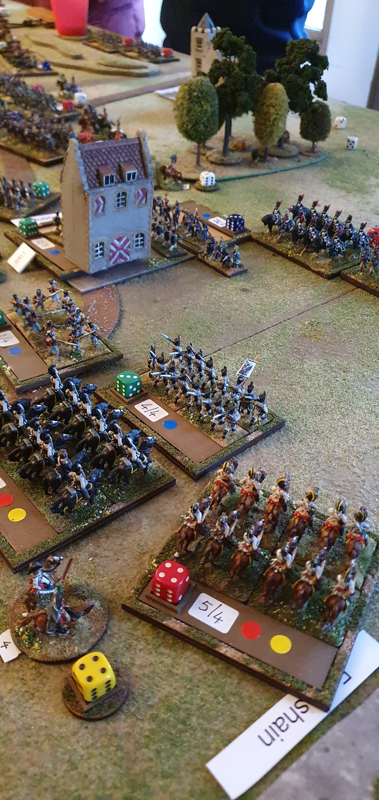
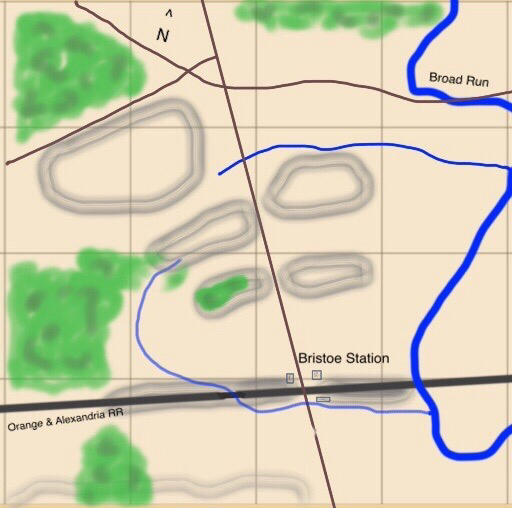
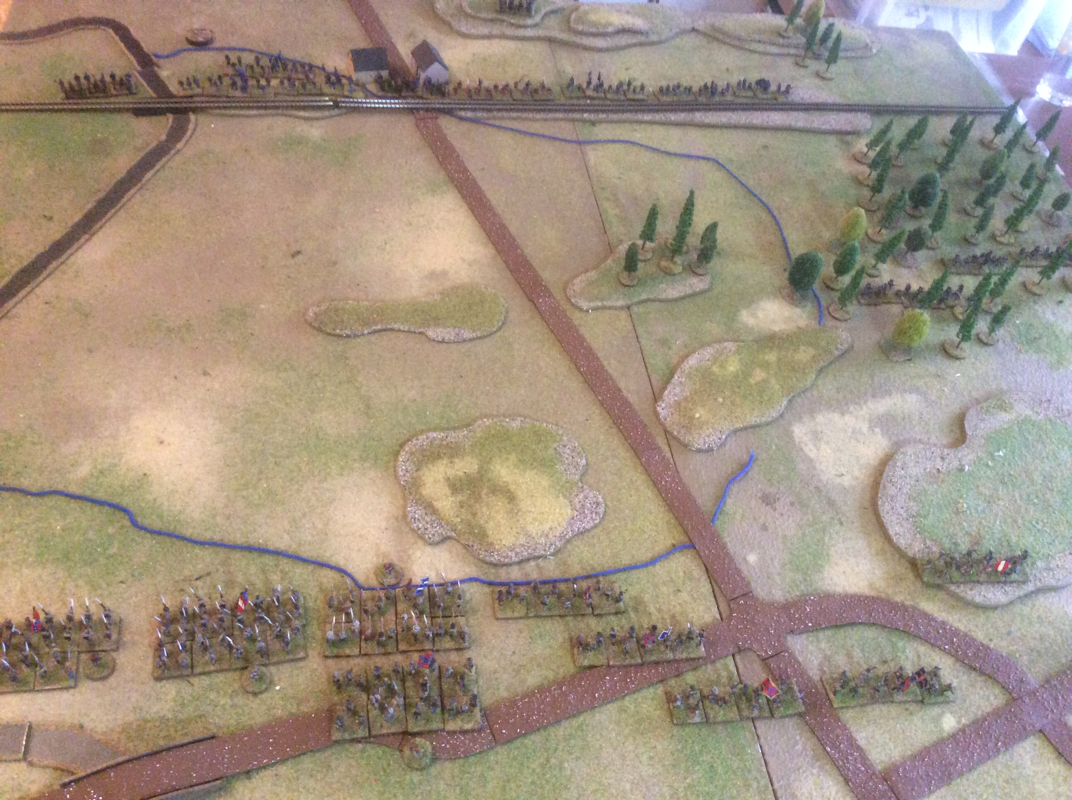
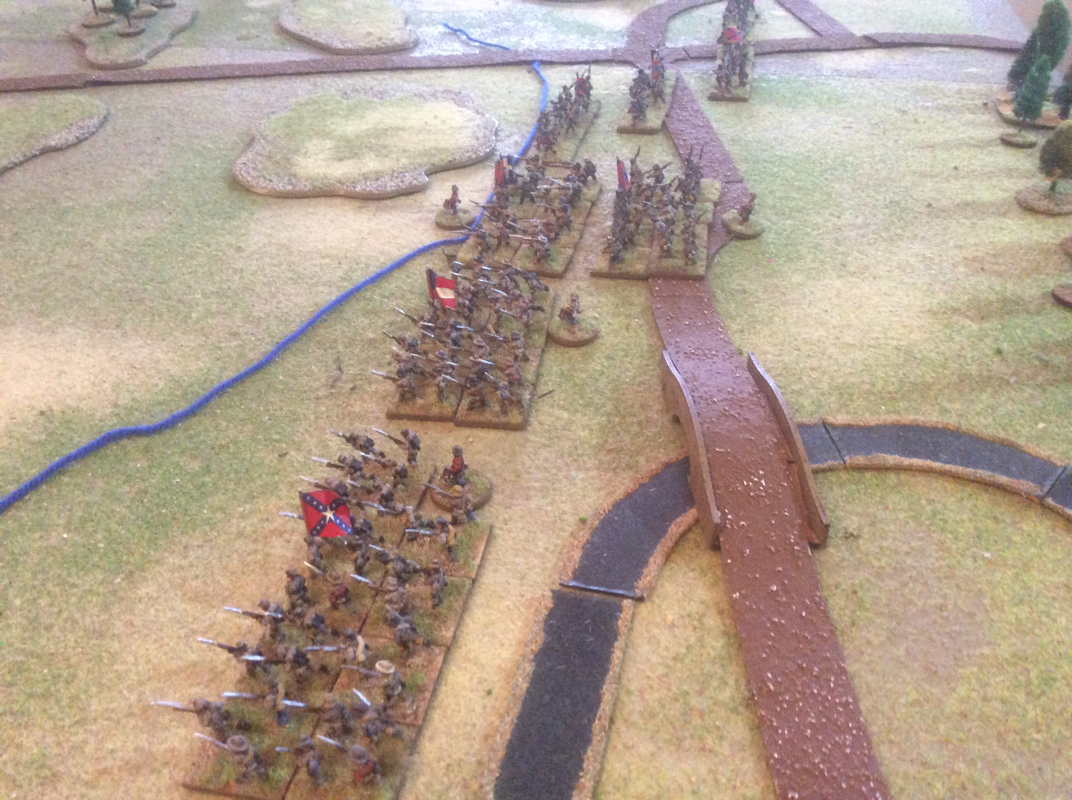
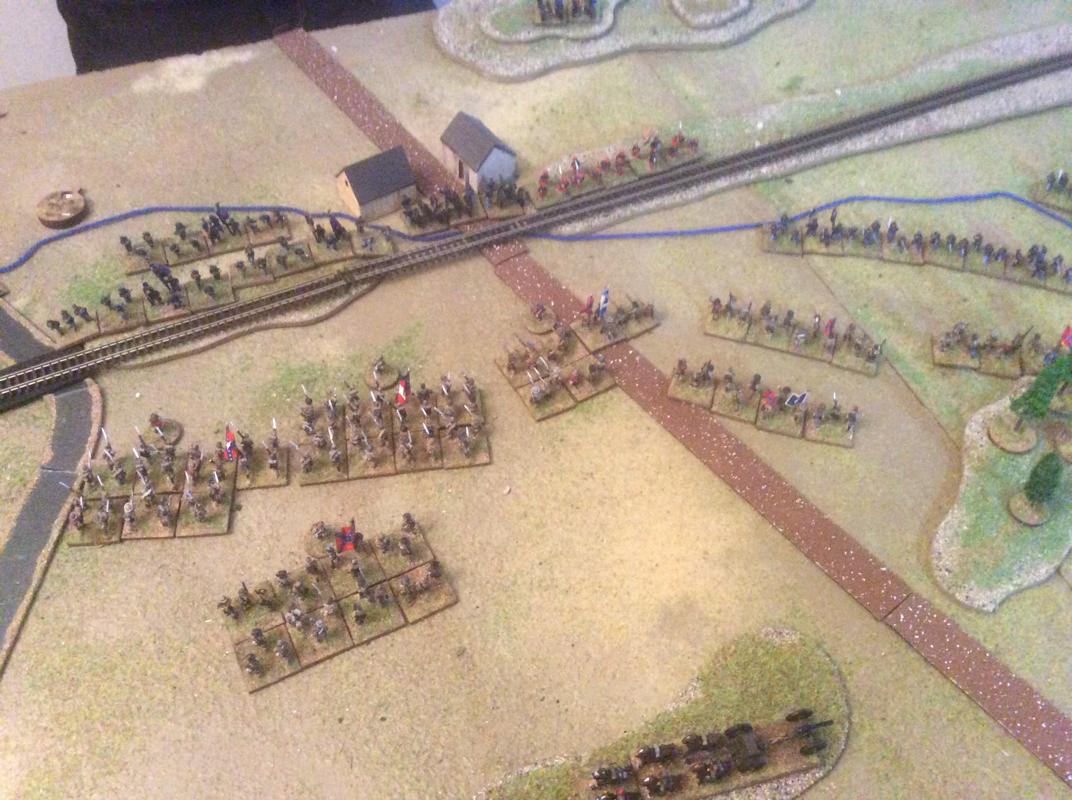
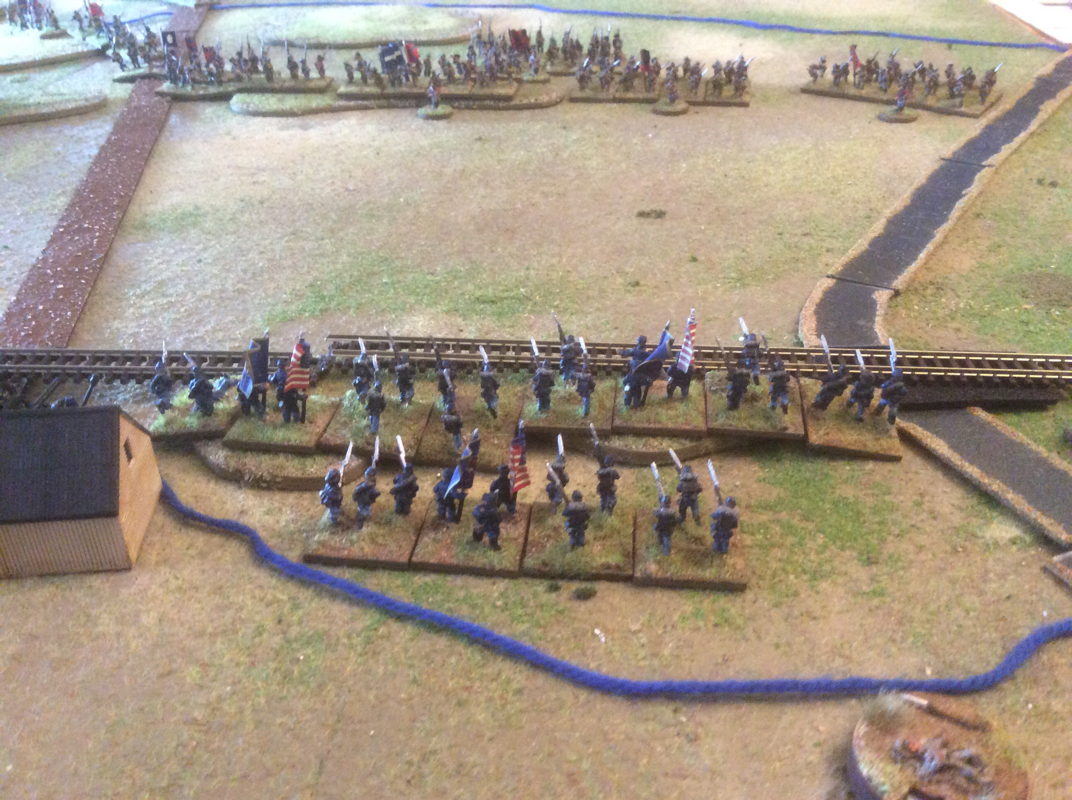
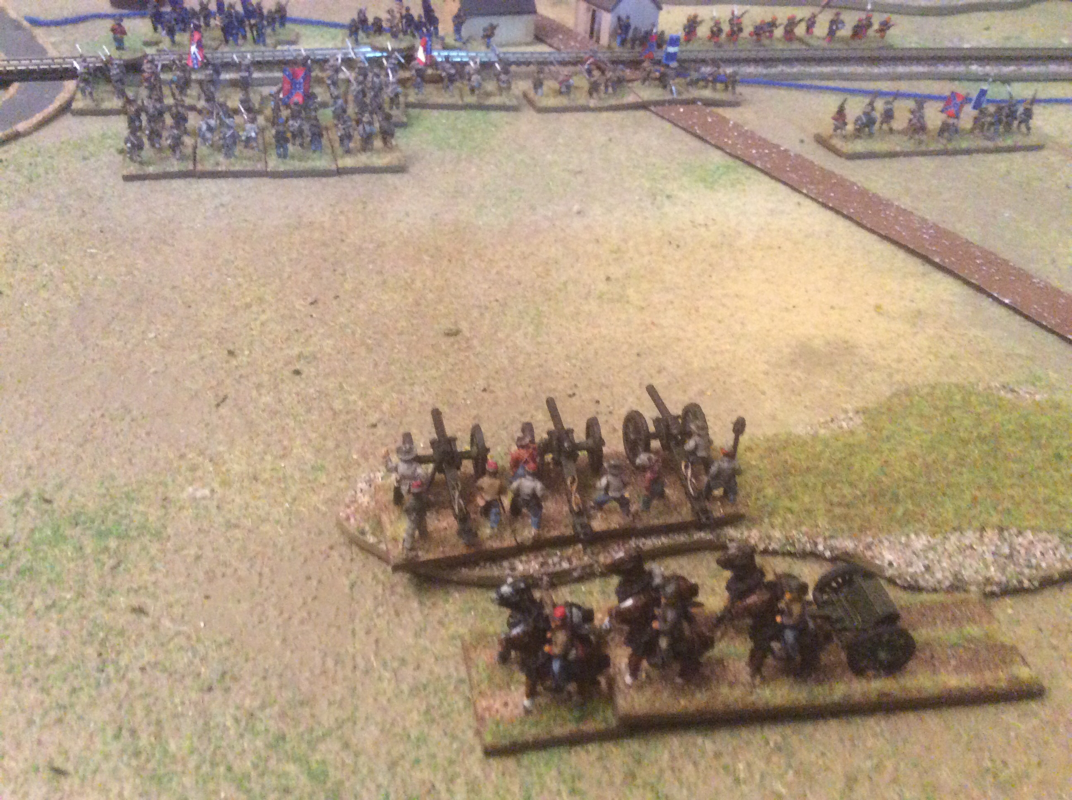
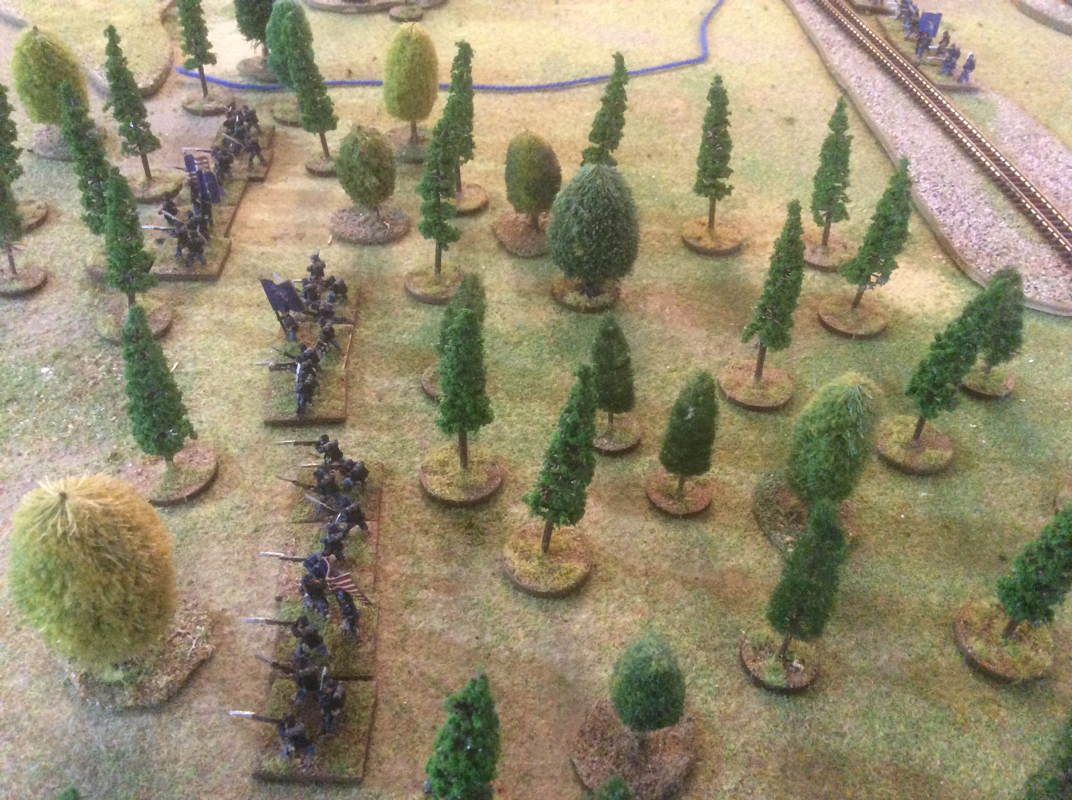
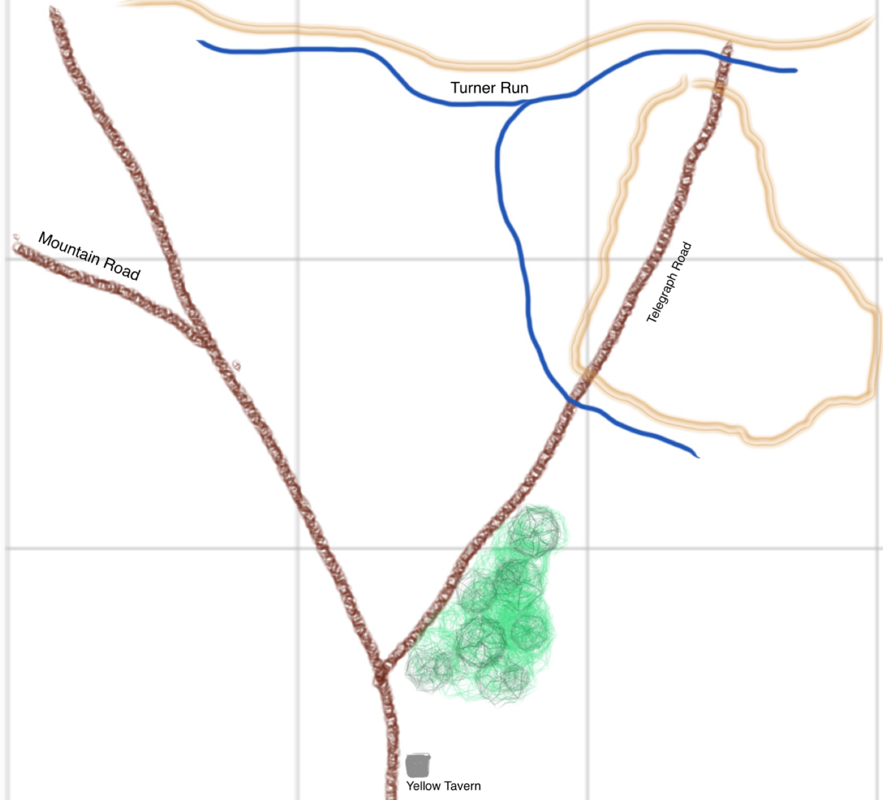
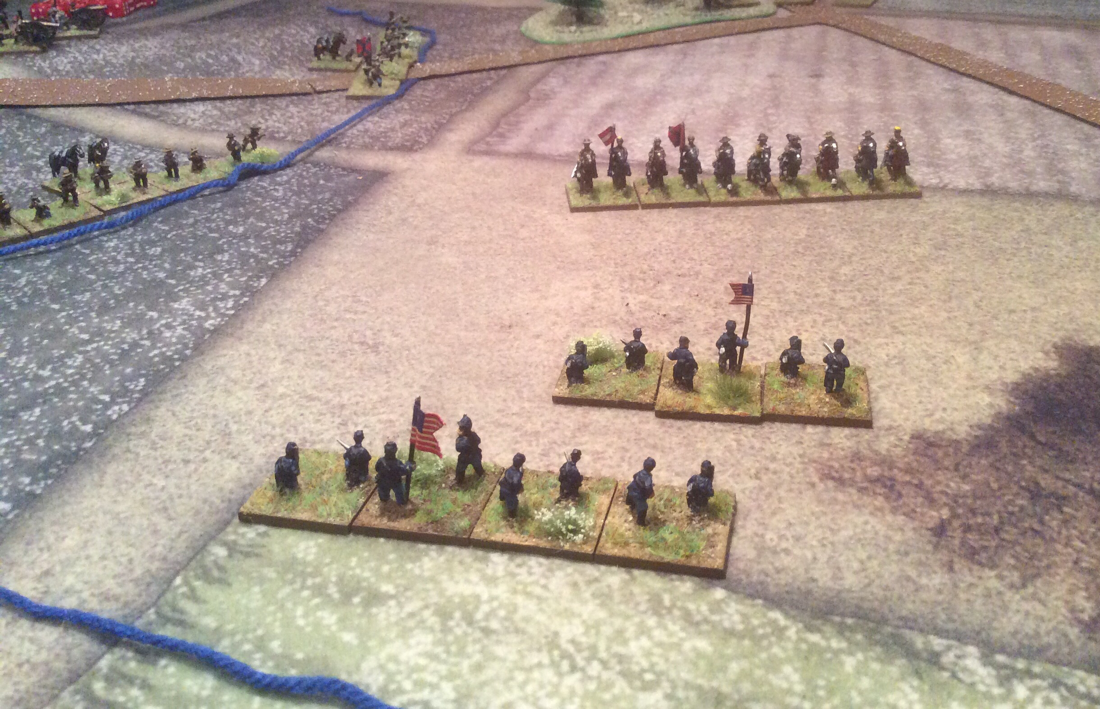
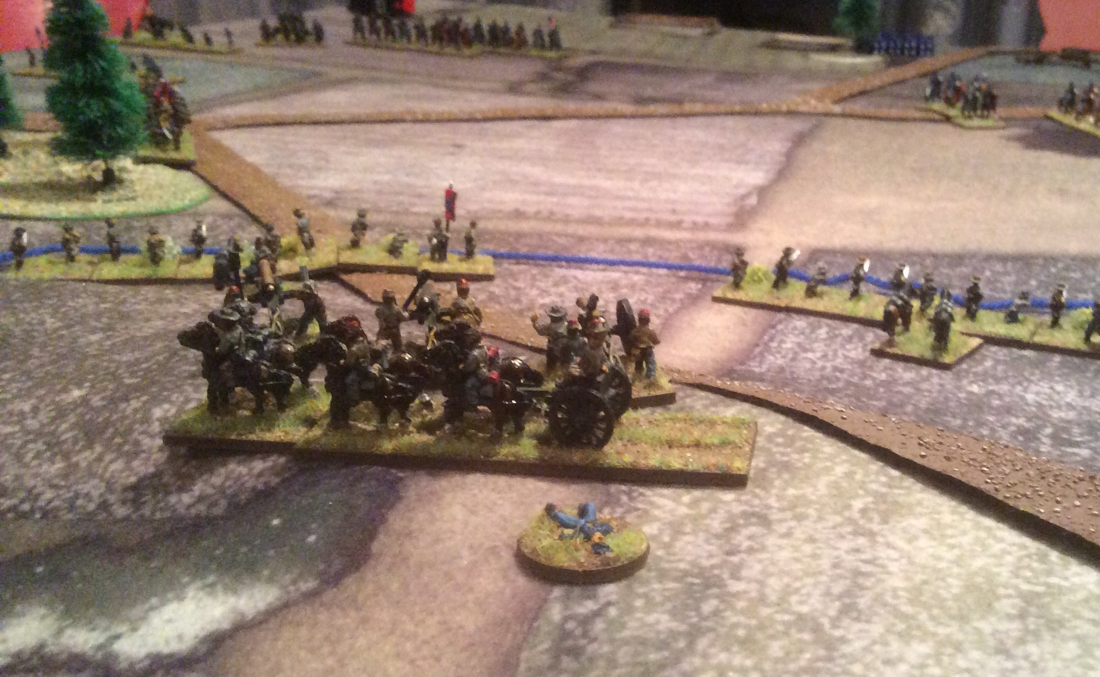
How does Pickett’s Charge compare to Longstreet? Using 1” figure bases, the ground scales, unit sizes and ranges are similar. PC has more period chrome incorporated in the rules, whereas the flavour in Longstreet mostly comes out in the Action cards. A big visual difference is that casualties are not physically removed in PC. A Longstreet battlefield can look a bit empty towards the end of a game! Longstreet doesn’t have explicit morale rules whereas these are important factors at both unit and brigade levels in PC. As I have said before, Longstreet is my favourite rules set for any period. It flows so well and provides period feel and excitement. It also produces occasional situations that historical reports are full of but players almost never permit, when units do something unexpected or unwise in the face of the enemy. I love those moments. But Longstreet has its limitations. With house rules, we were able to use it in a divisional game with four people, but it doesn’t pretend to challenge the player to think beyond the level of brigade commander. Pickett’s Charge on the other hand does this well. So I think the answer for me is that I will continue to use Longstreet for Brigade and small divisional actions and bring in Pickett’s Charge for bigger battles. On Friday Keith and I replayed Bristoe Station, using Honour Games' Longstreet rules. The details are on the Scenarios page of this website, here. The game covers the attempt at the start of the combat by Heth's Division to cut off Warren's line of retreat. The shatter point for both armies was 24. As Warren, Keith deployed his centre and right brigades behind the railway embankment (and so benefitting from cover), and his left hand brigade across the railroad in the woods. He supported his line with three batteries: one at Bristoe Station itself, one on the far side of Broad Run with a good field of fire across his front; and one on high ground behind his front line. As Heth, I put Cooke's stronger brigade on the left and Kirkland's brigade on the right. The front is quite restricted so I deployed Cooke's regiments in double lines. 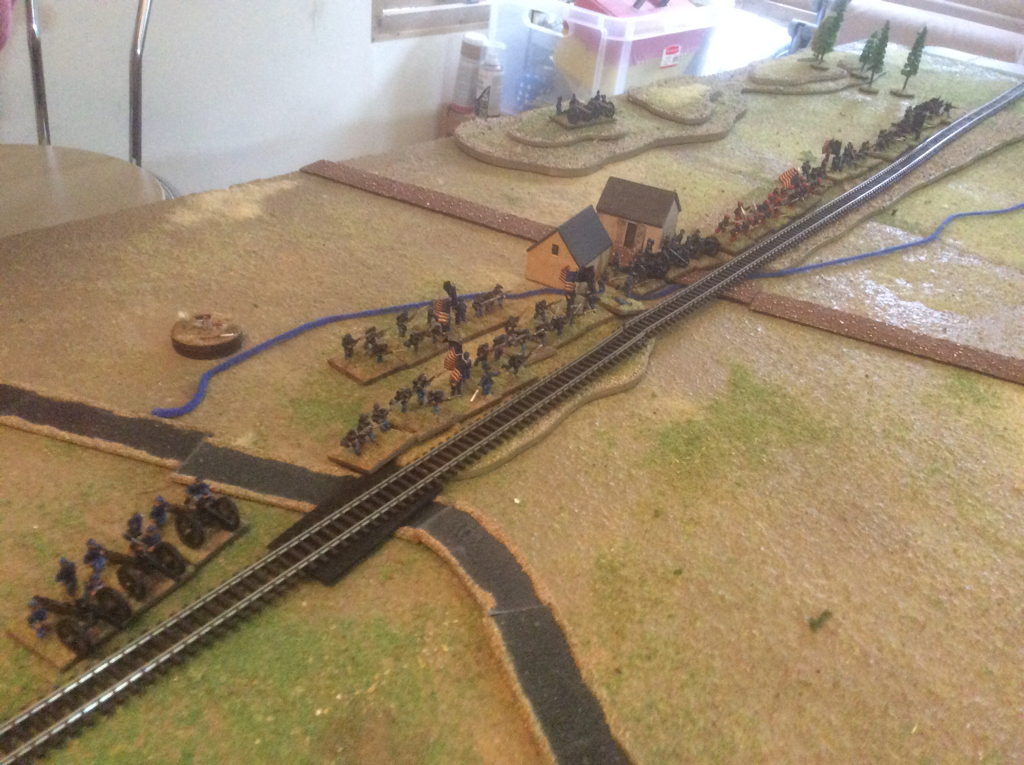 Keith's centre and right, lining the Orange and Alexandria railroad For the first few moves I tried to close the distance quickly, having nothing to counter Keith's powerful artillery. I used up a lot of morale cards and still lost a good few bases. I also lost an entire turn as Keith shot my general (playing the 'couldn't hit an elephant' card) and rolled 6, wiping out my entire hand. On my right, Keith's brigade in the woods came looking for Kirkland, forcing me to refuse my right. I tried not to divert too many units from the main assault but as Keith reinforced his troops on my side of the railroad, more Confederate regiments got stuck into firefights with Federals. However, I was pretty happy with Cooke's progress and approached the embankment with promising local superiority over the Yankee right. But my losses rose quickly as we came into small arms range and I was pushed over my shatter point with Cooke just a couple of inches from the railroad. This was a great game and brought out some of the best aspects of Longstreet. The rules are really easy to remember and strip out unnecessary gloss, but the action cards bring in the flavour of the period- and of the specific stages in the war- perfectly. I came off worse partly due to the Yankee guns card, which made his artillery particularly deadly. Losing 6 Action cards and a whole turn due to my general getting shot increased the time my troops spent in the artillery killing zone. A good test of any rules is how close a refight comes to what actually happened. Well, we couldn't have got closer to the real outcome. On the day, Heth made it to within yards of the railroad before his men were broken by weight of Union fire. At a couple of points in our game, the positions of the troops almost exactly mirrored the map of the actual battle. Very satisfying. Hats off to Keith who had not read about Bristoe Station but saw and exploited the benefits of the terrain pretty much as Warren did in real life. I now want to rerun this scenario using Pickett's Charge, which uses the same ground and units scales. To be honest, they'll have to be pretty amazing rules to shift me from Longstreet. Friday's game reminded why Longstreet is still my favourite rule set for any period. 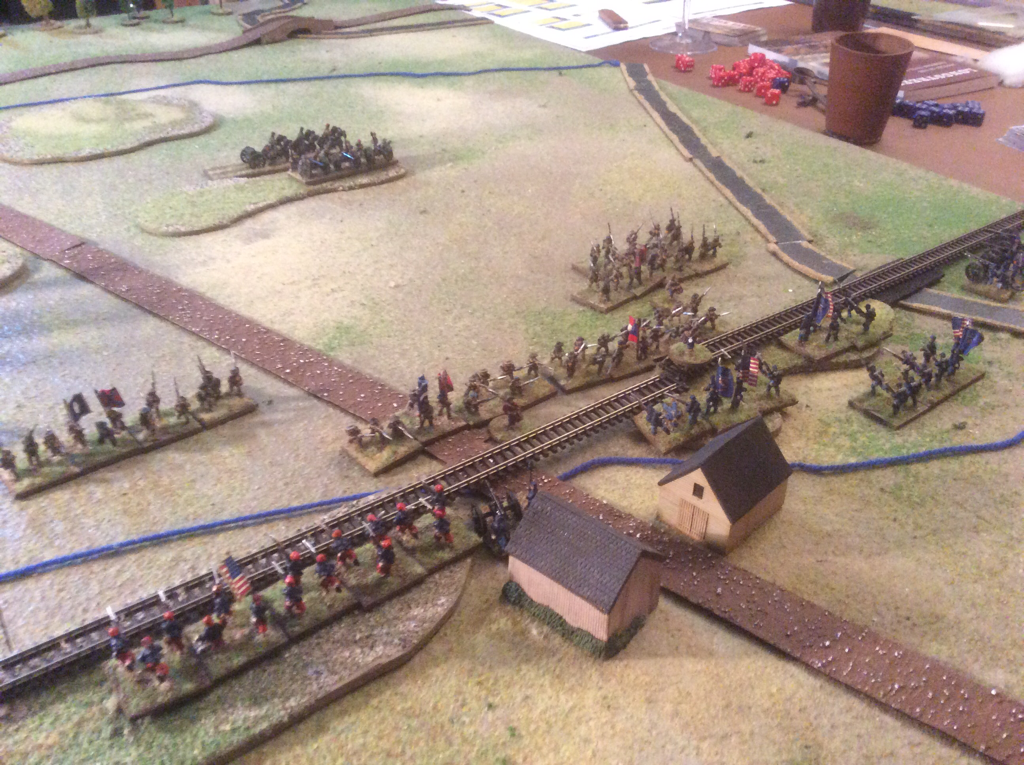 High water mark for Heth. At this point, Confederate losses pushed them over the line and the Union won the Action. I have spent the last couple of weeks painting ACW casualties. I picked up a copy of Pickett's Charge from Too Fat Lardies and they have really caught my imagination. Longstreet is my favourite game for brigade actions (actually it's my favourite game full stop) but it was over its limit when we used it to play day one of Gettysburg. On to Richmond by Paul Koch is excellent for army level actions, with its brigade sized units and streamlined mechanics. But Pickett's Charge strikes me as a good set for divisional and Corps level battles. Unlike Longstreet, these rules require casualty markers, so I needed to get equipped. I bought 30 casualty dials from Warbases, which show numbers from 1 to 12, and painted up some Kallistra 12mm casualties I have had for a year or so. I stuck them on the dials and added sand, tufts and flock. I am pleased with the results. The casualties don't stand out too much but my aim is for the dials to blend in to the rest of the table, which I think they will do. 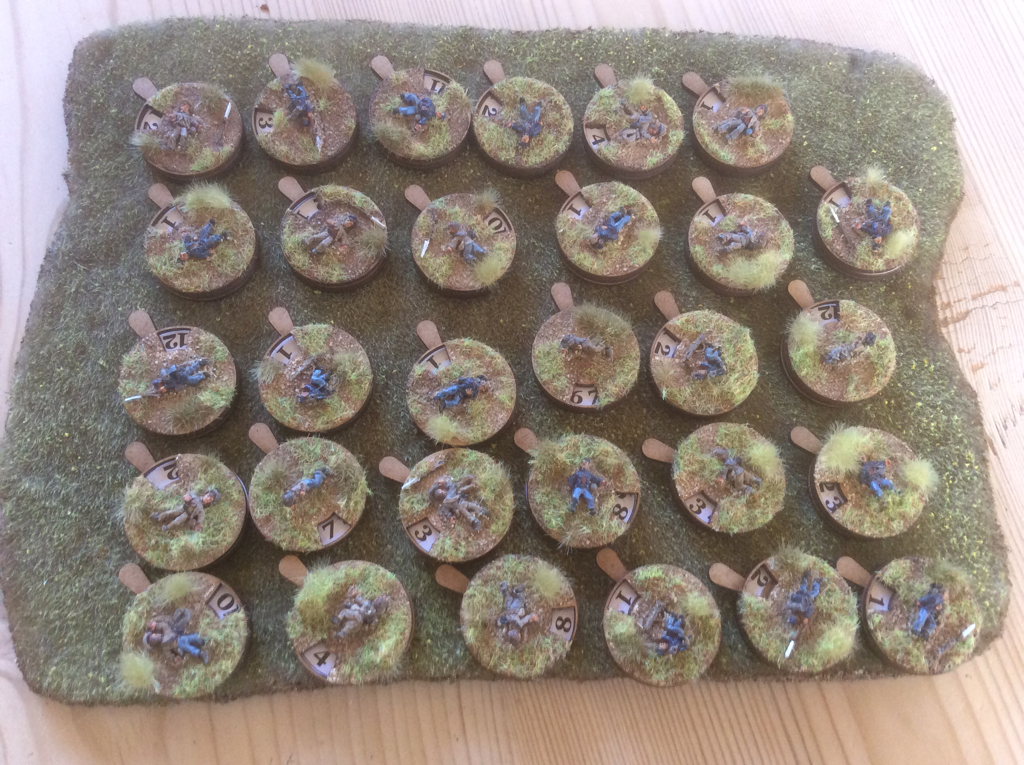 I decided against splatting ketchup everywhere. The most I'll paint on a wargame figure is a red stain on a bandage. I think this is a generational thing. Zulu is my favourite war film and I wanted my sons to share my enthusiasm. They quite enjoyed it but both thought it odd that with all the shooting and stabbing, virtually no blood was visible throughout the film. This had never occurred to me! Anyway, I prefer my casualties to be nearer the spirit of Zulu than of Saving Private Ryan. Perhaps I should have waited to see if I enjoyed playing Pickett's Charge before making the markers. But I'm pretty confident it will go down well. For our first game, I am looking at Bristoe Station in late 1863, the one after which Lee told Hill to bury the dead and say no more about it. I am attracted to the fog of war in this battle, when a force pursuing a retreating enemy was suddenly assailed from a new direction entirely. It is a situation that most wargame rules make very hard to pull of: usually the players can see too much and the rules allow them to do too much. I'm hoping that Pickett's Charge will provide the balance between restricting player omnipotence and still giving a satisfying game. Meanwhile I have just finished reading Rebel Yell, the biography of Thomas 'Stonewall' Jackson by S.C .Gwynne . It is a great book, showing the contrasts in Jackson's character and bringing his campaigns vividly to life. The accounts of fighting are authoritative and clear. This isn't a biased account: Jackson's frailties are scrutinised as closely as his strengths. There is plenty of inspiration here for the wargamer. The author doesn't speculate on what would have happened had Jackson not died after Chancellorsville, but is certain that the loss to the Confederate military cause was immense. 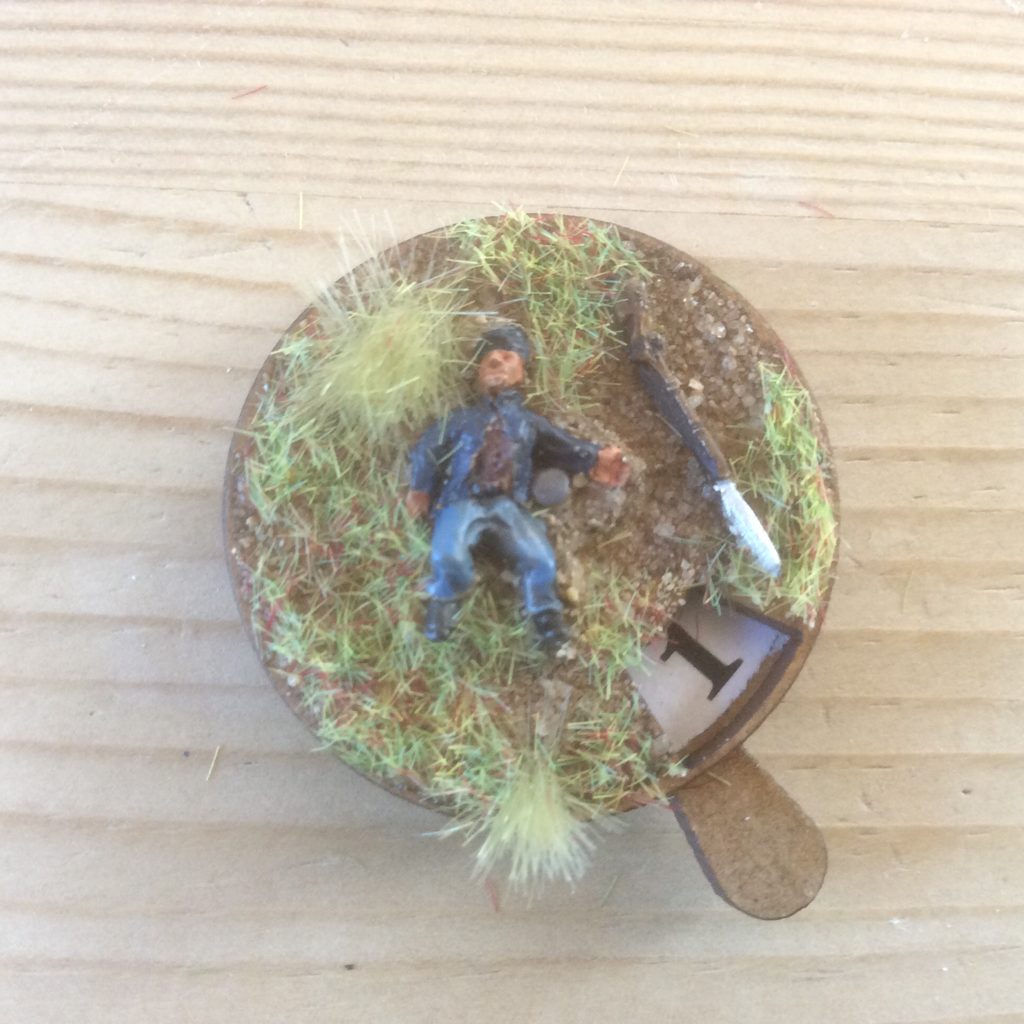 On 24 February Matt, Ian and I played a game of Longstreet, using a scenario based on Yellow Tavern, available here. It only focuses on the first stage of the battle, when Lomax's Brigade was assaulted by Devin and two of Custer's regiments as he stood facing West along the Telegraph Road. We chose this because as the battle progressed, the Federals came to outnumber the Confederates by more than two to one. They still had the advantage in the first stage but not by so much. Also, we don't have the figures for a bigger fight. As it was, I was painting Federals late into the previous evening. The battle began with the Federals trying a wide outflanking attack on their right, while pinning the Rebels to the front with Custer's regiments. But the main attack went too wide and lost contact with the Federal left. This allowed Matt, commanding the Rebels, to bring his only reserve regiment out to maul the Federal left before the main Union attack struck home or was able to help out. The Confederate reserve then turned about face and went back to improve the odds against the Federal right. The result was a decisive win for the Confederates. Of course, as Federal numbers grew there would have been no option but to withdraw to join Wickham as happened on the day, but within the confines of our slice of the battle, the Federals were whipped. 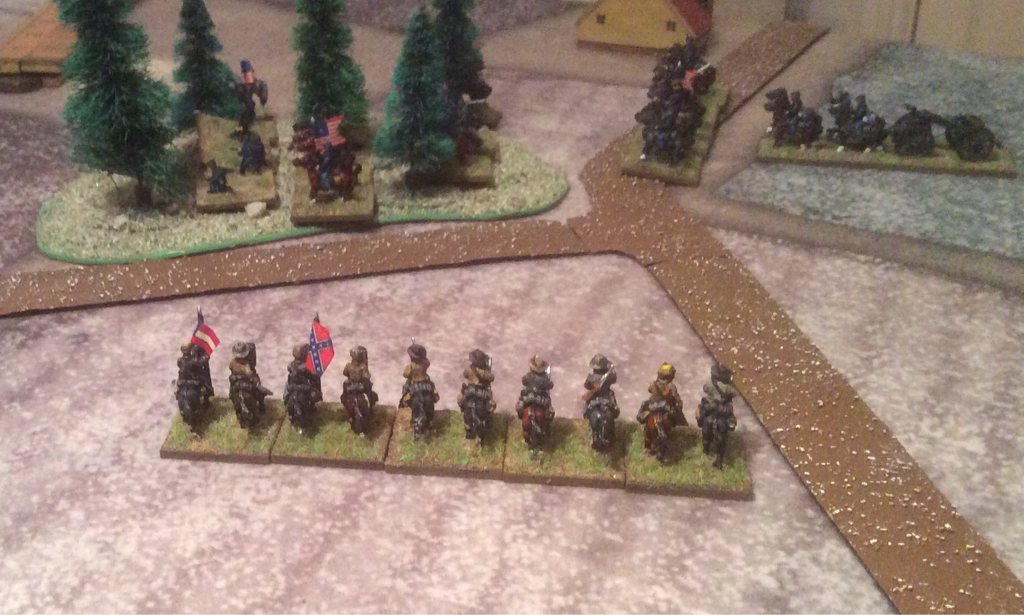 Having dealt with the federal left, the Confederate reserve regiment has turned about and now threatens the left flank of the main Federal assault. This was an absorbing game and one of the smallest we have played with Longstreet. But it was every bit as challenging as others we have played and a reminder that more units don't necessarily make for a better game. Once again, the rules provided a clean, fast-moving game with plausible actions and a clear outcome. Would a more detailed rules set represent cavalry combat more faithfully? Perhaps. But as with other Sam Mustafa systems, the elegance of Longstreet is its capacity to provide period flavour and tactical choices without bogging down in chrome and spurious detail.
On 3 February Ian, Matt and I fought a three player Longstreet game, using a rebooted version of the Macpherson's Ridge scenario (available here). I have slightly amended the set-up to allow the action to hot up sooner than previously. I have also tidied up the map. I played the Confederates, while Ian and Matt each led a Union brigade. Figures are 12mm by Kallistra. 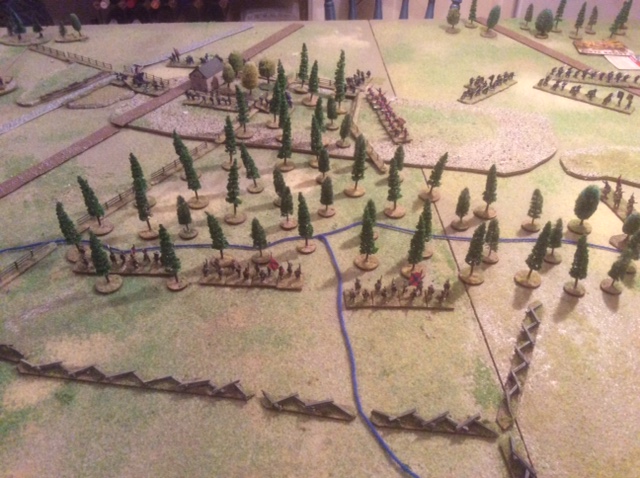 Archer reaches Willoughby Run as the Iron Brigade arrive in the distance The game begins as Buford's cavalry retires through the advancing 1st Division. Archer, on the Confederate right, raced the Iron Brigade to the ridge and just reached the crest first. Davis on the left assaulted Oak Hill on the Union right and his eager recruits piled straight into Cutler's position, with mixed results. One regiment bowled over the opposition and then routed an Iron Brigade regiment in column that was marching to reinforce Cutler. The other regiment was held by the Federals and quickly started losing bases. Even so, in the middle game the balance of losses was markedly in favour of the rebels. 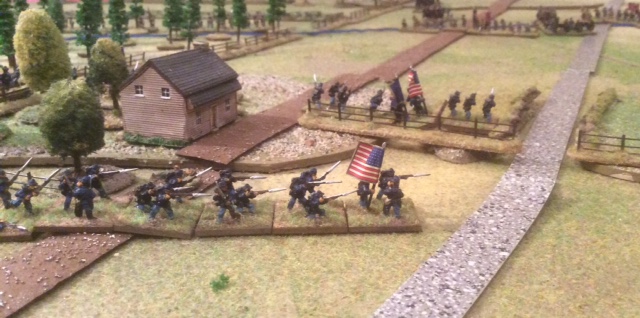 Wadsworth's last regiment rushes to reinforce Oak Hill. This unlucky unit is about to be swept away while still in column. The situation changed conclusively over the last two turns. First, the Iron Brigade assaulted Archer and while this was tough, they had the better of the combats. Then the Federals played the 'Couldn't hit an elephant' card, rolling a 6 and so completely denying the Rebels a turn. In their next turn the Iron brigade continued their attack and the Confederates hit Break point. Losses at the end of the game were 25 Federals and 29 Confederates. It was another great game in which the Elephant card was played at an ideal moment. Ian had been holding it since his very first replenish and he timed its use perfectly.  High watermark for Archer: his brigade didn't make it beyond Macpherson's Ridge. On 20 January I introduced a new player to Longstreet, playing a scenario based on the fight for Blocher's knoll on the first day of Gettysburg. This was the fight to the north of the town between Howard's unlucky XI Corps and Ewell's Corps. The focus of the combat was a small hill, the only high ground on this part of the field. The PDF of the scenario is on the Longstreet scenario page. I took the role of Schurz, commanding XI Corps on behalf of Howard, while Ian played the part of Ewell. This is the third time I have played the scenario, which has previously seen one victory for the Union and one for the Confederacy. Ian got the hang of the mechanics very quickly and set in motion a focussed assault on Blocher's knoll from north and east. The outcome matched what happened on the day: the Union couldn't hang on to the high ground and a lot of Yankee regiments were chewed up trying to hold it. After a couple of decisive turns in which an intense bombardment was followed by charges along the line, Ian took the hill and sent my army over its shatter point. Not for the first time, the Rebel Yell card proved its worth. This is an intriguing scenario, since the battlefield is divided down the middle by woods and a stream. The table is intentionally large for the number of bases involved, as the Union troops were spread very thinly on the field. Longstreet worked very well at this scale. Ian is keen to play the rules again. Next stop, the Peach Orchard. 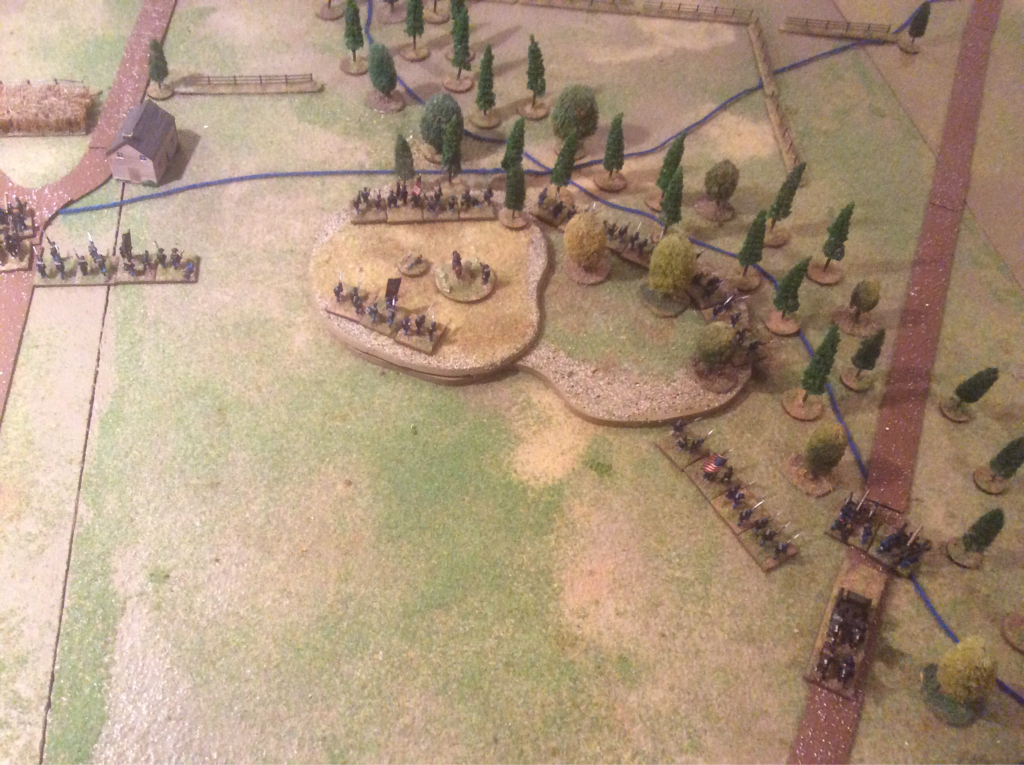 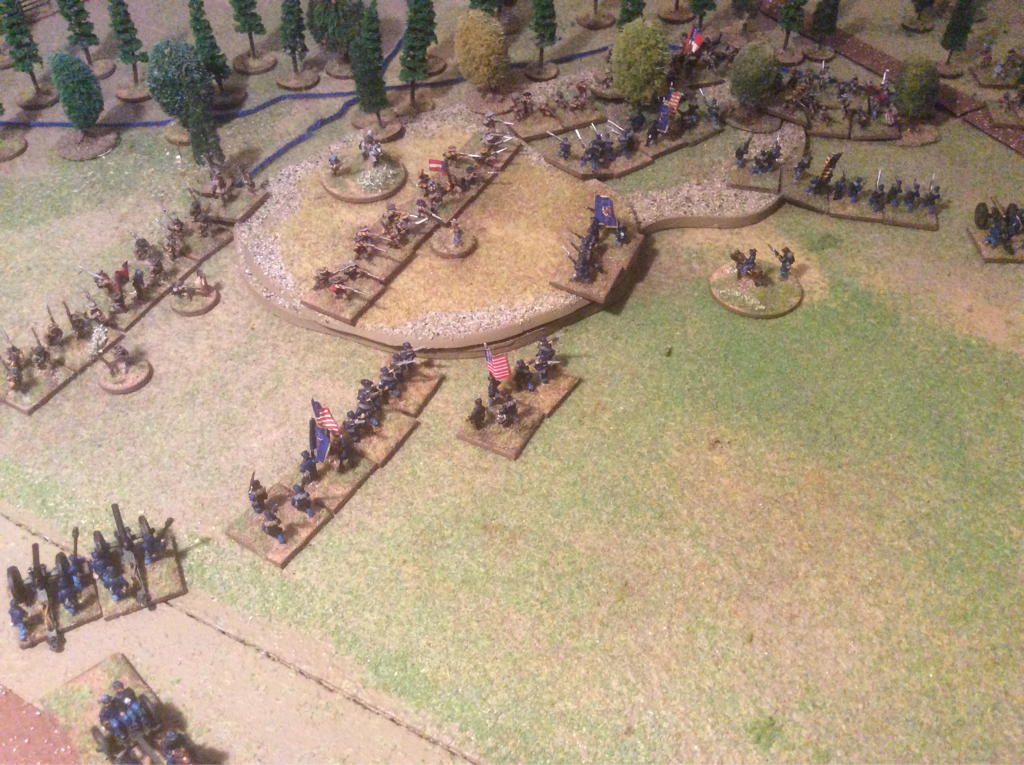 On 14 November, a friend and I refought the ACW Battle of Olustee, using a scenario from the Longstreet Scenario bucket on the Honour Games Forum. It was written by Pete, aka Captain Darling, in Australia. There were about 75 stands a side, on a pretty open battlefield, give or take a pond, woods and fenced farmland. It was an escalating engagement, with reinforcements coming on at two entry points per army.
The Confederates made a tidy deployment of four regiments and a battery on table at the start. These formed a coherent front and started advancing while Federal reinforcements were still trying to reach the firing line. The Confederates called the tune for the rest of the game and the Federals had mainly to conform to Rebel movements. The game was tense as all Longstreet games tend to be. The Federals had some local successes but were outplayed and ultimately they crumbled, mainly because at key points on the field, there were more Rebel bases firing on fewer Federals. The Federals were also distracted by trying to man a long stretch of fencing in the centre of the line, but much closer to the Rebel entry points than Federal ones. With hindsight, the Federals would have done better to hold back and wait for their line to be reinforced, rather than gallop across the table hoping to hold a position where they were soon outnumbered. It was gratifying, reading an account of the real battle afterwards, to learn that our game followed a similar course to the real thing, with the same outcome. That's a measure of a good scenario so hats off to Captain Darling I have uploaded a scenario for Heth's attack on McPherson's Ridge on 1 July 1863, using Sam Mustapha's Longstreet rules. See the scenario here. This is one of several scenarios we have played over the past year, for which I had no respectable maps. I'm still not totally happy with the map attached to this scenario, but I hope it is enough to transfer to the tabletop. I have been struggling to master the Sketchbook App and hope to produce more attractive maps with experience. 1 July 1863 provides some really interesting encounters that we broke into manageable scenarios to fit Longstreet's brigade level focus. Heth's assault provides a balanced game and of course provides a chance to deploy your Iron Brigade figures. The challenge is for the Union to form a defensive line on the ridge before Heth can get his troops up there. In our replay, the Union managed to hold the line and exhaust Confederate fighting power, but only just. We fought with Kallistra 10/12mm figures and Timecast buildings. The next map I'm working on is to accompany the fight for Blocher's Knoll, which took place later the same day to the North of Gettysburg. 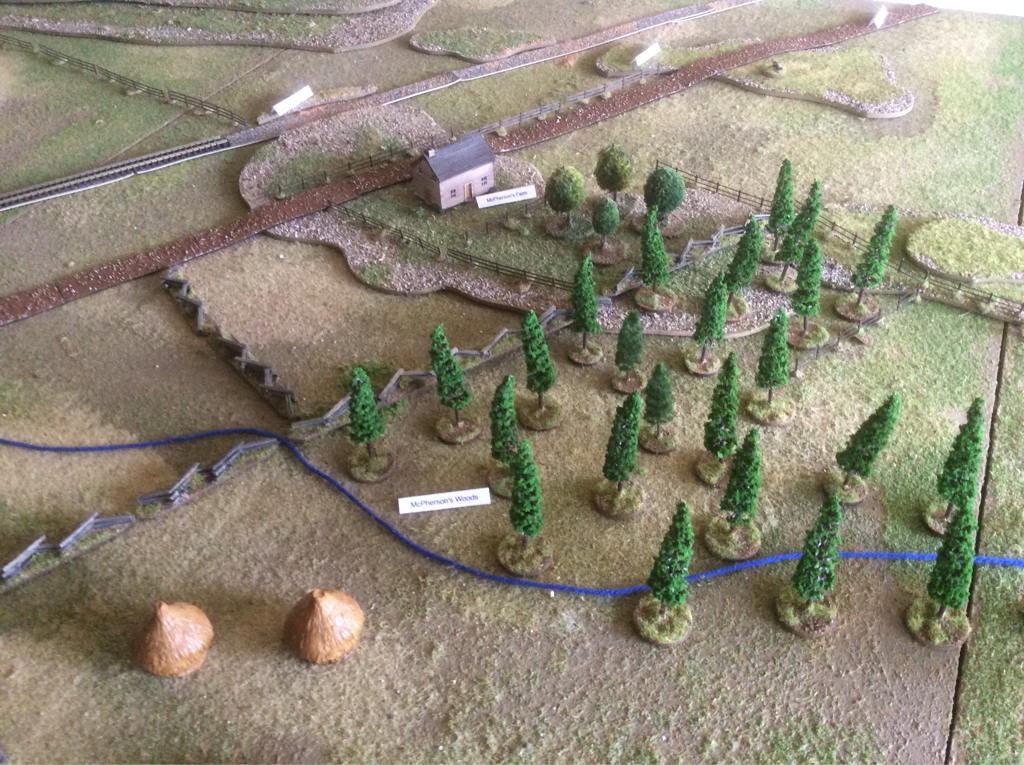 Looking East towards McPherson's ridge and farm from the Confederate lines. Last week we visited our good friends Keith and Fran in their new home in Devon and Keith and I played the first game in his new wargames room. We played the opening clash of the First Battle of Bull Run in 1861, using Honour Games' Longstreet rules. It was such a good game that we played it again right away. See the battle report and scenario here.
Keith's ACW collection only started last autumn when he moved house. It is already an impressive force, combining figures he painted from scratch and units bought off EBay which needed a little titivation. He has also invested in a Cigar Box Battles playing mat, which looked very fine with some polystyrene hills beneath it. |
Archives
November 2023
Categories
All
|

 RSS Feed