|
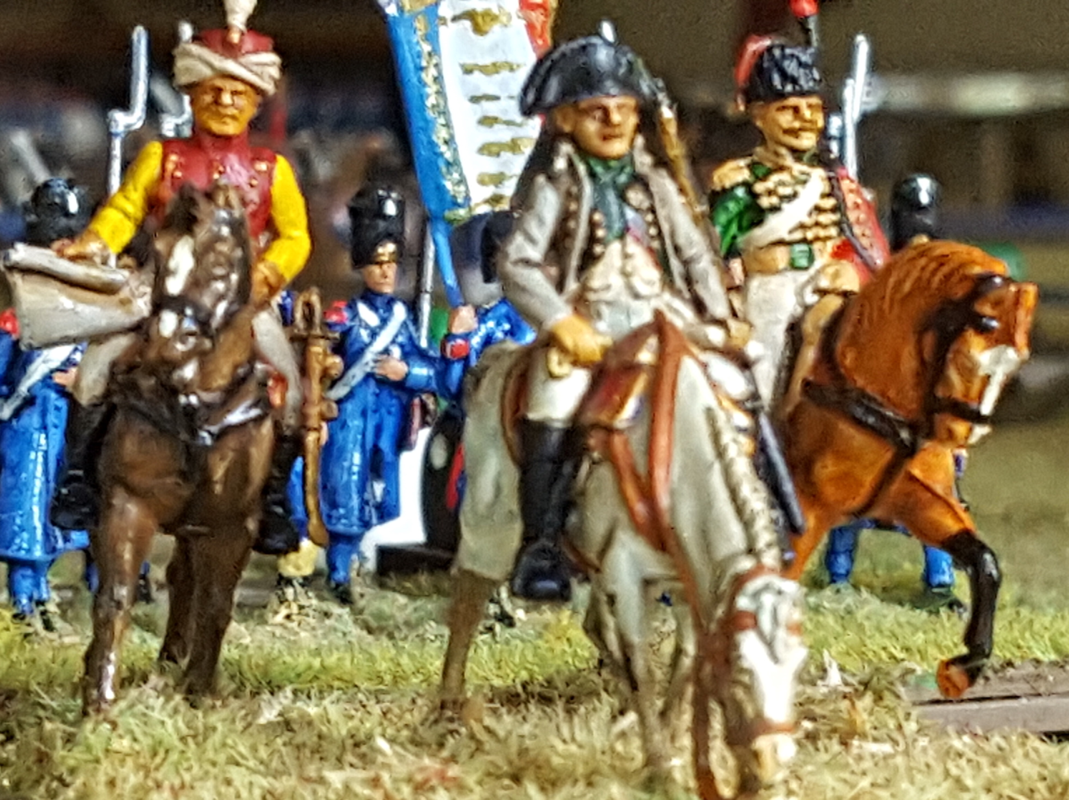
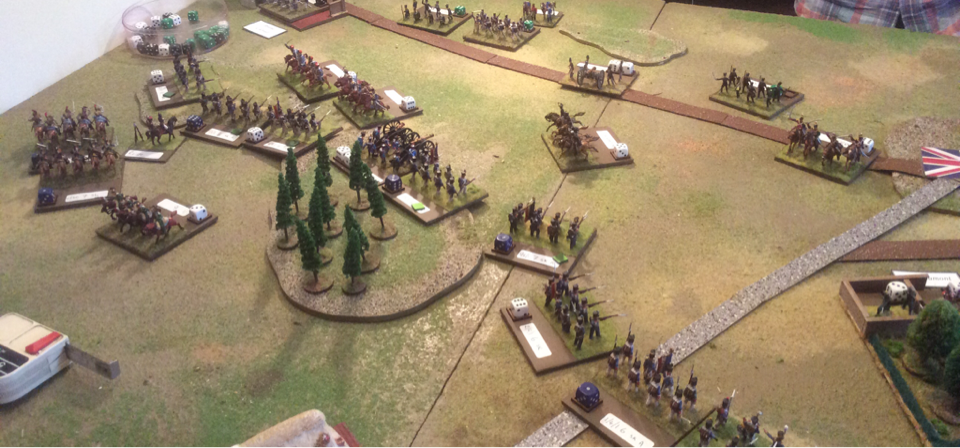
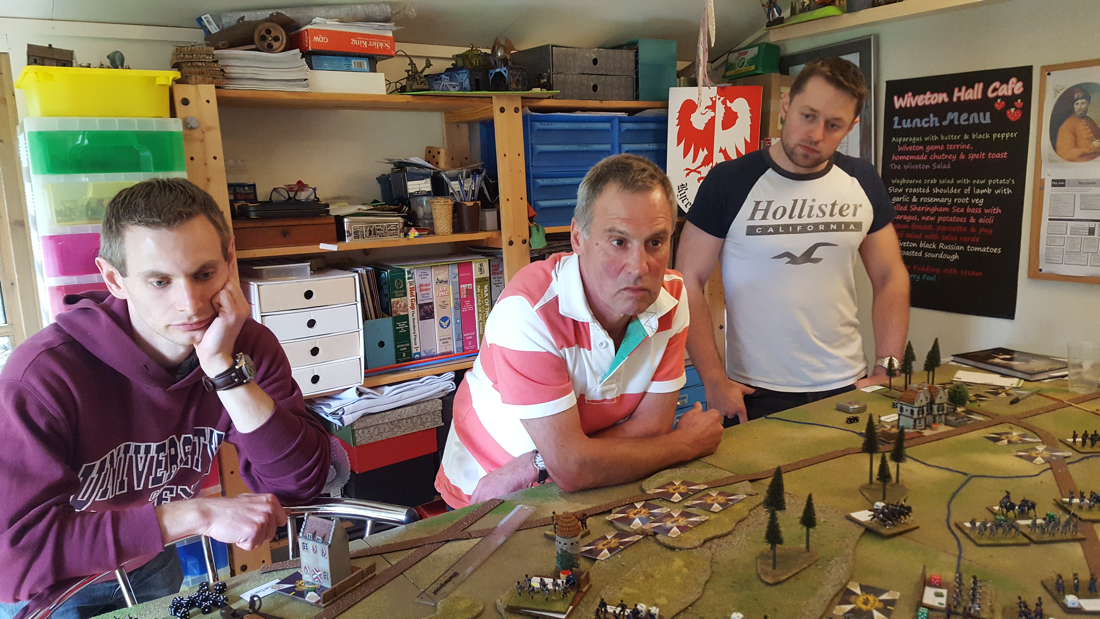
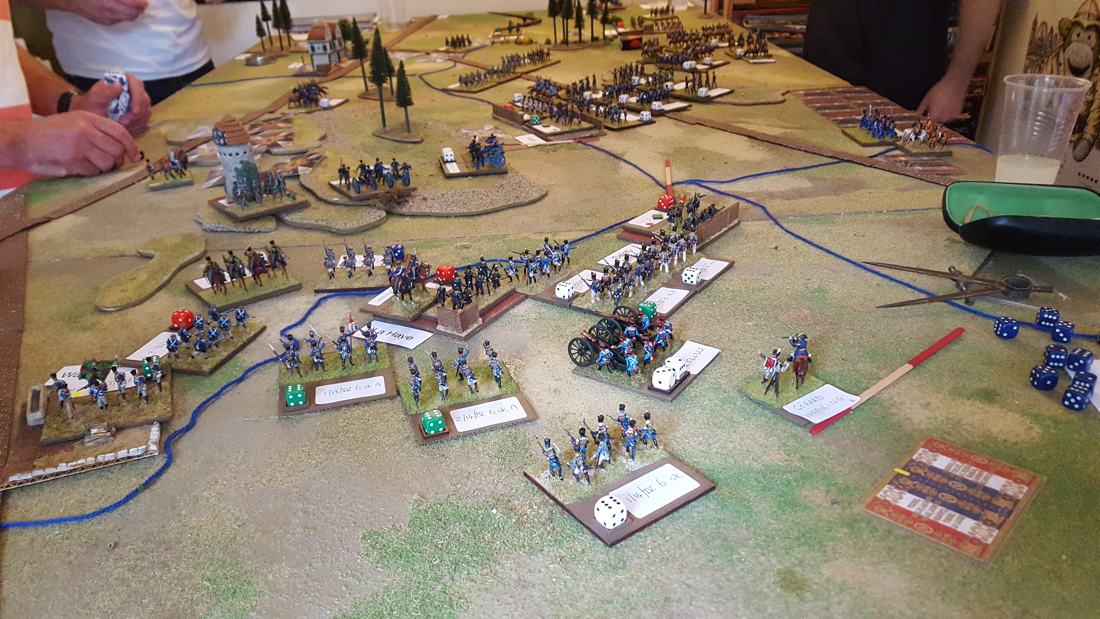
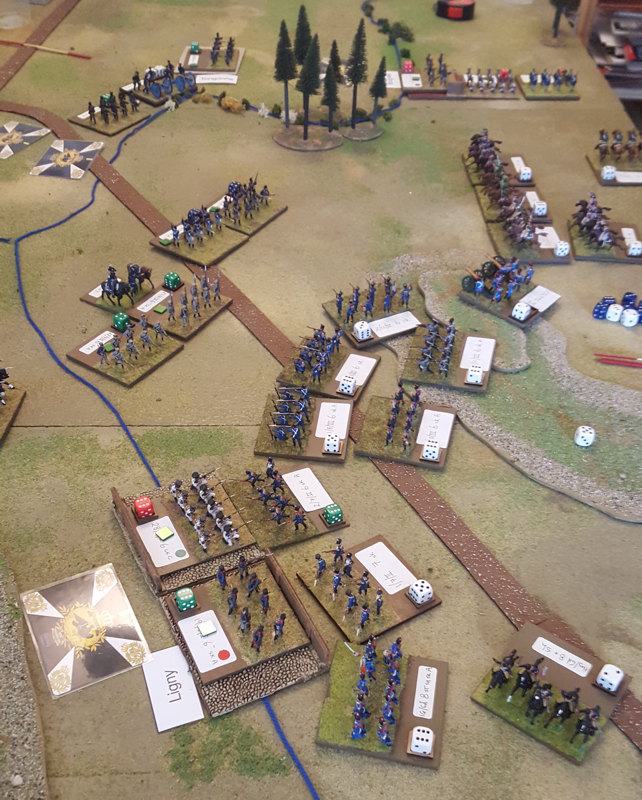
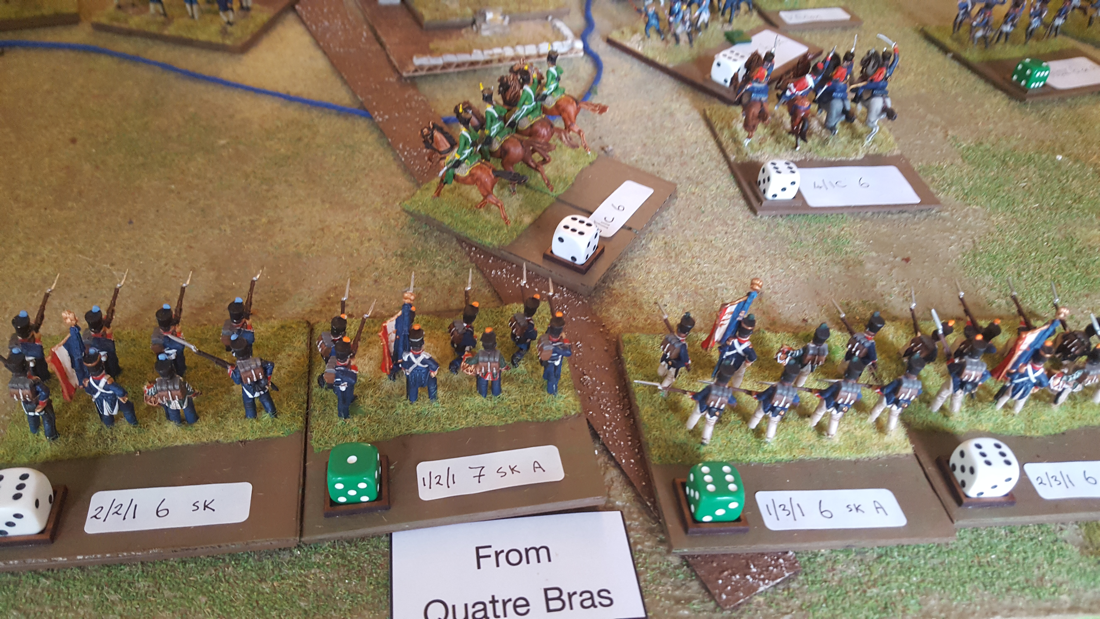
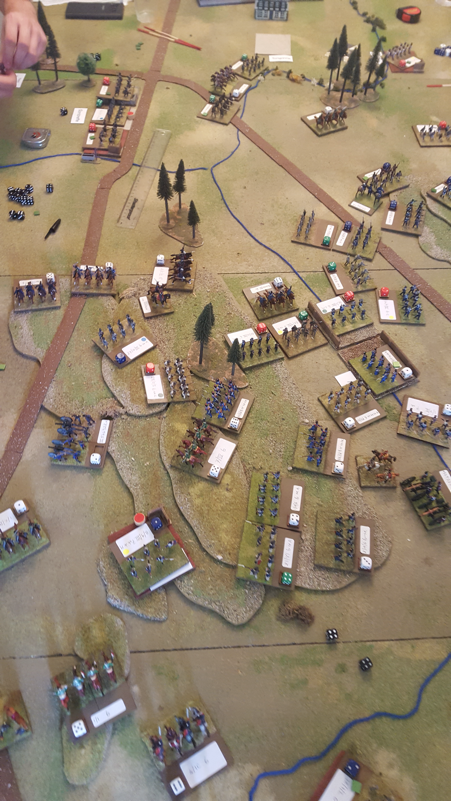
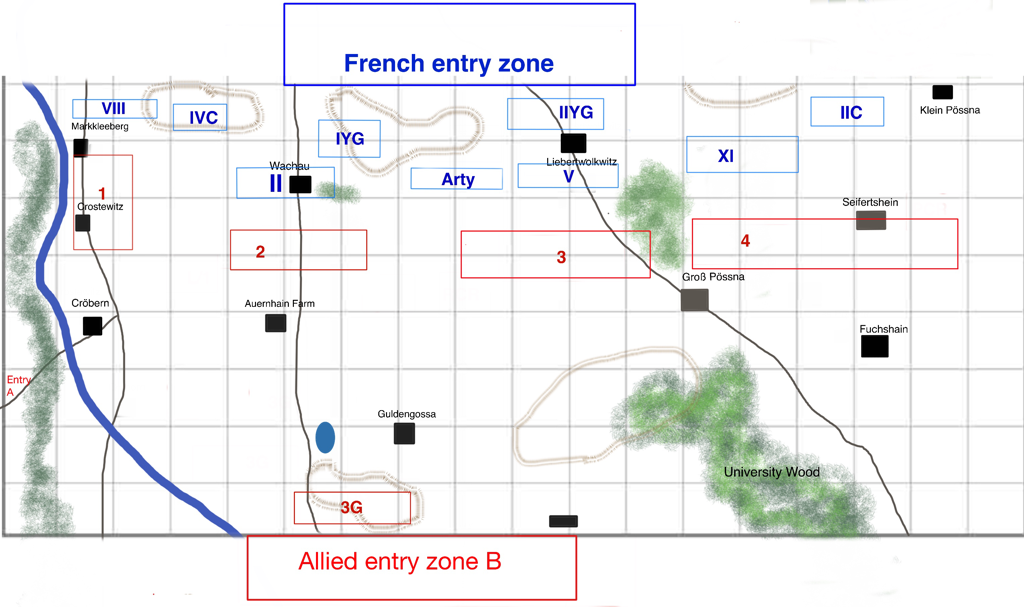
On 18 August we played a day-long refight of the battle of Ligny, using Honour Games’ Blücher rules and 20mm plastic figures. We began around 10 and finished at 6, with the French just meeting their victory conditions. Oddly, the Prussian players seemed happier at the end of the day than the French. Rules, figures and scales Blücher is a grand tactical rules set where each unit represents roughly a Brigade. It focuses on the level of detail that would interest an army commander rather than a brigadier or battalion commander. It’s pedigree is excellent. Sam Mustafa’s first grand tactical set was called Grande Armée, which came out some years ago. He then produced the simplified Fast Play Grande Armée, which dropped a lot of detail. Finally came Blücher, which stripped back the detail even more. At each stage the rules have become more elegant but they keep a period feel and are a subtle challenge to master. Blücher’s ground scale is adaptable but I use 1” to 100 yards, the scale of Grande Armée, Volley & Bayonet and Napoleon’s Battles. This produces 3” Square unit bases. The figures are all plastics by various makers, collected over many years, with quite small unit sizes. This was a deliberate choice, partly to save cost and partly to encourage my sons who were young at the start of the project. Most of my Napoleonics are 15mm but I have never collected figures for the Waterloo campaign in the smaller scale. Keeping the players guessing Three of the players know the Waterloo campaign very well so I had to set up a way for them genuinely not to know whether either side would be reinforced from Quatre Bras, where Marshal Ney faced Wellington’s steadily reinforcing army. I wrote a decision tree for the events off table, which could have ended in a range of outcomes, broadly: French reinforcements, Allied reinforcements or nobody, at least in time to affect the game. Huw took the role of Napoleon, supported by Tim (Gérard) and Ian (Vandamme). Keith was Blücher, with Matt (von Zieten) and Nick (von Pirch). I like each player to have a characteristic so made Tim inspiring, Ian vigorous, Matt steadfast and Nick heroic. If you don’t know these rules, these traits translate as good on the attack, good at getting troops moving, good on the defensive and capable of rallying lost combat power. Napoleon was a legend but not on his usual energetic form; Blücher was also a legend and mobile, which made it easier for him to send in the troops than a standard C in C. Being a legend improves your army’s break point. For orders of battle I used a few histories, mainly volume 1 of Peter Hofschroer’s Waterloo Campaign and a French language history of Ligny by Alain Arq and others. For starting strengths and general organising I used the 100 Days unit cards, released by Honour at the same time as Blücher. These cards make sorting out and deploying the army very easy. Deployment The Prussians were obliged to deploy 1 Corps first, strung along the river Ligne. The French were then to deploy 3 and 4 Corps and their three cavalry corps anywhere on the field up to 4 base widths from a Prussian unit. Finally the Prussians deployed 2 and 3 Corps then the French had the first turn. How it went The game began with Tim/Gérard attacking the Prussian right, while Ian/Vandamme screened Ligny along with the three cavalry corps. Evidently the French didn’t want to get bogged down fighting for this village. However the screening force was much the biggest French formation and while it sat watching Ligny, Tim bled his Corps dry on the French left. The Prussians meanwhile made several counter attacks against Tim, then Keith sent Nick/Pirch over the Ligne on the Prussian left to put pressure on Ian. This worked well as it constricted the French position and put their right wing on the back foot. As the elan of Tim’s units ran down trying to dislodge Matt and Ian’s wing faced off against Nick, Huw was reinforced by the Guard and, not long after, by 6 Corps. We learned after the game that Huw had ambitions to use the reserve rule to deliver a wide flanking attack with these reinforcements, but felt thwarted by his narrow deployment zone and after a couple of turns’ delay, he launched an attack up the Prussian centre. Meanwhile, off the table... Each French turn after turn 11, I rolled on the decision tree. Every roll went in favour of reinforcements arriving with Napoleon. In summary, the story grew as follows. Ney began his assault on Quatre Bras early. He kept his whole command together (meaning no enthusiastic ADC gave D’Erlon verbal orders to march eastwards) and used both 1 and 2 Corps to overwhelm the Netherlands contingent before it could be sufficiently reinforced. He then carried out his original instructions from Napoleon and directed D’Erlon towards the Ligny battlefield. Rolling for losses and delays, I concluded that in the end two divisions and the Light cavalry of D’Erlon’s Corps would arrive at Ligny, late in the afternoon but in time to influence the outcome. News reached Huw that Ney had taken the crossroads at Quatre Bras and despatched D’Erlon towards the Ligny battlefield. When these arrived on the table he gave their command to Tim, who found the fresh troops a great boost. With the revelation that he would not be reinforced by Wellington as expected, Keith took stock. His left was doing well against the French right, which continued to retire before 2 Corps. But the right was now paper-thin, facing fresh troops, while the centre was buckling under the punch of the Imperial Guard. Keith ordered his army to withdraw, under the cover of 2 Corps. When we reached the last turn of the gaming day, the Prussian line had started to contract from the right and rotate clockwise, as it withdrew on Sombreffe. The French meanwhile had finally cracked the Prussian centre and were advancing to cut off the Prussian right. The Prussians were close to their break point and the day went to Napoleon. Hail the happy losers And here is the curious thing. The French victors seemed to feel a bit flat as the day ended, whereas the Prussian team was brimming with good humour and pleased with its performance. Why was this? Well, I think the players on the side that lost in history may feel less pressure to win the game: the Prussians did very well and cooperated effectively, with messages flying in all directions throughout the day. They didn’t win but were well placed to fight another battle. The French on the other hand came close to a bigger victory than they achieved: an earlier assault by the Guard could have cut off half the Prussian army. Also, I fear that Huw felt thwarted, not by the performance of his side but by the scenario and rules. His first hope was to send the Guard on a sweeping reserve move to fall upon a Prussian flank, but the field was constricted by the table edge and he couldn’t calculate a ‘legal’ route that would deliver his units unobserved on the enemy flank. I do sympathise and can’t change the fact that the table was 4 feet wide so he did not have space at the rear to flank March. That said, the French right could have deployed much further forward than they did and on top of that they were then soon retreating from their starting positions. When the umpire’s happy, everybody is happy Overall I was very pleased with the day. I think the game was well balanced and both teams played in good spirit. The decision tree for events at Quatre Bras gave a plausible result and I will use the idea again. I think the Blücher rules are perfect for a multiplayer game like this. Between 1030 and 6pm with a break for lunch, we played the full 28 turns and had very few rules quibbles. We had all played the rules before but not for some time and they came back easily. My note to self for future games is that I should check in with Commanders in Chief a few times during play, to check if they feel able to do what they wish. It hadn’t occurred to me until he said it at the end that Huw felt unable to act because of the table size. Had he told me his outflanking plan I could have worked out a way to make it possible or to explain why it wasn’t. When the game isn’t a tournament, I think the umpire should show a bit of flexibility if this helps the story to flow. I was grateful to all six players for giving up a summer Saturday and pitching in with such good humour. Multiplayer Wargames are a rare event but they have to be my favourite part of the hobby. 
0 Comments
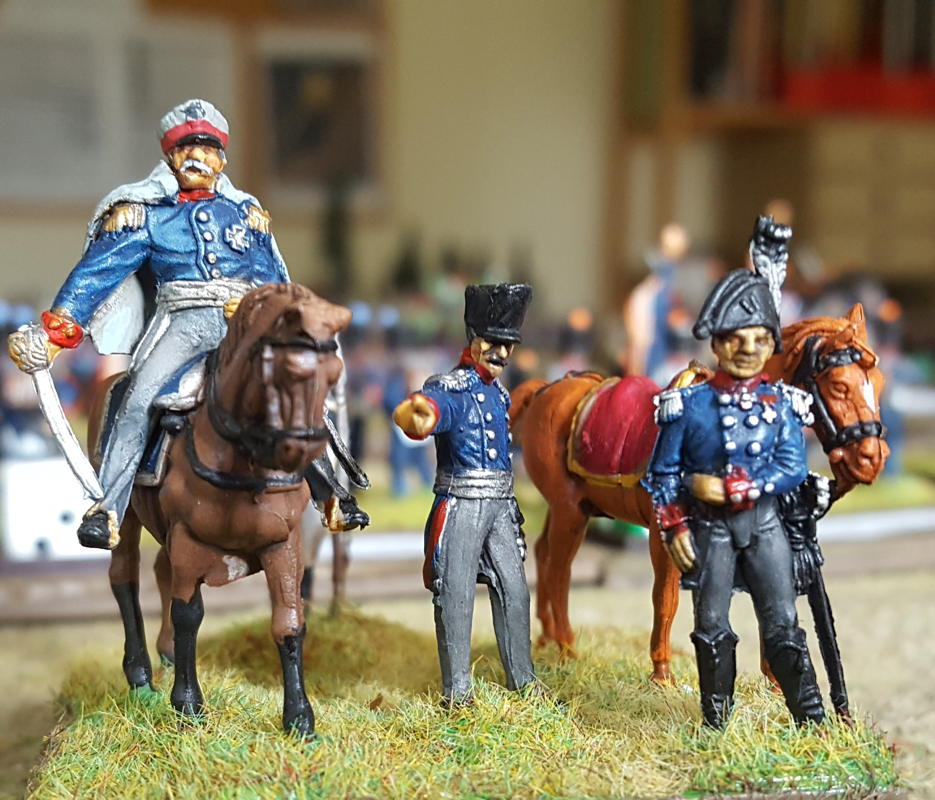
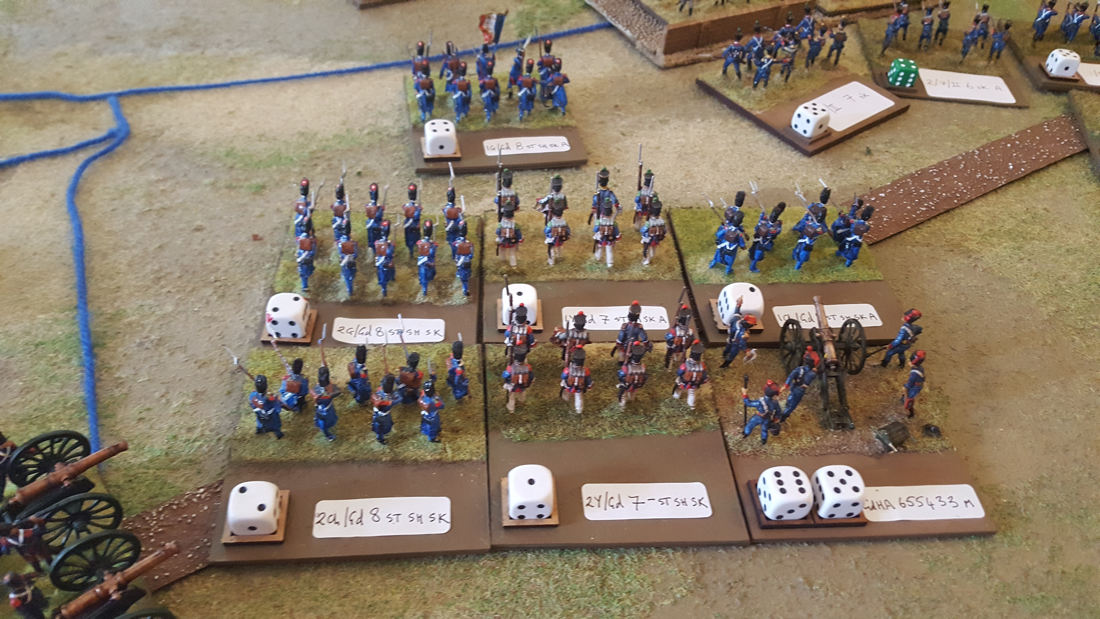
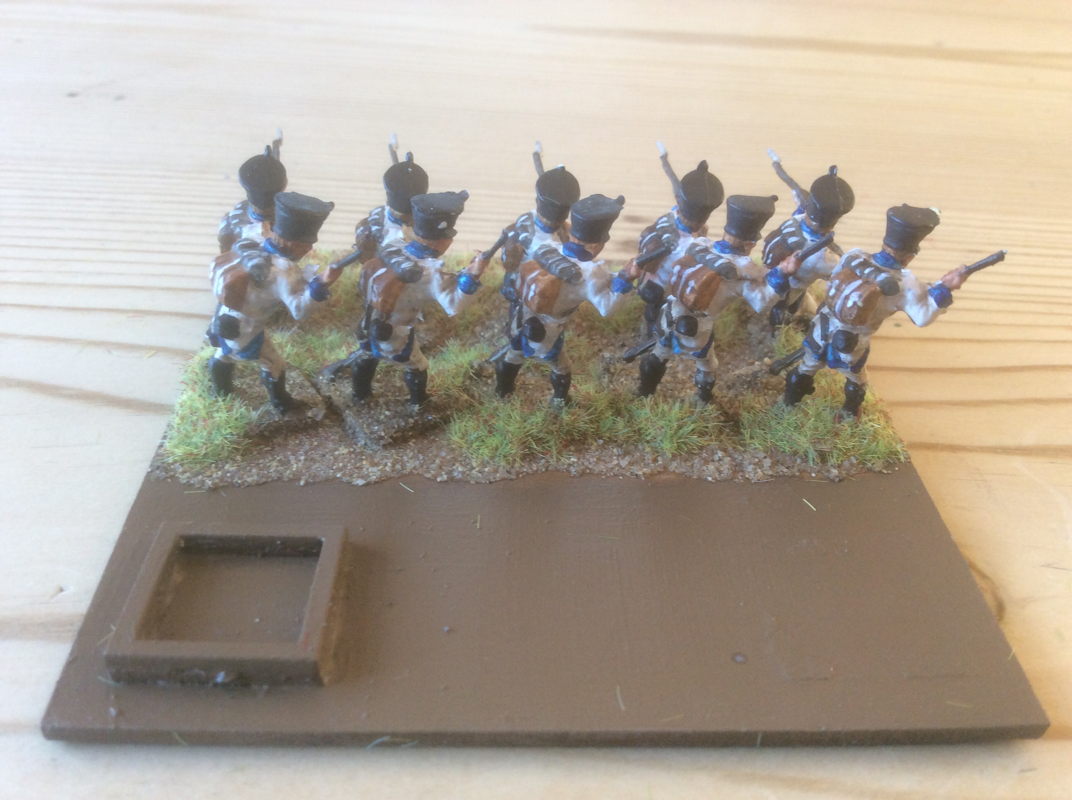
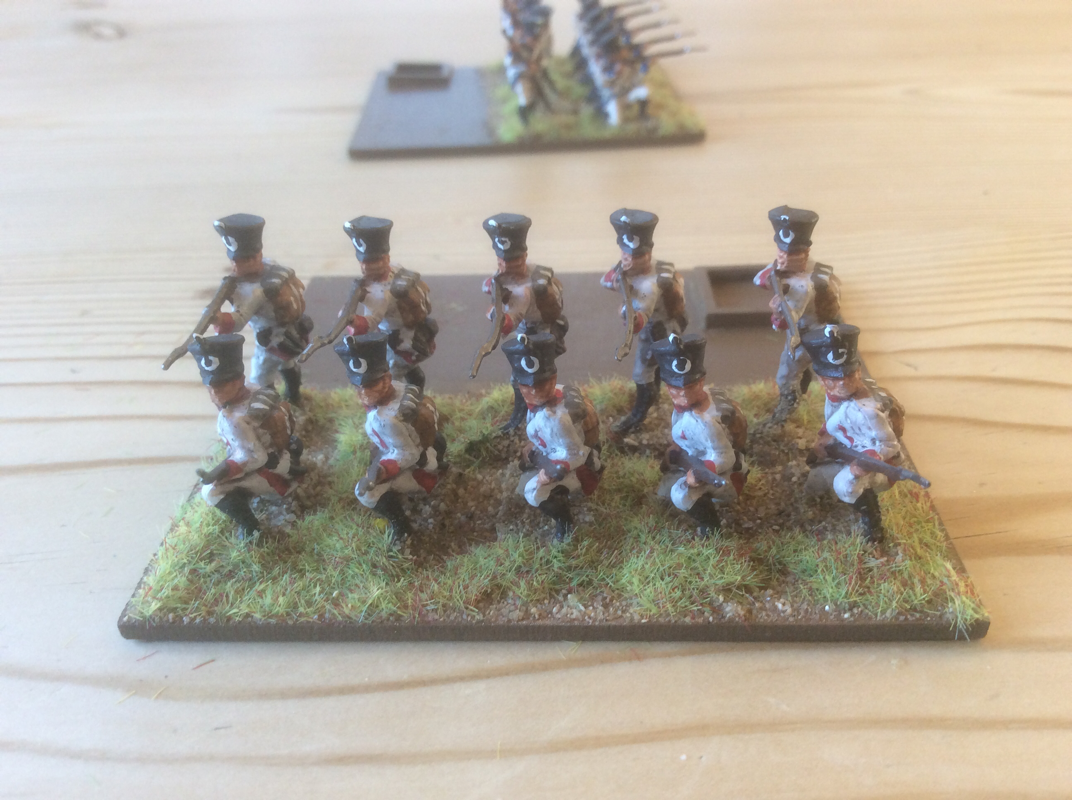
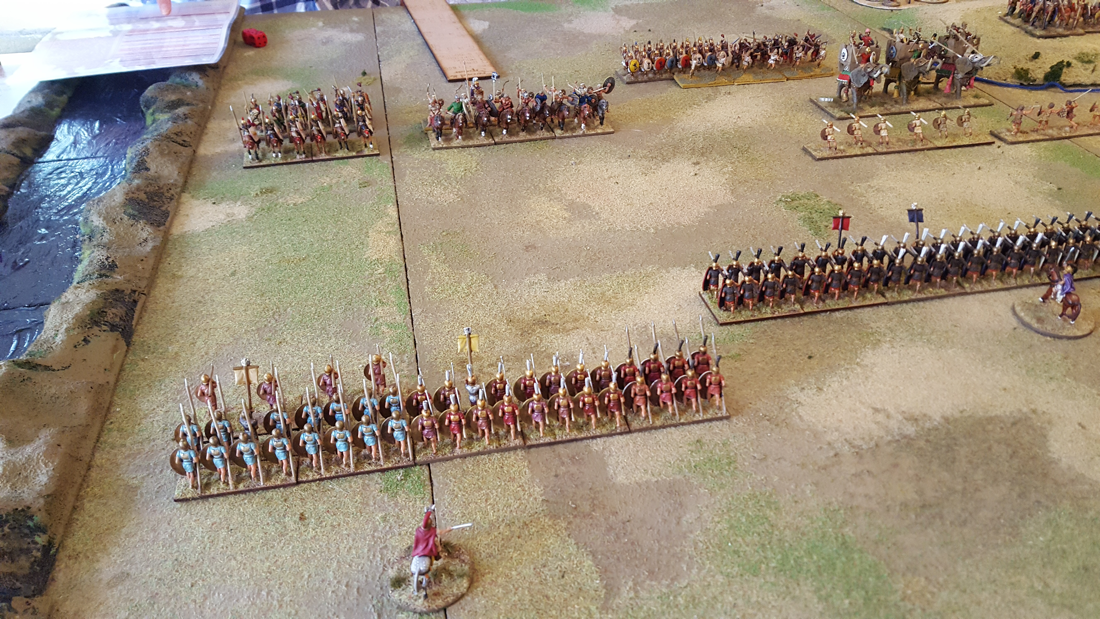
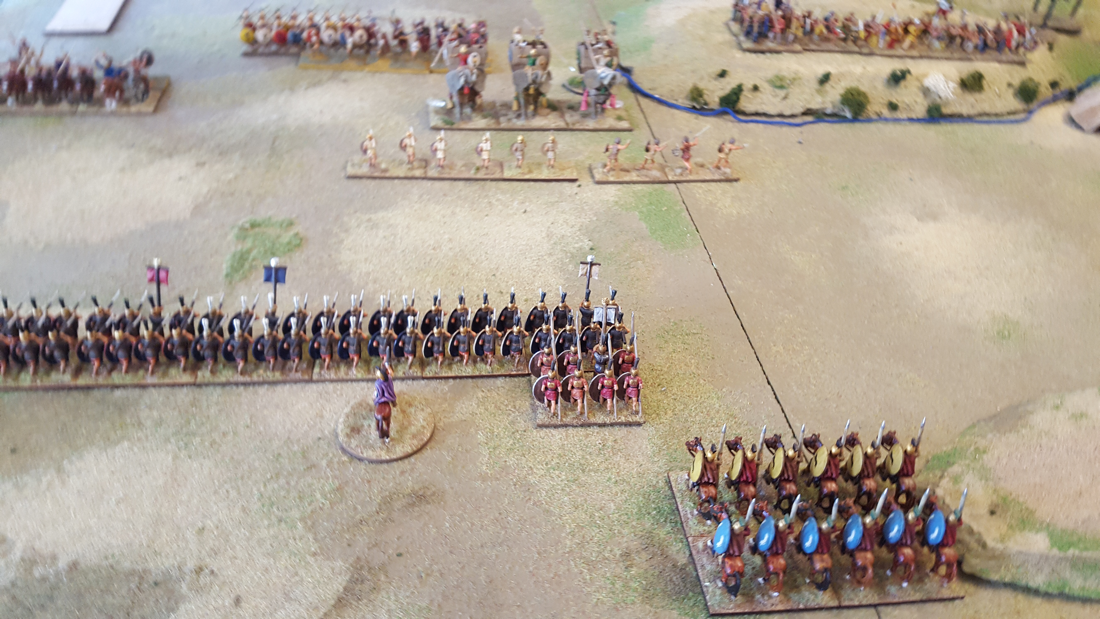
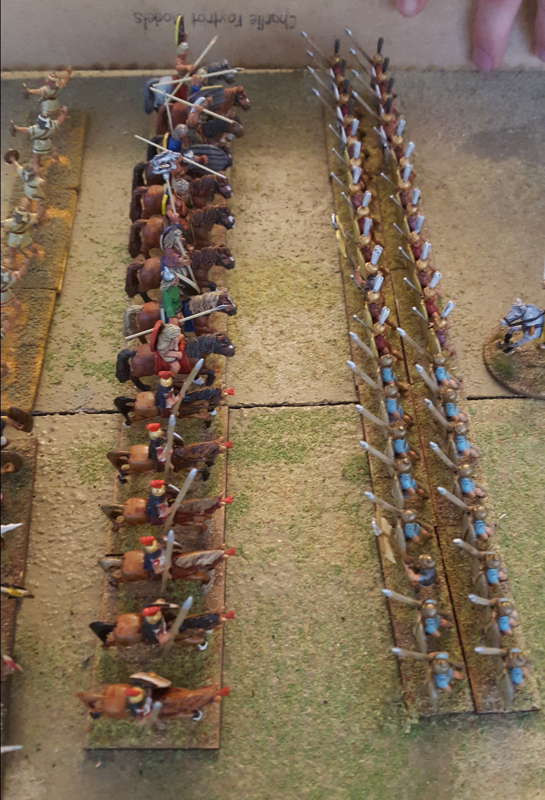
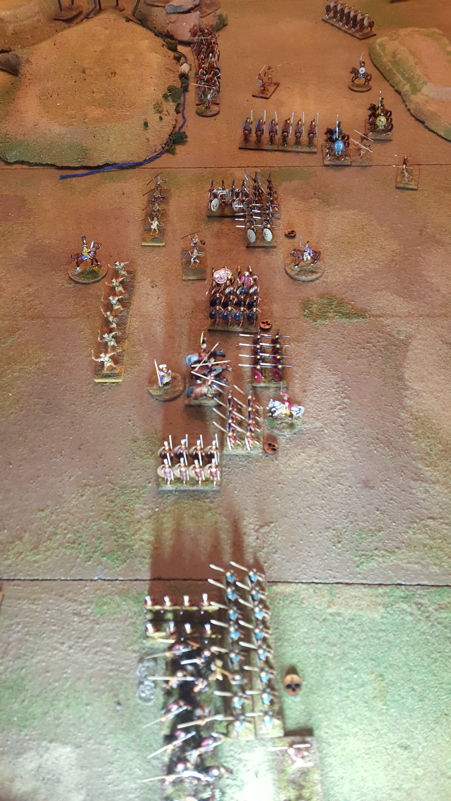
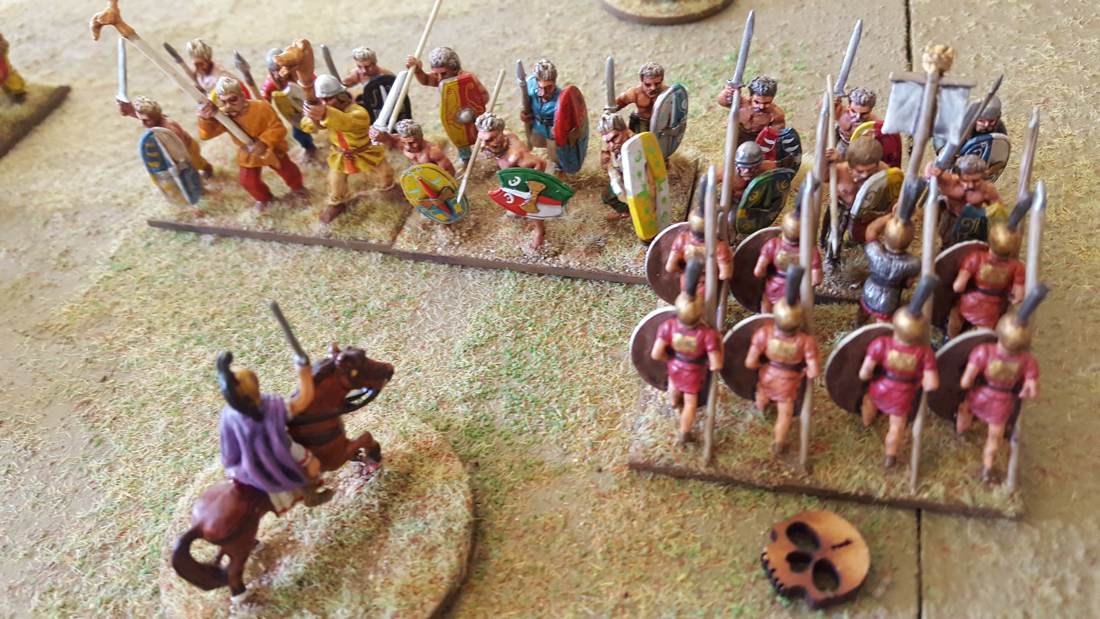
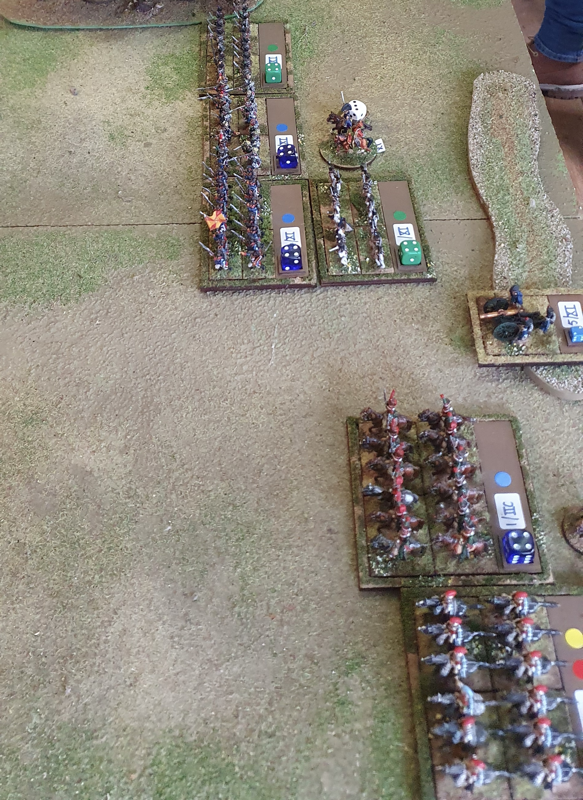
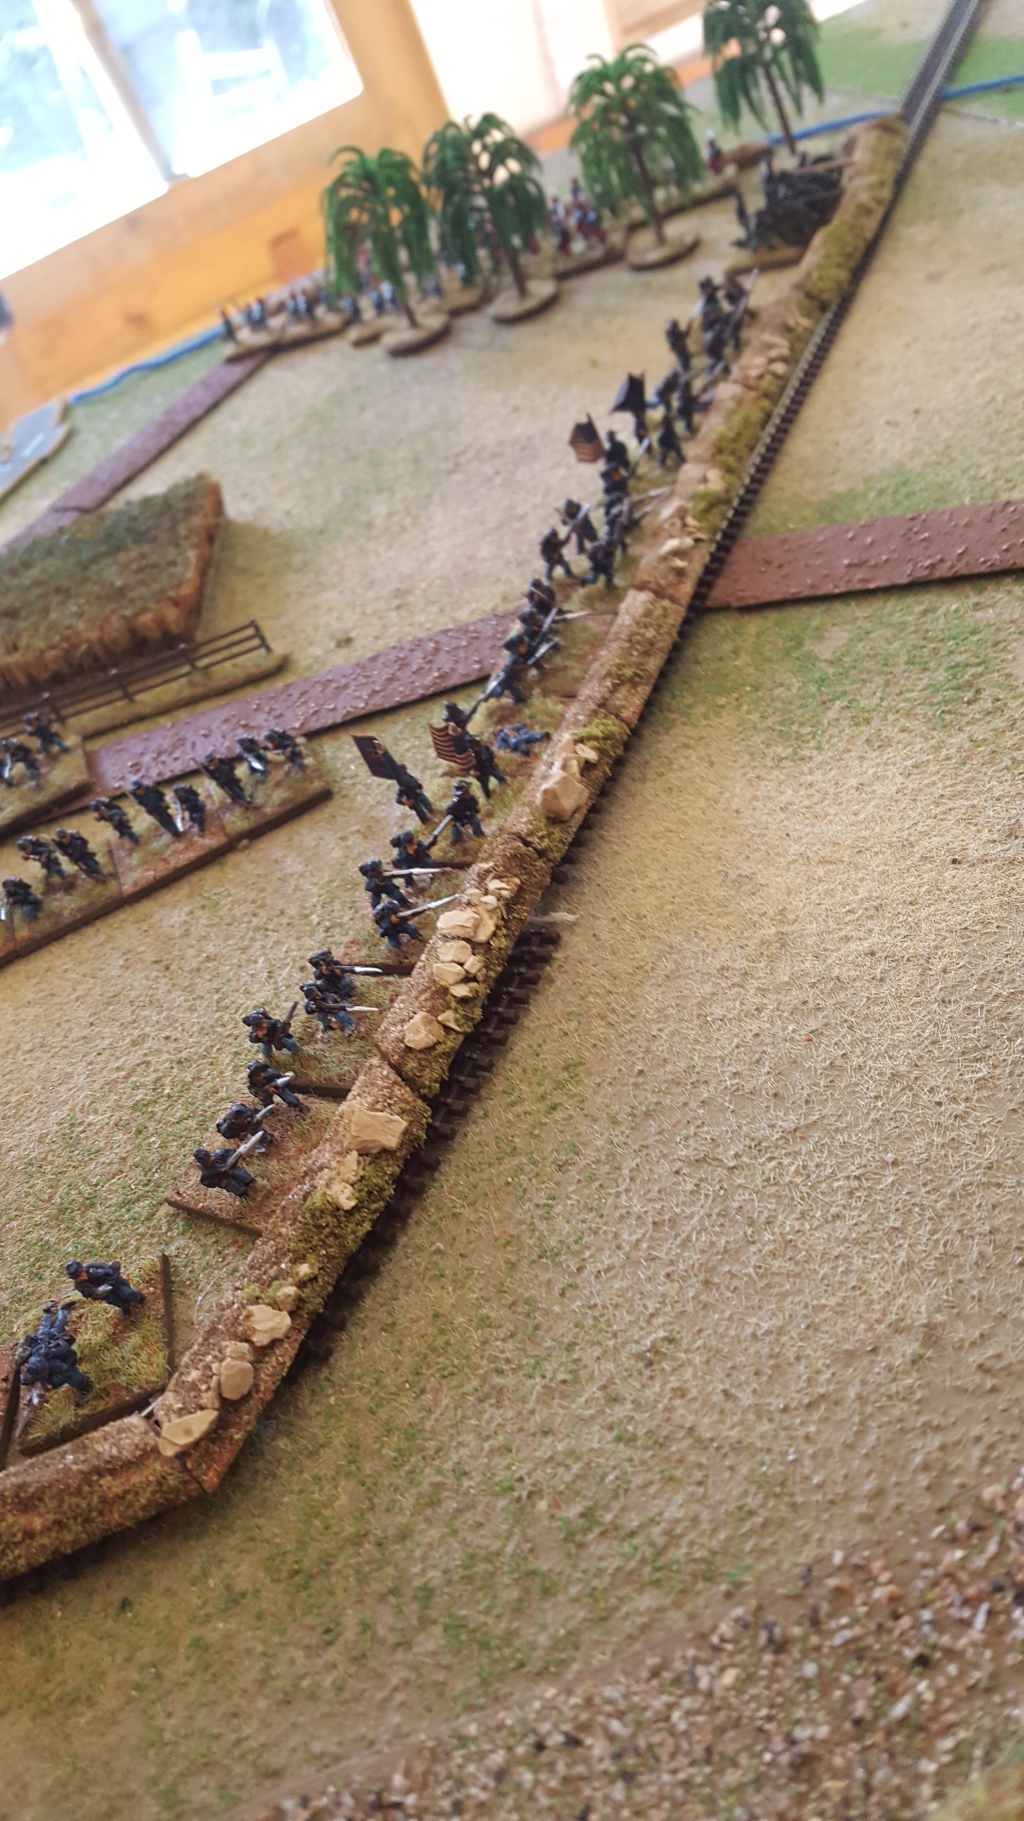
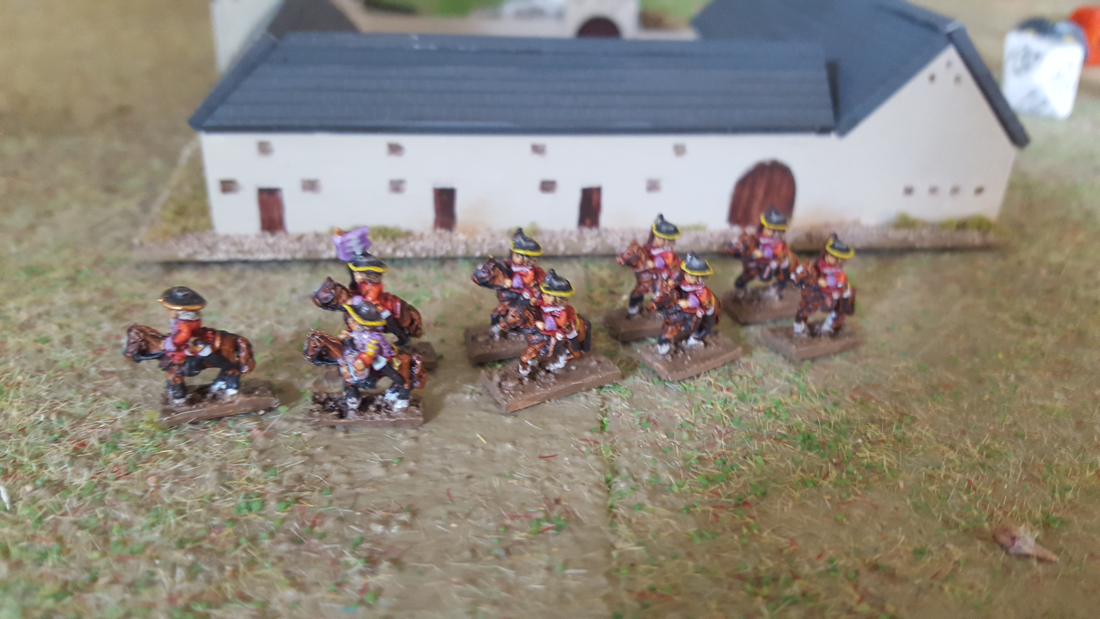
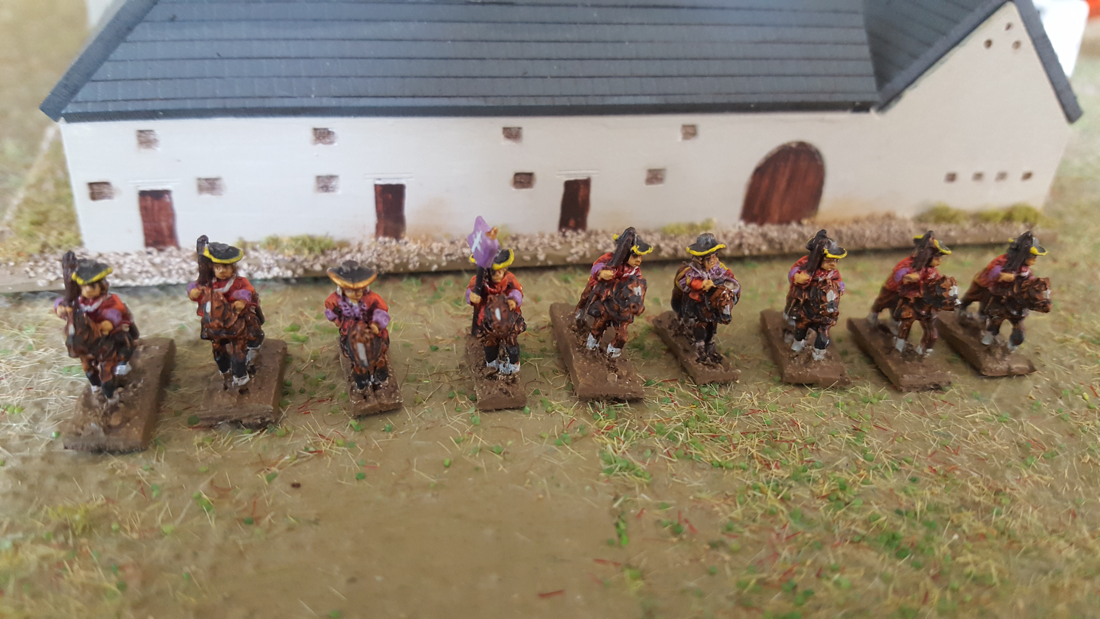
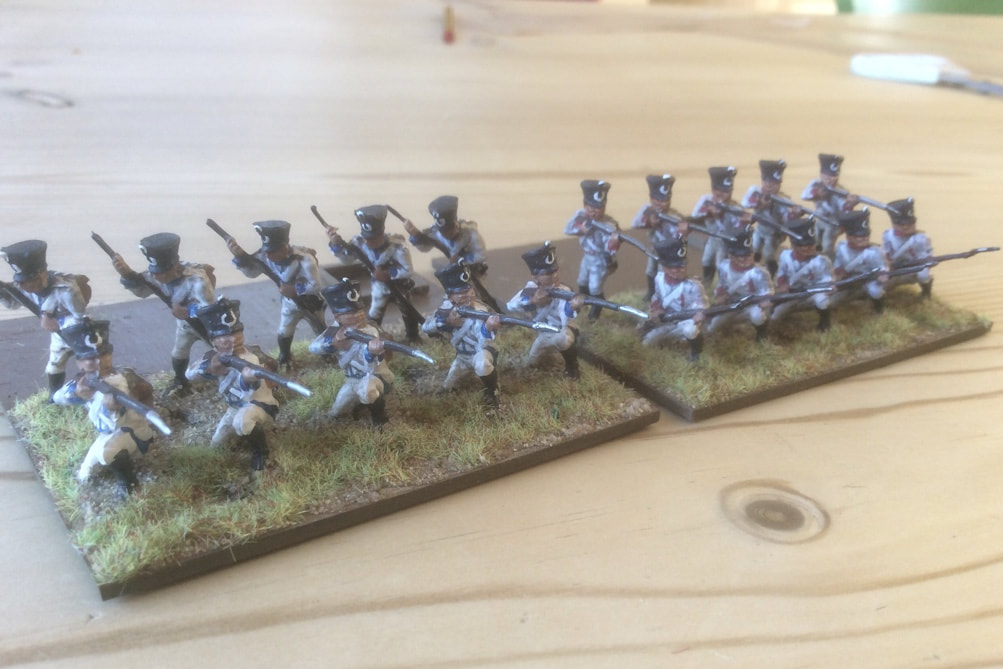 Keith’s Old Airfix French, repainted as the 28th and 29th Prussian Line. Getting the figures together Three years after we replayed Waterloo using Honour Games’ Blücher, I will be hosting a multiplayer refight of Ligny later in August. I have started organising the units, which has been nice and straightforward using the 100 Days unit cards. The figures are soft plastics from Airfix, Revell, Italieri, Esci, Zvezda and Hät. Some of them are 40 years old or more, since my friend Keith presented me with his boyhood Airfix Waterloo collection. My original plan at the start of the 1815 project had been to make a separate figure base for every Brigade in the campaign. To be able to refight Ligny, this would have required me to paint up the Prussian III Corps and French III and IV Corps in their entirety. That makes a lot of work and I don’t have that much time to prepare. Also, while there might be satisfaction in completing the whole Orbat, when would I actually play using every unit that took part in the campaign? So I decided to recycle some existing units. First I decided to relabel the French II Corps to cover most of the 3rd and 4th Corps, since one habit veste is pretty much like another. For the Prussians I already had II Corps from the Waterloo game, along with a few I Corps units. If I repurpose my IV Corps units I can make most of III Corps and a fair chunk of I Corps. However. Ever since I bought David Nash’s Prussian Army 1808-15, published by Almark, back in about 1970, I have loved the varied uniforms of the post-1812 army. I am proud of the fact that every Prussian unit painted to date has the right uniform for the regiment represented. Could I bring myself to relabel Silesian Landwehr as Westphalian, without overpainting the facing colour? Who besides me would notice, still less care if the uniforms didn’t fit? As it turns out, I realised I couldn’t do it. Even if others didn’t notice, I would know that the Prussian uniforms are wrong. I have therefore started a programme of repainting, adapting and adding to my Prussian collection so that every unit is properly dressed. And there are some great uniforms to recreate. I started with the 28th and 29th Line in I Corps, who until 1814 had been regiments in the Duchy of Berg and still wore their white Rhine Confederation uniforms. I used some of the old Airfix French that Keith had passed on. Next comes the 30th and 31st regiments in III Corps, which had previously formed the Russo German Legion and wore Russian uniform. I have ordered a box of Zvezda Russian infantry to cover these units. For the rest, I am repainting facing colours where this is easy and painting more demanding colour combinations from scratch. I also need to add more Prussian horse so have painted the West Prussian Dragoons and am about to start some Landwehr lancers. If this sounds like amazing dedication, bear in mind that I represent foot units with only 8 to 10 figures and cavalry with 4 or 5 horsemen. So I can complete a unit in an evening as long as I don’t have distractions. The clock is ticking however and I can’t afford to slack.  The West Prussian Dragoons. Hät figures. Not great sculpts but I like them Source Materials Meanwhile, I am thinking about aspects for inclusion in the scenario. There are two main what-ifs: D’Erlon’s I Corps movements and the arrival of Lobau’s VI Corps. D’Erlon barely contributed to the day because of countermanded orders, while Lobau only arrived from Charleroi as the battle ended. Both could have arrived earlier and contributed to the action. To help decide what, if anything, I do about these absent formations, I have been rereading Colonel Charles Chesney’s Waterloo Lectures, first published in 1868 and reprinted in the 1990s by Greenhill. Chesney is fascinating. His book is not a conventional narrative history of the campaign and in fact he presumes the reader already knows the main events. Chesney’s purpose is to analyse the various myths and assertions about the battle that were already manifold by the mid 19th century. His main target are those historians who placed blame for the French defeat on everybody else but Napoleon. It is striking how much of the mythology is still current, including in some modern histories of the campaign, not to mention in the entertaining hogwash that is De Laurentis’ film of Waterloo. I suppose two world wars didn’t help the British to give due credit to Blücher and his army, or indeed the Germans under Wellington’s command, for their contribution to victory. In this Chesney is scrupulous: he stresses the immense achievements of the German-speaking troops and places Wellington’s personal relationship with Blücher at the heart of the success. He also argues persuasively that neither Ney nor Grouchy were to blame for the alleged errors of judgement and action that were later used by Napoleon to explain away his defeat. Where is D’Erlon? In the case of Ligny and Quatre Bras, Chesney points out that Napoleon’s order to Ney on the 16th was only to detach a Force towards Ligny once he had taken Quatre Bras with both Corps. It may have been unfortunate that due to countermanded orders D’Erlon was unable in the end to contribute on either field, but Napoleon was not counting on his arrival at Ligny, at least for some hours. Indeed, when the head of D’Erlon’s column first appeared in the distance, Napoleon was surprised to see it and delayed an attack on the Prussians until he found out who it was. Given this interpretation, I am not inclined to make D’Erlon’s arrival a particularly significant factor in the scenario. VI Corps Lobau’s VI Corps spent most of the 16th in reserve a short distance from the Ligny battlefield and came up too late in the day to contribute to the outcome. In his case I think the French should be able to use him if they wish, since he had not been given a competing task for the day. Bülow Another ‘what if’ is whether Bülow’s IV Corps could have been present at Ligny if he had shown more energy or his orders had been clearer. I think the answer is ‘probably not’. He had the furthest to travel from his cantonments and his orders did not tell him to come to Ligny. It seems to me that the only circumstances in which he could have been present on the field would have been if the army had been ordered to concentrate sooner than it actually was. This takes the ‘What If’ so far into alternative events that we could at that point change any number of factors and end up fighting a different battle altogether. Fine if we were to refight the campaign but we will only be looking at the battle of Ligny. So in summary, Bülow is out, Lobau can arrive early and D’Erlon might appear but he also might be recalled and/or arrive late, having stayed with Ney until Quatre Bras was taken. I’ll try to turn these possibilities into a series of dice rolls, to keep our generals guessing. I will be painting hard over the next several days and must then think what we need for the battlefield. There must at least be a windmill for Napoleon’s use.... 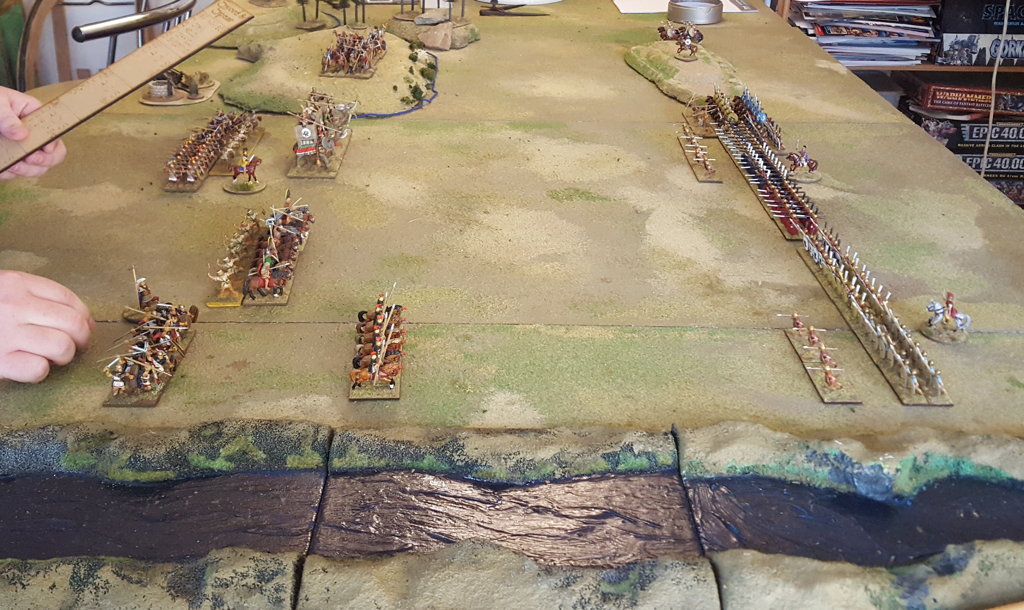 Hamilcar on the left, Nero and Salinator on the right Gaming the Metaurus My previous blog post explained how we created an ADLG scenario for the battle of the Metaurus. This post tells you how the game went. Ben took the role of Hamilcar and Matt commanded the Romans. Ben followed Hamilcar’s deployment, putting his Gauls on the high ground protected by a strip of difficult terrain. He put his elephants in the centre, with Spanish and African foot behind them, and his cavalry on the right, supported by two more stands of Spanish foot. Matt deployed one infantry command on his left, the other in the centre and his cavalry on his right. Phase one of the game saw Ben’s elephants crash into Matt ‘s centre and pretty much slide off. We had expected them to be destroyed while disrupting the Roman centre but they barely made a dent. Matt’s dice rolling was consistently luckier than Ben’s, setting the pattern for the evening. On the Carthaginian left the Gauls and Roman cavalry looked at each other, while by the river, Ben’s cavalry advanced on Matt’s infantry but wisely chose not to attack. 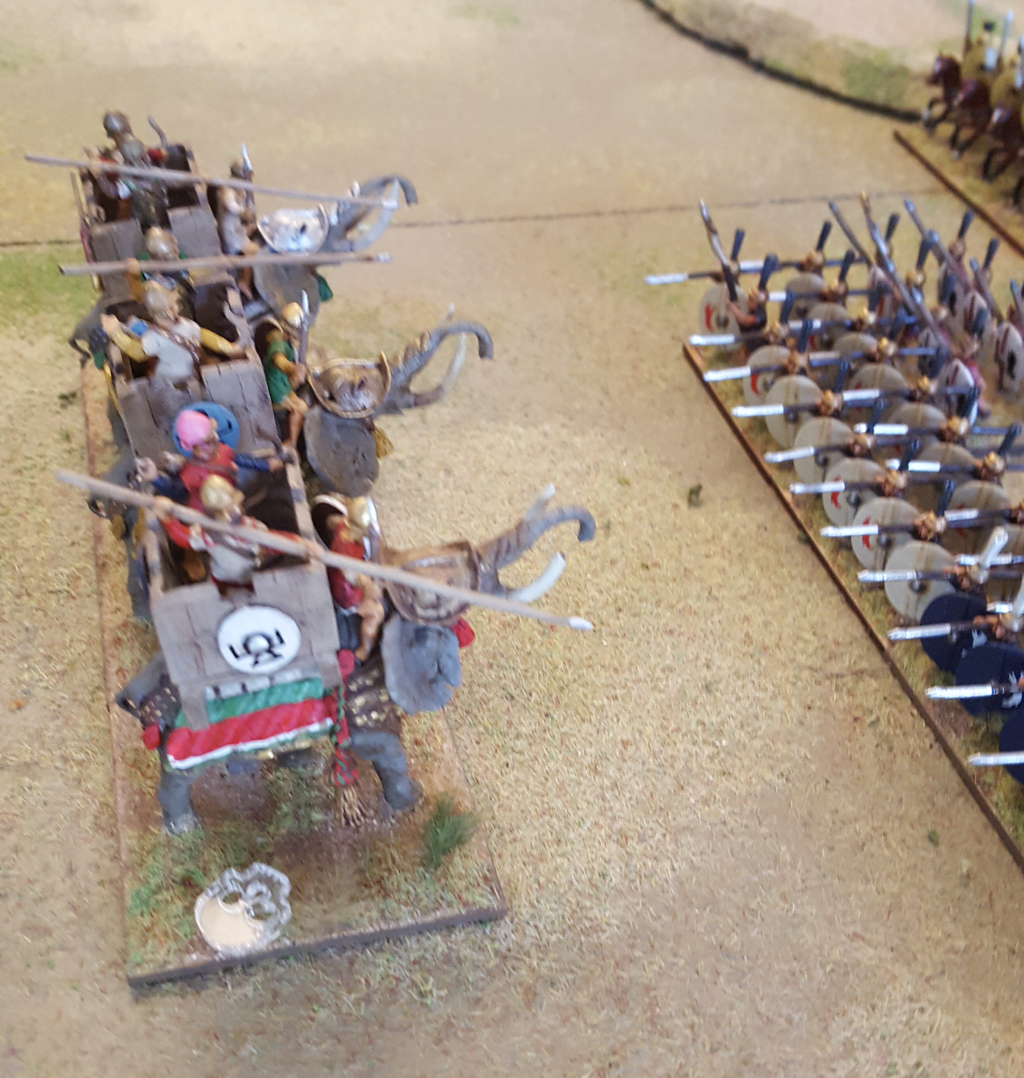 The elephants looked imposing but melted fast In Phase two the two centres came to blows. Ben’s troops fought rather better than their elephants had done and the fight was quite balanced. Meanwhile a couple of stands of Gauls came off the high ground, to be mauled by Matt’s cavalry. Then, Ben decided to launch his cavalry at Matt’s unruffled left wing. Matt again rolled some lucky dice but he also had the edge in modifiers all along this combat. Ben lost several stands in one combat phase, taking him perilously close to break point. In the final phase the rest of Ben’s Gauls came down from the high ground, too late to have an effect on the battle. His cavalry nearly all routed and his centre started to crumble, mainly because his Spanish MI were less resilient. The game then ended as Ben’s morale losses hit 26. At that point Matt’s losses were only 9 points, of which only 4 were due to units routing. Measuring up to the history
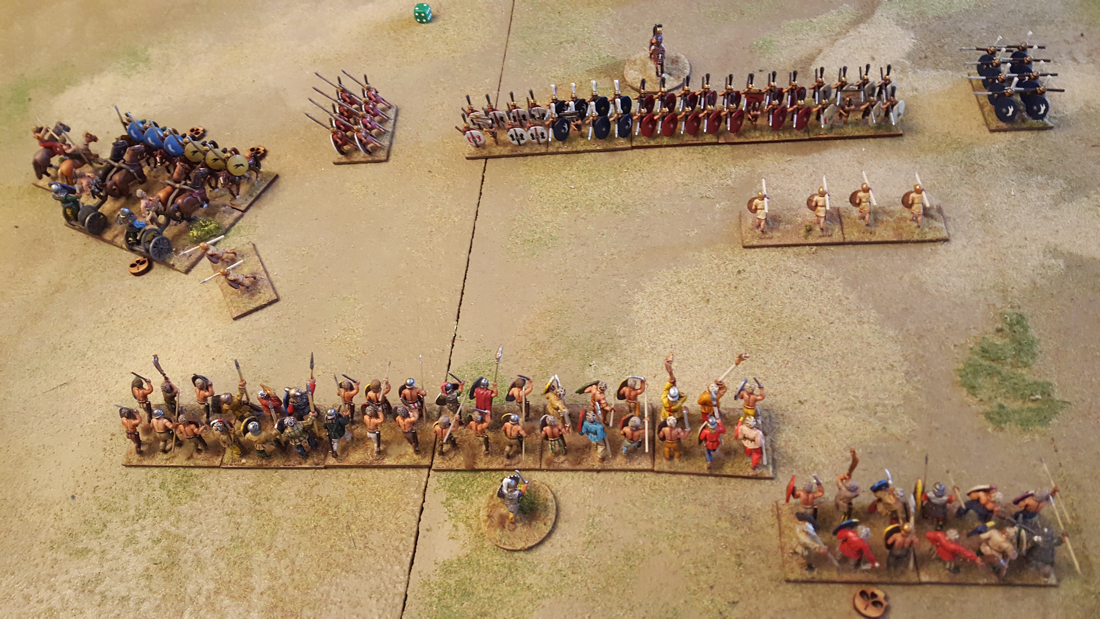
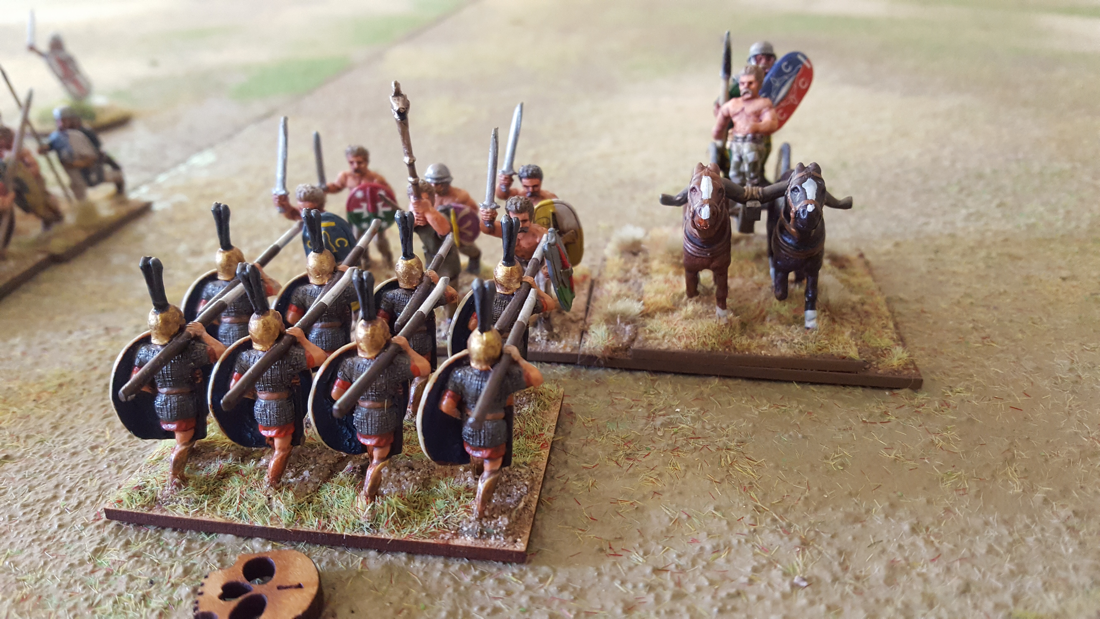
According to the generally accepted account of the battle the Carthaginians deployed pretty much as Ben did in our game. The Romans on the other hand placed their cavalry by the river, Salinator in the centre and Nero on the right. Phase one of the battle saw the Carthaginian elephants attacking in the centre, with similar unimpressive results to what happened in the game. On the left the cavalry wings clashed and the Romans began to push the Carthaginians back. The infantry in the centre then closed, with neither side gaining the advantage. On the right Nero soon abandoned any intention to charge the Gauls, who were too well positioned on the high ground. He then marched his wing around the rear of the Roman line to the left and assaulted the Carthaginian centre in its right flank. With this, Hamilcar’s army collapsed and he spurred his horse into the melee. The first Hannibal knew of the defeat was when his brother’s severed head was catapulted into his camp. The big difference in our game was of course Matt ‘s deployment of infantry on his left and cavalry on the right. This made Nero’s manoeuvre impossible. I could, I guess, have imposed historical deployment on both sides but would argue that the more restrictive the setup, the less satisfying the game. To be frank, I was surprised by Matt ‘s deployment and wondered at the outset if he was squandering his cavalry by placing it facing the Gallic Hill. As things turned out, I couldn’t argue with his emphatic victory so what do I know? Nevertheless his cavalry played only a bit part in that victory. I think he was helped by Ben’s decision to charge Roman heavy swordsmen with medium cavalry, rather perhaps than to shift this cavalry to face the Roman horse. In the last turn Ben had to take a survival roll for his C in C when the unit he was with routed. He passed it, so at least our Hamilcar kept his head Matt and I played a 100 Point game of Art de la Guerre on Wednesday. Matt commanded Republican Romans while I had a Gallic army. This was the first time we have played with impetuous troops and with light chariots. I had hoped to field enough Gauls for 200 points but was 30 odd points off. I need to get my last bare metal Gauls onto the painting table. Matt won the initiative roll and chose to attack. The field had two gentle hills and a field, all spread around the table edges. The middle of the table was completely flat. Matt placed his cavalry on his right and rested his left on hills. I put my medium cavalry on the right and light chariots and scouts (javelin armed light cavalry) on my left. 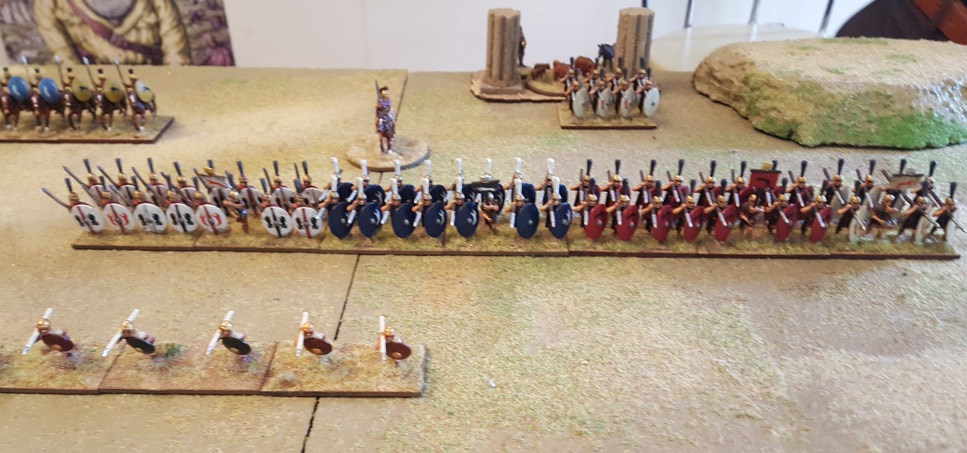 My plan was to hold back the centre at the start and send my mounted troops forward. The chariots were to attack the Roman horse on my left. On the other flank my Medium cavalry were to go deep right, to discomfort the Roman centre but wait for the Gallic foot to advance and then join the attack. I reckoned that the first turn disadvantage against Roman swordsmen needed offsetting with some combined arms combat. My right wing cavalry galloped down the field and onto the first hill. I faced them at about 1 o’clock and then turned my attention to advancing the left and centre. Matt meanwhile peeled a base of hastati off his centre, turned them to face my cavalry and began to advance. I had a turn to react but chose not to. On his next turn Matt charged my cavalry in the flank. I elected to evade, in the expectation that I could travel deeper towards the Roman rear. However, the rules revealed that evading troops must make a 90 or 180 degree turn before scampering off. Instead of going down the table, I had to face the side. Even had I rolled a 1or 2 I’d have still left the table. Idiot. I deserved that three times over. First, I should have chosen my position and facing more carefully. Then, I had time to respond to Matt’s threat but didn’t. Finally, I chose to evade without knowing what that means in the rules. Accepting the flank attack would have been expensive but at least I might have done some good. As it was, the hastati had time to rejoin the main line having done their job of chasing away the threat. I won’t do that again. Probably. Anyway. On the Gallic left my chariots attacked and got the better of the Roman cavalry while my centre advanced. In the event, the first clash of the heavy infantry went the Gauls’ way almost everywhere. Despite the Gauls losing impetus against the Roman swordsmen, the Gallic dice just rolled higher. The luck evened out in following rounds but my first round advantage held and the Romans broke three points before mine did. The last few turns were tense and Matt’s victory point tally nearly overtook mine. But if I won the game, he got bragging rights for chasing off 14 points of cavalry with a base of hastati. I like ADLG. The rules are clear and I find them a lot more enduring than the entry level DBA. I do however wonder about the wide range of outcomes possible in a combat round. This victory felt unjust. Matt‘s swordsmen should have had the edge over my Gauls but the dice rolled well for me and poorly for him. Perhaps this was more noticeable because we were playing a 100 Point game: my luck probably wouldn’t have been so great with more combats to resolve in the centre. Perhaps we should focus on 200 Point Battles in future. So I’d better get all my Gauls painted. 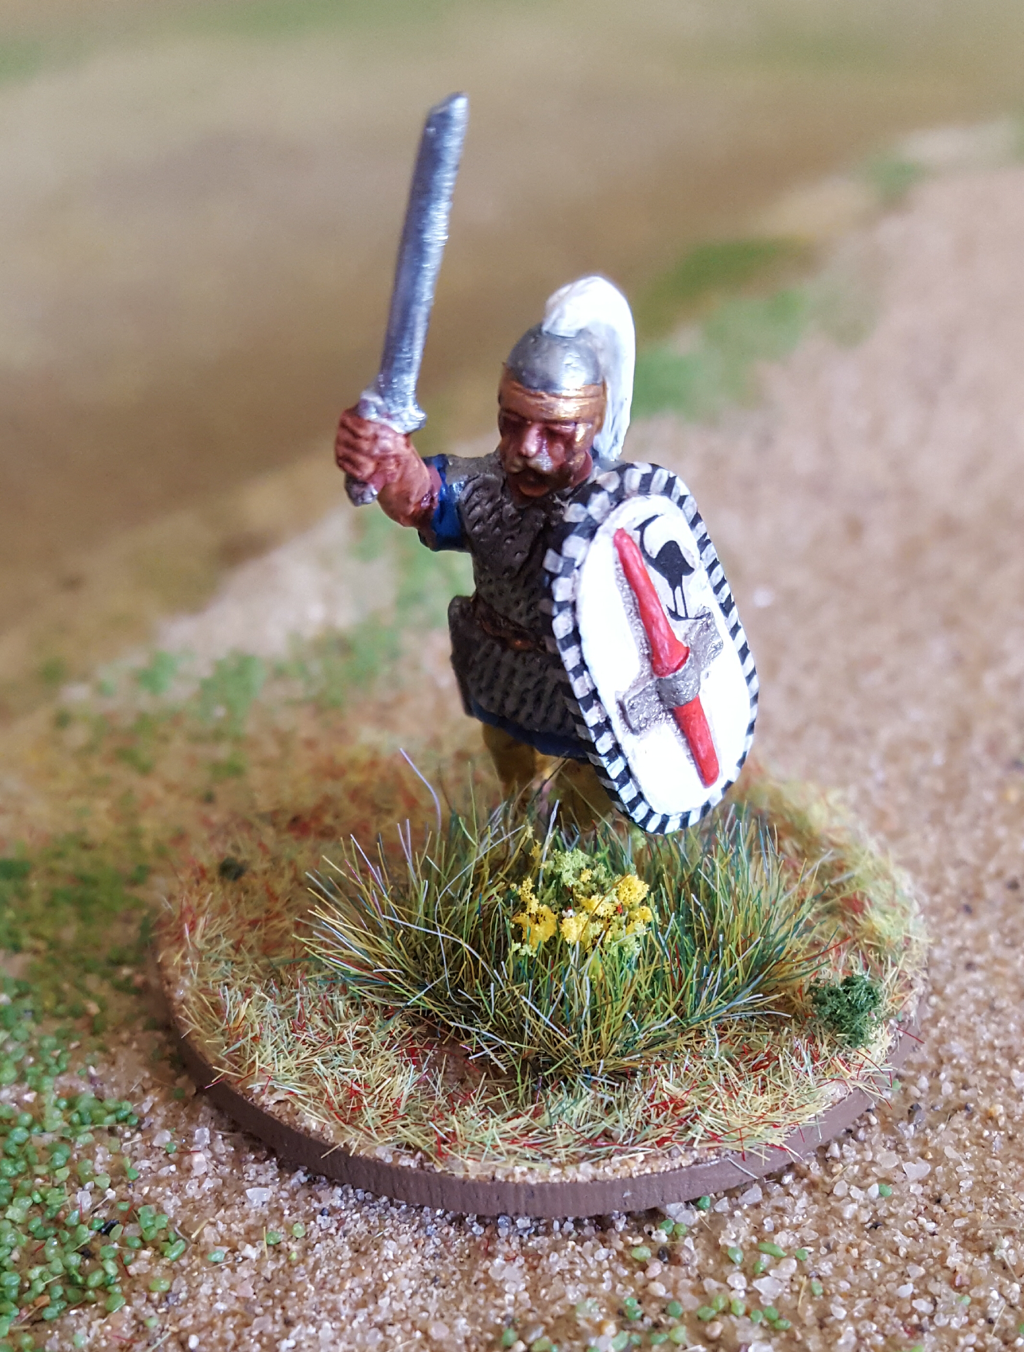 The victor, Fulliautomatix the Gaul 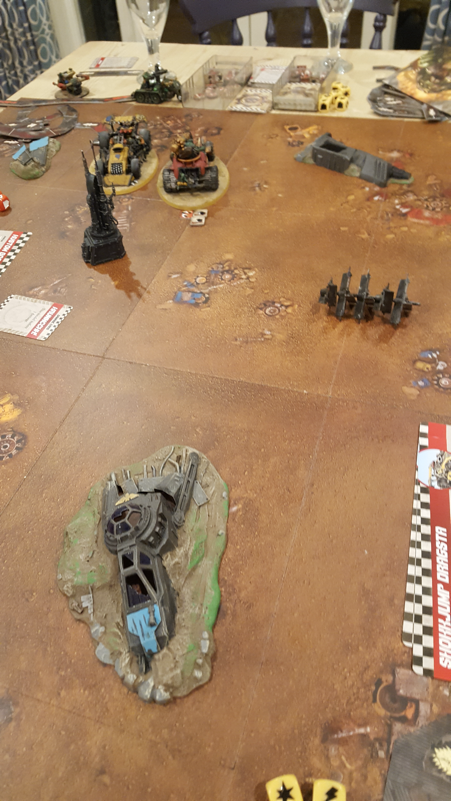 I have been rattling through my 20mm German figures this past week, trying to create enough points for a platoon sized game of Battlegroup. Latest to finish are a Stuh and three Stugs. My painting skills aren’t great but I think they’ll do for gaming. I am trying various weathering powders, mud textures and washes. I could probably add a lot more weathering but don’t want to go overboard and regret it later. 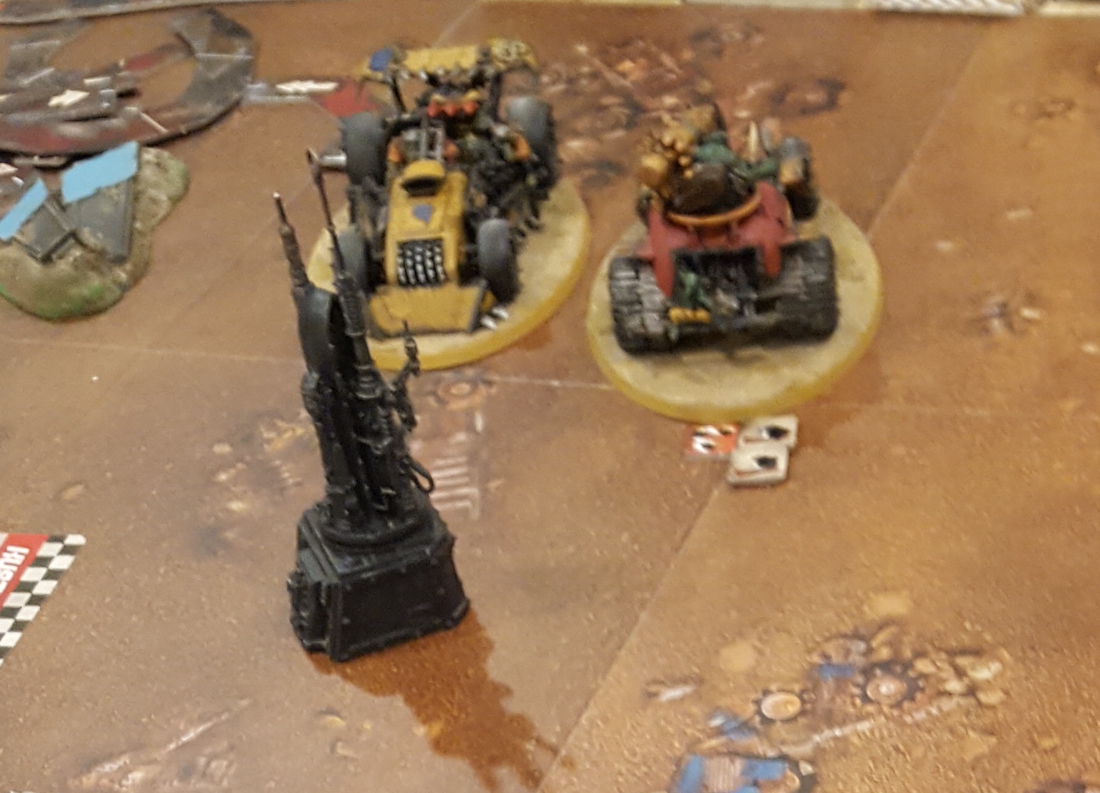 I have three Panzer IVs undercoated but will finish them after I paint a Sherman tank troop and 6pdr with tow. The models are a mix of Combat miniatures, Airfix, PSC, Armourfast and a rather hefty diecast Tiger made by Lord knows whom. The model houses are a box of card models I picked up in a Bring and Buy at Valhalla a couple of years ago. I wish I could remember the manufacturer. They were top of the range in the 80s and still look good to me. 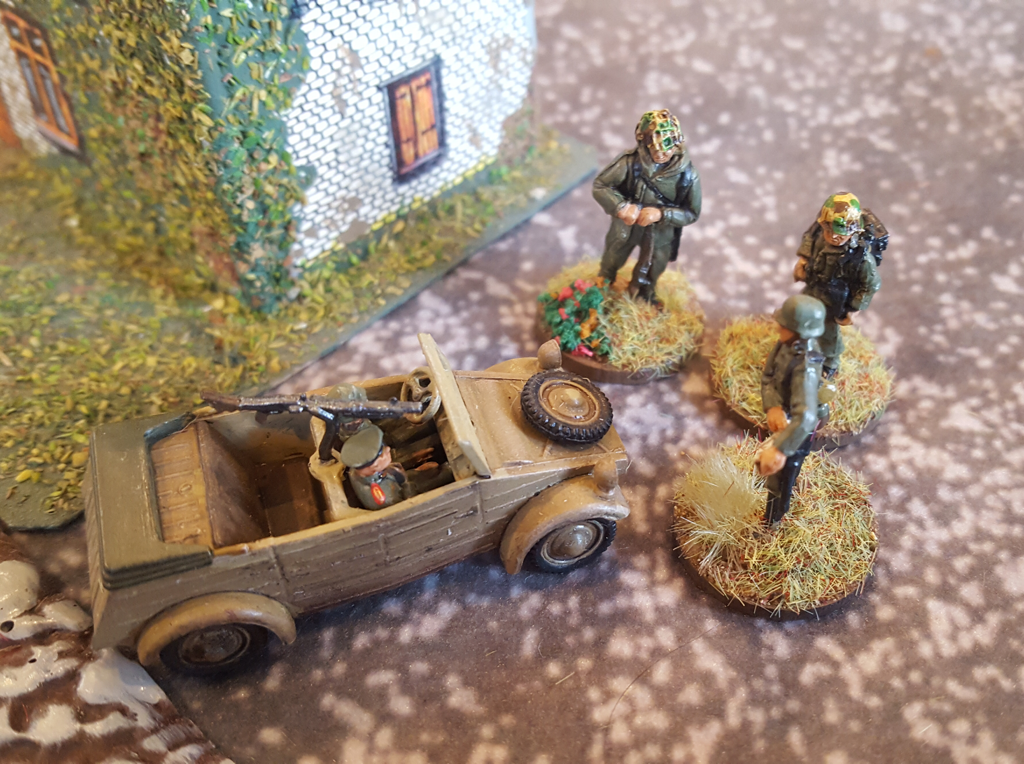 I have recently picked up a project that I had abandoned a good four years ago. The year that Warhammer Historical folded, I had picked up a cut price copy of Kampfgruppe Normandy by Warwick Kinrade. It is one of the best rulebooks I have ever read, packed full of historical information, scenarios, Army lists and photographs. I bought the makings of two 20mm forces, one British and one German. I painted a platoon of British and assembled some vehicles, but then stopped. The main reason was the gift of some 28mm Germans and a Warlord King Tiger, followed closely by a group decision to start up some forces for Bolt Action. We have been steadily building our Bolt Action armies and I especially enjoyed creating a stock of terrain pieces.
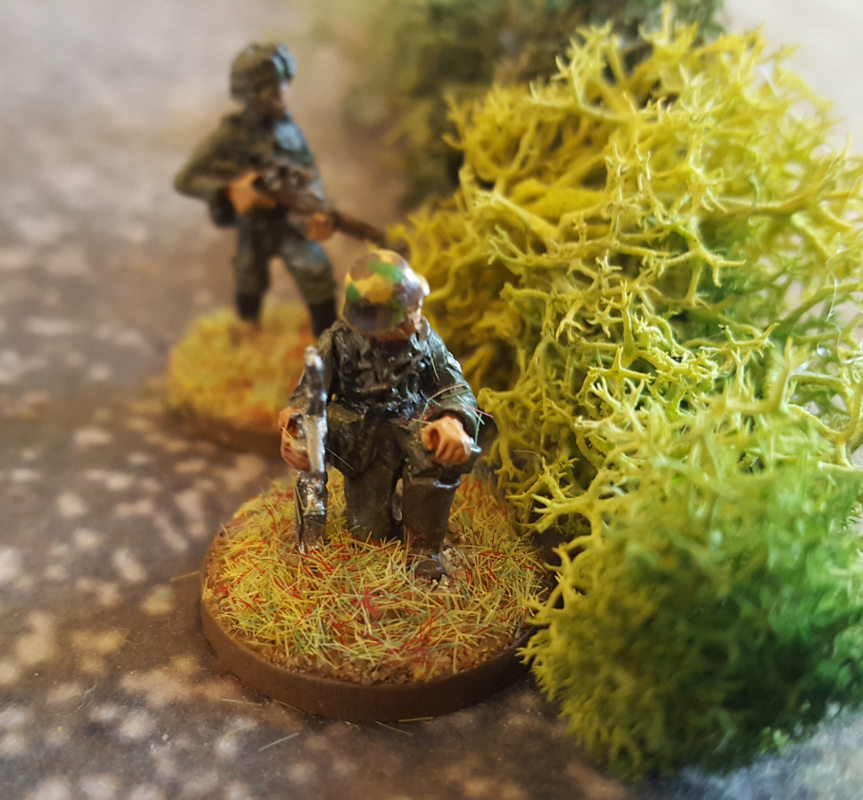
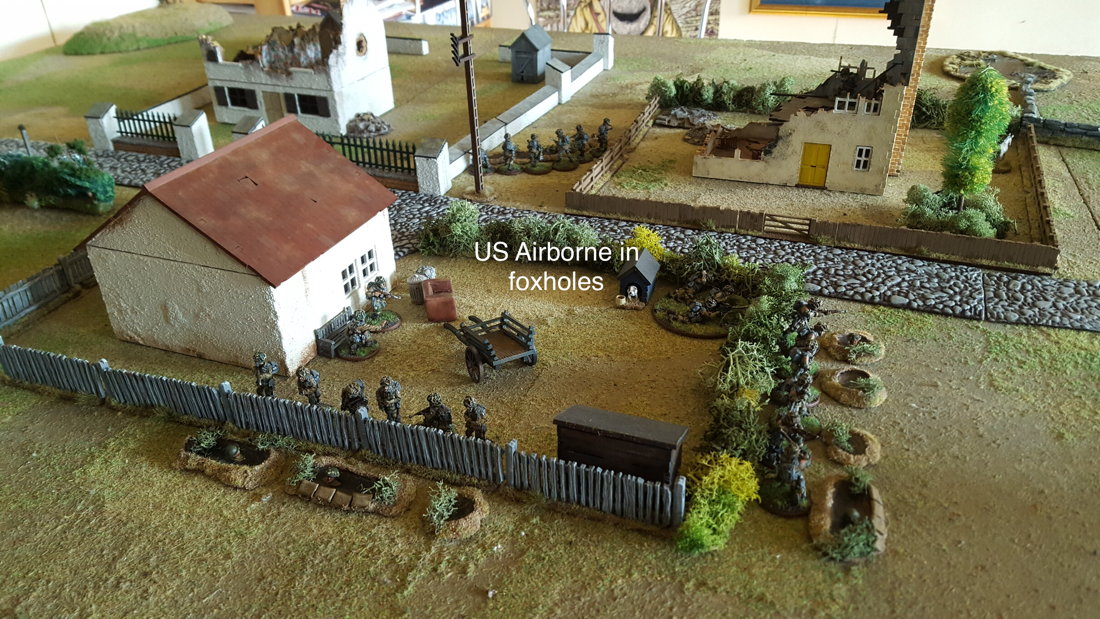
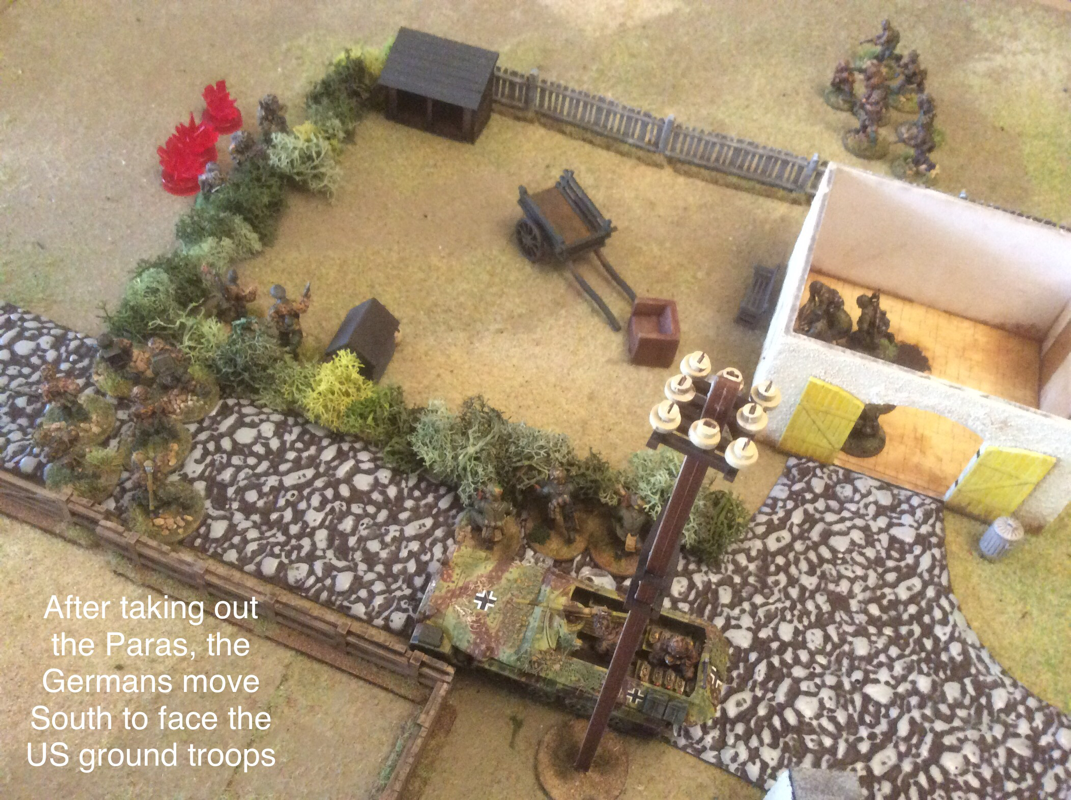
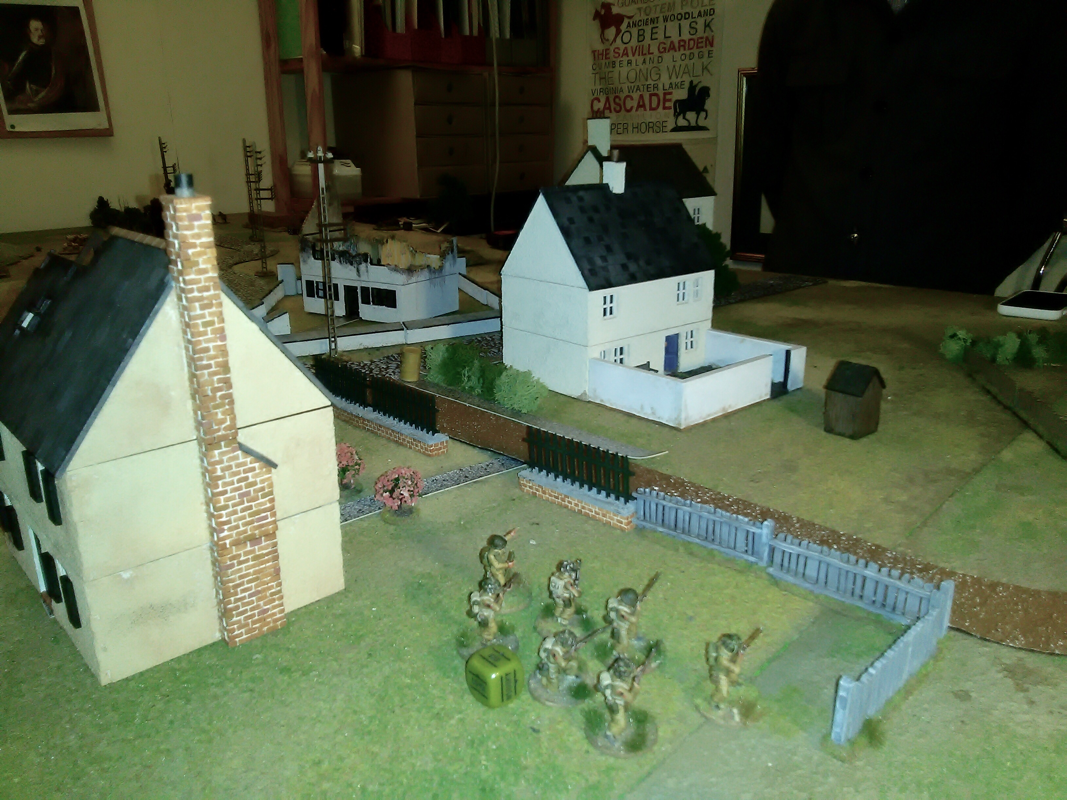
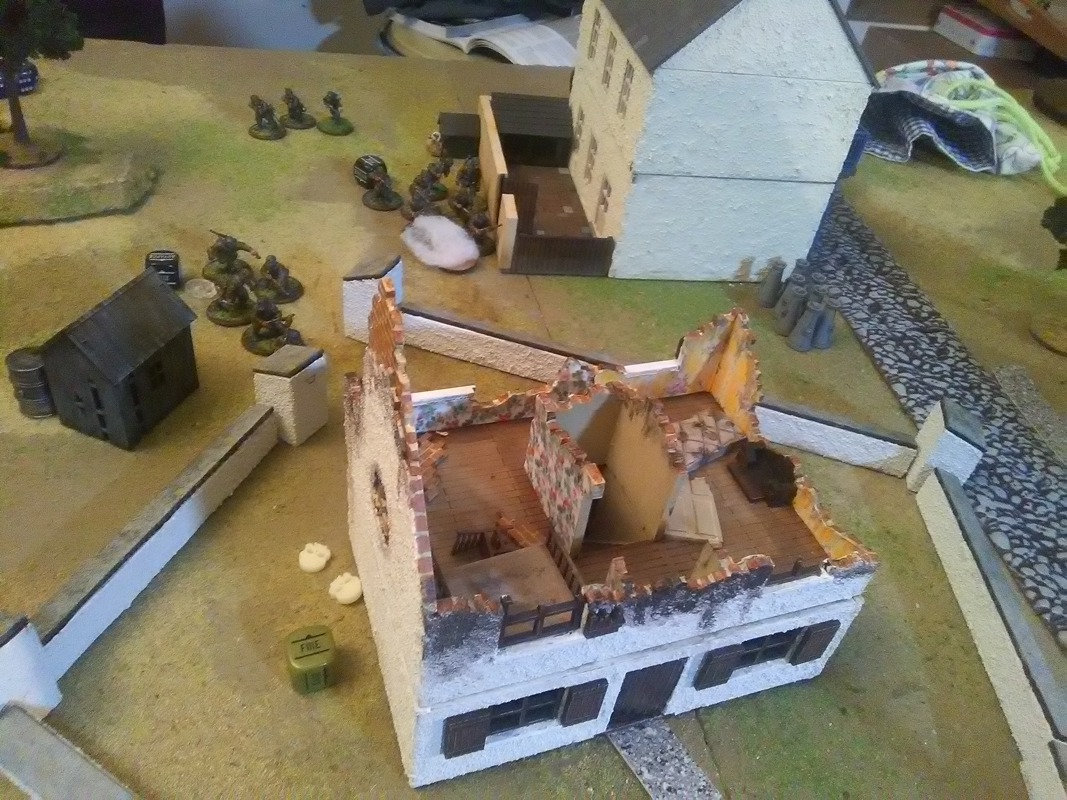
Bolt Action is great fun but with my table size, it will only ever permit platoon sized games. Tank War in particular is frustrating since the action all occurs at such close ranges. I hanker after something bigger, if only company or battalion level. Last summer I picked up the new printing of Battlegroup, which is pretty much the exact replica of Kampfgruppe Normandy. Another well-written rulebook, although less full of goodies than KgN, it has got me back into playing with smaller models. The 20mm project is back on track. Several times in recent years I came close to selling my unfinished 20mm collection to fund new projects. I am relieved I didn’t. I have now painted two platoons of German Grenadiers, various support vehicles and an Assault gun. Several models are rejuvenated plastics that my friend Keith used to play with in the 70s. He donated them to me when a house move finally compelled him to thin out his collection. I have also picked up some new kits and am mid way through painting 3 panzer 4s and a troop of Stugs. 4 Shermans and two 6pdrs are on the production lines. I now have to persuade poor long-suffering Matt to give Battlegroup a try. I swear he thinks this is my way of stopping him from developing his skills. Every time he masters one set of rules I hit him with a new one. In this case, I know he will thank me for the introduction. 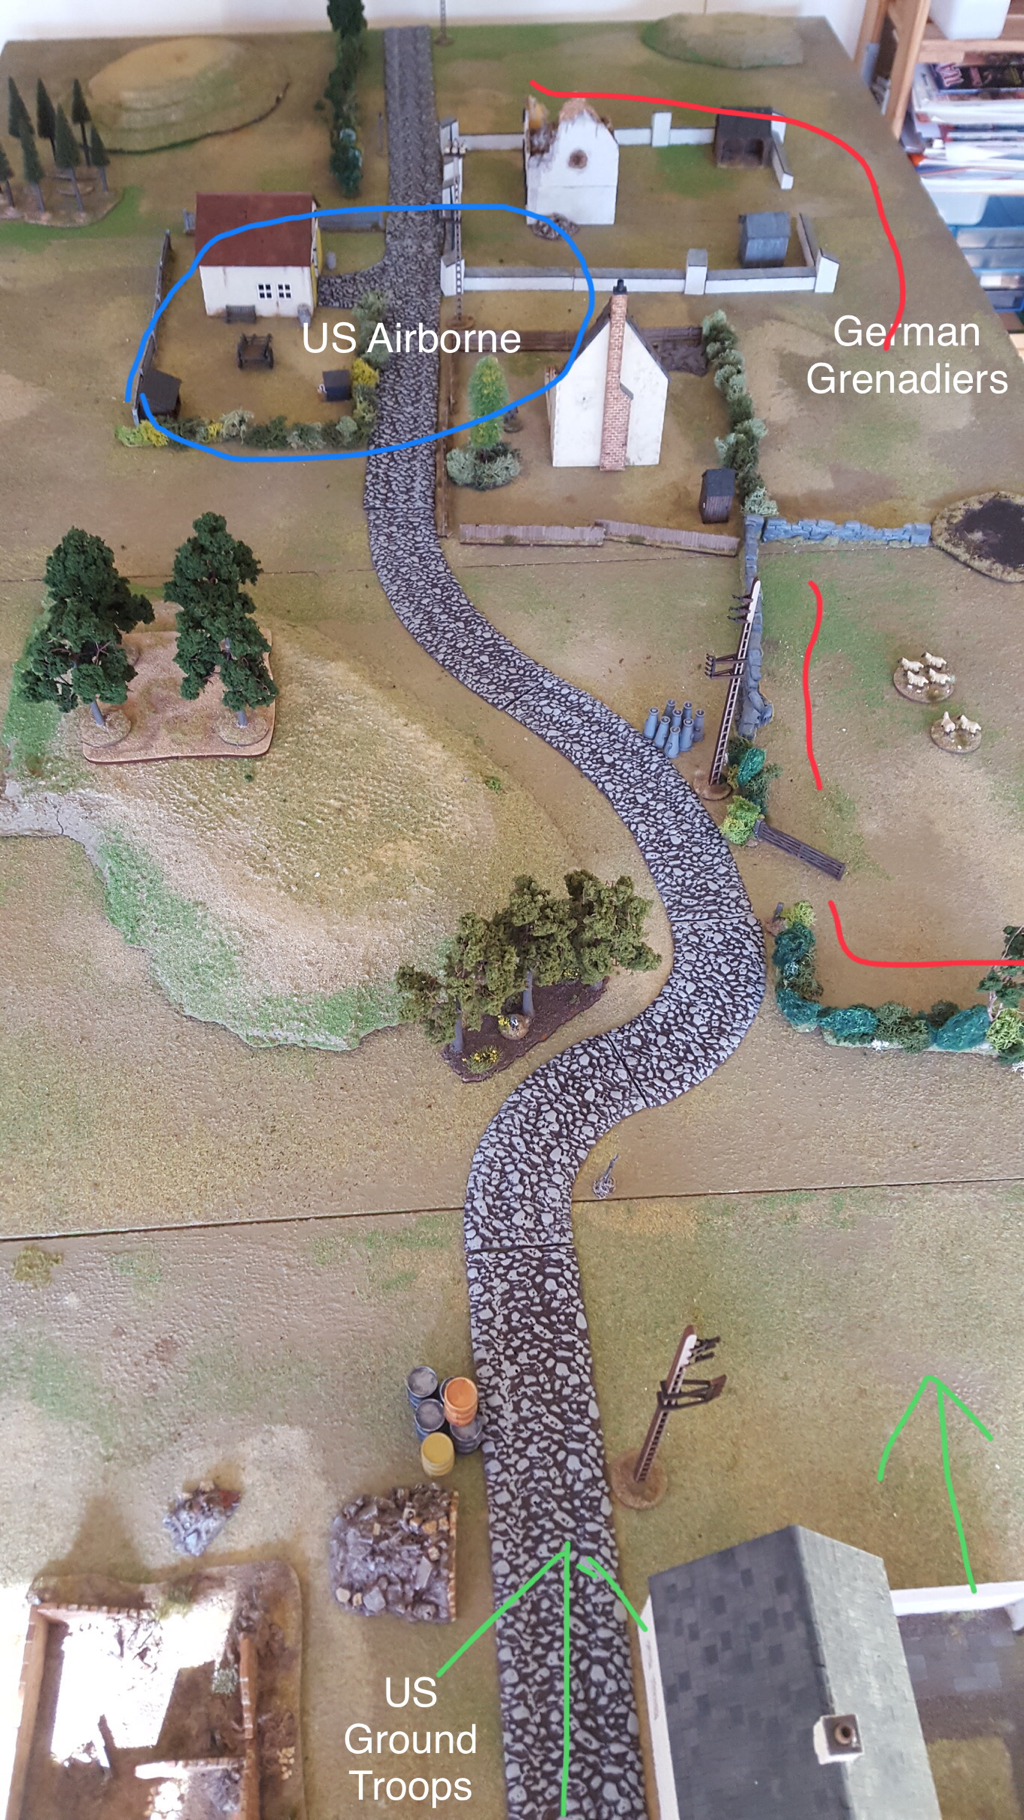 We played a three handed daytime game of Bolt Action on Saturday, to mark the first visit by Ian since he left for Asia in December. It was good to be back in BA after a run of Ancients games. Ian brought down his US paratroopers and Fallschirmjaegers and I wanted to include them in the game so I prepared a 1500 Point scenario very loosely based on Market Garden, as follows: “The 101st Division has been holding the road open to Eindhoven, the first piece of the airborne carpet over which 30th Corps plans to roll in its drive to cross the Rhine. Delayed from the start, the Armoured column is struggling to stick to its timetable. The German forces have reacted faster than the Allies expected and are pulling together an increasingly powerful defence. Place 3 objective markers along the main road, at 18, 36 and 54 inches from the Southern table edge.
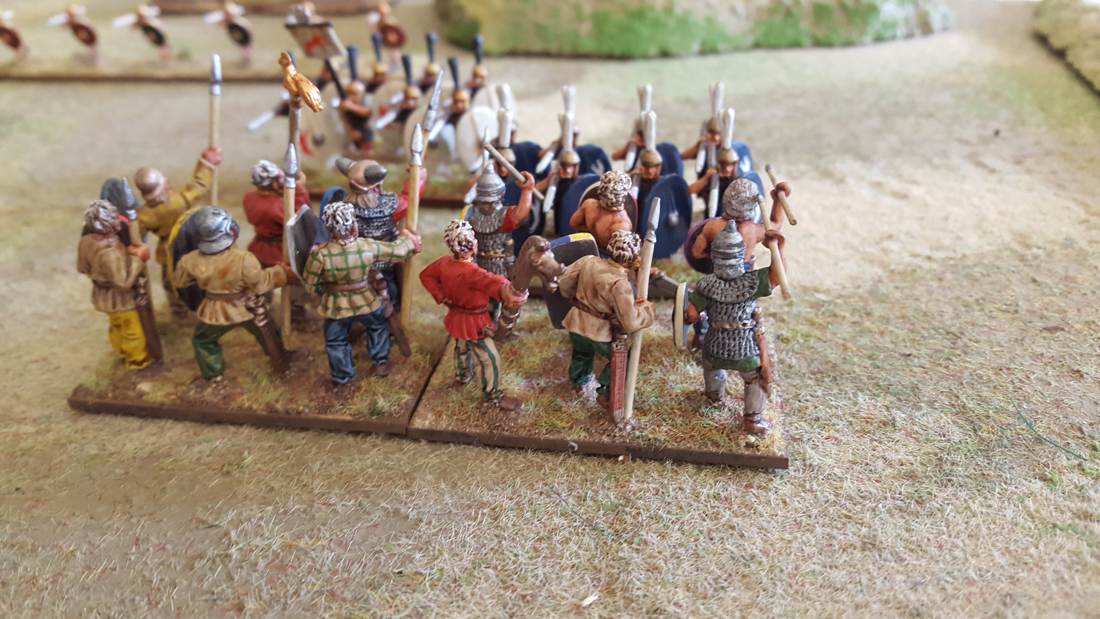
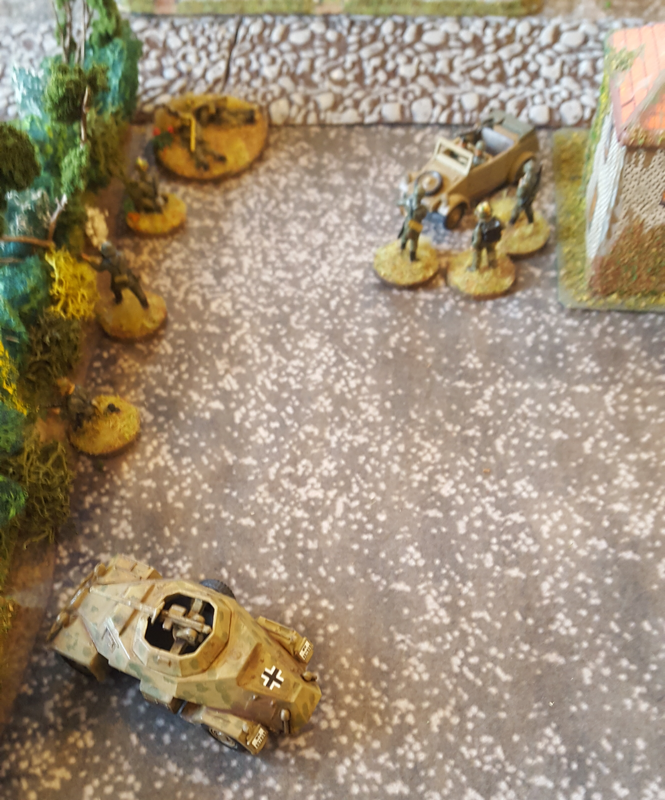
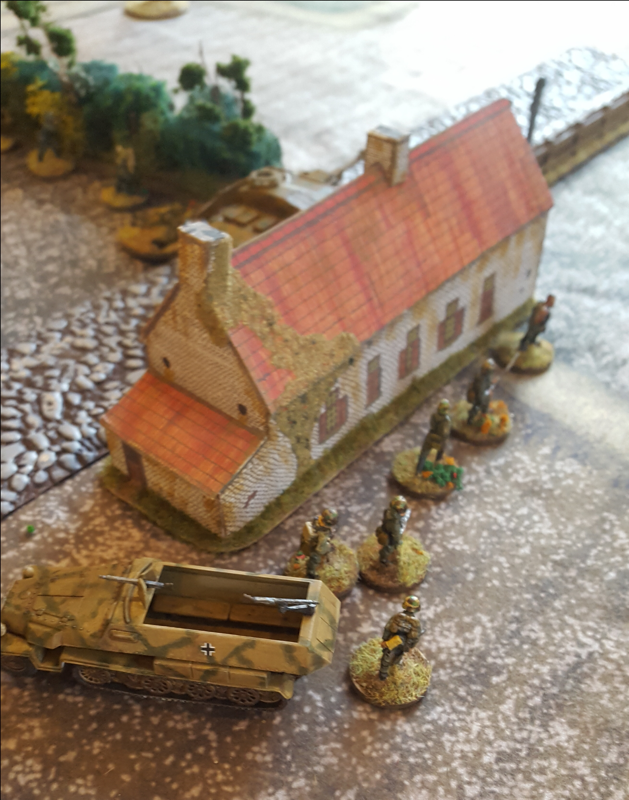
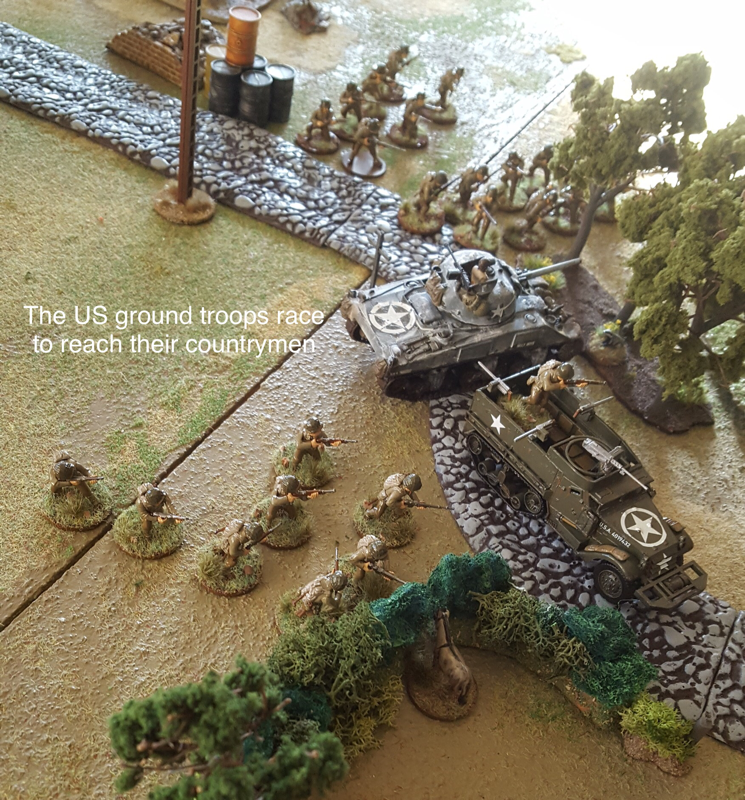
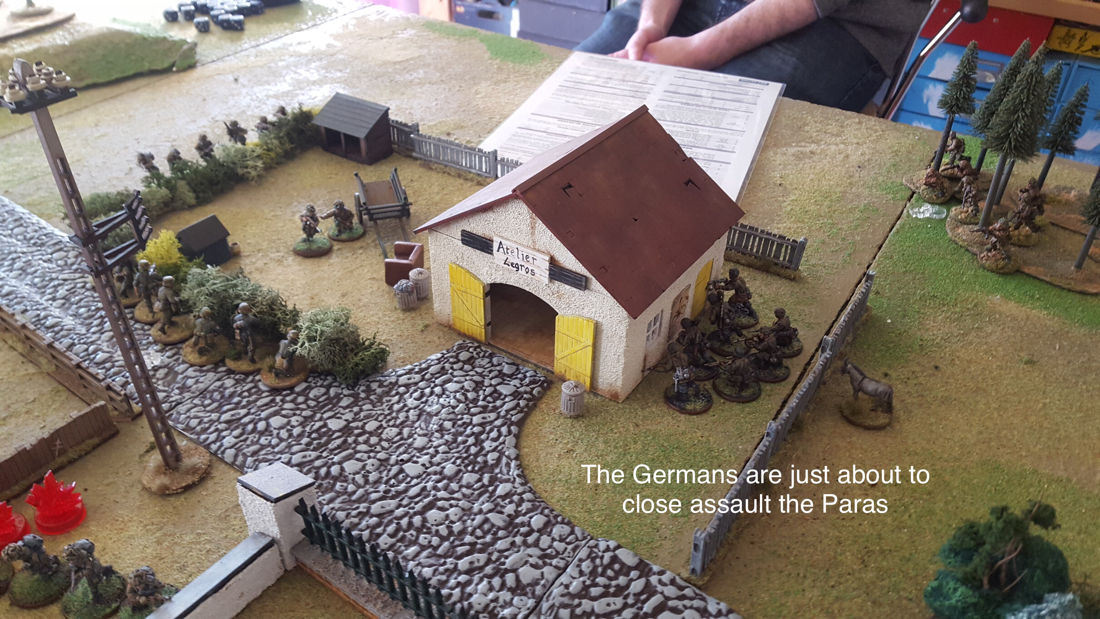
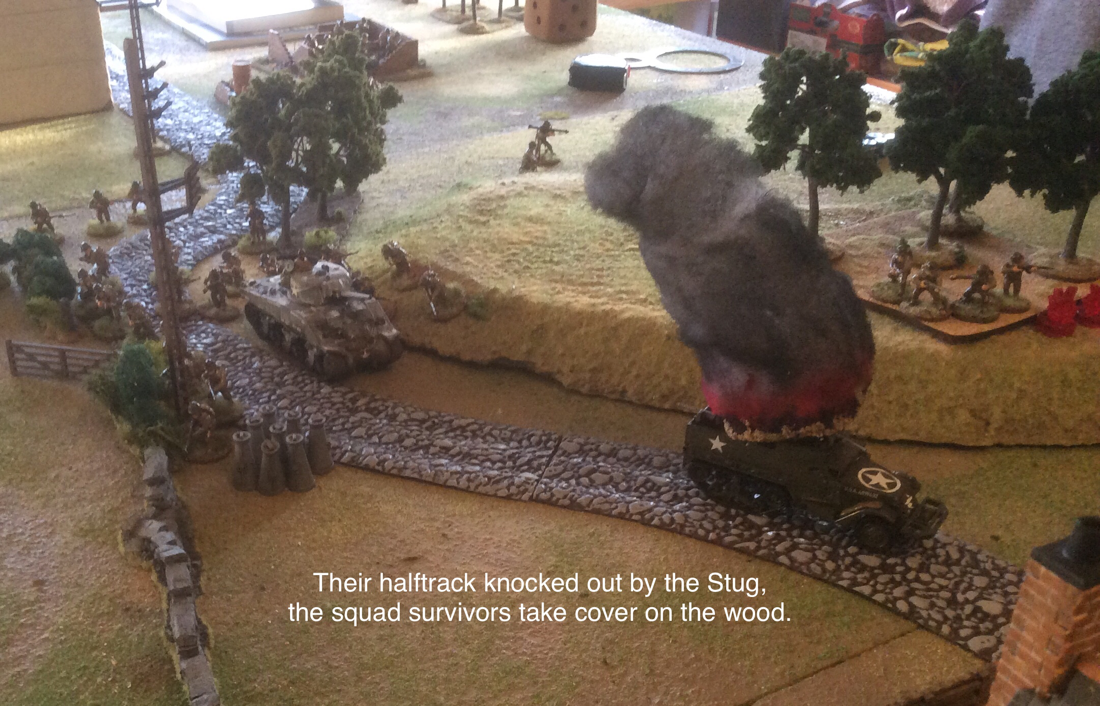
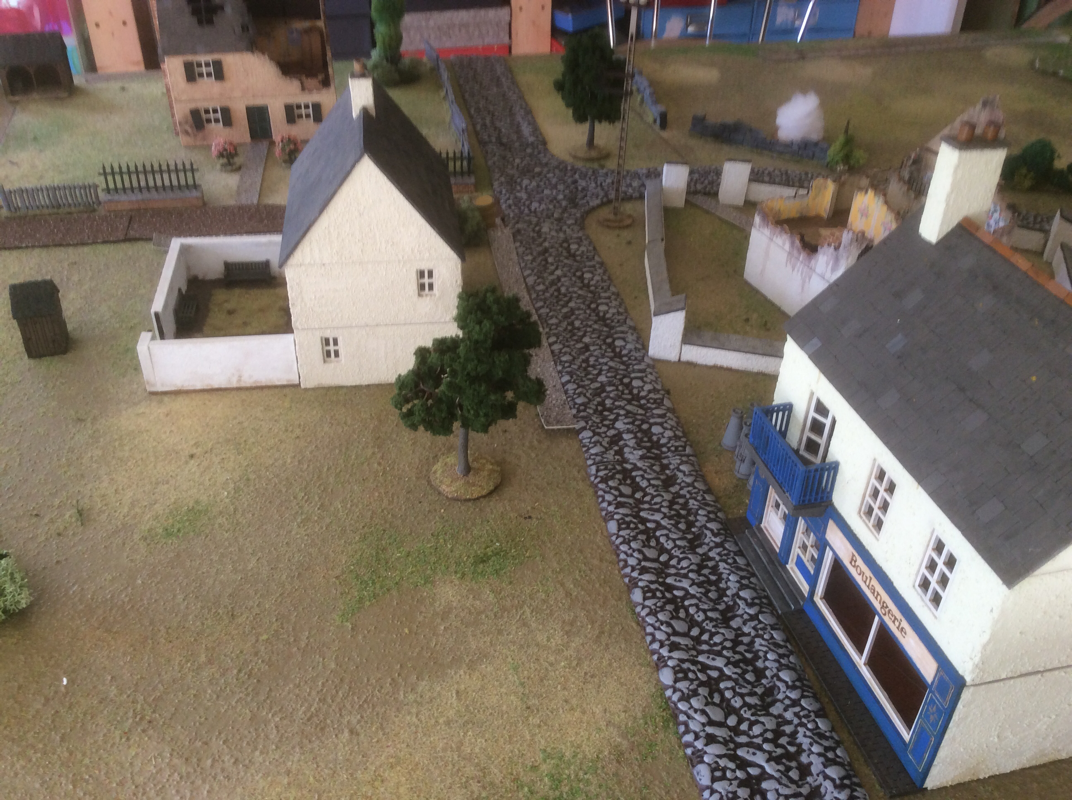
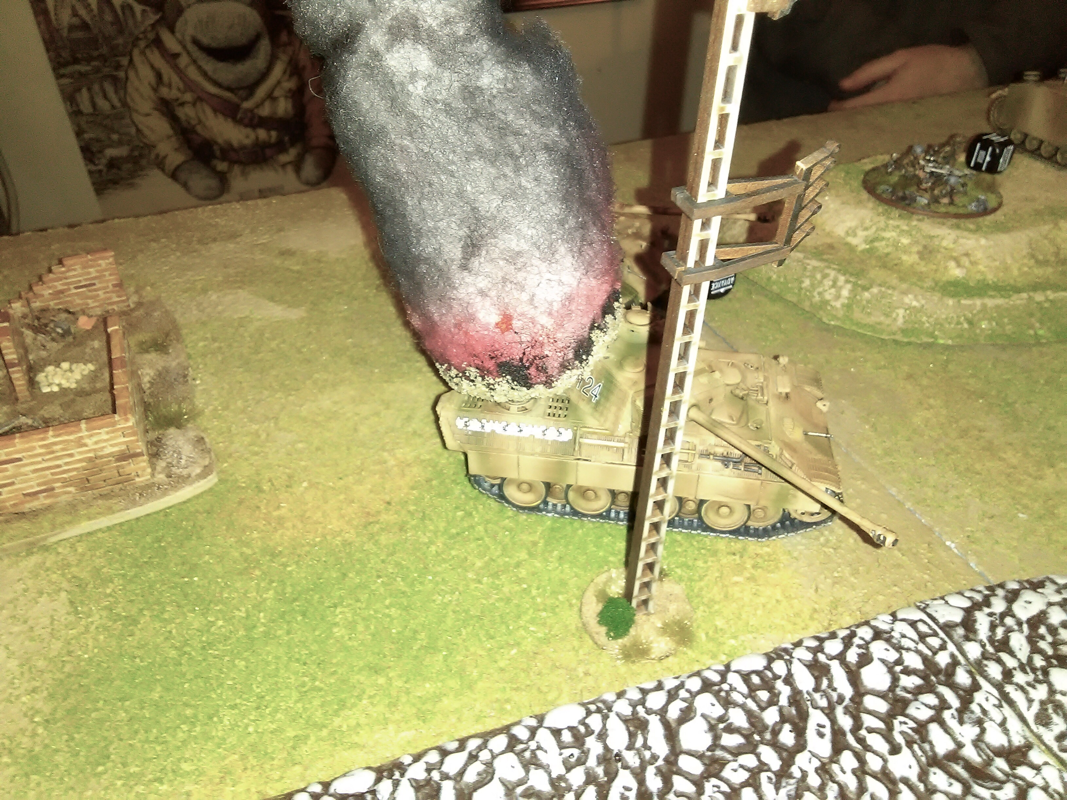
The game lasts 6 turns, with the possibility of a seventh on a roll of 4,5,6. 1 VP for each enemy unit destroyed; 2VP for each objective controlled by troops within 3”. Matt used his US troops as the relief force, with a Sherman, half track-mounted squad and an infantry platoon. I created 750 points of Heer Grenadiers for the on table Germans and a selection of Waffen SS and Fallschirmjaegers squads, a Stug and a panzer grenadier squad for the reinforcements. The objectives were represented by oil drums, milk churns and a dog kennel. The US paras set up in foxholes around the bicycle workshop and the dog kennel objective. The on table Germans all set up to the East of the road, with two squads and an MMG behind a hedge facing South and the rest facing the Paras to the West. In the first stage of the game, Matt’s relief force attacked the German hedge line while the rear area Germans, reinforced by two arriving squads, attacked the US Paras. In the second stage, the relief force destroyed the hedgerow Germans and advanced on the second German line, while the rear area Germans tightened their grip on the Paras. In stage three, the relief force was stalled by the destruction of an M3 halftrack, and held up long enough for the US Paras to be badly mauled and dislodged from the dog kennel objective. The game ran to a seventh turn and ended with the Allies holding 2 objectives for 4VPs, plus 3VPs for German units destroyed. The Germans meanwhile held one 2VP objective and destroyed 6 US units. So a German victory at 10 VPs to 7. The game was closer fought than the final score suggests. The US Assault on the first German line was quick and effective, destroying a 10 man squad and an MMG in short order. The second German line held well however, and was helped by the arrival of the Stug which first destroyed the halftrack then placed itself in ambush round the curve of a hill, threatening to enfilade a further US advance northwards. As it happened, when the Sherman did move into view the Stug only managed a ‘crew stunned’, but this bought enough time for the Germans to wipe out the US Paras. 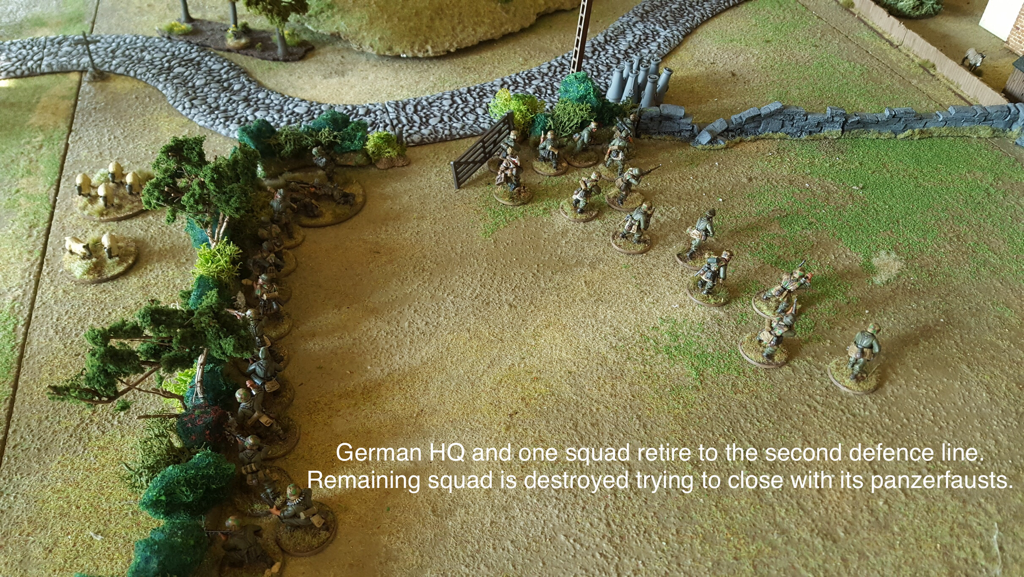 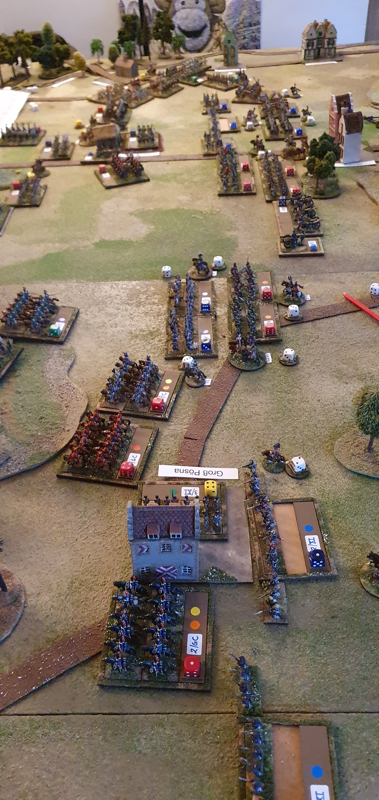 Before it all went wrong: my Romans at the start of the game We played a 200 Point game of Art de la Guerre last night. Matt led the Army of Philip V of Macedon against my Republican Romans. Matt was joined by Warren, in his second ever wargame, as commander of his left wing. This was the first ADLG game we have played with pikemen and it was an Education I’d rather have skipped. Matt won the initiative and chose to attack. I decided to meet him in the mountains, hoping to exploit the vulnerability of pikes in difficult ground. I selected the maximum number of terrain pieces and Matt chose the minimum, one of which was a road. We ended with an impassable river down one flank, a lot of difficult terrain on the other one and a bowling alley down the centre. It started well for me. Then the game began. With great care, I deployed an ambush of triarii in the difficult ground in my left rear, planning to tear into the Macedonian flank as they bore down on my centre. What a plan. I then completely forgot my basic idea and set off across the table to attack the enemy on their baseline. What a pillock. Our centres met in open ground and after the brief benefit of impact in the first round of melee, my Swordsmen began to crumble. Warren kept my right wing busy with his Greek and Illyrian horse and Agrianoi javelinmen. He knocked out my Velites and Roman cavalry, then started hammering my heavy infantry from the flank. At about the same time, Matt punched a hole in the centre that I lacked the reinforcements to plug. Where were my triarii when I needed them? Oh, yeah. Sniggering in the bushes on the far side of the table. 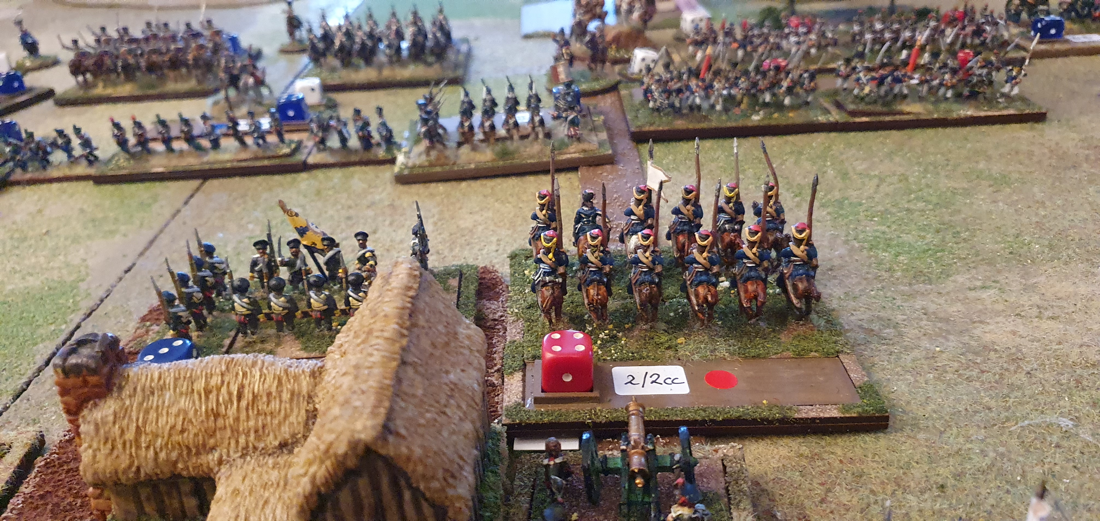 Warren’s Greek horse start eating up my Centre The end came in a rush, with too many of my depleted units breaking together. In all, Warren’s flank attack took out two bases of swordsmen, two Roman cavalry units and two velites. On the opposite flank Matt’s Companions destroyed my allied cavalry, while his rock hard pikes in the centre overturned my heavy swordsmen, admittedly after several rounds but with grinding inevitability. Lessons? Well, if you make a plan, stick to it. Pikemen in the open really are hard to stop and if I’m going to engage them frontally, I should have a pretty good chance of getting troops around their flank before they steamroll my swordsmen. And maybe in future I should spike the enemy’s drinks... Warren seemed to enjoy himself and had the baptism of stabbing his hand on the agema’s pikes not once, but twice. You’re not a true Ancients player until you’ve drawn blood on a spearpoint. It is lovely playing with my old 25s. Some of the Macedonians date back to 1982 when we started playing Ancients. Their pikes are dreadfully brittle and held together with superglue. The definition on the moulds is poor by today’s standards but I still love them. Anybody else know the song Roads to Moscow by Al Stewart, circa 1974? A rare rock song about WWII that isn't thrash metal. Every time a German tank dies in a game, I think of the line:" Two broken Tigers on fire in the night." I was humming it last night. Ian and I played a game of Bolt Action Tank War. We had 2,200 points each on an 8’ x 4’ table. This was the biggest game we have played so far, with every tank we could get our hands on. Ian’ Germans had 2 Panthers, a Panzer IV, a Stug and a Puma, plus 520 points of Fallschirmjagers. My British had a Cromwell, 6 Shermans and 500 points of infantry. All tanks on both sides and the British infantry were regular, and Ian's Fallschirmjagers were veteran. I began with 14 dice and Ian with 11. The table was quite busy to ensure we didn't have too many uninterrupted lines of sight. It was divided up the middle by a cobbled road, on one side of which were the outskirts of a village and on the other, more open farmland. We rolled four objectives which we placed in a rough line, lengthwise down the middle of the table. Three of them were in the village, which was on Ian's left and my right. 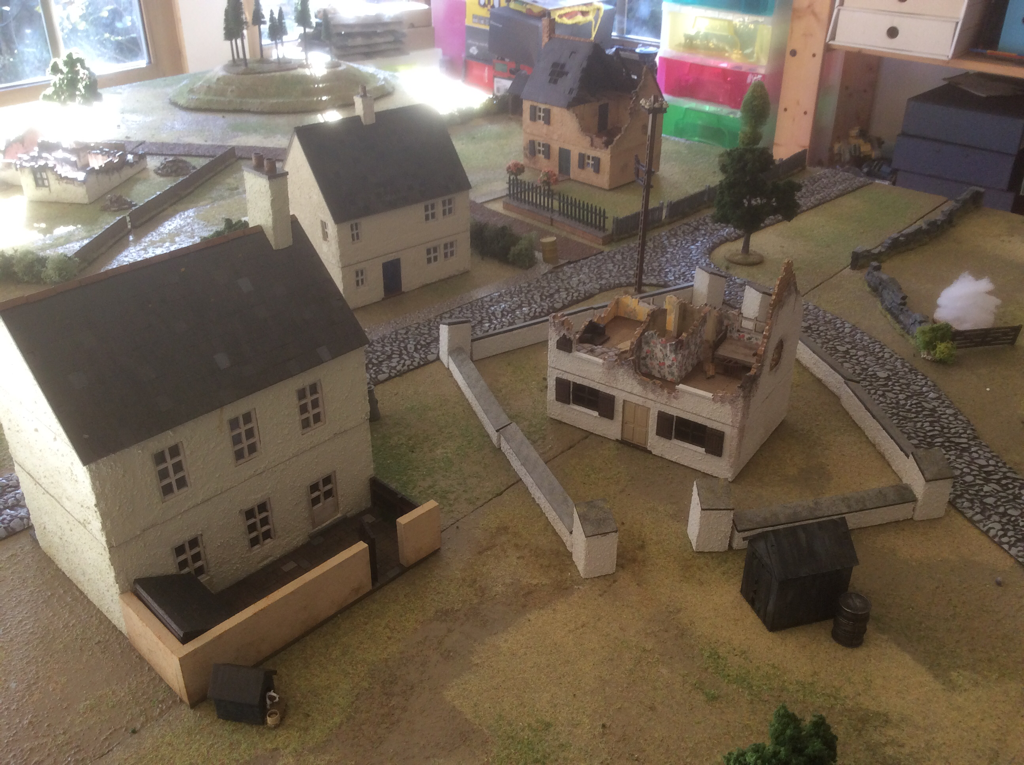 The view from the German centre. On turn 1, Ian placed a lone Puma on his extreme left; his Panzer IV in support of most of his infantry in the centre, then his remaining armour, along with a single infantry squad and an MMG, in the fields on his right. I sent all my infantry into the village in the centre, one Sherman into the open ground on the left and the rest of my armour behind the village and on my right. I struck lucky early on, knocking out the Panzer IV and a Panther in turn 2. My dice rolling balanced out later when my armour repeatedly failed to damage Ian's vehicles, but it was a great advantage to roll so many high numbers in the opening stages. The game split into three combats: on my left, the Remaining Panther and Stug duelled with 4 Shermans (quickly reduced to 3); in the centre, our infantry fought for control of two objectives in the village; and on my right, the Cromwell and 1 Sherman played peekaboo with the Puma. Early luck tipped the scales in my favour and by game’s end Ian had lost every tank but his Stug while I had lost just the one Sherman. With two objectives apiece at the end of turn 6 we counted points and I got a ‘clear victory’. I think this was my luckiest wargame for a very long time. Did skill come into it? A bit, perhaps. My tanks used cover more than Ian, who confessed he had put his faith in the superior armour of his Panzers rather than tuck them behind walls. In truth, an awful lot of my fire did bounce off harmlessly but if you take enough shots even a 75 will get through eventually. I also think it helped to keep my infantry in mutual supporting distance. But if truth be told, I won because I had a big fat slice of improbable luck. Bless him, Ian stayed cheerful until the last 6 was rolled. He used his Puma to tie down three tanks for much of the game: I almost regretted knocking it out on turn 6. Almost. And at least his Stug shrugged off every single attempt to pierce its armour. 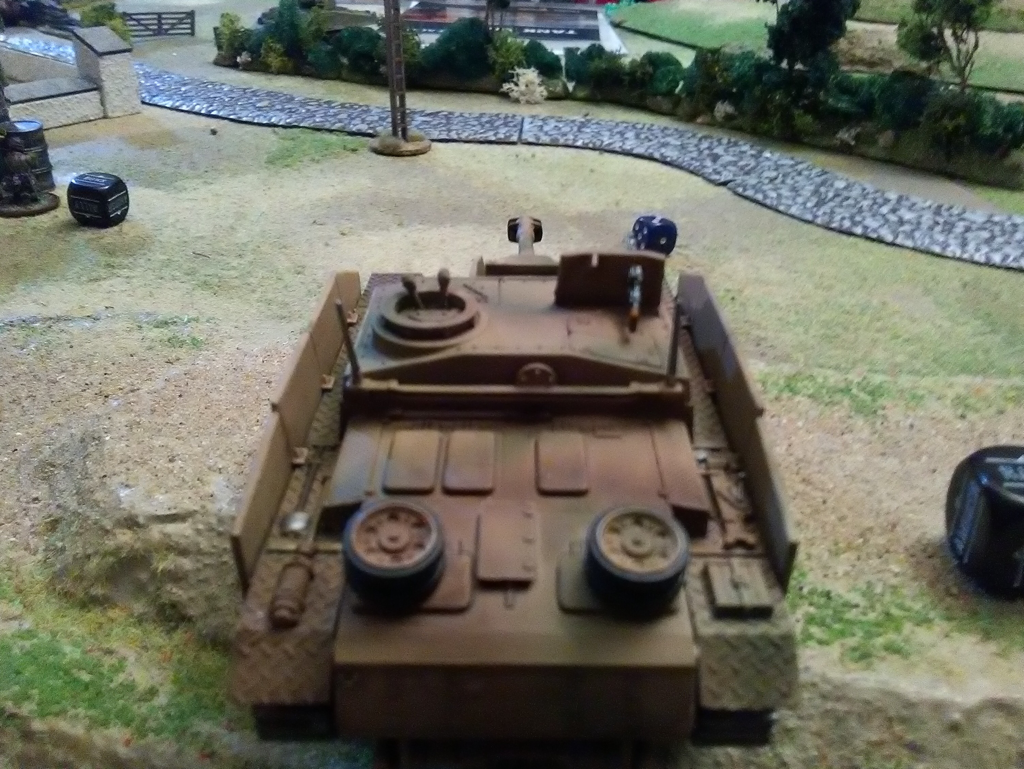 Last German standing 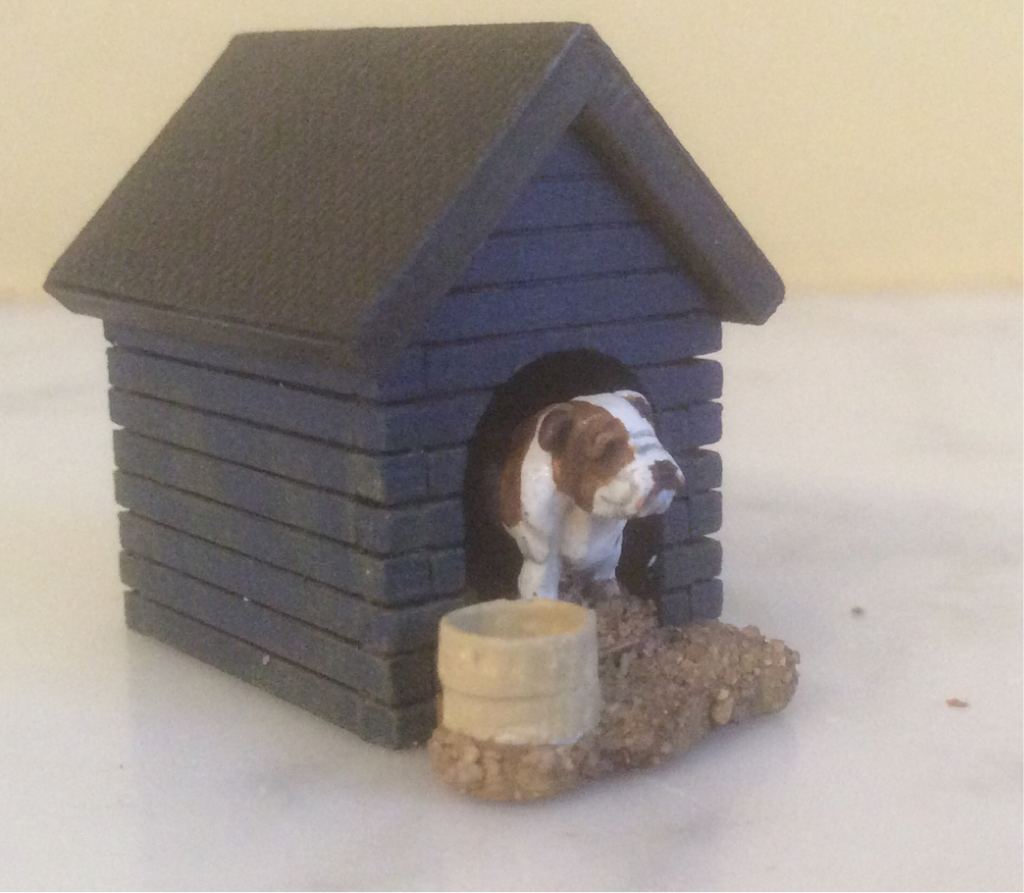 I've just finished this kennel and bulldog from Warbases, to add to our BA table. Fun to paint. |
Archives
November 2023
Categories
All
|


 RSS Feed