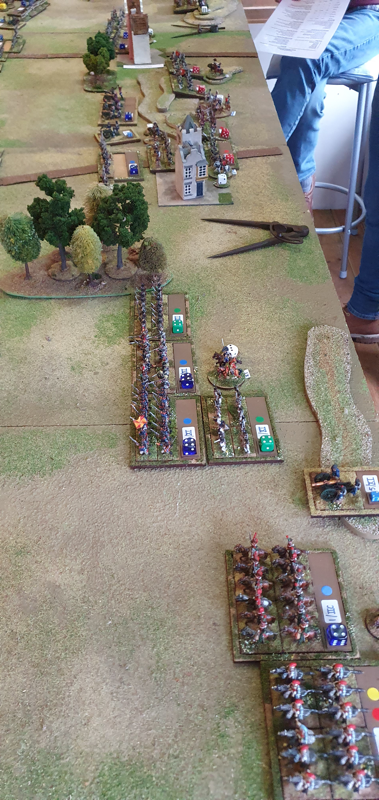
 Matt and I played an impromptu game of Blücher last Wednesday, having established that this really would be our last chance for a wargame before he moves away. I already had units based and labelled for the Waterloo campaign, so we played a game loosely based on the first Prussian attack against Plancenoit. Matt commanded two brigades of the Prussian IV Corps plus Corps cavalry, while I had the French VI Corps, plus Domon and Subervie’s cavalry brigades. Matt’s IV Corps artillery and the French Young Guard would enter as reinforcements. We had two MO dice each. The terrain was impressionistic but not too far off the real geography. Matt’s Prussians emerged from the Bois de Paris on the Eastern table edge, to find VI Corps deployed on high ground to the north east of Plancenoit. The Lasnes stream bounded the southern table edge. The village of Plancenoit was an objective for both sides and victory would go, either to the side occupying it at game end, or to whichever broke enemy morale first. The village was unoccupied at the start. 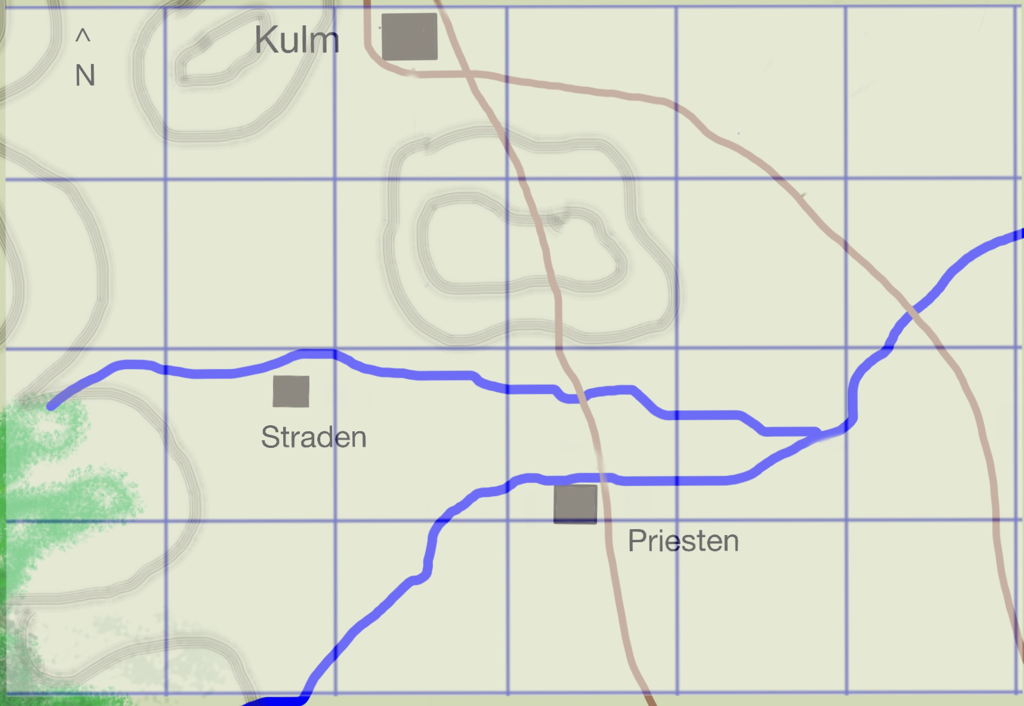 The French VI Corps are about to be ejected by the Prussians I realised before the first turn that I had already broken the scenario, as the Blücher reserves rule meant that Matt could bypass VI Corps and walk his whole force into and around Plancenoit on his first turn. He is too canny a player to miss an open goal like that. As we were trying to recreate at least the flavour of the historical encounter, we agreed that Matt should treat the village as notionally occupied by the French, meaning that no unit on reserve movement could approach closer than 4BW away. Matt began the game by advancing on Plancenoit on his left with one brigade while screening my French on the high ground with the other. In response, I shifted some of VI Corps to my right, sending one unit into Plancenoit. This had time to form garrison but would soon be ejected by a combined attack by two Prussian units. Meanwhile Matt tried to cut the village off from the rest of the French force by sending cavalry against my centre. The results there came out about even but I was left with a dent in the line. The French Young Guard then arrived and assaulted Plancenoit, failing to break in on the first attempt but kicking the Prussians out with the second attack.  The Young Guard arrives to retake Plancenoit (the units with red dice) Matt’s IV Corps artillery arrived and I started to pull back my left hand infantry unit, which had started to look shaky due to Prussian gunnery. On reflection this was a mistake as the unit soon found itself caught between enemy infantry and cavalry, with no support within reach. By now the turns were running down and Matt concluded he couldn’t eject the Young Guard with his depleted left wing units. Instead he drew back his left and focussed on reducing my morale before the turns ran out. I would have been wise to move back my own command and play for time, since Plancenoit was firmly mine. All I needed to do was hang on for a couple more turns. However we were both one morale point away from defeat and I thought I might break Matt as well as holding the village. What a glorious victory that would be! Of course it went wrong and Matt broke my morale first. Gamer, Know your limits! 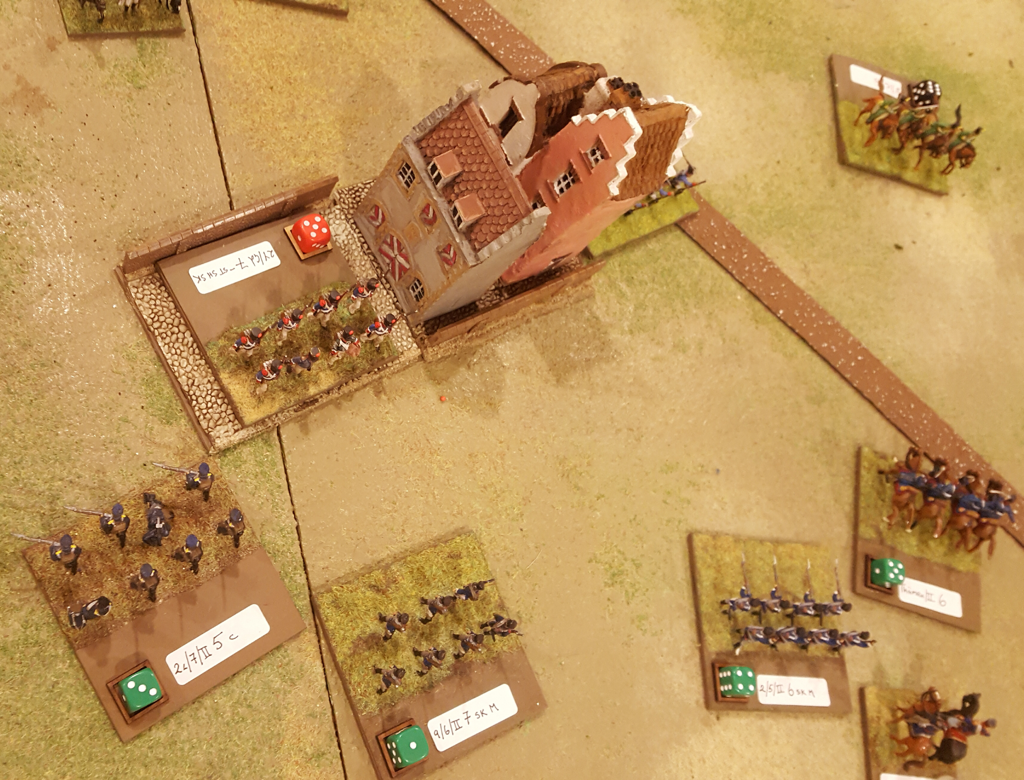 So the game ended with Matt victorious. VI Corps was badly battered and the Young Guard held Plancenoit, while the Prussians were stood off from the village, with one brigade nearly used up but the other still in goodish shape. Historically the Prussians would soon be reinforced and retake Plancenoit, only to be ejected again by French Old Guard, before the weight of Prussian numbers, combined with the failure of the Middle Guard to break Wellington’s centre, would oblige the French to give up the village for good and join the general retreat.
This was an exciting and absorbing fight, despite its last minute arrangement and the small number of units. Rarely for me, I still haven’t felt the temptation to fiddle with the rules, as they continue to give plausible outcomes and to be great fun to play. With time for preparation I would have checked the map more carefully and given the scenario a dry run, which would have highlighted the risk that the reserves rule could be used to change the nature of the encounter. I could address this by changing French deployment to allow them to occupy Plancenoit at the start, even though this wasn’t actually how VI Corps initially deployed. Alternatively, we could decide that the Prussians cannot take a reserve move because they have been force marching all day from Wavre. The figures we used are a mix of 1/72 scale plastics, which I have collected over many years to create the whole 1815 order of battle, originally based for Volley & Bayonet and Grande Armée. The number of figures per base is a bit sparse but I started this project on a budget. For games set in other campaigns besides 1815, I do prefer 6 or 15/18mm. All in all, our impromptu game was great fun and I’m glad we were able to fit it in.
1 Comment
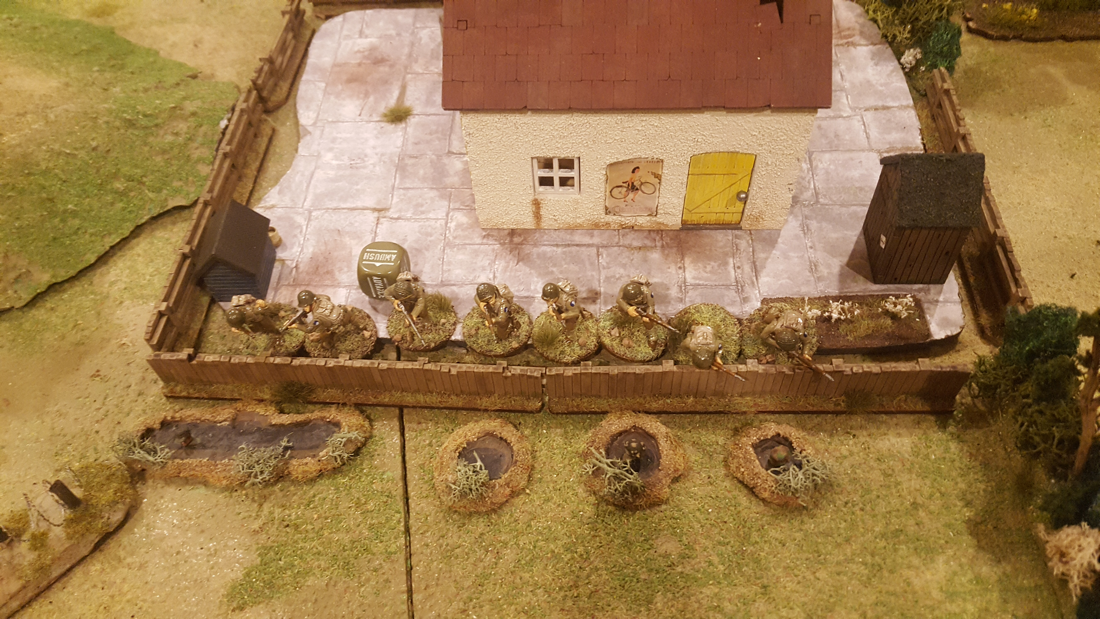
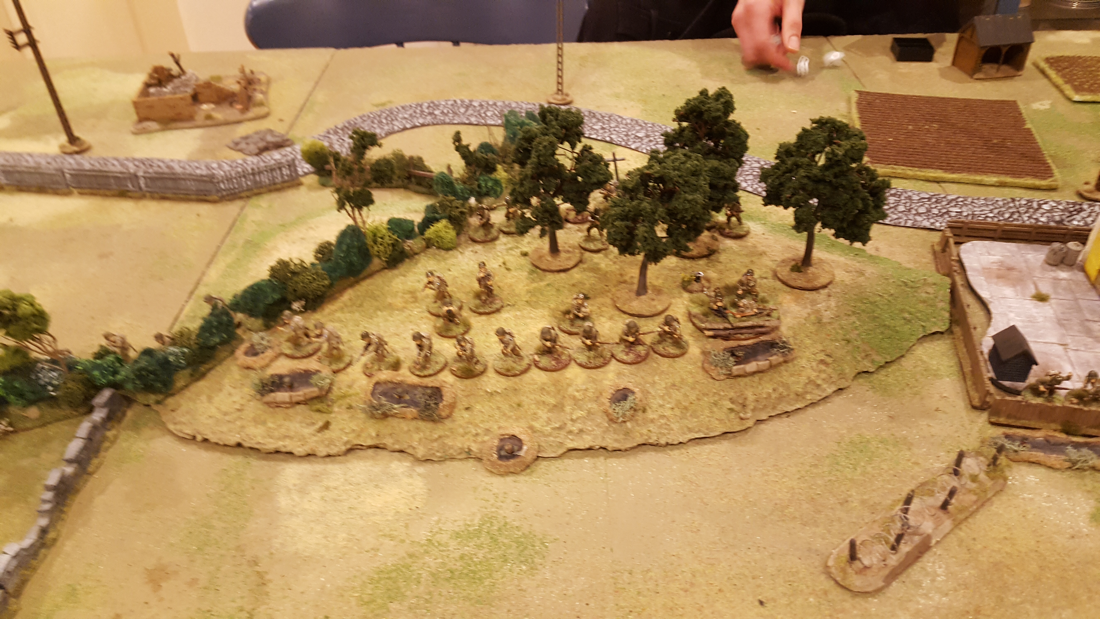
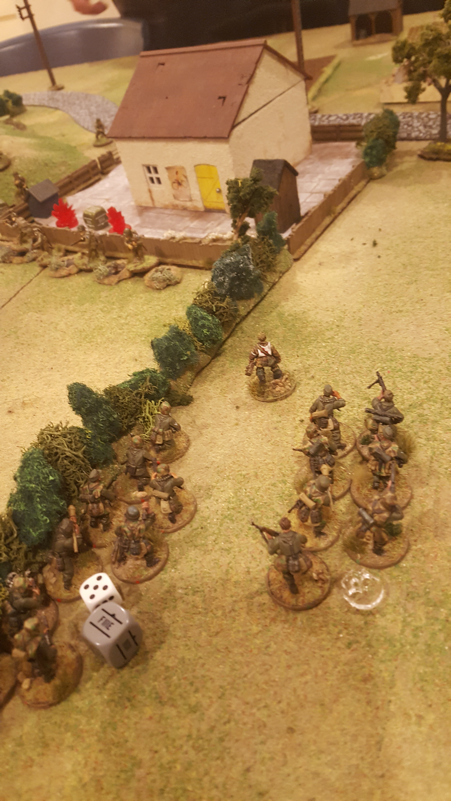
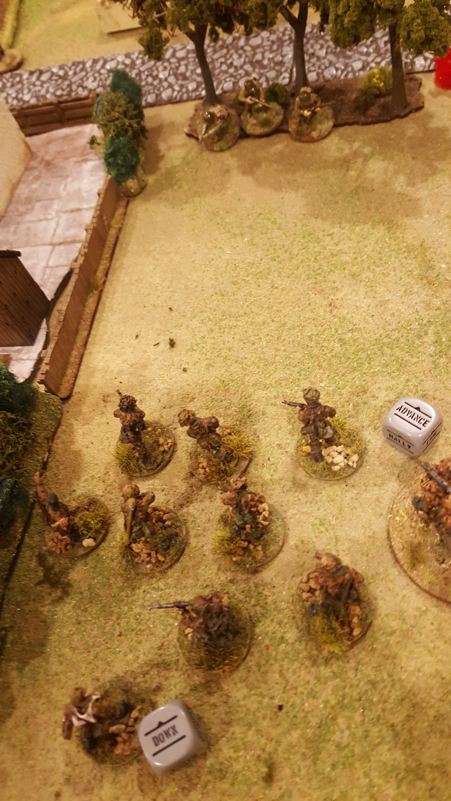
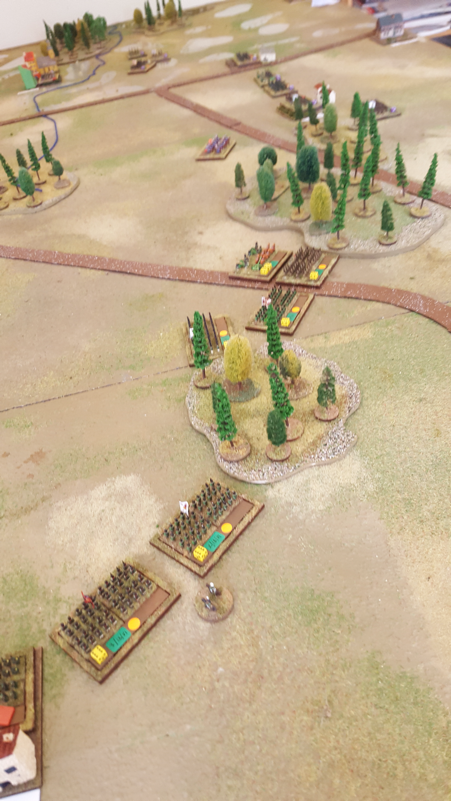
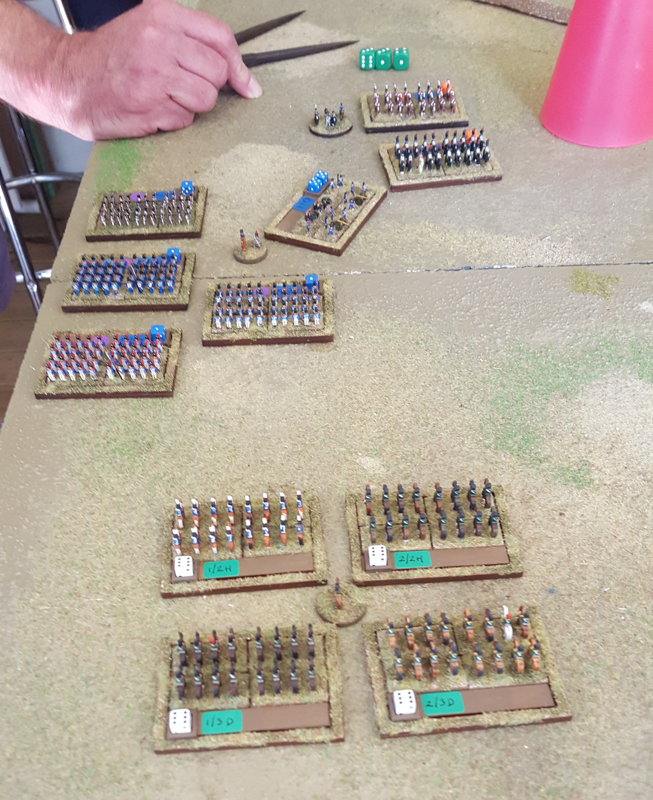
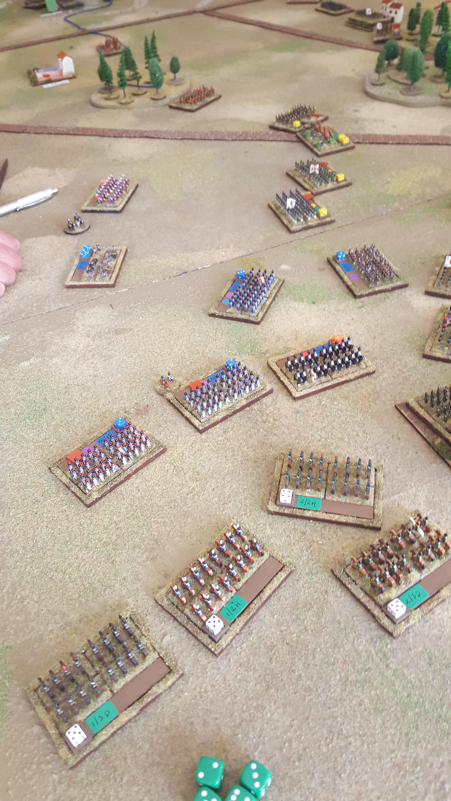
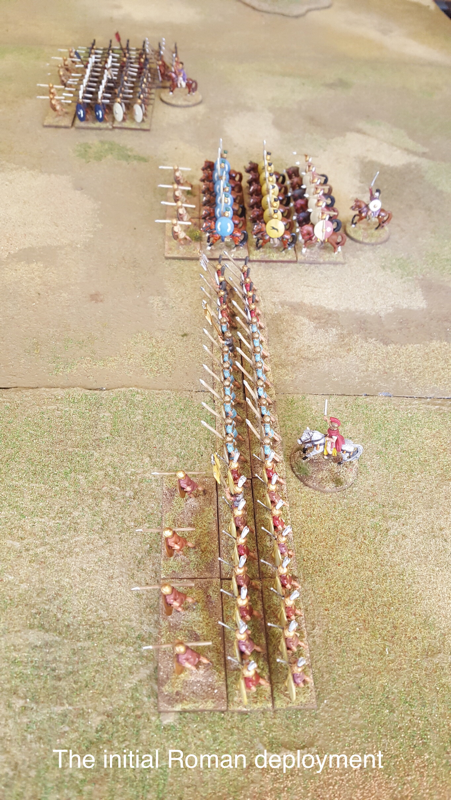
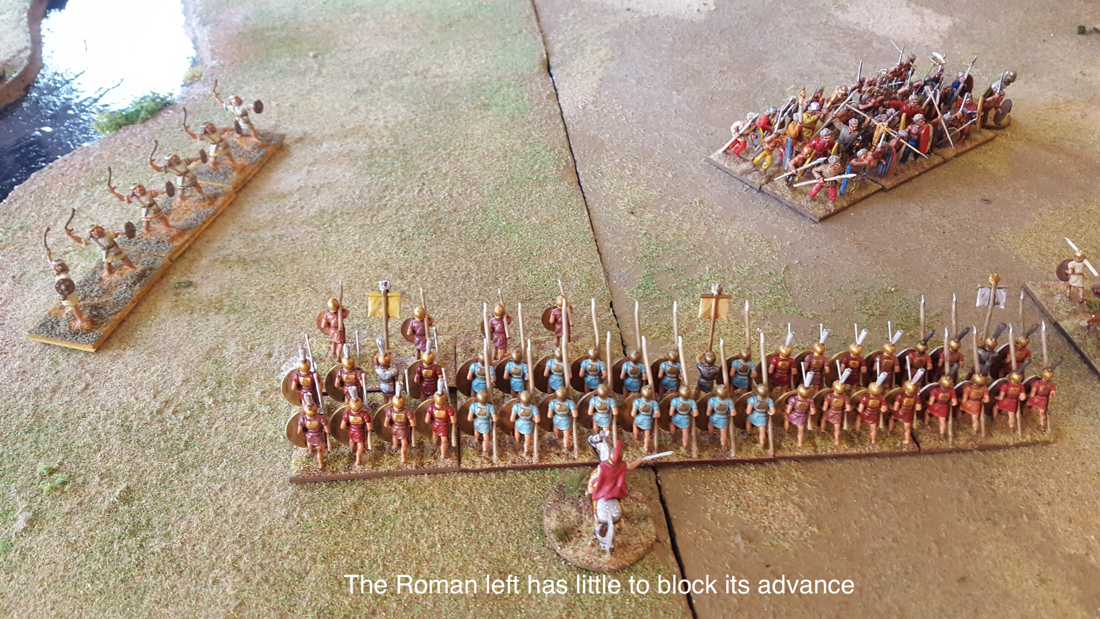
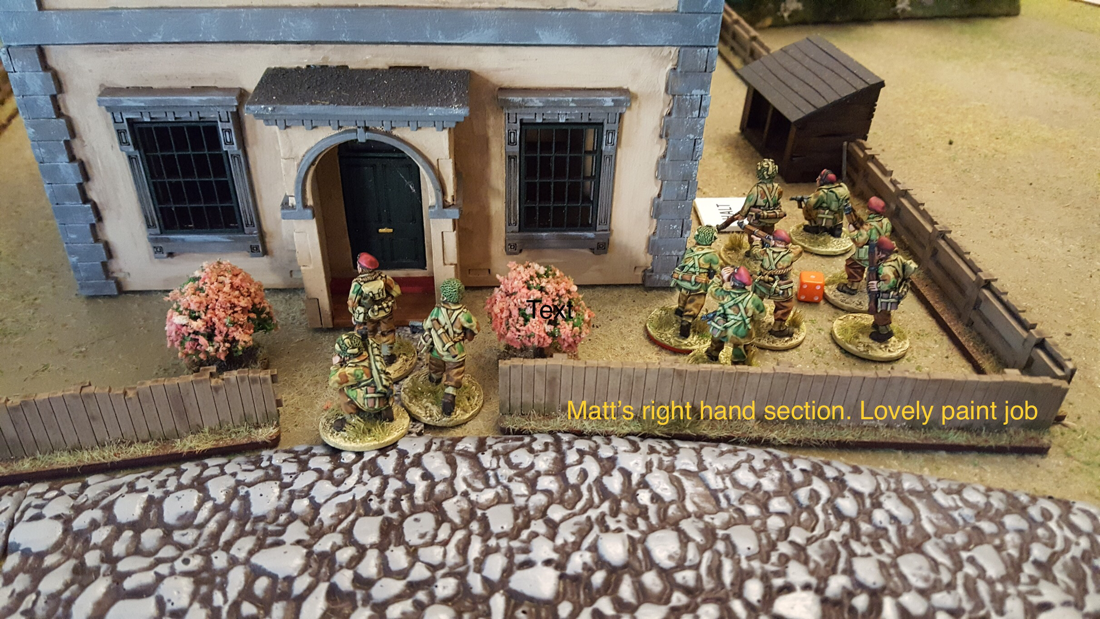
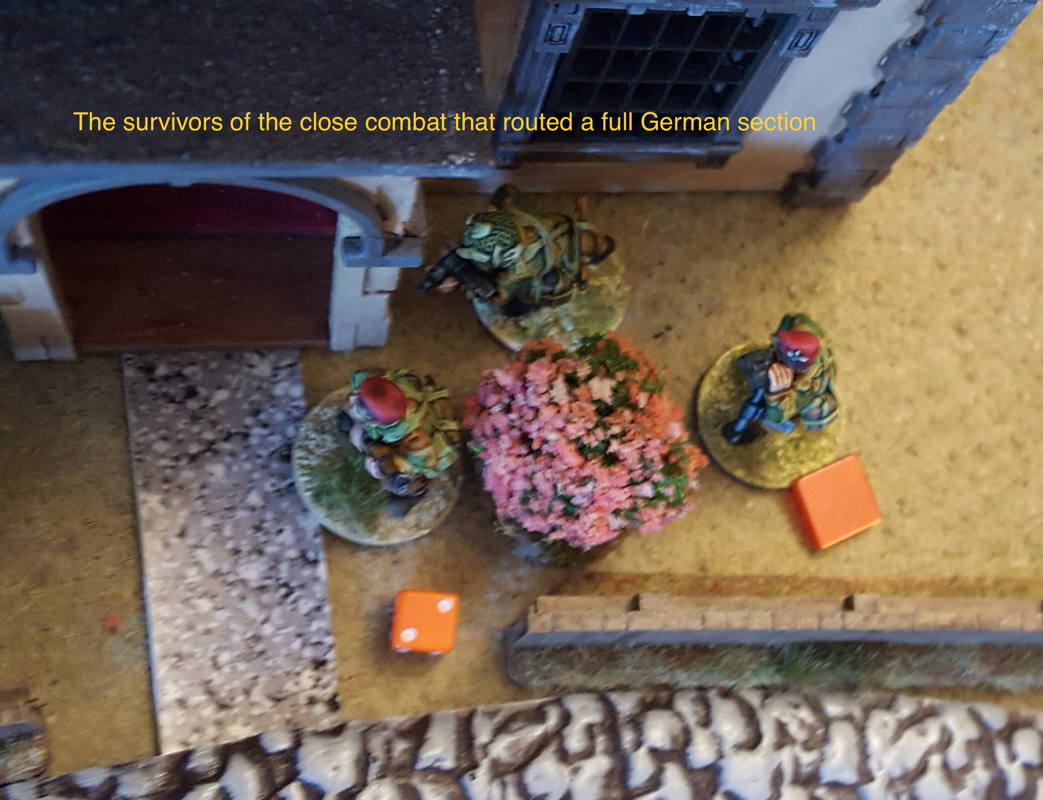
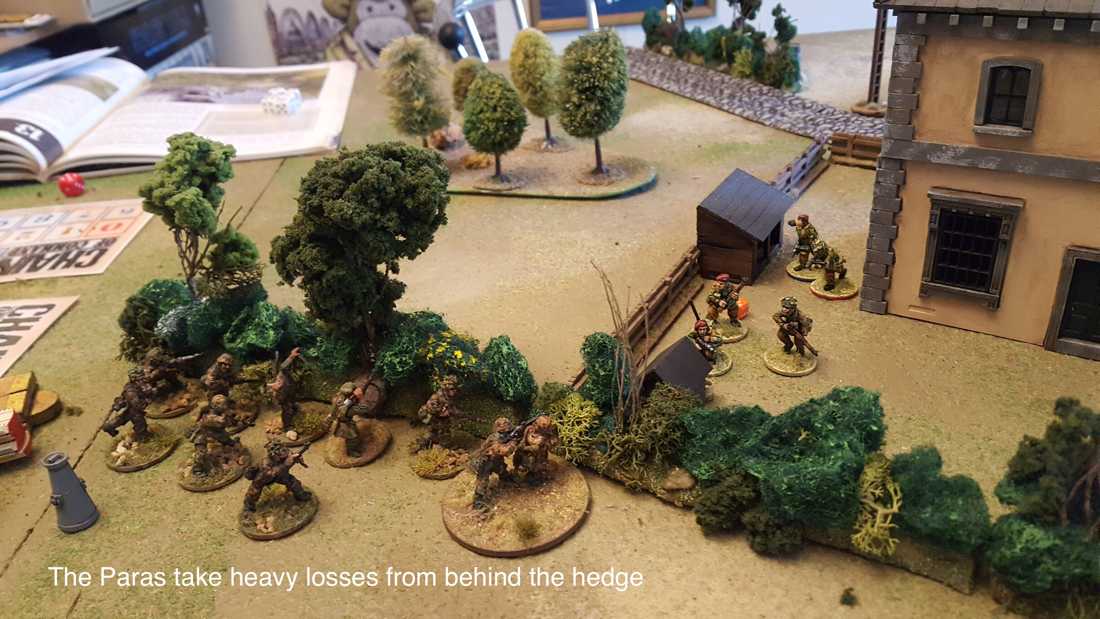
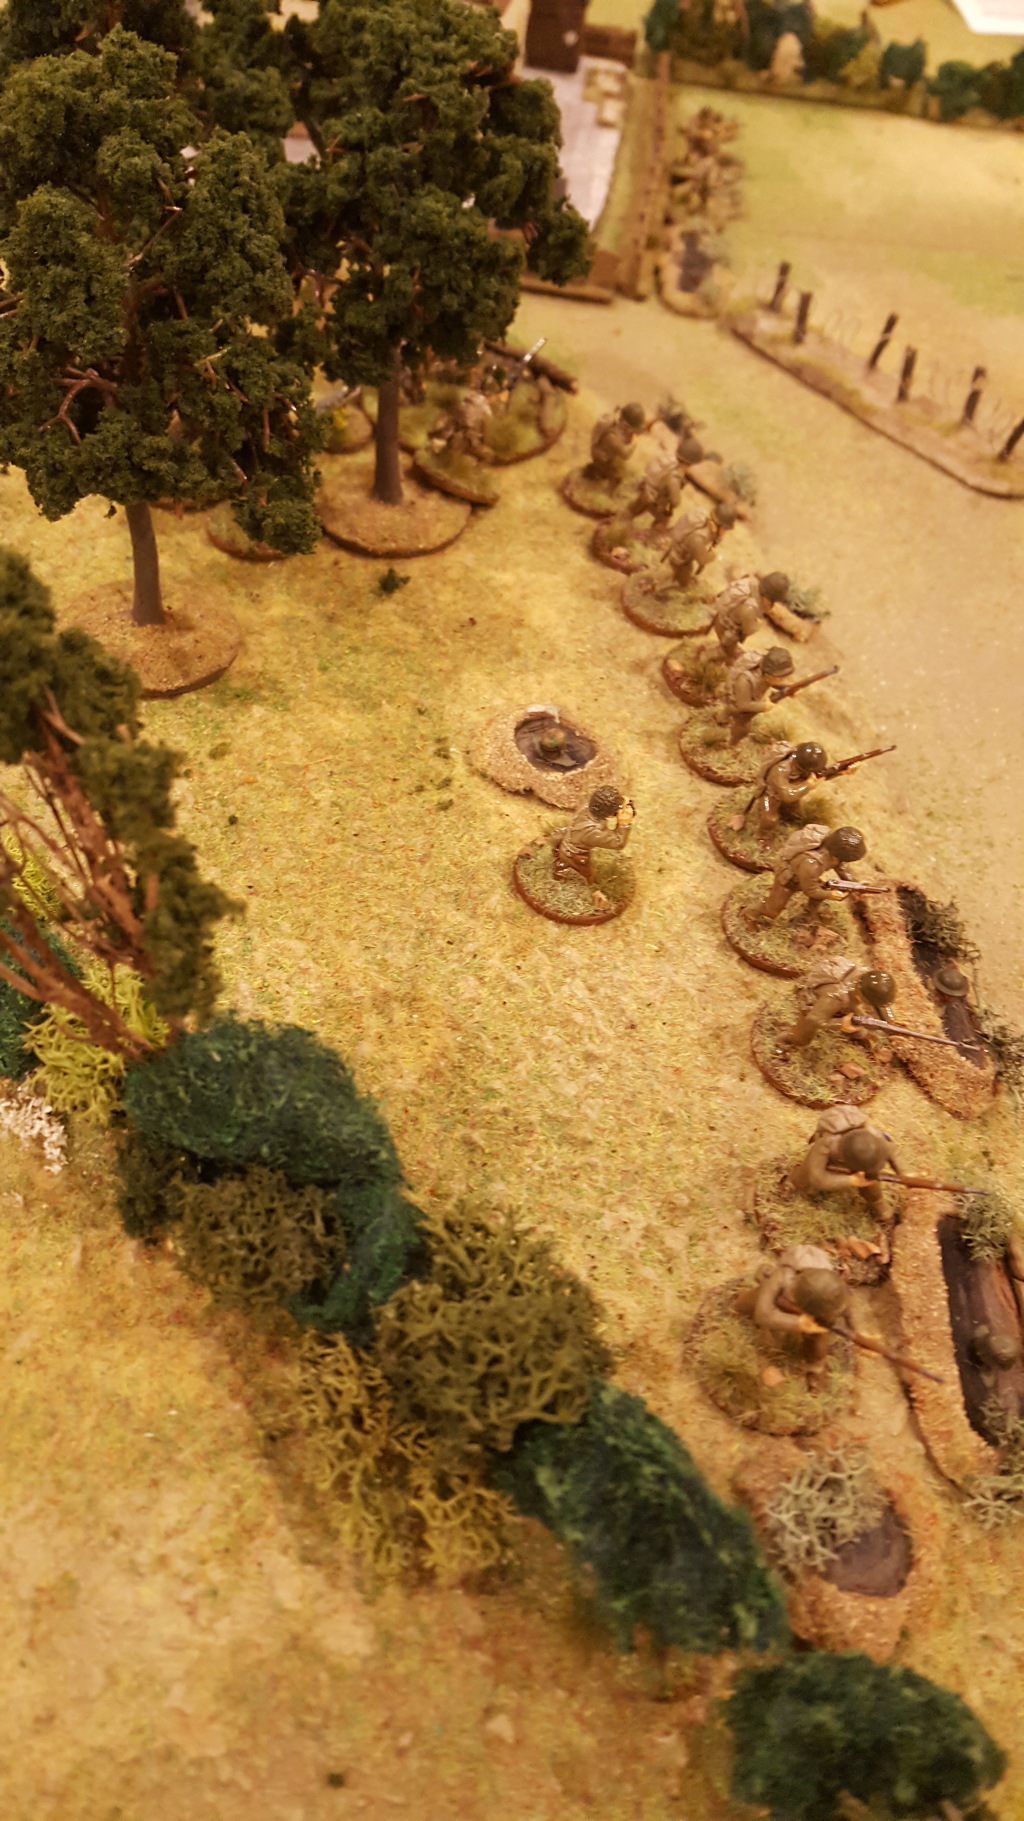 The US centre, ready to sell their lives dearly Last Thursday we held the “Matt Pendle Farewell Commemorative Bolt Action Battlegame”. After four years of happy gaming, Matt is inexplicably moving away. He said something about jobs, wives and quality of life and I wish him well, but the simple fact is that a splendid opponent is leaving the area. We have played various periods and rules since 2015 but as Matt, Ian and I started out on Bolt Action together, it seemed fitting to return to BA for our final encounter. We were joined by Dan, a player of various games including Star Wars Legions and RPGs. Having watched a Youtube tutorial beforehand on Bolt Action basics, Dan picked up the rules remarkably quickly. We played a 1000 point game with D Day US versus Late War Germans. I wanted a suitably heroic and memorable game so adapted the Hill defence scenario from Battleground Europe, replacing the defending Poles in the original with Matt’s Americans and transposing the setting to operation Cobra. The briefing is set out below. 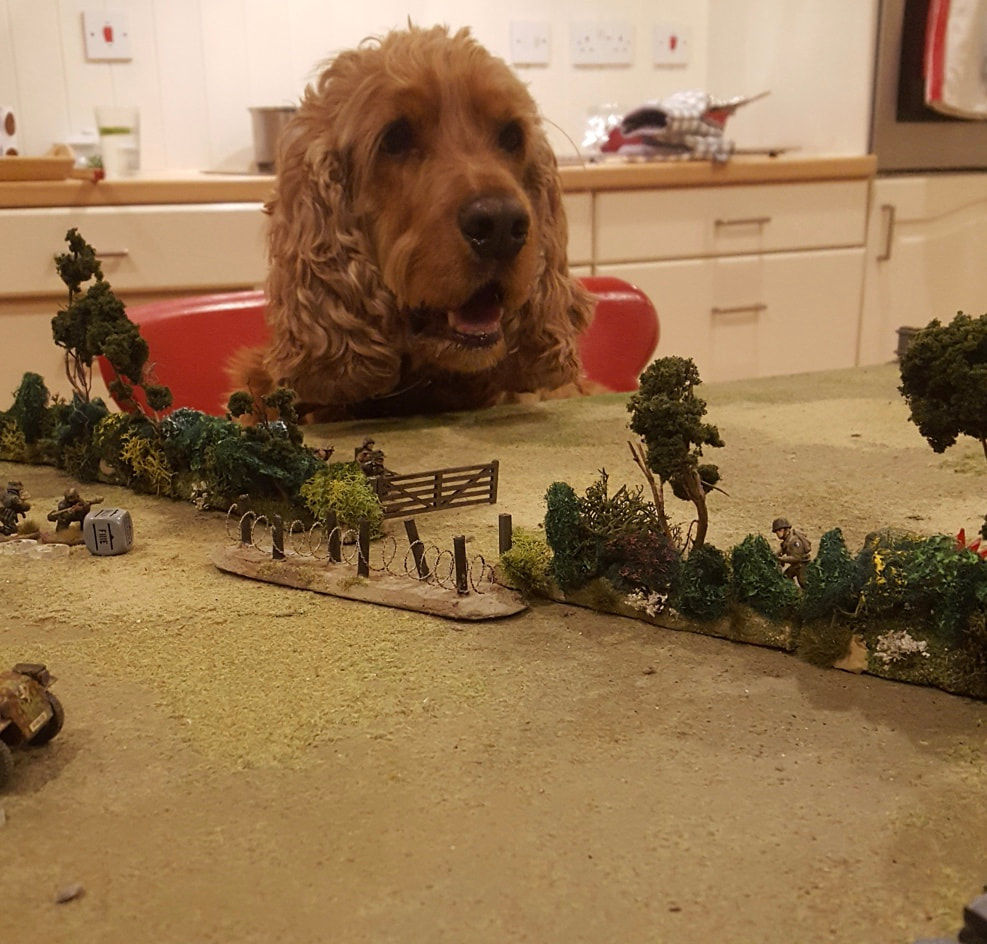 Hauptmann Rotthund surveys the field “Last Stand on Hill TW20 It is the third day of Operation Cobra, the US breakout from the Cotentin Peninsula. General Bradley’s First Army has pierced the German’s Western flank and is advancing south and eastwards into the interior. If the US armour can break out of the bocage country, the German forces in Normandy face encirclement and annihilation. Aware of the stakes, the Germans are throwing everything they have against the neck of the American advance, aiming to cut off the spearhead from its crucial supplies. The corridor opened by the assault is narrow. While the tankers race ahead, it is down to the long-suffering GI to keep that corridor open. Hill TW20 is already behind the US spearhead. It overlooks a key road along which the gasoline and ammunition must flow. It is held by Major Matt “Hedgehog” Pendle and his hard-bitten platoon of veterans. Their task is to hold the hill at all costs. Approaching from the East is a scratch force of German grenadiers, as determined to take Hill TW20 as Matt’s Marauders are to hold it. Their commander, Hauptmann Rudolf von Rotthund, peers at the hill through his binoculars and plans his assault. He is confident of success: what Ami can resist the power of his new dice tower?” Matt set his force up on the hill, minus a half track with infantry section in reserve. He was allowed to dig in his infantry, which he did on his left and centre. Dan and I shared the Germans between us. Matt had a pretty clear killing ground to his front so we agreed that we would try a pincer, Dan on the left and I on the right. How did the game play? Well, I did say I wanted it to be memorable. The first scene unfolded on the German left/US right, as Dan set out to dislodge a US squad behind a row of bocage. This started well, with several useful pins falling on the US squad. Matt regained the initiative with a direct medium mortar hit in its first round, followed by a bazooka taking out Dan’s command halftrack. In return, Dan achieved a first-time direct hit with his medium mortar and started to filter his command squad across to the US side of the bocage. So far, honours were about even. At this point, Matt pulled a very clever turnaround. At the end of one turn he rallied off all of the pins on his right hand squad. When he then drew the first order die of the next turn, he sent the rallied squad smack into Dan’s command squad and wiped it out. Shortly after, Matt’s halftrack arrived and joined in the destruction. From that point on, Dan’s wing was doomed, even with the arrival of a German section from reserve. On the German right, meanwhile, I was footling around behind a hedge, swapping pins with Matt’s MMG and left hand squad in foxholes. Matt shifted his central squad around his left-rear, overrunning as he did so a sniper team that hadn’t even set up for business yet. This was getting embarrassing. With Matt’s encircling squad arriving to my front, I no longer had cover from enemy fire and suffered the consequences. The rest was a blur: some nasty close combat which went in US favour, a last ditch attack by a panzerschrek team using their bazooka as a club, and eventually agreement on all sides that the Germans were unlikely to get a live body onto the hill. After five turns, Dan and I surrendered, first to the inevitable and then to Matt. Blimey! What happened there then? Being a modest bloke, Matt pointed out that the dice had been with him at certain key points, both in shooting and in the drawing of order dice. He argued that had a German die been the first to be drawn in one particular turn, this could have reversed the whole course of the game. Let’s be clear: had the luck been strictly balanced, he would still have beaten us, if perhaps a tiny bit less emphatically. We were beaten - and soundly - by the player, not by any dice gods. This was our first Bolt Action game in several months and I’d forgotten how much fun it can be. The game mechanics are robust, logical and easy to learn: Dan was off and away pretty much from the start of his first ever BA game. There is real suspense in the drawing of order dice and lots of tough choices on who to activate next. There are also moments that may not be historically plausible but are great fun in the game context, often involving success against the odds. And it is the sign of a good rule set that Dan seemed thoroughly to enjoy his first Bolt Action encounter, despite being roundly trounced. On the whole I don’t find the scale distortion in BA troublesome, although I would happily adopt a house rule that while mortars are paid for as usual, the only presence required on the table top is that of their spotter. It did feel quite cramped to have a German and a US mortar within four feet of one another. Inspired by Thursday’s game I have painted a new German NCO and MG42 team, to round out another section of grenadiers. I increasingly feel that the more cost-effective investments for a general scenario are in infantry squads and MMG teams: exotic specialist units that might not get to use their kit are less likely to justify the expense. As for Matt, I hope he was satisfied with the performance of his GIs on their final outing in South East England. What do I mean, final? I am determined to get him back down here for some more games in the future. It would be criminal to lose touch with an opponent who is as sporting, capable and likeable as Matt has been over the past four years. Excuse me for a moment, I have something in my eye….  We played a 200 point game of Art de la Guerre on Wednesday, with Spencer and Matt pitting their Early Imperial Romans against my Ptolemaic army. Both of them are building their own Roman armies, Spencer’s set a little earlier than Matt’s so with oval shields. Together, they fielded ten bases of legionaries, one of equites and two light infantry bases, supplemented by some Hellenistic horse and medium infantry. My Ptolemaics had six bases of pikes, four of thureophoroi, five of xystophoroi, two Nubians and a bunch of light infantry. The Romans fielded two commands entirely of infantry and put all their cavalry in their right hand command. The Ptolemaics had the pikes in the centre with cavalry and light infantry divided more or less evenly between the two wings. The Roman plan was to avoid the front of the pikes by drawing their centre back and to the left like a matador’s cloak. Meanwhile their horse would crush my left wing horse and fall upon the rear of my pikes, while their left would fend off my right wing. 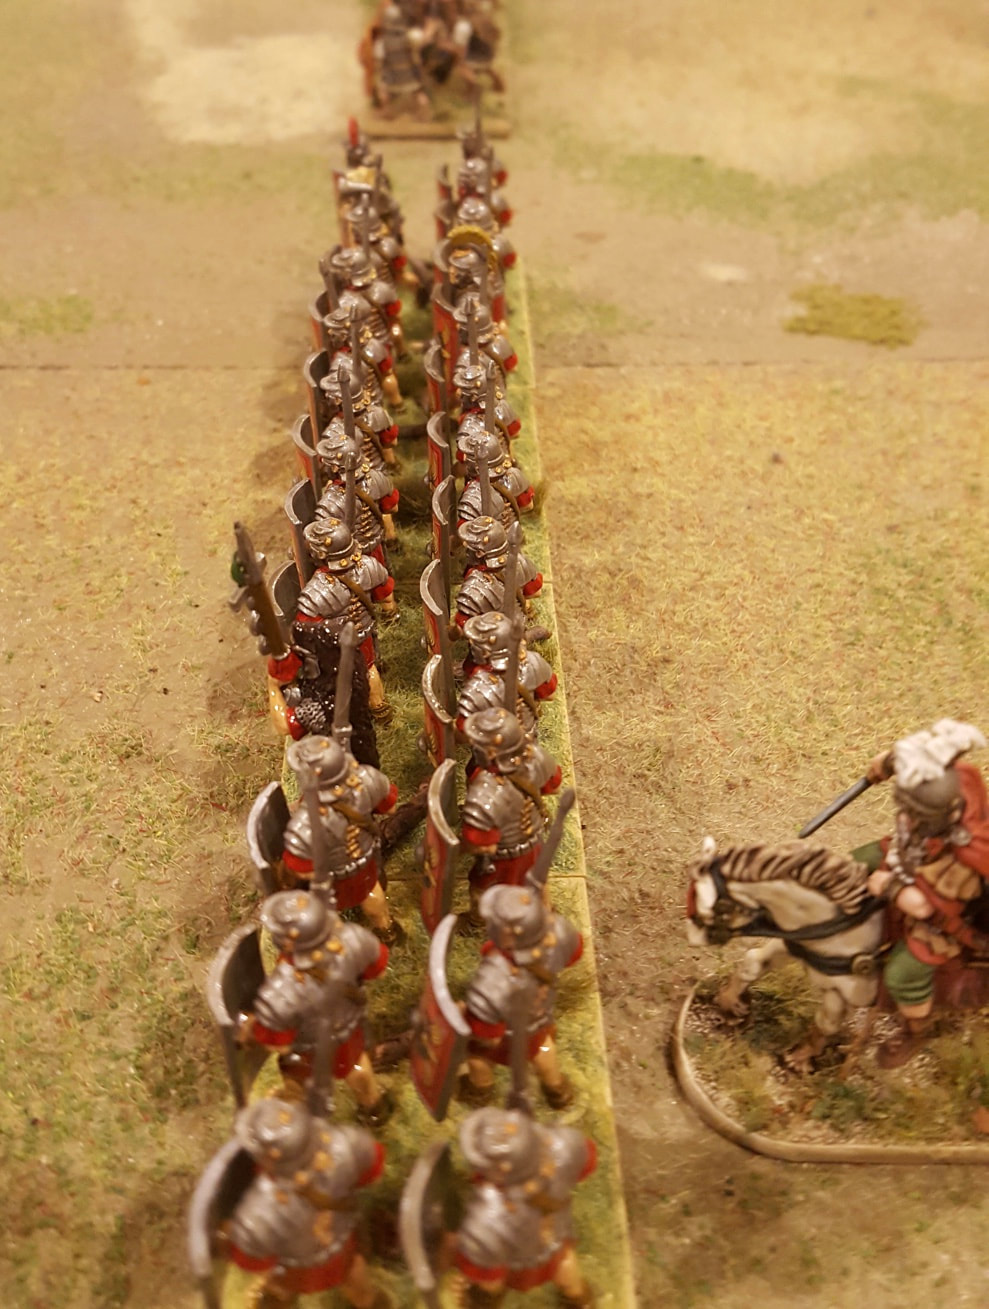 The legions advance 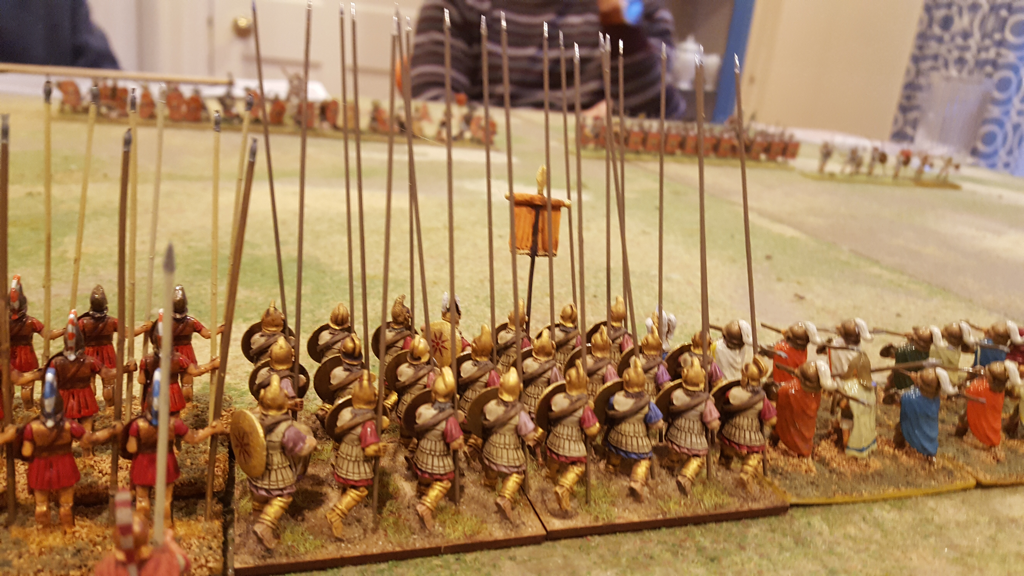 The Ptolemaic centre To begin with, the Roman plan went well. Their right wing drove my Nubian horse right off the table. But as they turned to engage my centre, their commander threw himself into a melee with some thureophoroi in which he was killed. From then on, the Roman right had to operate with no command roll modifiers and a 2CP cost for each order. Meanwhile, my pikes were able to close with the Roman centre before it could get out of the way. On the Roman left/Ptolemaic right, the Greek/Macedonian horse faced off against Matt’s legionaries with neither side closing.  Stand off on the Roman left The combat in the centre went well for the pikes, as their Roman opponents were out of position. Even so, the Romans were a tough nut to crack and took time to wear down. On the unengaged flank, the Ptolemaic horse finally charged the Roman left but there followed several rounds of inconclusive combat. Eventually, the uneven struggle in the centre tipped too far in Ptolemy’s favour and the Roman army broke. 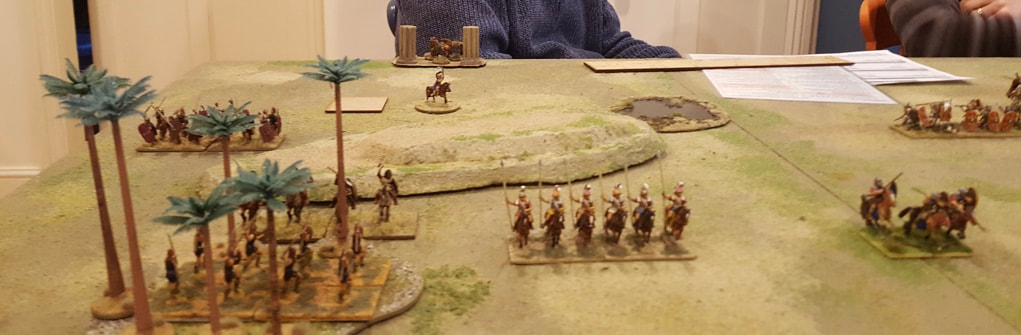 The Roman right goes deep, but will shortly lose its commander The game ran at a fair pace. We are all now more familiar with the rules although still needed to do some checking here and there. There were various points to note for future games. One is the powerful combination of an elite unit with armour. The armour rule really reduces the chances of an emphatic or rapid result. Another is the crippling effect of losing a commander. Before you get stuck in with a general, make sure it’s worth the risk of losing him. Another thought is that the threat of combat can be more effective than charging in. For most of the game my right wing was facing off against the Roman left, stopping it from turning to attack my centre from behind but without actually charging it. With hindsight, I needn’t have charged at all since my victory points were coming from elsewhere. Once we did start fighting on this wing, all I really did was increase the risk that poor dice rolling might give the Romans victory points unnecessarily. It is always tempting to get stuck in with everybody but in some situations, I don’t think this is a smart option. 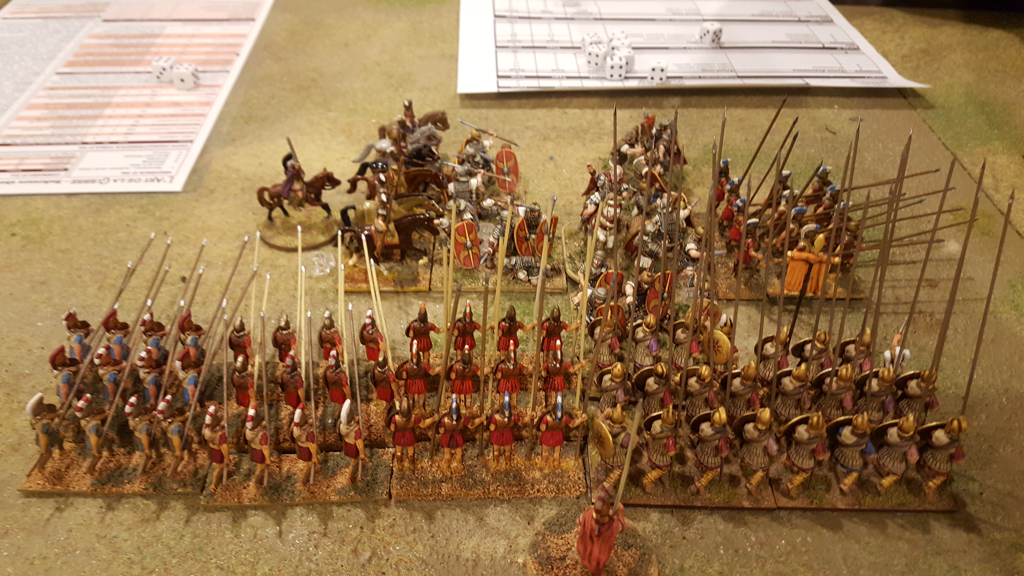 The end of the Roman centre, fighting to front and both flanks (those pikes on the right are facing the wrong way so the bases can touch...) As usual with these opponents, the game was played in a generous and cheerful spirit. Special mention must go to Spencer’s handiwork on his legionaries. Exquisitely painted and posed, each base is a vivid little diorama. He isn’t exactly a fast worker but the results are splendid.
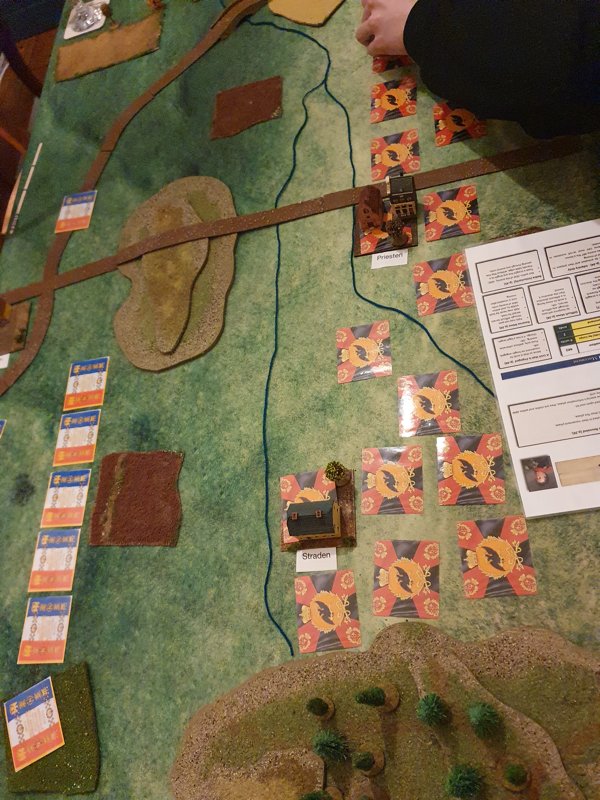
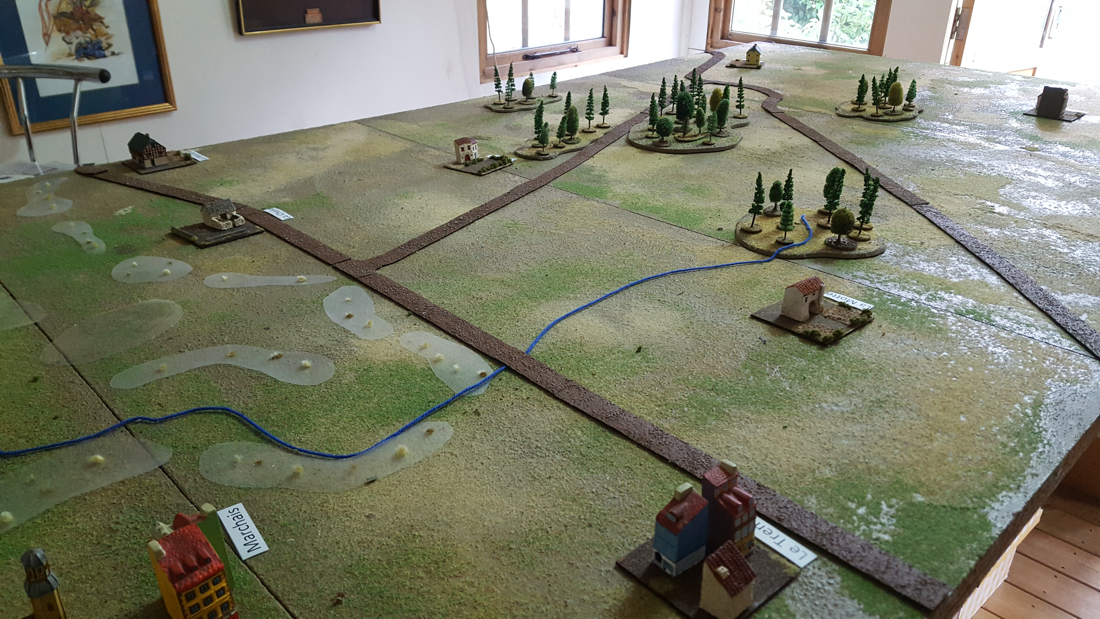
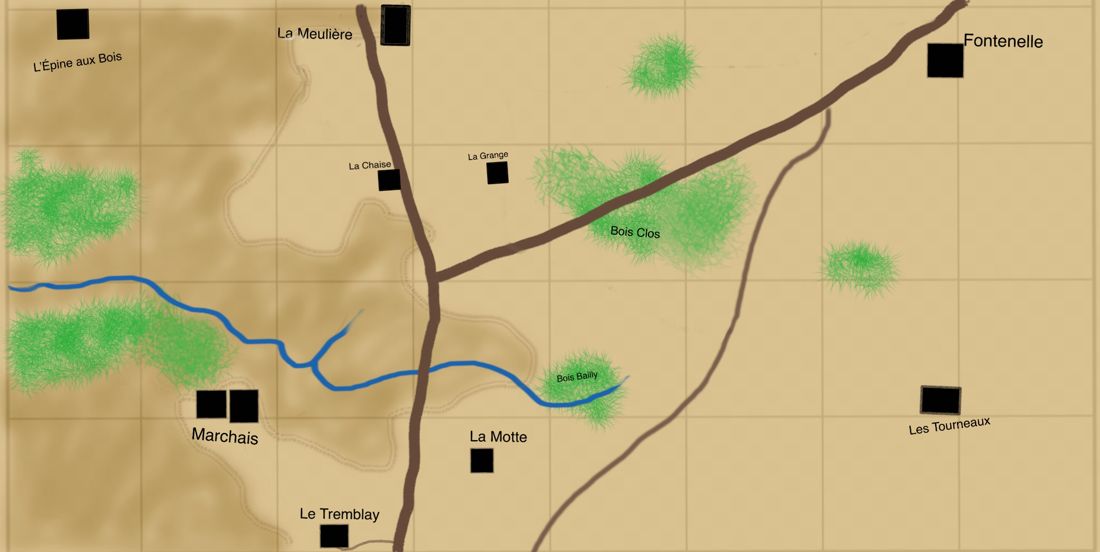
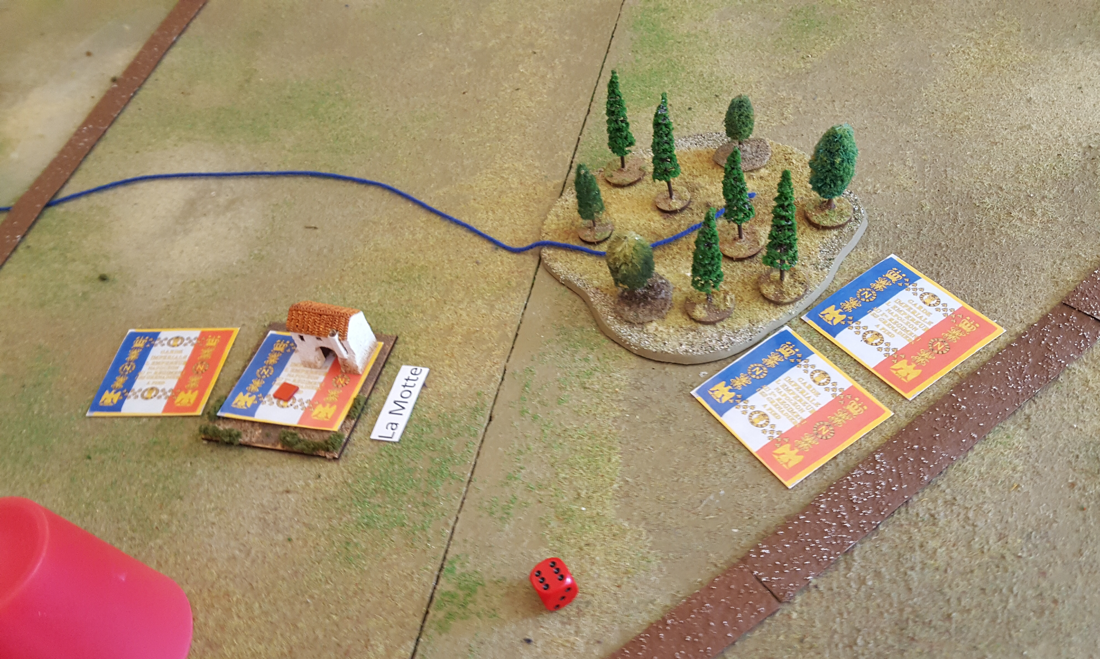
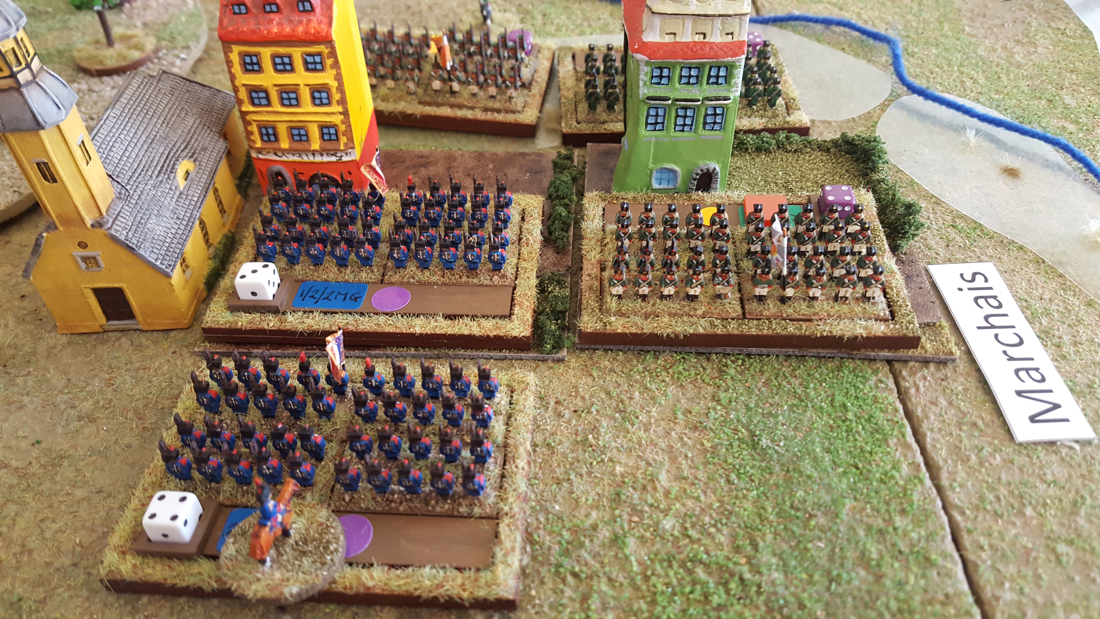
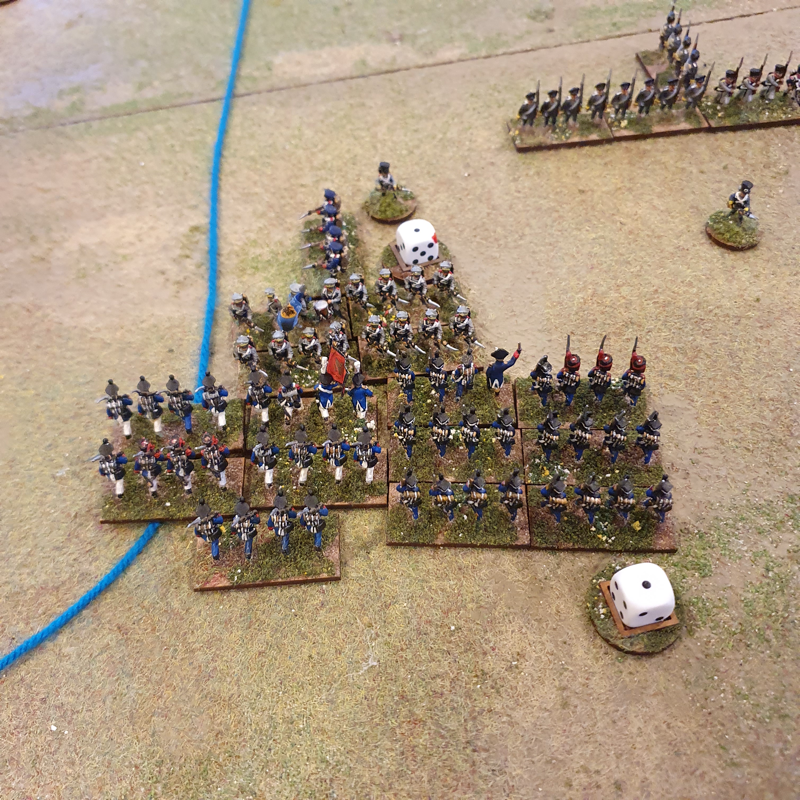
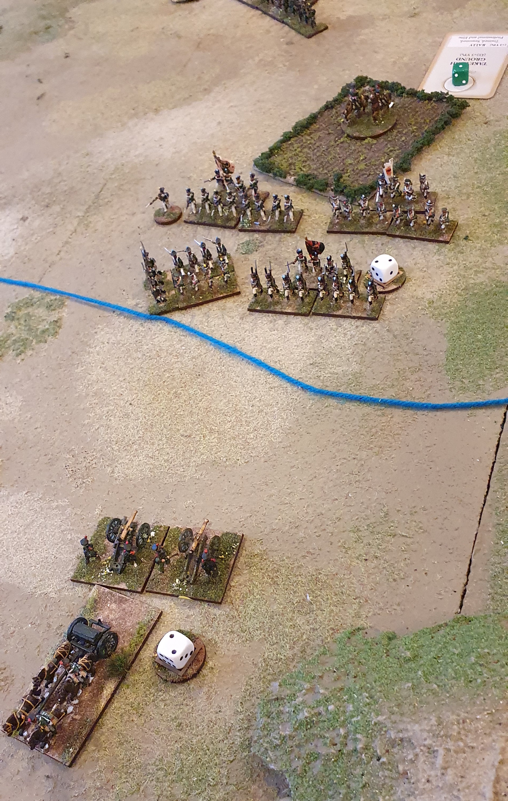
The figures on the table were a mixture of Heroics and Ros plastics, Minifigs, First Corps, Victrix, Warlord and Black Tree Design. Oldest painted in 1981 and newest finished last Tuesday.  Late in 2018 I posted some house rules for adapting For King and Parliament to campaigns in Eastern Europe. These included unit statistics for Cossack and Commonwealth armies, around the time of the Berestechko campaign of 1651. Recently I extended the stats to cover Muscovy. I have been rereading an account of the 1660 Cudnów/Chudnov campaign, in which a Muscovite army advancing in Ukraine was checked and later defeated by the joint Polish forces of Lubomirski and Potocki. 1660 offers lots of scope for scenarios, including a meeting engagement, a set piece battle with a surprise twist, a rearguard action and an assault on a fortified camp. I have three different accounts of the campaign including detailed orders of battle and it cries out for some wargames. . Back in 2015 and 2016 we fought several games based on 1660, first using Pike and Shotte and later using the Spanish set, Tercios/Kingdoms. Both rules gave satisfying games and I particularly like the mechanisms in Tercios, but I’d love to see how the bigger actions in particular play using FKaP. The first scenario I plan to run is the battle of Lubar, in which the Muscovite general, Sheremetyev, offered battle in the belief that he outnumbered the enemy. It was his first and only foray into an open field. I have uploaded the new unit stats and FKaP army lists for Cudnów here, I am still working on the map and scenario for Lubar and will put this up when it is a bit more polished. 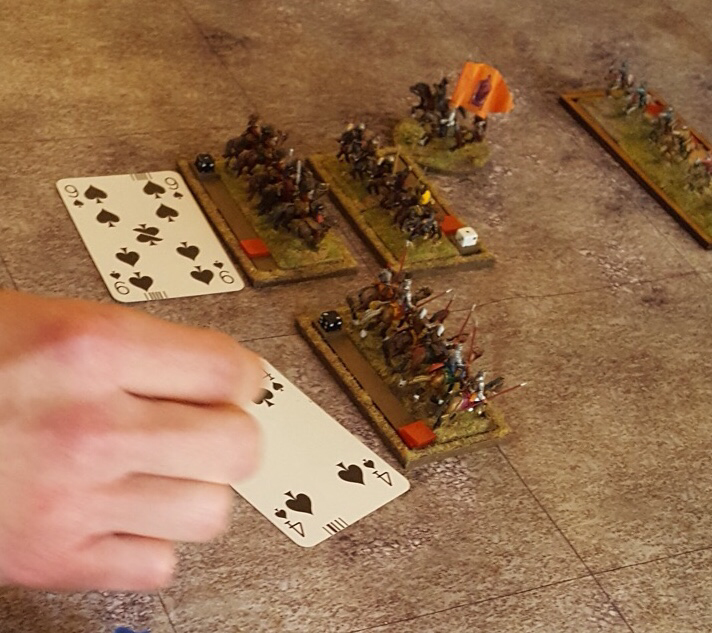 On 16 August we played a 6 player game using Sam Mustafa’s Blucher rules and 6mm figures, mostly produced by Commission Figurines. The battle was Montmirail, 11 February 1814, using the small scale variant in the rules. Montmirail is an encounter battle in which the French are heavily outnumbered at the start, while the Russians are present in their entirety from turn 1. It is a chance to use the French Guard, who actually constitute the majority of units, and to pit smaller numbers of high quality troops against a numerically superior opponent. But the Russians are no pushover: all their infantry count as steadfast and so are tough on the defensive. Scenario and Setup The scenario, now in its third version, can be found here. The original was a two player scenario at ‘normal’ scale, so one base per brigade. I expanded this to ‘small’ scale, roughly doubling the number of units, but then after a dry run I added a few more, based on a new guesstimate between the different sources. I stuck with the original decision to leave the Young Guard out because only Allied accounts said they were present and Allied witnesses were not great at recognising enemy units (cf mistaking naval artillery for marines of the guard at Leipzig). French accounts were clear that while the Young Guard’s then commander, Ney, was present, he had left his troops behind. If they did reach the field at all, I believe they will have done so after the battle was over. The battlefield was mostly easy to depict. As accounts of the battle say the roads were bad due to heavy rain, I only showed the two main roads: the East-West Little Paris road and the road going north to Chateau-Thierry. I also struggled over how to depict the waterlogged low ground on the Russian right/French left. After first trying to work out a way of modelling the contours here, I concluded I didn’t need to: the issue that affected the battle was the state of the ground, not line of sight. In the end I cut out several irregular pieces from a clear plastic wallet and placed these on the table to represent the area of low marshy ground. It looked quite effective and had the desired effect on play, making the fight in this area an infantry-only affair. How it Played Matt took the role of General Sacken, while Chris was Von Lieven, commanding XI Corps. Keith played Napoleon, Spencer was Ney and Nick was Nansouty. I umpired at the start and came on in the last quarter as General Yorck. At game’s start, the whole Russian army was on the field, facing (count them) four French units. Matt and Chris used the first turn to advance as far forward as possible and close down French options. Chris on the right assaulted the village of Marchais, a struggle that would last all game. Matt advanced his left almost as far as the French baseline, thereby threatening Nick’s flank. Nick slipped a brigade of conscripts into Marchais and tried to look brave with his cavalry. One of these units was almost crippled by Chris’s artillery, which had a couple of high rolling turns. Luckily for the French, Keith and Spencer then arrived with the Old Guard and some more cavalry. Spencer’s Old Guard expanded his room for manoeuvre by assaulting Matt’s cavalry on the Russian left. He pushed Matt back but with heavy losses. Infantry pay a high price for attacking cavalry, although if it is worth the gamble with anybody, the Old Guard is probably the best formation to try. Matt’s cavalry still being potent, Spencer now formed square with two Guard units and sent the other two against the left wing Russian infantry. At this point Napoleon himself joined one of these units and disappeared into the smoke, presumably ignoring the pleas of his aides to move himself out of danger. So what happened next? The French Left and Russian Right fought stoutly over Marchais, which changed hands twice before ending the day in disputed possession (one town base occupied by French and the other by Russians). This denied either side victory points for the town. At the other flank, the French assault chewed up several Russian units but used themselves up in the process. Yorck arrived late but in time to eliminate an exhausted Old Guard unit and to fill gaps in the Allied line. In the Centre, Chris launched an attack on La Motte which was only thinly held by the French, but just too late in the day. Darkness fell with the Russians nearing their break point but still hanging on. With possession of Marchais still in dispute, and to my private disappointment as I dislike a hung result, the day ended in a draw. What might have been Hindsight is a wonderful thing. The Russian Left did well to take territory and let the French try to dislodge them. On their Right, Chris handled the assault on Marchais well but Nick made good use of his conscripts and the arrival of the Middle Guard allowed him to deny Chris undisputed occupation of the town on almost the last turn. I think, had Chris attacked La Motte sooner, Nick would have been stretched too thin and the outcome at Marchais could have been different. Between the two commanders in chief, Matt stayed in control of his battle while Keith got too involved in the assault by two Old Guard units and lost his overall grasp. Although a drawn battle according to the rules, I consider Matt was the better CinC on the day. By general agreement, Nick made good use of his meagre numbers. Twice in the last turn of the game, the Russians were within an unlucky dice roll of reaching break point. Fortunately for them, they didn’t. This was also fortunate for me, as after the game ended I realised I had made an umpiring mistake. Around a quarter of the way through the game, I had allowed Nick to send a cavalry unit into the rear of a Russian artillery unit, wiping it out. When I checked the photographs and reread the rules the next day, I found that this charge had been illegal, since the artillery’s rear had been protected by the 1BW zone of control of a neighbouring infantry unit. If it charged anybody, the cavalry should have charged this unit. So I apologise to Matt and Chris for my error: you were two units away from breaking at nightfall, not one. I hope the team enjoyed the game. There’s more to be explored in this scenario and I have kept the stickers on the units, in case we can have another go at it some time. It’s curious that wargamers don’t often replay the same battle with miniatures, whereas it is common to play the same board game several times over. We played a 200 point game of Art de la Guerre last Saturday. Spencer having confessed a weakness for elephants, I revisited the lists for the battle of the Metaurus that we used a year or so ago. Spencer took the part of Hasdrubal, arriving in Italy to reinforce his brother Hannibal, while Matt led the combined consular armies of Nero and Salinator. The army lists were adapted in two ways to reflect the scenario. First, the Gauls in Hasdrubal‘s army were made mediocre and not impetuous, to reflect their poor quality (Roman accounts say they were drunk, but more likely they were just disaffected and wobbly). The Romans were not told about this drop in quality until the Gauls’ first combat. Second, the cavalry limit for the Romans was increased as Nero’s highly irregular decision to join Salinator had given the Romans cavalry superiority, an unusual situation in the Punic wars. The battlefield was flanked by the river Metaurus on the Carthaginian right, with open plain in the centre and rising ground on the Carthaginian left/Roman right. A hill with a steep ravine at its base ran in front of the Carthaginian left while a more gentle hill faced it on the Roman side of the table. To reflect the fact that Hasdrubal had been retreating and turned at bay when his pursuers got too close, Spencer was obliged to set up his entire army first. He placed his cavalry on his right, his Gauls in the centre and his Spanish and elephants on his left, including on the hill protected by the steep ravine. Matt set up with Nero’s infantry on the left, his combined cavalry in the centre and Salinator’s infantry (his largest command) on his right. However, instead of matching Spencer’s frontage, Matt deployed in some depth and his extreme right set up opposite Spencer’s centre. This left the Spanish on the hill with no opposition to their front. Matt’s plan was to grind down the Carthaginian right and centre before Hasdrubal’s left could engage. As the need arose, he was ready to peel off troops from behind Salinator’s front line to hold off Hasdrubal’s left wing if and when it did reach his flank. On seeing the Roman deployment, Spencer began racing his cavalry to the left behind his front line, in an attempt to get around the Roman right flank. However the gap behind his line was narrow and Matt charged this horse as they tried to pass. The horse managed to evade but now found themselves penned in behind the Carthaginian centre. Thwarted in their plan, Spencer’s cavalry then returned almost to their starting position on the right flank and got stuck in. It was a valiant attempt to seize the initiative but Matt had neutralised it by maintaining his objective, ploughing forwards and restricting Spencer’s room for manoeuvre. Unusually for a game of ADLG, we ran out of time before a clear victory was won. A points count gave a draw, although we agreed that the moral victory was Matt’s. Certainly for most of the game, the Romans chewed up their opposition and caused much more serious losses than they incurred. However in the later stages, when Spencer’s cavalry stopped manoeuvring and started fighting and his left wing engaged Matt’s right, Roman losses rose quite fast. The outcome seemed much less certain at the point when we finished than it would have, had we stopped three or four turns earlier. Even so, I think Matt would have carried the day as he still had more hitting power in a position to do damage. It’s always interesting to see how players interpret their brief. Matt took a risk by deploying on a narrow but deep front. At first it looked like he was inviting a Cannae-style envelopment. Had the terrain been more open he would have been in serious trouble. But the ravine-fronted hill on Spencer’s left, while strong defensively, would also impede a Carthaginian advance to envelop the Roman right. It was probably this fact that prompted Spencer to try to send his cavalry around Matt’s right. He nearly succeeded but Matt fended off the attempt with his steadily advancing legionaries. When Spencer did advance his left and it eventually made contact, it did a lot of damage but too late in the game to swing the balance. It was fun playing a scenario as opposed to a straight points battle. At least, I found the narrative more compelling for knowing who the players were supposed to represent. As usual, the players were great company and courteous to a fault: maybe next time we should play something from the Lace Wars so each can invite the other to shoot first... Figures are a combination of 25mm Minifigs, Garrison, Newline, Black Tree and First Corps. The Roman army in their entirety are very old Minifigs and they really can’t combine with other ranges, but I am very fond of them, telegraph pole spears notwithstanding. 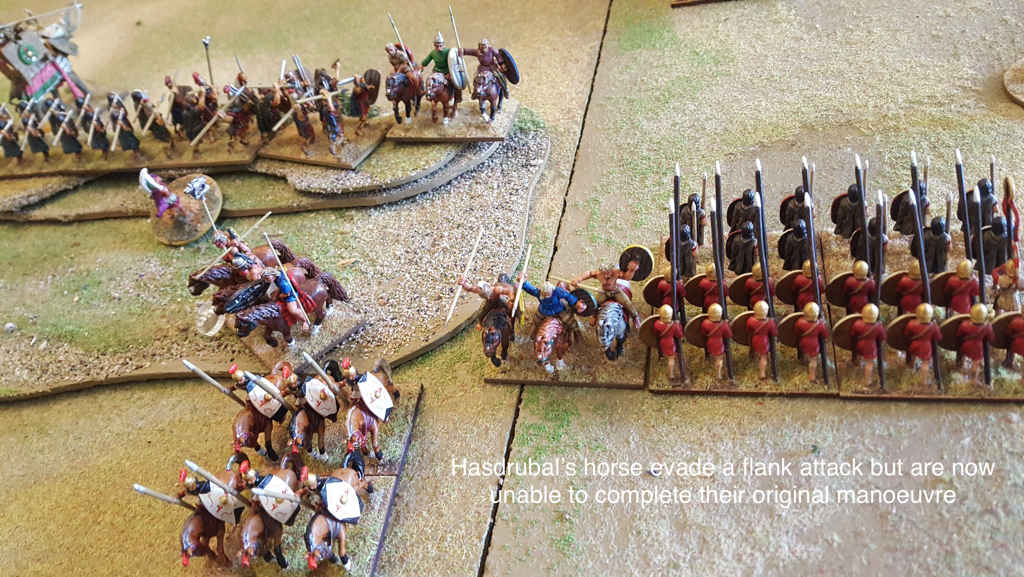 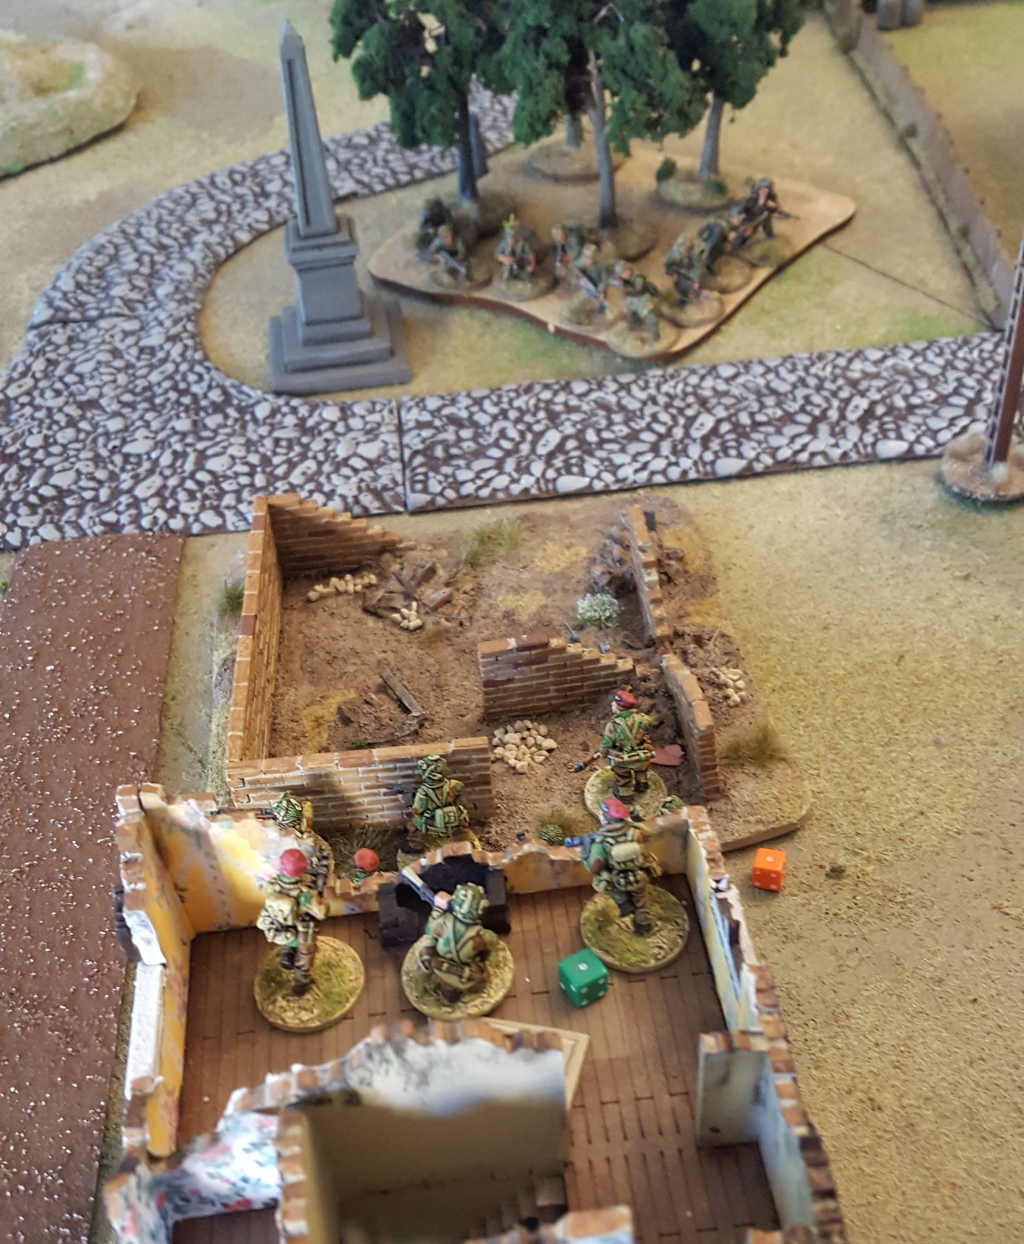 On Wednesday evening I played my second game of Chain of Command, arranged by Spencer. I took a German platoon with an extra section and HMG, plus a STUG to introduce the vehicle rules. Spencer took a platoon of British airborne, together with a Sherman and a flamethrower. Let’s get it out of the way quickly: I was pulverised. We played a patrol scenario and both came on in the same table third (my left, Spencer’s right), which had a big house around the half way line. We ended up with jump off points quite close to and either side of this house and it was the scene of an interesting sequence of events. Spencer deployed first and placed one section behind the house, one in a hard cover ruin in the centre of the table and one behind the ruin, ready to swing round to his left. I deployed a section behind hedgerow on my left, a second further along the same hedge nearer the centre, a third in woods close to Spencer’s section in hard cover (what was I thinking?) and the fourth behind a Hill on my right. On his right, Spencer advanced his right hand section along with a senior leader, aiming to knock out my left jump point. I met him with fire from behind the hedgerow and from a fence behind his left flank.This took out several Paras and he decided to withdraw behind the house. Thinking I would go for a wipeout, I sent a full strength section into close combat with his five (count them) surviving men. Well! That was quite a way to find out how tough elite infantry with stens and a senior leader can be. Spencer had many more dice to roll than I. My section lost six men and routed back to their starting hedge line, while Spencer lost only two. His depleted section took no further part in the game but they didn’t need to as they had done their work. 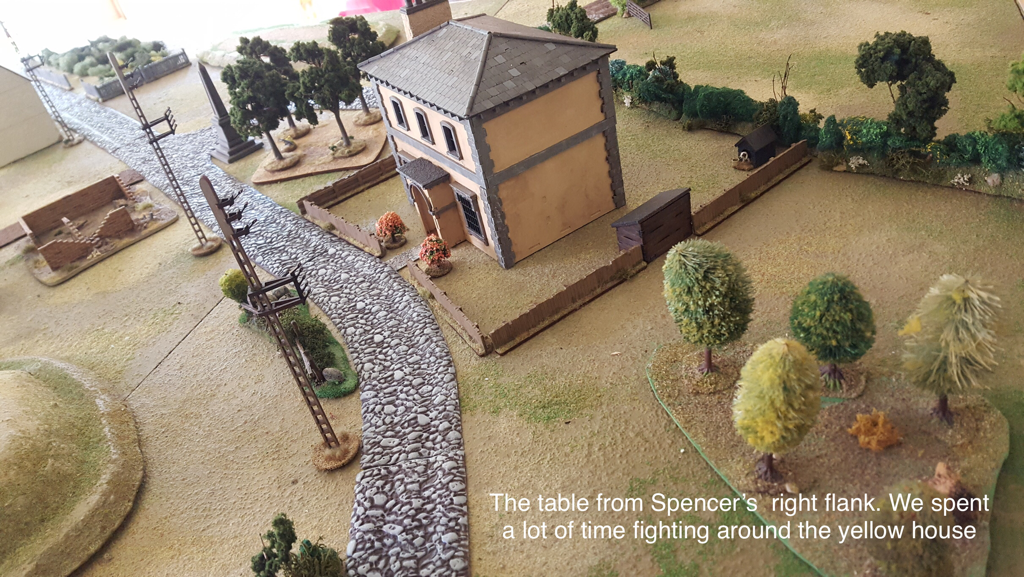 In the centre my third section in the woods fought an unequal duel with Spencer’s middle section in hard cover. I had thought my MG42 with its extra dice would partly counter their cover advantage but when that combined with elites being harder to hit, I was heading for a sticky end. On Spencer’s left I think we both took some odd decisions. His left hand section legged it towards my right flank, then ran back almost the way it had come, intending to assault my section in the woods. They stopped short in the open and got shot up good. My right hand section, meanwhile, deployed behind a hill that lacked any cover and started out to meet Spencer’s flanking section, but when Spencer turned this unit around, mine jumped up on the hill and helped to shoot it up. Next to appear were our respective AFVs. Neither made a huge impact on the game although each helped to whittle down enemy numbers. In Force morale terms, Spencer made early gains through his brutally successful hand to hand defence, reducing my morale further as he broke my guys in the woods. I made some counter gains by beating up the section he had sent to his left then brought back again, but Spencer used a chain of Command die to end the turn and two of my routed sections left the table. In the final stage he deployed a flamethrower who fried my third section then engulfed my senior leader in flame, taking my force morale to zero. Game over. Lessons for the next game? Regulars won’t win a firefight with elite troops in hard cover. Don’t even think of close assaulting elites as you’ll get stomped. Before you place a unit, think about the avenues open to it after deployment: beware dead ends. Also (and I did know this but it’s easy to forget) you don’t have to mirror your opponent’s deployment. My right hand section was wasted for most of the game and could have been more useful reinforcing the hedgerow line on my left. Finally, think more about the mechanics of the patrol phase and remember the jump off point will be some distance behind the patrol markers once these have been locked down. The game was great fun and looked good. In particular, Spencer’s Paras were beautifully painted. I’m looking forward to the next one.  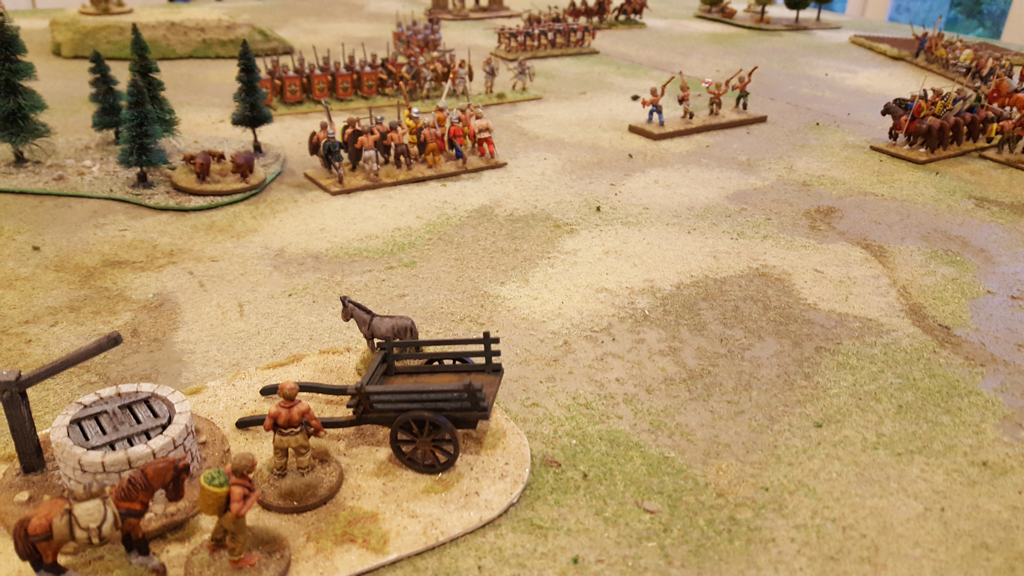 On Monday evening we played two 100 point games of Art de la Guerre. The aim was to introduce these rules to Spencer, in return for his recently introducing us to Chain of Command. It was also Matt’s first outing with his early Imperial Romans. He hasn’t painted 100 points’ worth yet so we supplemented his army with Iberians. Spencer led a horde of impetuous Gauls. I haven’t known him long but somehow I knew they’d suit him. After a couple of turns learning the ropes, Spencer got into the swing and sent his lads flying every which way, marching down his right flank, moving up the middle and sending a very cheeky scout around Matt’s right to capture his camp. The Gauls also had the better of combat and this, plus the VPs for plundering the Roman stockade, won Spencer a rapid victory. Game two was a different proposition. Spencer tried again to distract Matt with his light cavalry but they were quickly chased off the field. As the centres closed, a Gallic chariot charge on their right nearly succeeded but as more supports were committed, Matt won that combat. In the centre the Gauls (mostly) bounced off legionaries and in relatively short order, Matt had his revenge. One game all. 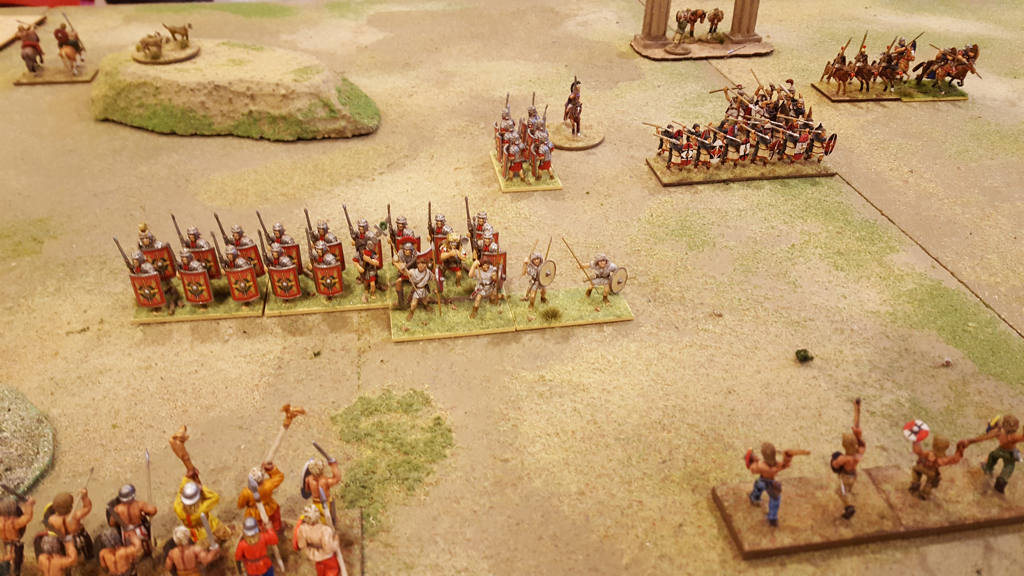 The Roman line is all over the shop The difference between the two games was interesting. In the first one Matt came forward, making it easier for Spencer to swamp his position. In the second he held his line back, with woods on his left and a difficult hill anchoring his right. On this more constricted front, the Gauls couldn’t get the overlaps and in a straight face to face contest, the odds favoured Rome. Both games were good fun and I think we’ll get Spencer back to try ADLG again. For the second game we allowed each side a few rerolls as suggested in the optional rules. Matt had observed that a bad roll in a critical moment can be devastating, especially in a 100 Point game, and the rerolls did help here. Next time,we will field 200 point armies as they do make for a more varied game. ADLG is an easy rule set to learn and it delivers decisive results. Light troops work very convincingly and the evade rule is particularly effective. But I have two low level grumbles. The first is the rules for flank and rear attacks, notably when gaps appear, which for the life of me I can’t retain in my head. Did they have to be so fiddly? The second is the appearance of the table in the closing stages of a game, when the battle lines end up looking like a mouthful of broken teeth. It may be simpler and make sense in gaming terms to remove bases in the middle of the line while their neighbours plough on, but this doesn’t fit my imagination of a line slowly crumbling until everybody goes. I think this is probably just me and I still enjoy the mechanics, - but the game gets less photogenic as play wears on. That said, any rules that permit two satisfying games on one weekday evening have to be doing something right. 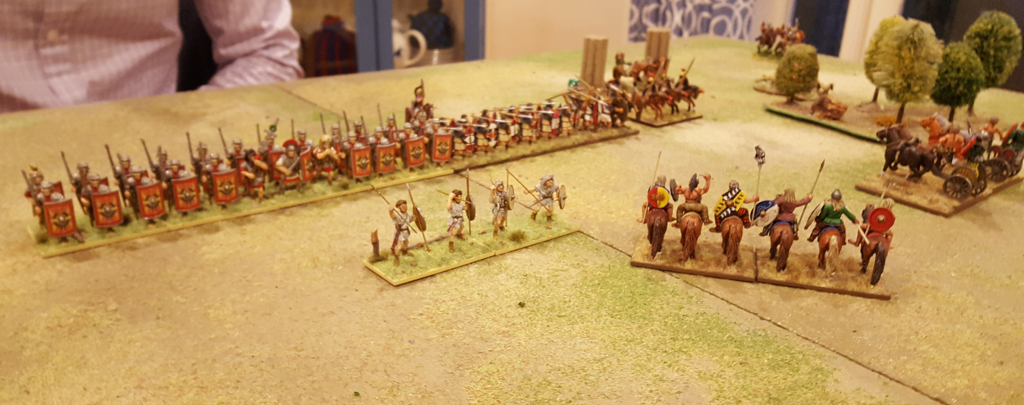 That’s more like it! The Roman line in game two 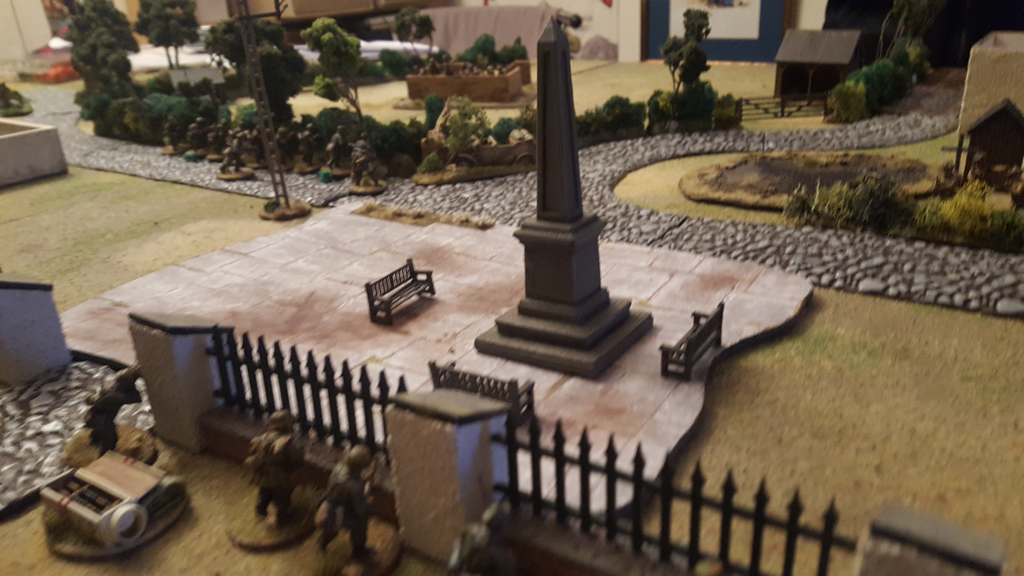 This week I finally played my first game of Chain of Command. I have had the rules for about four years but found them a daunting read and never got around to trying them. Somehow Bolt Action was that bit easier to grasp. Then along came Spencer, member of the Staines Wargamers and keen CoC player, who very kindly agreed to run a game in the shed for me and Matt, who has played it a little but is also pretty much a beginner. What can I say? I am hooked. These rules are so much more intuitive in play than in print. We had a platoon of regulars each, with no supports. Matt took the Brits and I had the Germans. It was a patrol encounter with a twist: there was a crashed kubelwagen near the middle of the table that I needed to control and Matt needed to deny me. 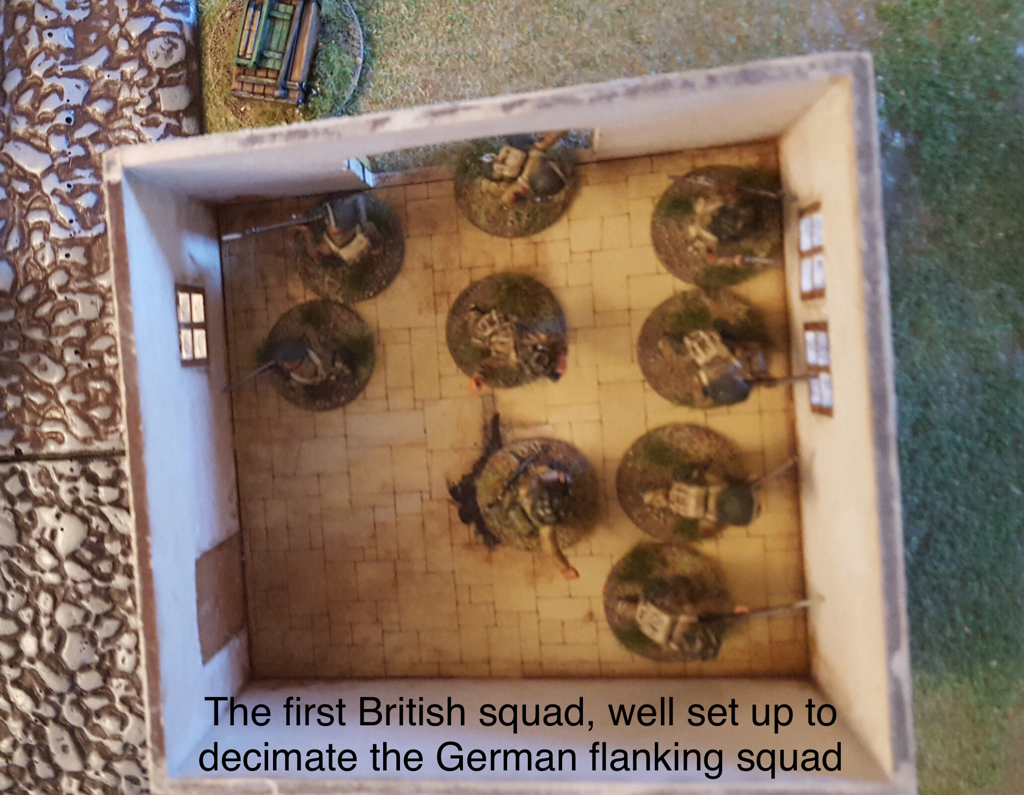 Chain of Command has been around for a long time so I presume it’s main design elements are pretty well known. The salient features for me are the patrol phase, jump off markers and Command dice. Spencer offered some useful tips for using the patrol phase to win ground, which was actually an intriguing game within the game. When it ended, Matt had a row of jump off markers in the centre of the table while I had two markers facing his in the centre and a third a little behind his left. I hoped this would give me a flanking advantage but in the event my daft deployment nearly cost me the game. Once we started placing figures, I quickly got into trouble. I deployed my first squad from the jump off point on my right flank in the open, placing the LMG team on overwatch and going tactical with the rifle team (increasing their cover save). Matt then deployed his first team in the building on his left, fired at my squad and began to dismantle it. Thanks to rolling several sixes, he played three phases on the trot, by the end of which I had lost my LMG team, junior leader and a couple of riflemen. My remaining troopers were pinned in the open. Bummer. 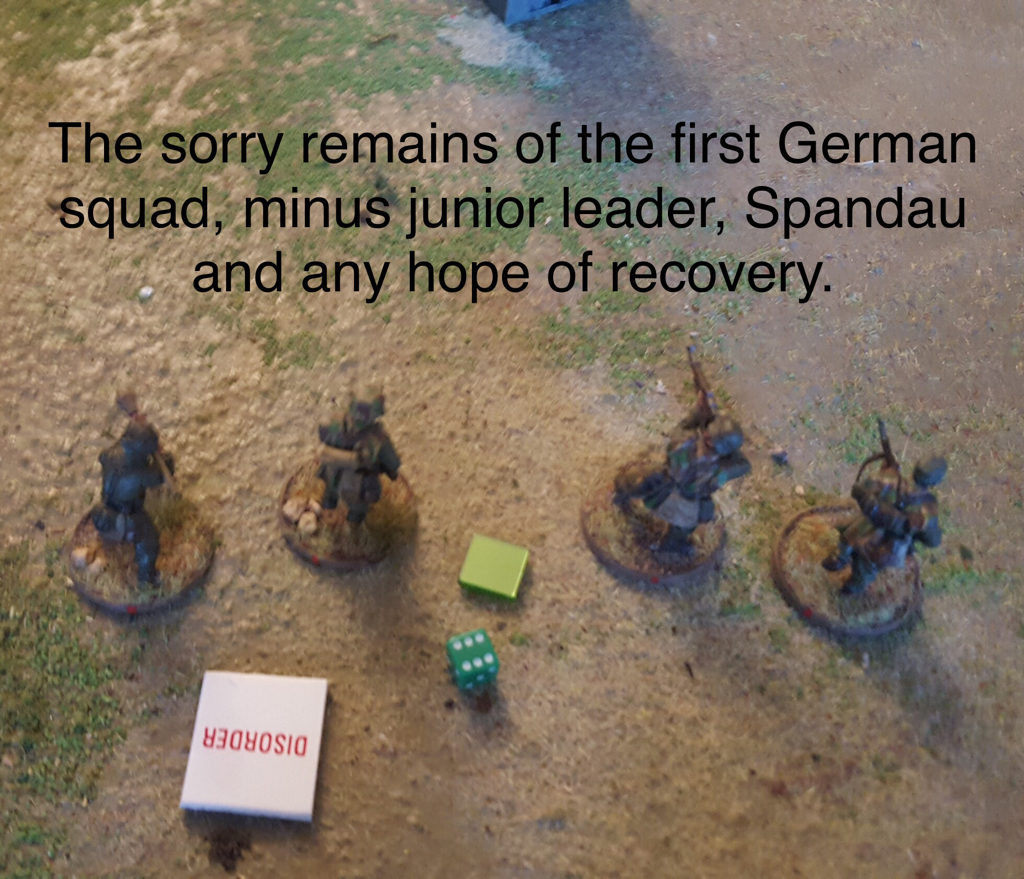 When my next turn came around I could do nothing to help the battered squad so deployed my remaining two squads and senior leader on my centre and left, close to the kubelwagen. Matt meanwhile deployed his second section beside his first on his left and his third section in the centre. I think his decision to reinforce his first section gave me a chance to recover from my stupid first move, as although he could now wipe out my first squad, I had more weapons firing at his troops in the centre than he had firing at mine. To cut a long story short, my left hand squad and senior leader reached the kubelwagen and lined a hedgerow, from which they won a duel with Matt’s third section; Matt moved his second section forward but they were pinned by my central squad; and he took his first section out of their building to put an end to my first squad and neutralise its jump off point. By game end, I had lost one squad and a jump off point, but Matt had lost two sections, two jump off points and control of the kubelwagen. I used my first and only Chain of Command die to end the turn and Matt’s force morale fell to zero. The game was exciting throughout and I only just managed to swing the win. The dice favoured Matt at the start with his series of rolled over phases but later on, I had some well above average shooting results, so (as always) the luck evened out. Spencer was an excellent tutor and umpire, advising us both on rules niceties and options. I found the rules far easier to absorb in play than they had been while reading the book. I think this is true of all rules to an extent but I do find Lardies rulebooks especially hard to navigate. As for subtlety, I am sure it will be several games before I start to get the hang of how to play properly. Having played a great deal of Bolt Action, I suppose I am bound to compare the two rules. BA is easy to learn and plays quickly. It has lots of tension and is always fun. It can however see some pretty unlikely tactics, the ranges are way too short and a lot of hardware appears on table that should be a long way away. I also hate the fact that some players create gamey army lists to get a killer - but unhistorical - army, but that isn’t the fault of the rules themselves. By contrast I think Chain of Command will take longer to master, even with the help of Spencer. But it will be worth the effort. CoC is definitely exciting to play. I really like the friction and uncertainty from the Command dice; the combat mechanics are not that complicated once you learn them and the players are faced with a wider range of tactical choices than with BA, both in what their figures can do and how they can operate. Of course, the most important factor to affect enjoyment in any game is the other player. Matt and Spencer were great company and the evening flew by. Spencer has recklessly agreed to come again. Before he does I’ve got some jump off points to build.  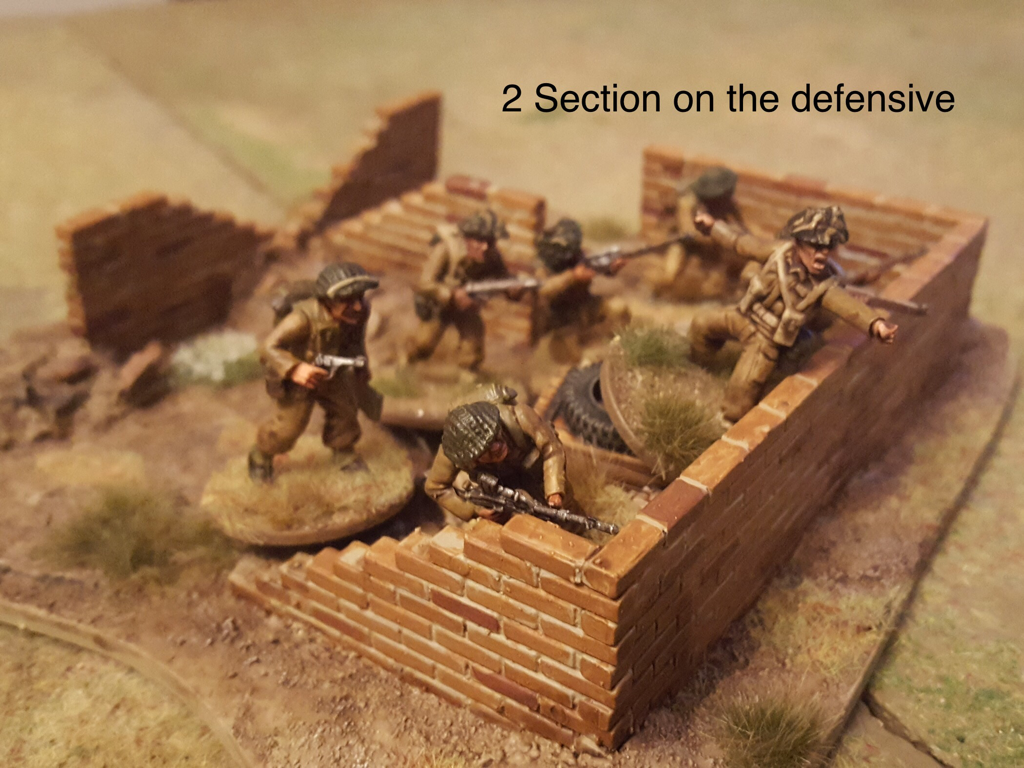 We managed to get an evening’s wargaming in over the Easter weekend. My son Nick is always happy to learn new systems so we agreed to try What a Tanker by the Too Fat Lardies. I had picked up the rules at Warfare in November along with a couple of MDF dashboards that the Rubicon team were selling. We took a Sherman and a Stug III G and set up a random table in the kitchen. 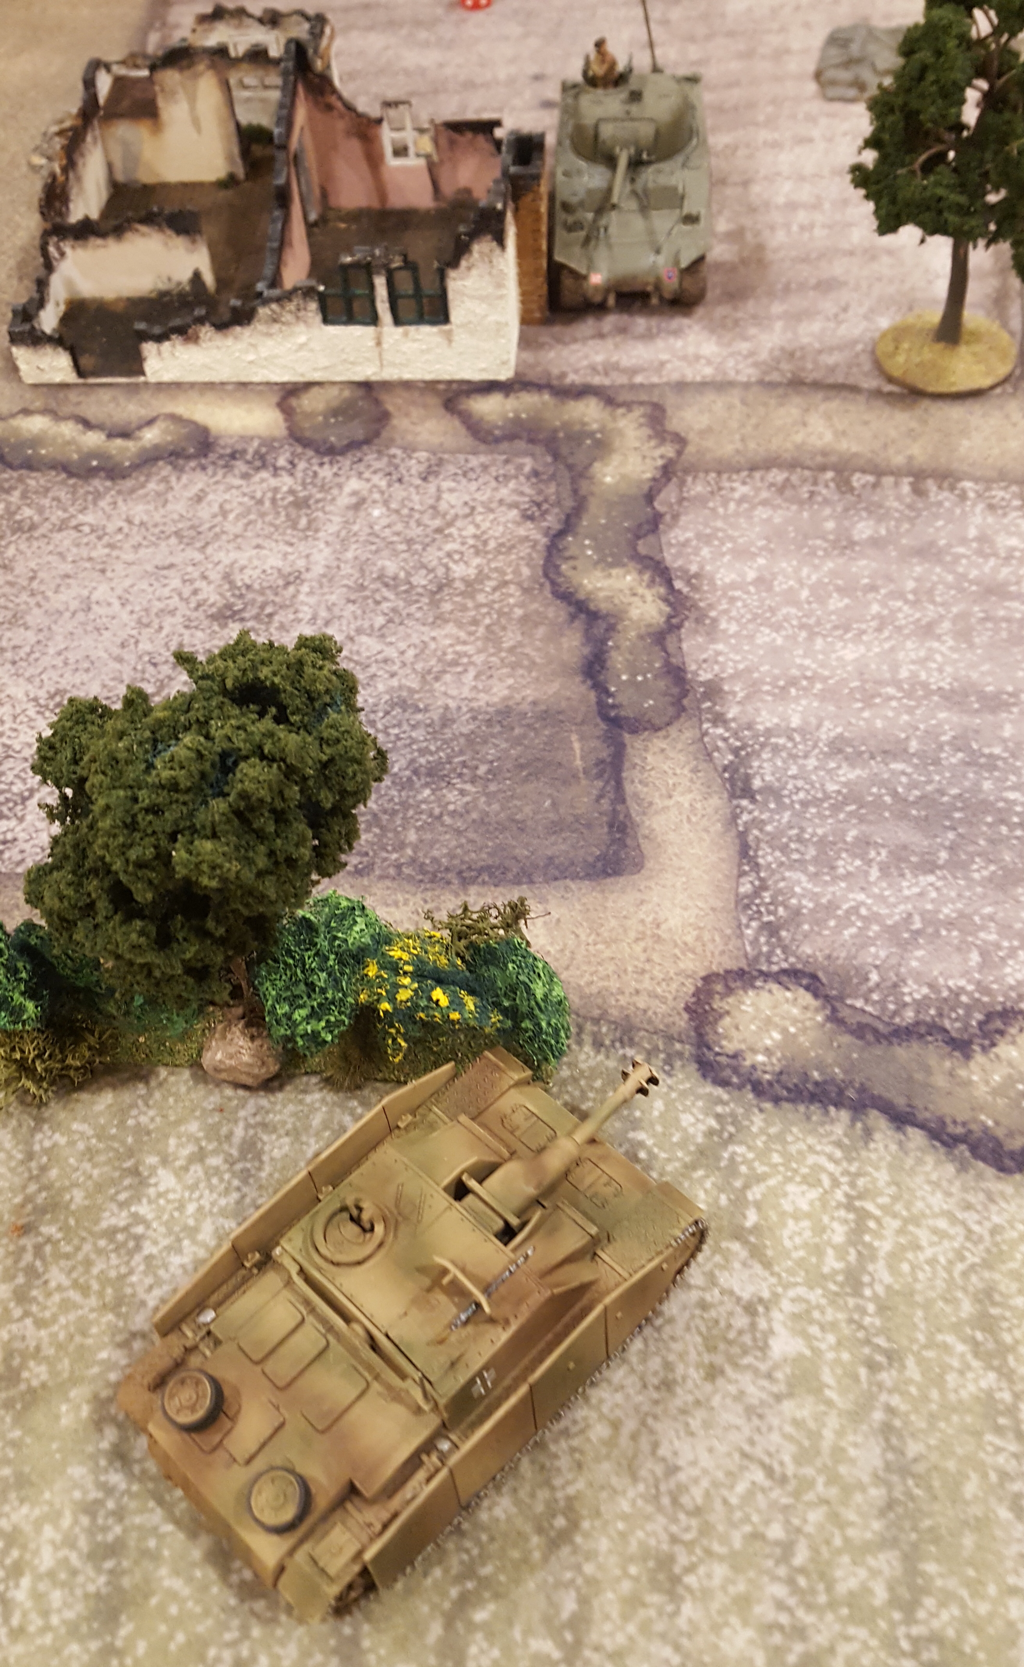 We played three games in all, the first one as a cooperative venture to make sure we understood the rules. As it turned out we got the hang of the mechanics within the first couple of turns. We didn’t miss the absence of a quick reference sheet as this function is mostly fulfilled by the dashboard. Also the rules are nicely intuitive: you just have to remember what actions the dice stand for and any special rules for your AFV. We were very soon focussing on how to play, rather than on what the hell the rules meant. We also really enjoyed ourselves. For those who have yet to play the rules, the core mechanic is the roll of 6 dice for each vehicle at the start of its turn. Each result allows for one action (drive; acquire target; aim; fire; reload; and wild die). The player can play these dice in any order. A tank can lose dice, temporarily or for good, as a result of enemy fire. We found that being restricted by the dice rolls caused some frustration but not so much so as to spoil the enjoyment. In fact it created some exciting moments as a tank found itself unable to exploit a perfect opportunity. And not only do the action dice work well as a mechanic, they are a very effective antidote to the usual wargaming problem of the all-seeing player’s eye in the sky. And even a little reading of tank crew memoirs throws up many examples of the limitations on visibility and awareness for a crew shut up inside an AFV. 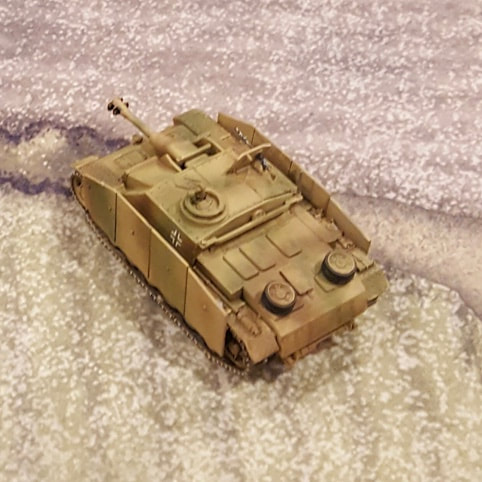 Our games involved a lot of cat and mouse creeping around the field, each trying to get a shot in while taking maximum advantage of cover. We learned quite quickly that a flank or rear hit is far more effective than a hit on frontal armour. We also realised that it isn’t always smart to keep firing: that wild die might be better used to move back into cover at the end of the turn than to stay in the open and fire another round. We also agreed that a straight duel to the death between two tanks can lead to some strange behaviour, as each player hangs on in there for longer and takes more risks than would be sensible in reality. At one point we were following each other around a building, each hoping to land a rear shot. There is little incentive in the basic game to apply the principle of ‘shoot and scoot’! I guess the answer is to have more than two vehicles on the table and/or to create scenarios that encourage ‘historical’ behaviour. 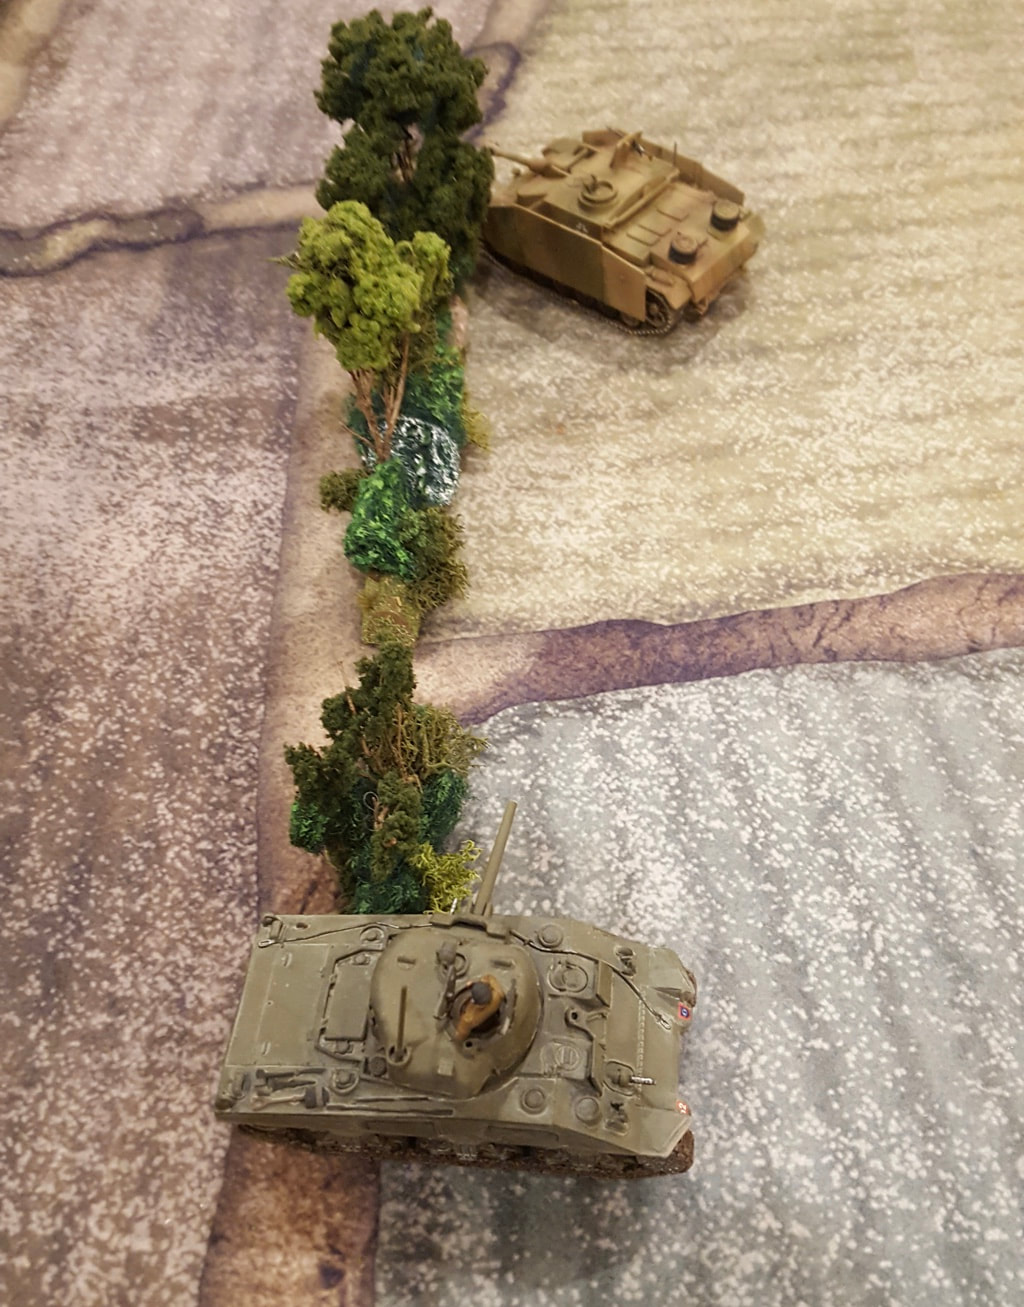 We agreed that What a Tanker is an elegant and exciting set of rules. In years gone by I think we would have called it a Beer and Pretzels game. I would mean that as a compliment. 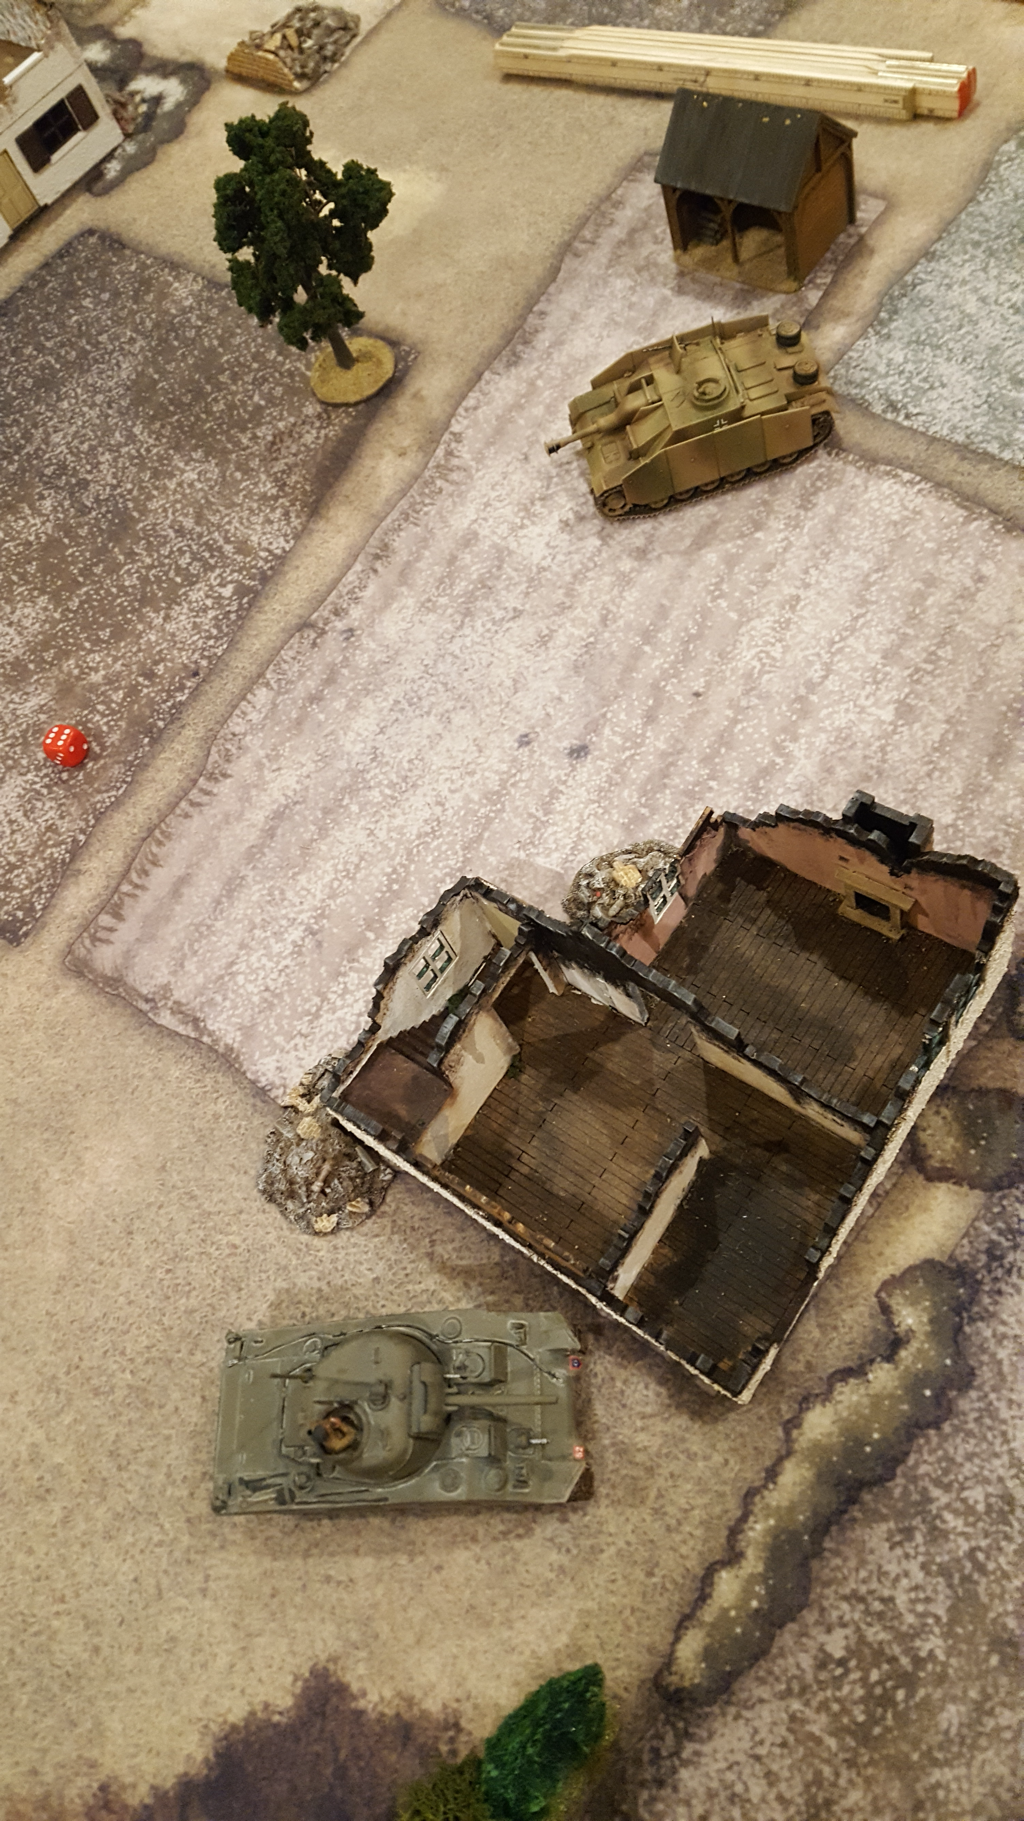 |
Archives
November 2023
Categories
All
|


 RSS Feed